PART1: VVD on VxRail – Deploy vRealize Suite Leveraging vRSLCM (Part1 – vRA)
Specifically posts Part1&2 in this series focus on deploying vRealize Automation (vRA).
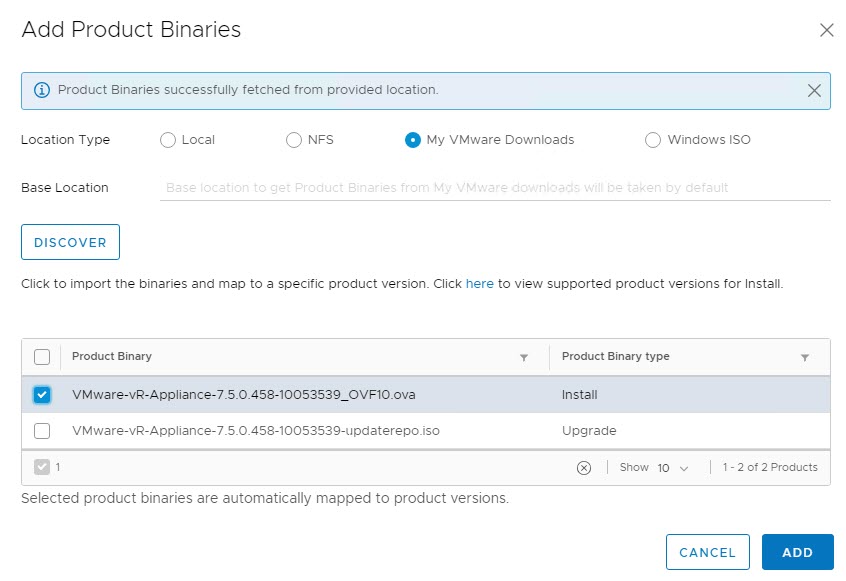
Product Binaries
Note: ensure ‘My VMware’ creds are entered successfully and list of available products are being displayed.
Before we can deploy vRA we first need to add the vRA product Binary. Click Settings->Product Binaries->Add Binaries (Requests will display 0% for the duration of the download but you can check vCenter performance metrics to monitor the download progress.):

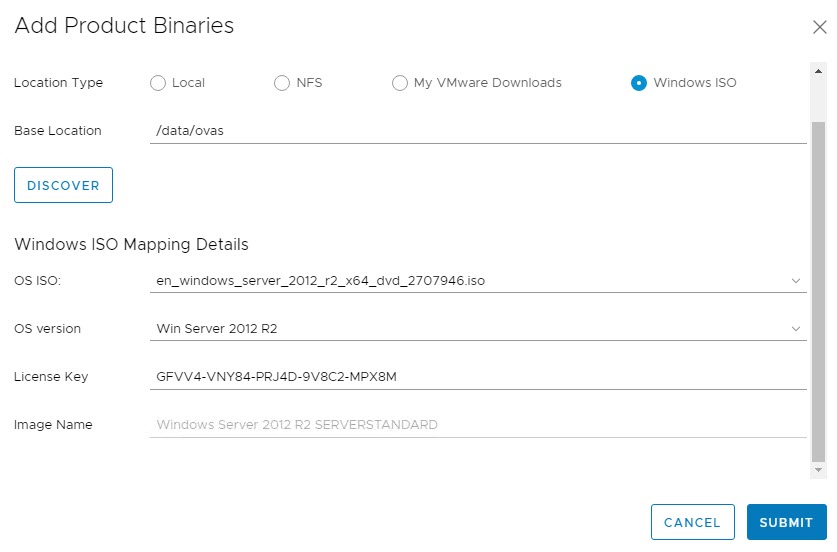
Windows ISO Mapping
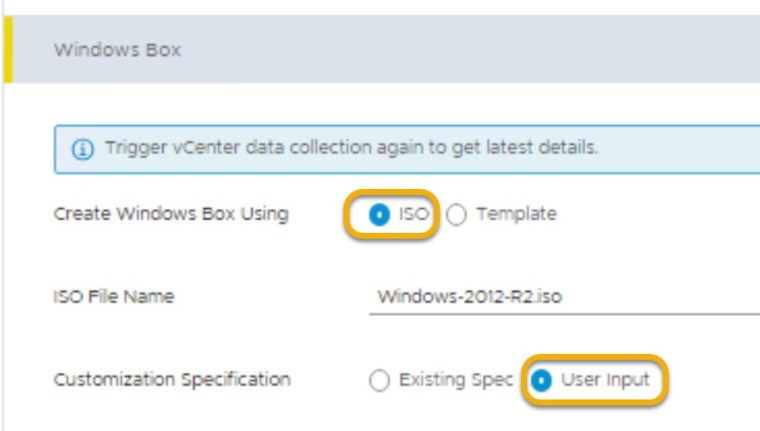
There are two options to deploy the Windows VMs during the vRA install, either Windows Templates or ISO may be used. In this example I used the ISO option, select Windows ISO and type the location where the ISO was uploaded to (via SCP), click on discover, select the OS ISO for the drop down and click submit:

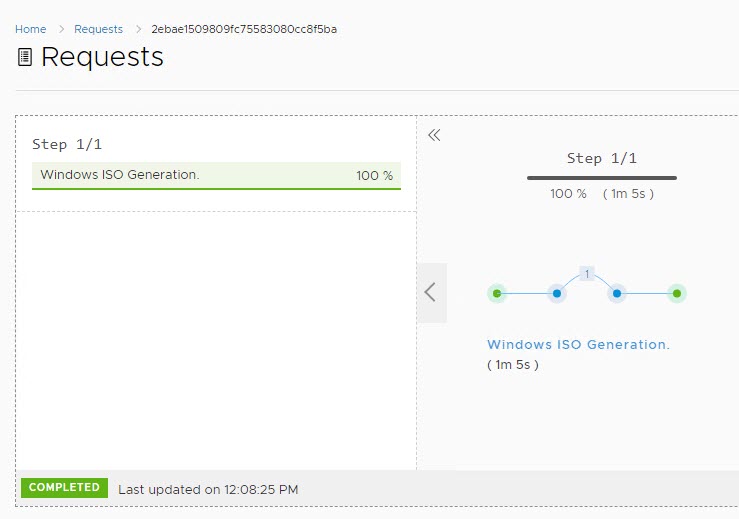
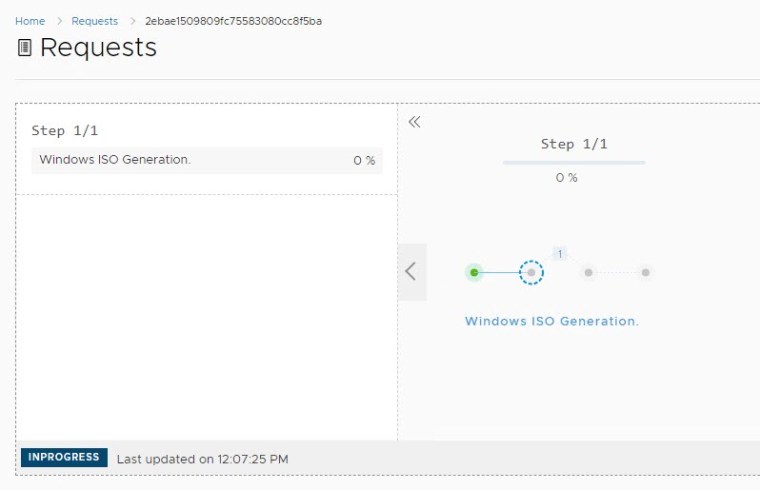
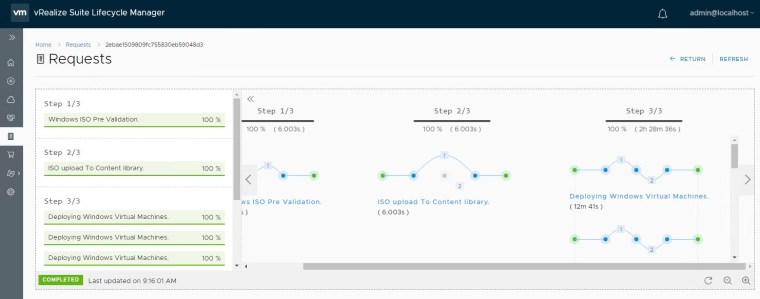
Progress of the Windows ISO Generation can be monitored via the requests tab:

NSX Load Balancer
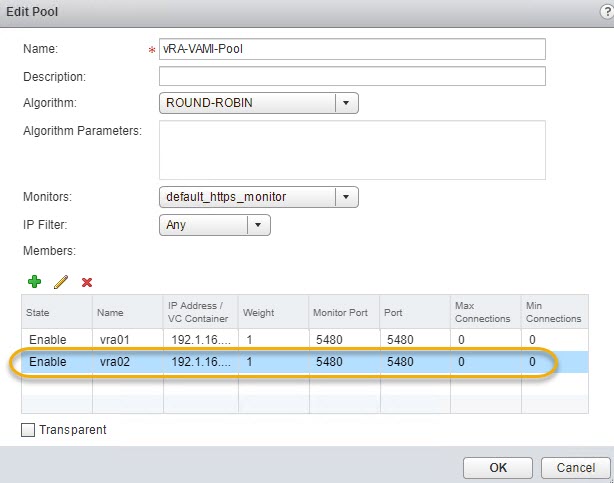
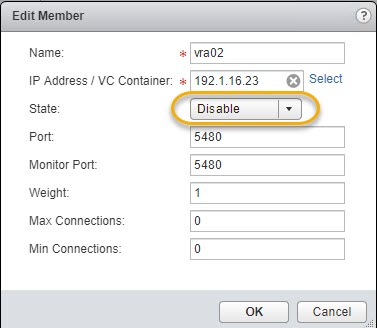
Now that we have the required bits upload we can begin the vRA install. But before doing so disbale the seoncd leg of the vra vip, edit nsxautolb, edit pools, disable second leg of each pool, run show pool statitics and confirma t least one leg is up.


Add Product – vRealize Automation
Note: An environment can contain only one instance of each supported vRealize Suite product.
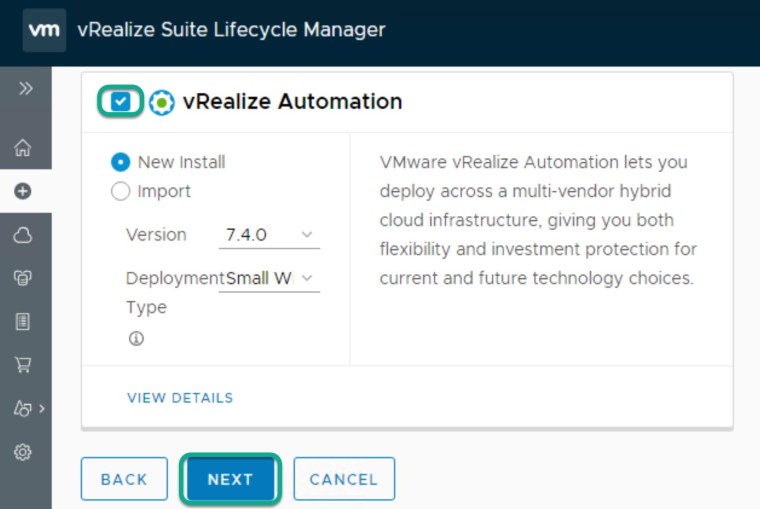
Click Home->Manage Environments->Click the ellipsis for the environment-> select Add Products. Select vRealize Automation and click next:
Accept the EULA and enter a vRealize suite license.
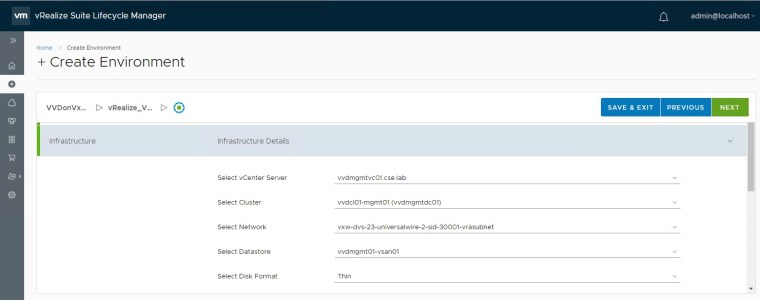

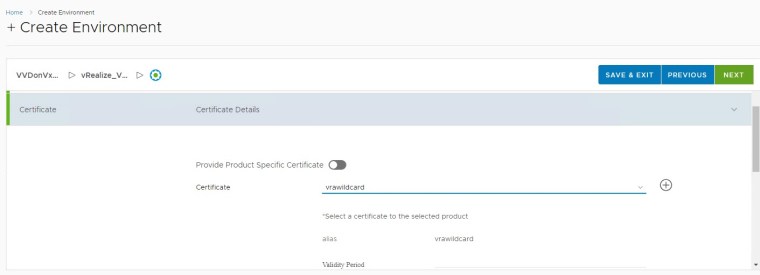
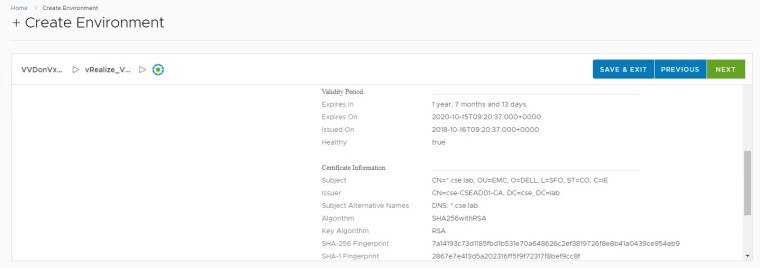
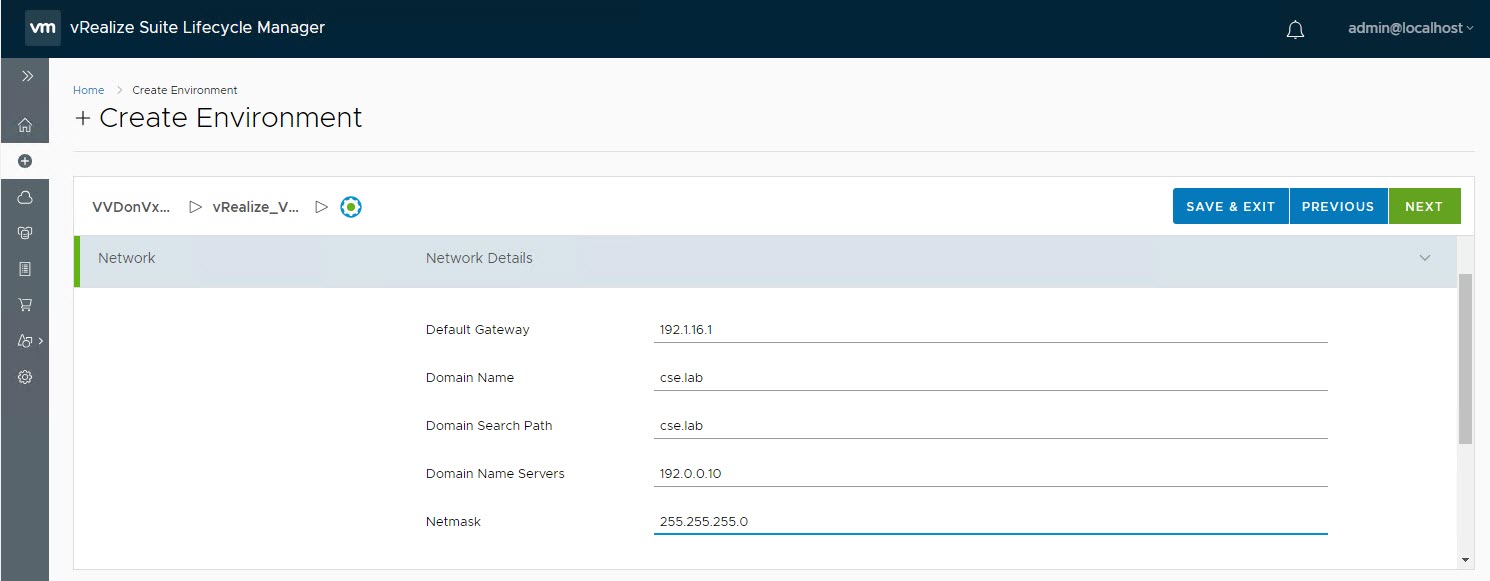
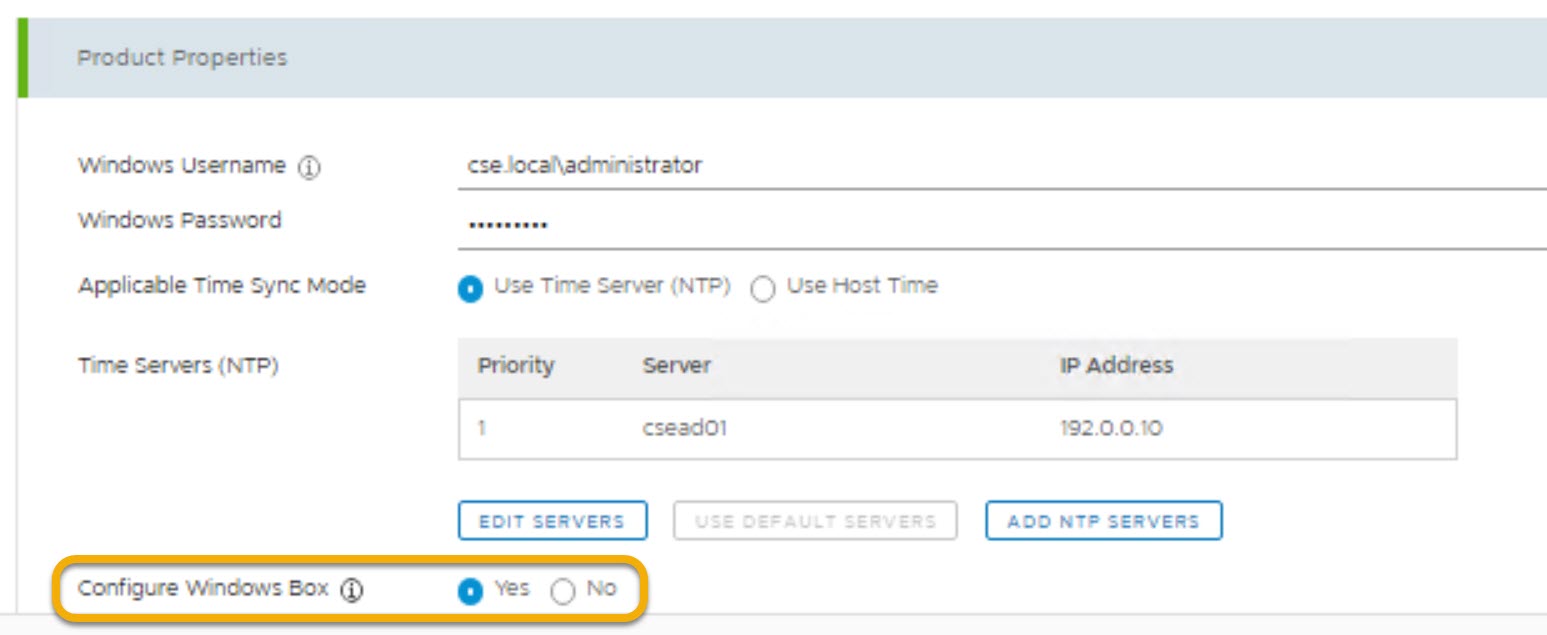
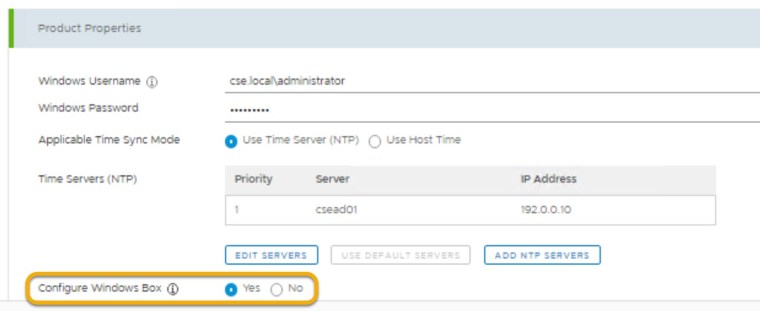
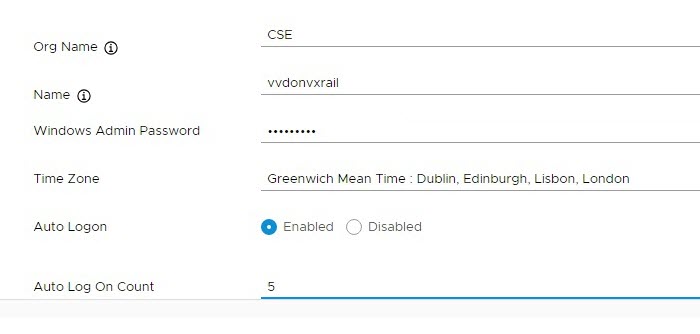
Moving onto the Products section which in this example is vRealize Automation enter the following details:
- Windows Username, and Password
- Applicable Time Sync mode – NTP
- Add the Time Server (NTP)
- Select the option to deploy Windows VMs required for vRealize Automation
Enter cluster Virtual IPs & hostnames for:
- vRA Appliance
- IaaS Web
- IaaS Manager
In this example we chose the ISO option for deploying the IaaS VMs as per mapping a valid windows ISO image previously completed above.
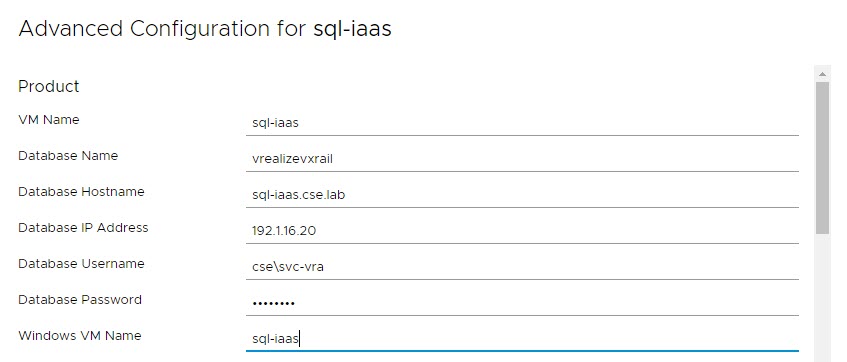
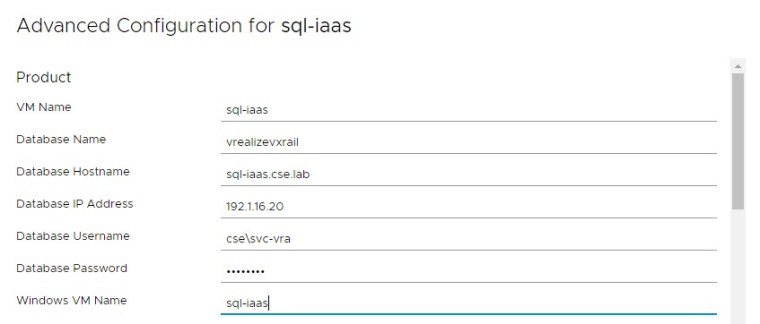
Proceed to enter the details for each of the vRA components. In the case of the database server click on the advanced property and enter your appropriate database configuration details, in this example the we are pointing at a pre-created SQL database:
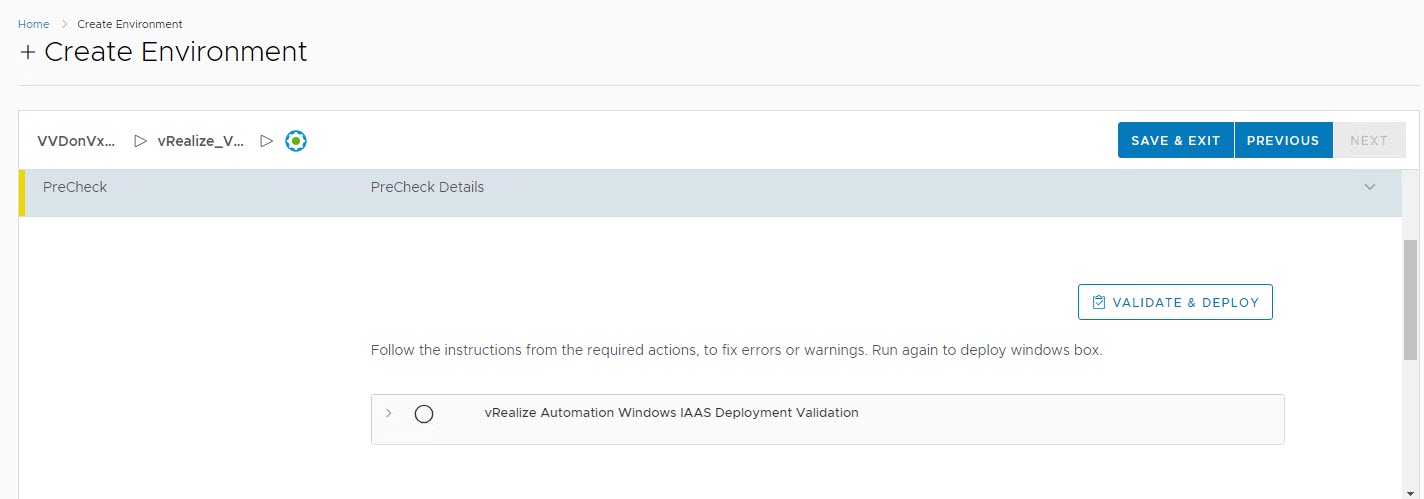
Click Next to continue to PreCheck Details section. Click on Validate & Deploy:

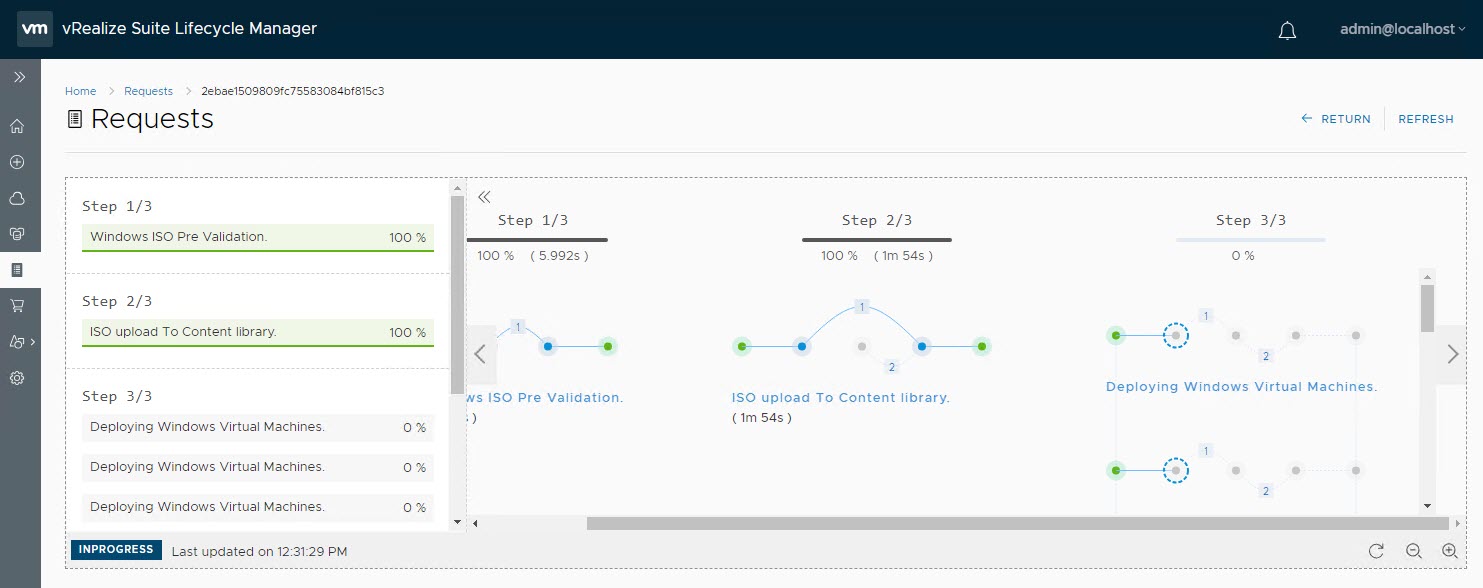
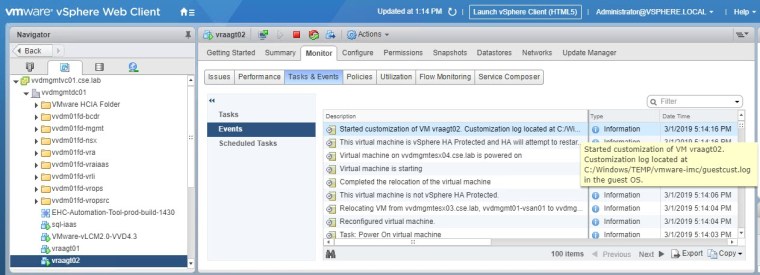
Click on the Requests tab to monitor the deployment of the Windows VM’s :

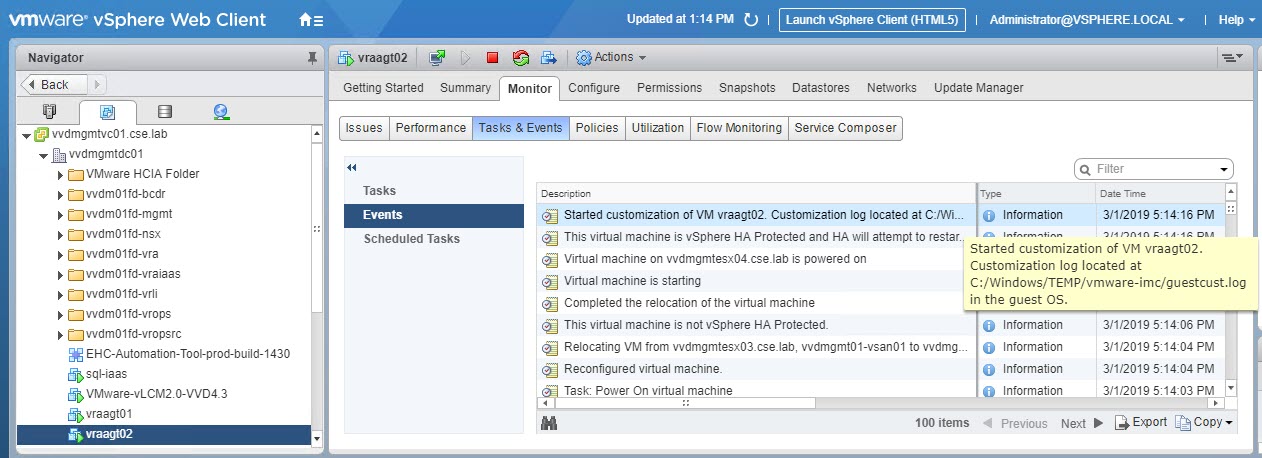
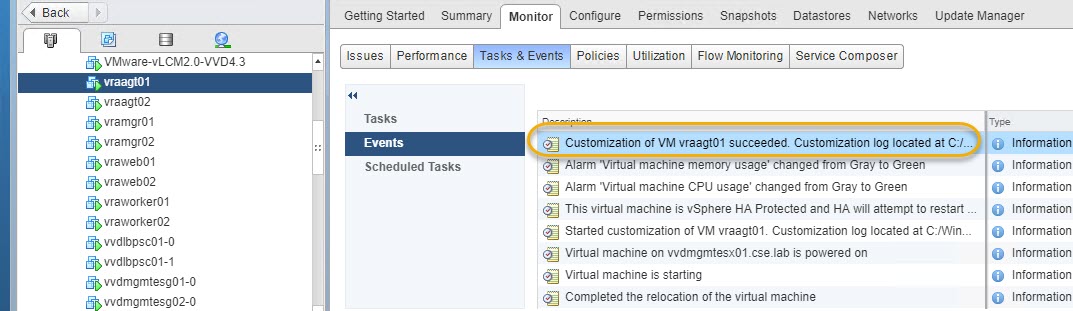
From the vCenter web client you can also track progress of each component installation, the following two images highlight the progress and completion of the vRA Agents Windows VM’s:
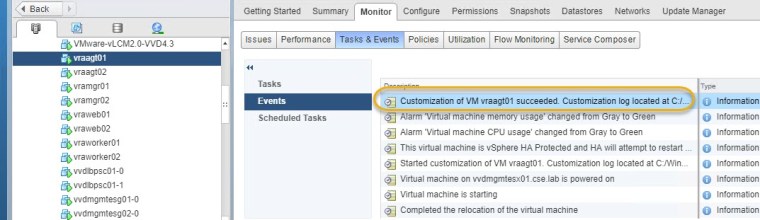
Completion of Windows VM deployments:
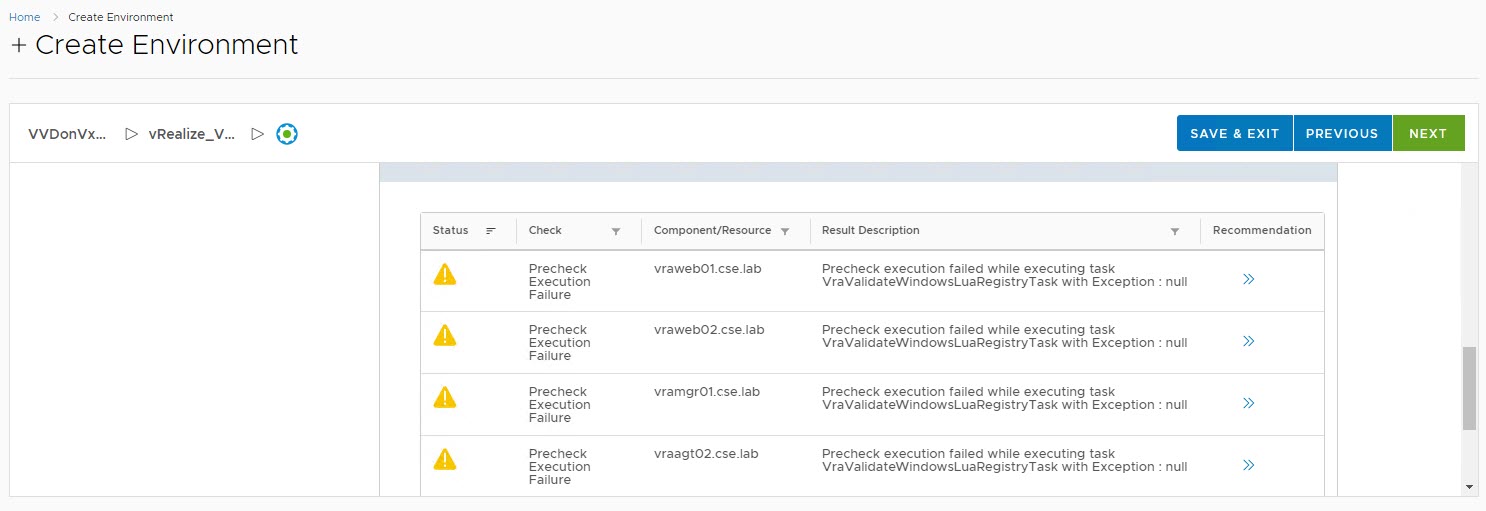
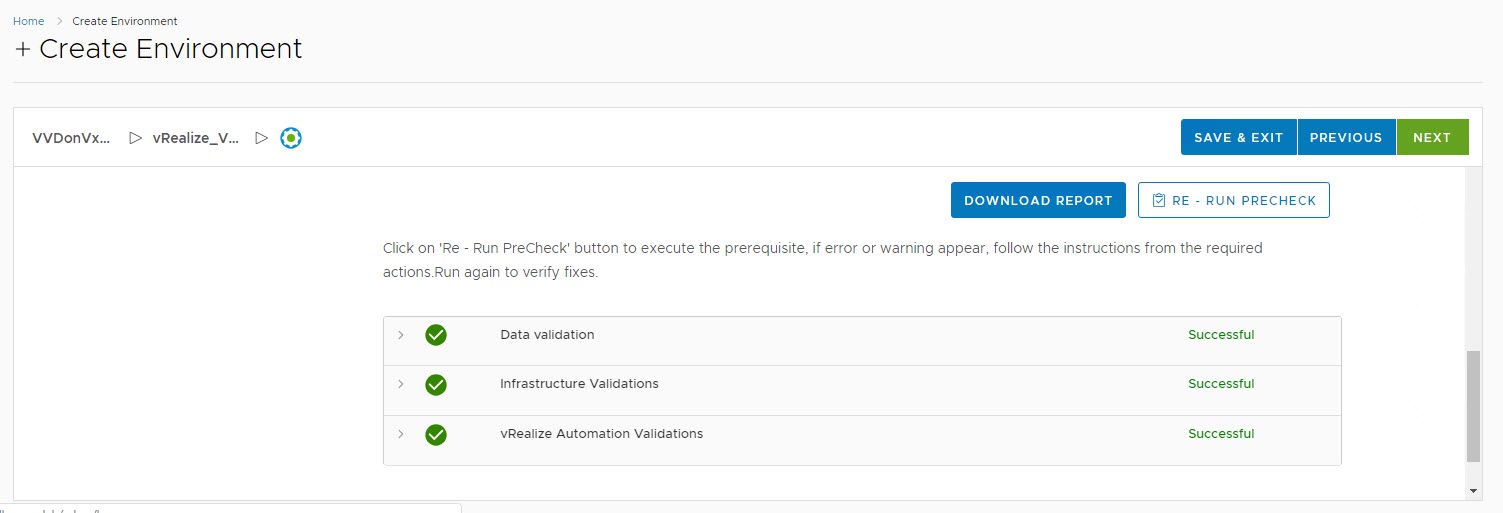
Click NEXT to continue with pre-validations:

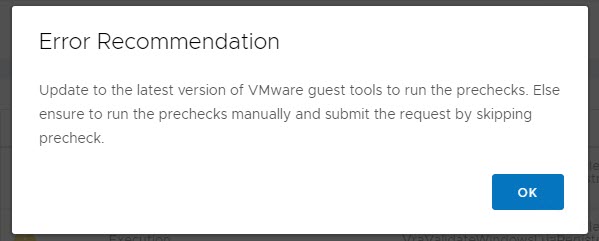
Warnings below indicate the VMware tools require an Update, you can manually update from within vCenter and click NEXT to continue:

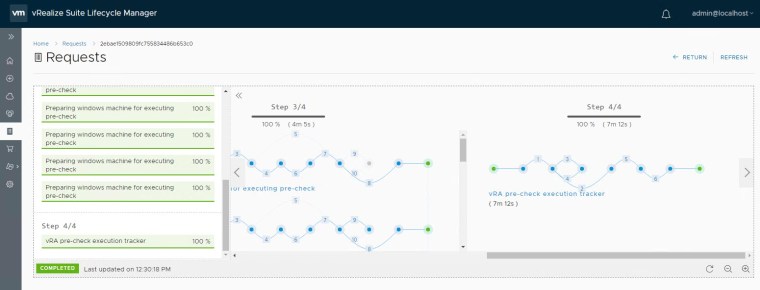
Windows machine pre-checks complete successfully:
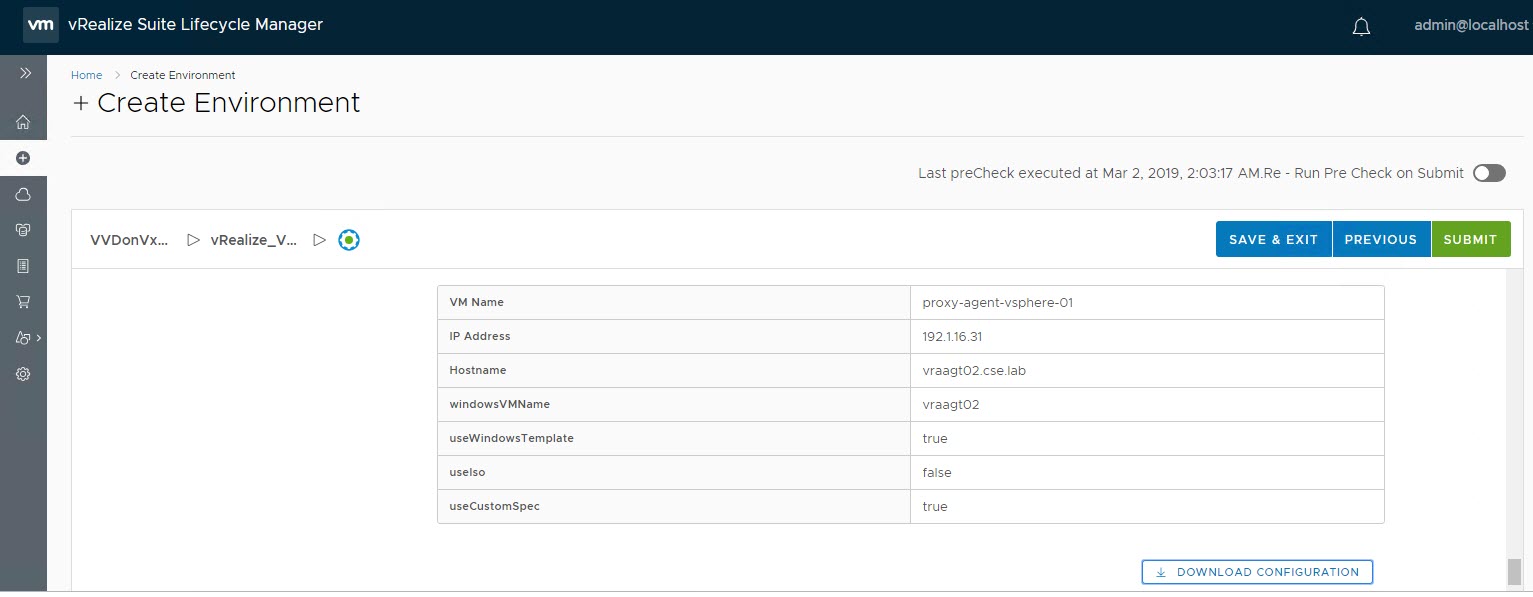
Click NEXT, download configuration and SUBMIT:


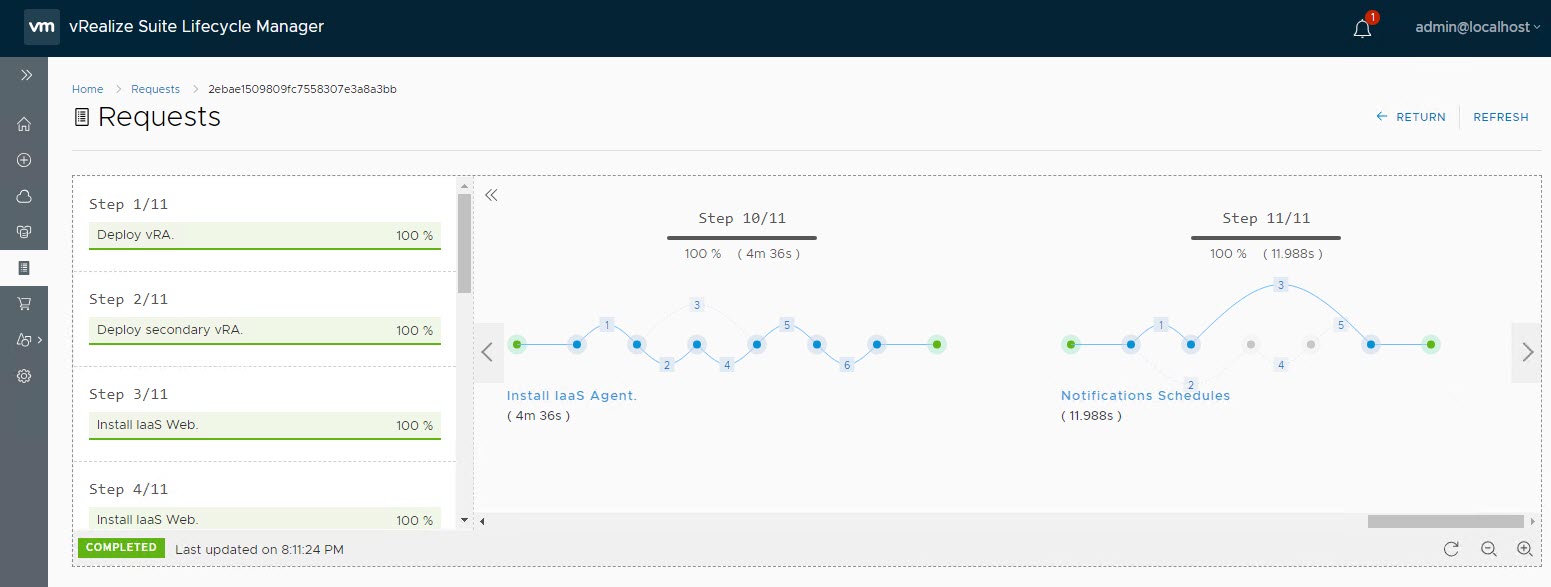
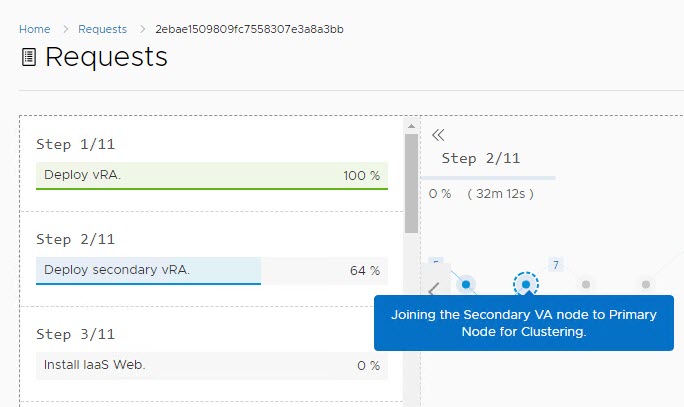
Monitoring progress of vRA installation:
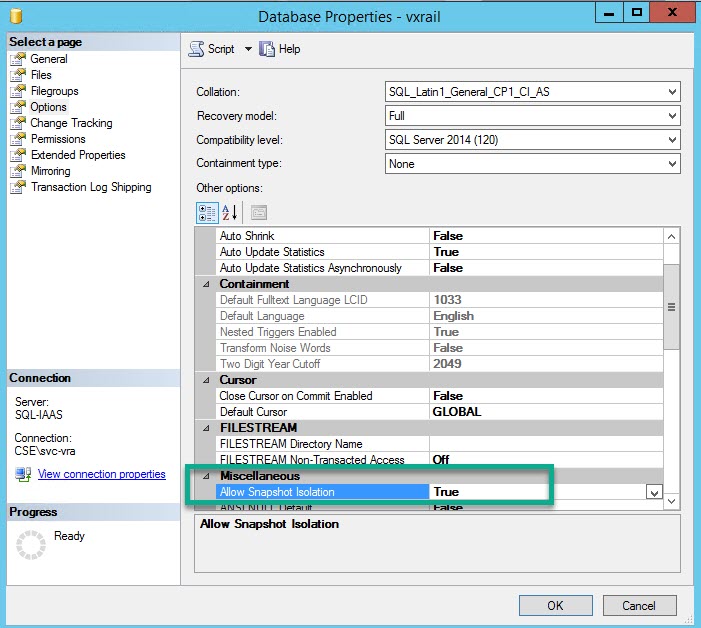
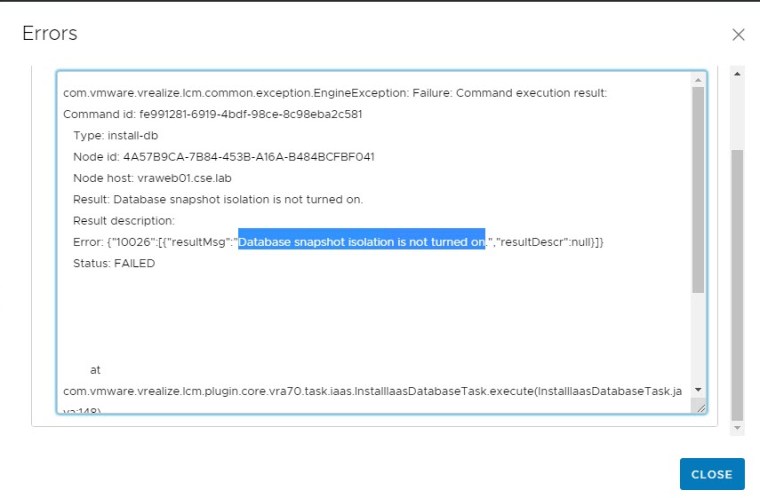
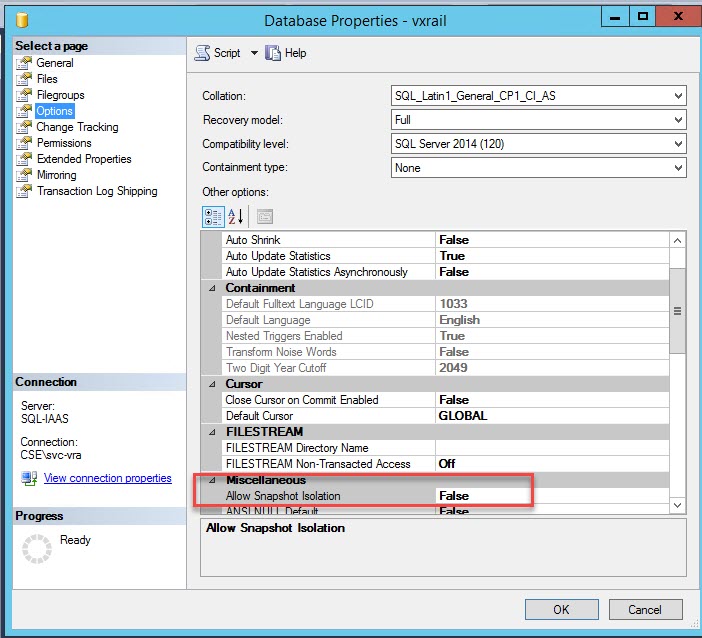
ERROR: ‘Database snapshot isolation is not turned on’
Remediate from within SQL manager and click retry from the vRSLCM request:


vRA successfully installed!:

Note: Post install re-enable the NSX LB second leg.