vRealize Automation 7.1 – Create Tenant & Configure Authentication (Part 2)
Following on from the tenant & authentication post above, the following steps detail the creation of an Endpoint & Fabric Group in vRA 7.1.
This post will show how to create a vCenter endpoint followed by a Fabric Group, a vRO endpoint and the credentials required to connect vRA to these endpoints.
Begin by logging into the new tenant with a user who has the IaaS Administrator privileges:

Nice flow chart from vmware.com:
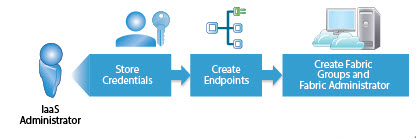
1. Store Credentials:
Login into your tenant:
https://vipvra.ppsilver.lab.local/vcac/org/ehc/

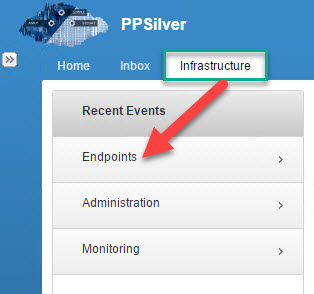
Click ‘Infrastructure’ and navigate to ‘Endpoints’:
Click ‘Credentials’ and create the logins required to connect to the endpoints (A requirement before we can create the endpoint!):

2. Create a vCenter Endpoint:
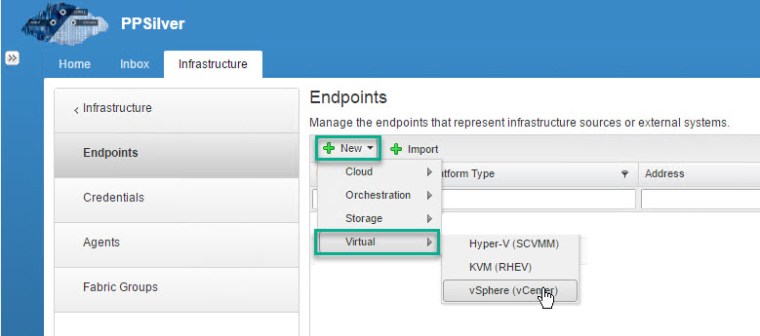
Click ‘Infrastructure’ -> ‘Endpoints’ and click ‘New’:

Click ‘NEW’ and select vCenter from the drop down:
Enter the proxy agent name in this case it aligns with the vCenter name, URL of the vCenter SDK and select the required creds. If using NSX enter the NSX manager URL and select the login created earlier for NSX:

vCenter endpoint created! We now have communication established between vRA and vCenter:

3. Create a Fabric Group & Fabric Administrators:
Once vRA completes a discovery of the vCenter endpoint, we can then proceed to create an associated Fabric Group.
Click ‘Infrastructure’ -> ‘Endpoints’ and navigate to ‘Fabric Groups’ and click ‘New’:

Enter the name & description for the Fabric Group, chose the fabric admins (these users will have permission later to create reservations and select resources associated with this fabric group). Finally select the ‘compute resources’ which essentially in this case relates to an ESXi cluster:

Fabric Group created!:

4. Create a vRO Endpoint:
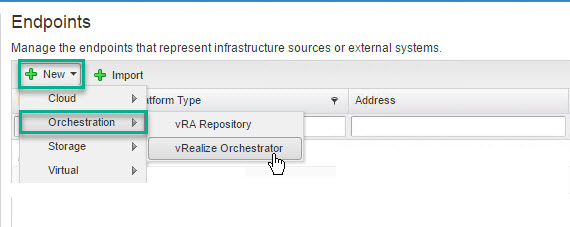
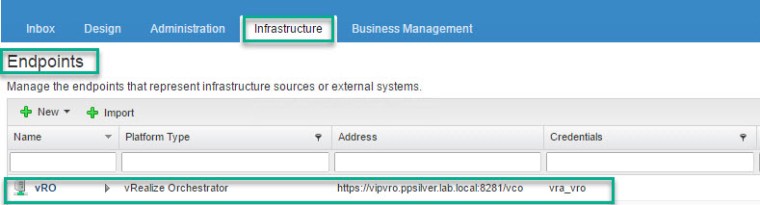
Click ‘Infrastructure’ -> ‘Endpoints’ and click ‘New’:

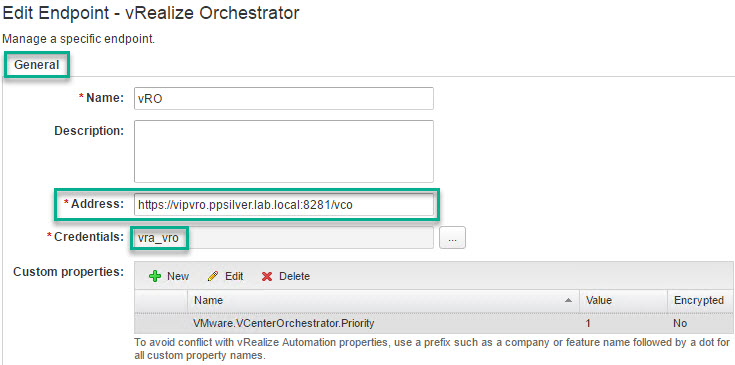
From the drop down select ‘vRealize Orchestrator’:
Enter the vRO name, URL including port details and enter the endpoint priority details:
In addition to the vRO endpoint detailed above, you will also need to apply the ‘vRO Configuration’ as detailed below, this additional vRO endpoint is used for example with DellEMC EHC solution during STaaS and BaaS operations:
Click ‘Administration’ -> ‘vRO Configuration’ and click ‘Server Configuration’:

VMware References:
Store User Credentials
Create a vSphere Endpoint with Network and Security Integration
Create a Fabric Group
Create a vRealize Orchestrator Endpoint


1 Comment »