VxRail
VxRAIL – ADD DISK GROUP
In this post I will provide an example walk-through of the process for adding a new Disk Group to an existing VxRail cluster node. The VxRail code version is 4.7.001 and […]
Virtualization & Storage

In this post I will provide an example walk-through of the process for adding a new Disk Group to an existing VxRail cluster node. The VxRail code version is 4.7.001 and […]
In this post I will provide an example walk-through of the process for adding a new Disk Group to an existing VxRail cluster node. The VxRail code version is 4.7.001 and leverages the native VxRail Manager.
This example begins with 2x Disk Groups created on the ESXi node and we display how to expand with 1x additional Disk Group, resulting in a 3x Disk Group configuration. This post shows how to complete the tasks for one node in the VxRail cluster, simply repeat the procedure for all other nodes if you are adding a Disk Group to each node of a VxRail Cluster.
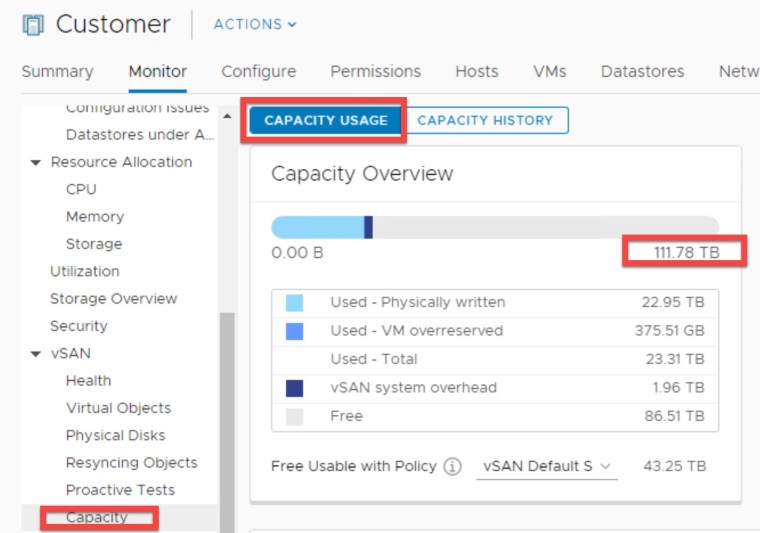
Logging into vCenter we confirm the health status and current capacity of the vSAN cluster before proceeding:

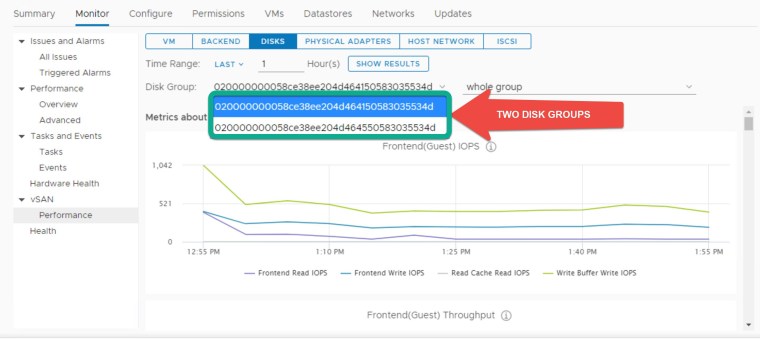
The existing two Disk Groups on the VxRail Node as displayed in the Monitor->vSAN->Performance section:
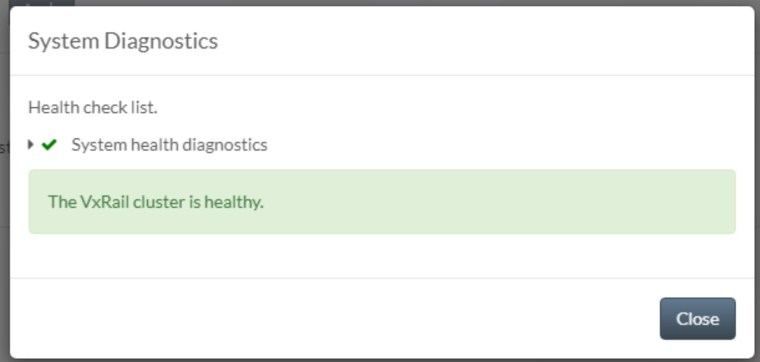
Logging into the VxRail Manager and checking the current Health status of the VxRail appliance before proceeding with any expansion:

VxRail Cluster displaying a healthy status, we are in a good state to proceed:
Click HEALTH -> Physical and click on the node where you are adding a new Disk Group to: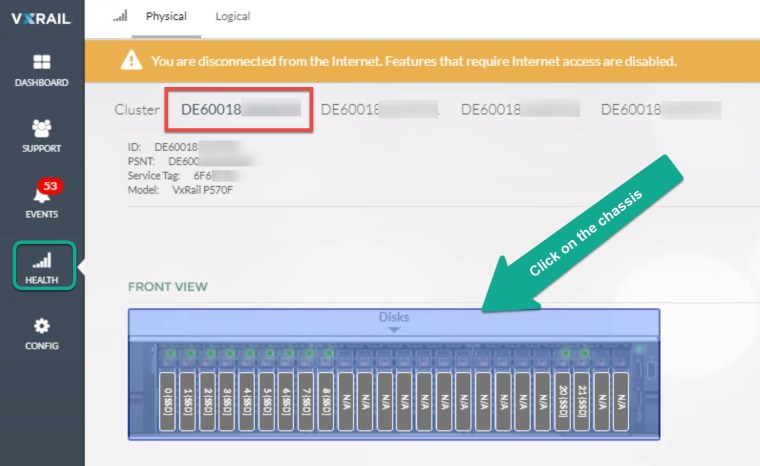
Enabling the Chassis LED in order to easily identify the host in question:


From within the same window Click on Add Disk(s):

Click on Capacity and enter the number of capacity disks you are adding (each disk group requires one cache disk). In this case we are adding 5 capacity disks and 1 cache disk:


The suggested slots are displayed, you can click on ‘Show in View’ to display the front view of chassis:


Picture of the actual physical VxRail node prior to disk insertion (insert the new disks at this point!):

Click Continue to discover the new drives inserted:

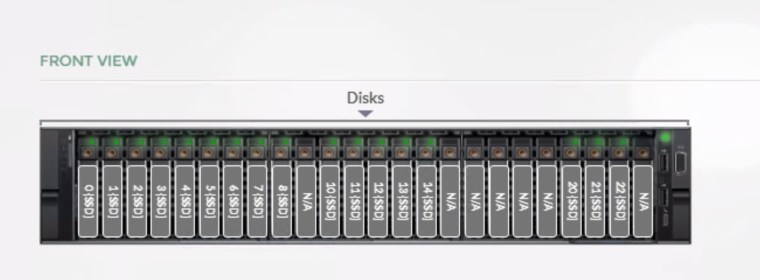
The newly populated disks are displayed, again you can click on ‘Show in View’ to display the front view of chassis:

Picture of the actual physical VxRail node post disk insertion:

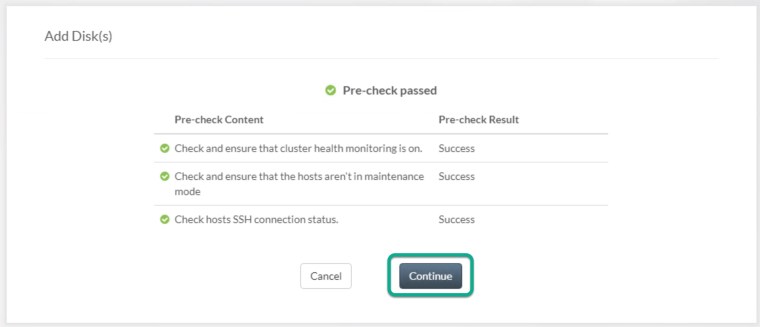
Click Continue once the Pre-Check passes to execute the Add Disk(s) workflow:

Viewing recent tasks from vCenter we can see the new Disk Group being created and disks being added to the vSAN cluster:

VxRail Manager displays disk add was successful:

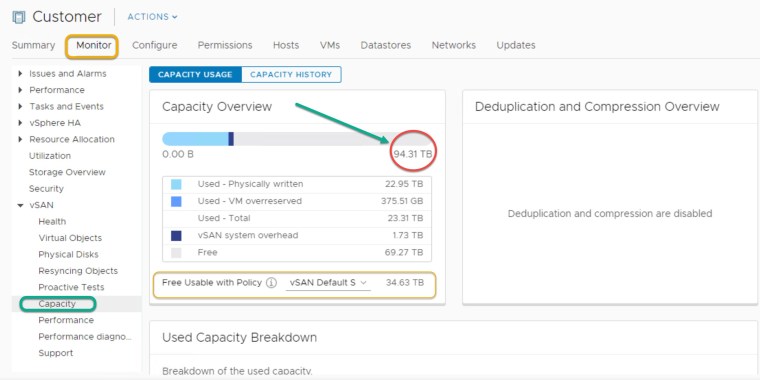
Confirmation of Capacity increase from the vCenter web client: