Uncategorized
DellEMC EHC – ViPR vPool Volume Migration
This post details the procedure and EHC validation steps to execute in order to move an EHC ViPR provisioned volume to a different ViPR virtual pool leveraging the ViPR Change […]
Virtualization & Storage

This post details the procedure and EHC validation steps to execute in order to move an EHC ViPR provisioned volume to a different ViPR virtual pool leveraging the ViPR Change […]
This post details the procedure and EHC validation steps to execute in order to move an EHC ViPR provisioned volume to a different ViPR virtual pool leveraging the ViPR Change Virtual Pool services.
High level steps that will need to be followed:
Renaming the new vPool with the old name results in a successful EHC StaaS provisioning task utilizing the original SRP.
There are many reasons for performing such an operation, for example you may have enabled Compression on a VMAX and now wish to gain the benefit of this change by migrating existing ViPR provisioned Volumes associated with the VMAX to a New ViPR vPool with compression enabled.
Please ensure no other operations either within VIPR or externally are being executed on the volumes that are being moved for the duration of this process.
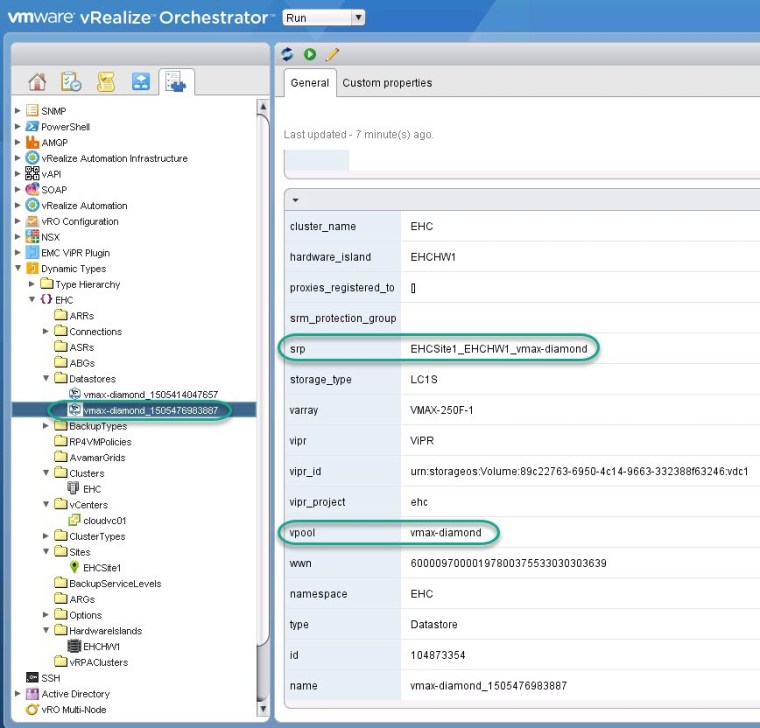
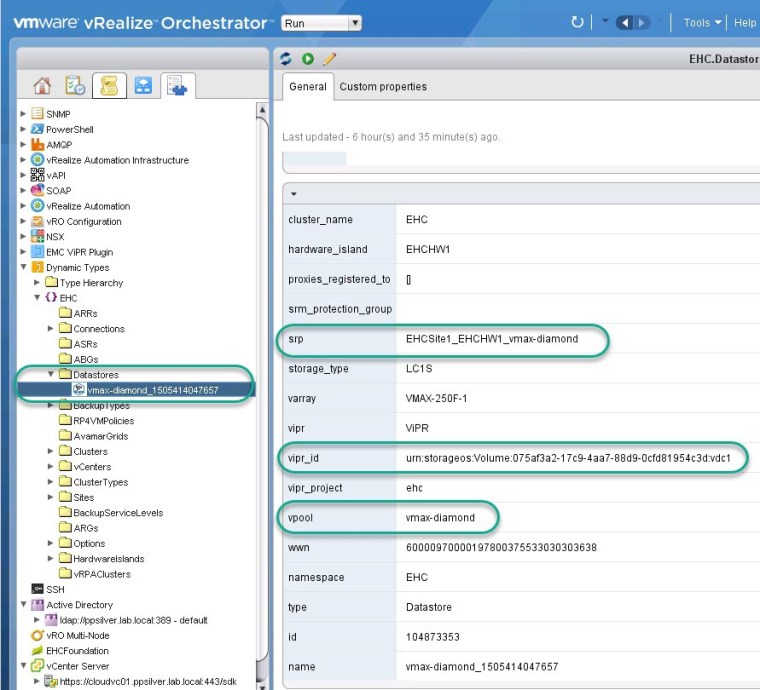
The following validation steps detail how to record the ViPR volume and EHC Object Model associated parameters.

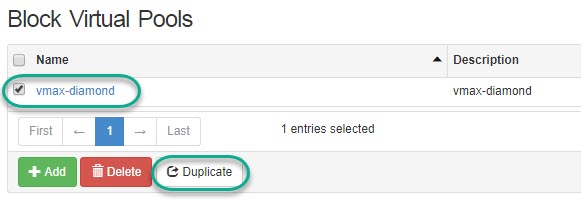
Create a new ViPR vPool with all identical properties except for feature that you are changing (in this example we enable compression as per the example scenario provided):
2. Enter a name and a description for the virtual pool.
3. Enable the required property which is ‘compression’ as per this example.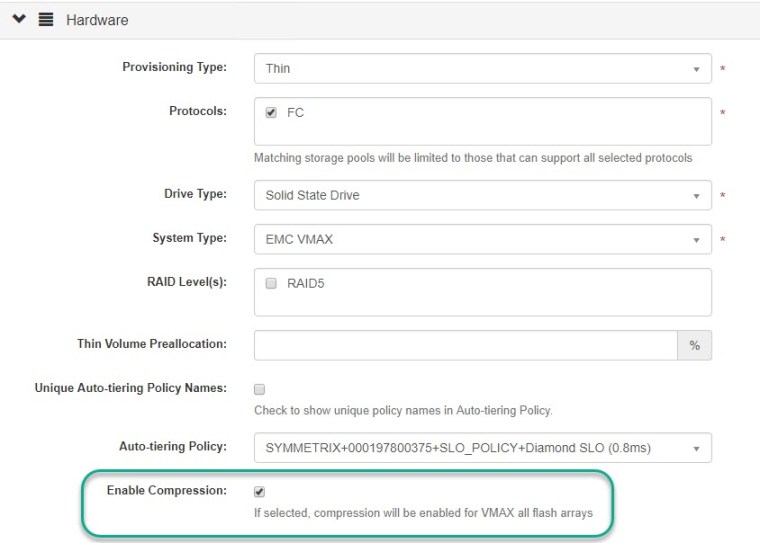

Note: This newly created vPool name will need to be renamed to the ‘Old vPool Name’ once the migration of the Volumes is completed.
Note: Do not provision any New Volumes to the affected vPool until this procedure is complete.
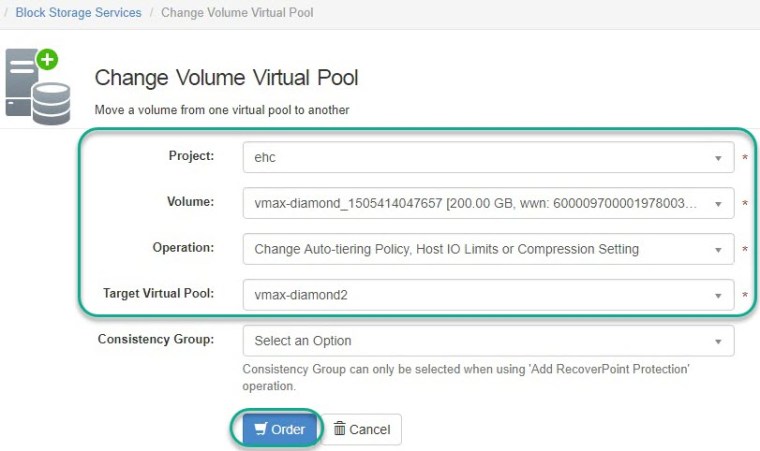
The following steps will detail how to move the volume referenced ‘vmax-diamond_1505414047657’ into the new vPool.
Note: This example leverages the ViPR workflow ‘Change Volume Virtual Pool’, if multiple volumes need to be migrated at the same time please use the ‘Change Virtual Pool’ workflow. Reference Guide: EMC ViPR Controller – Service Catalog Reference Guide
This operation requires a Tenant Administrator role in ViPR.
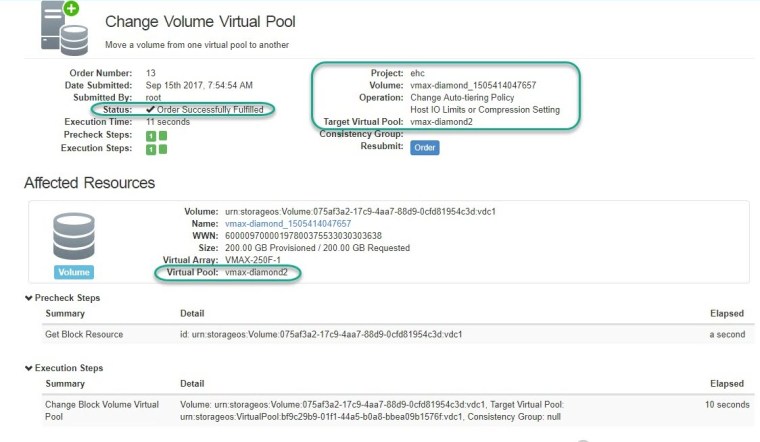
Note the operation completed successfully and the ViPR volume now has the ‘compression’ parameter enabled (ViPR will not let you perform a vPool change unless there is one parameter that is different between the vPools):
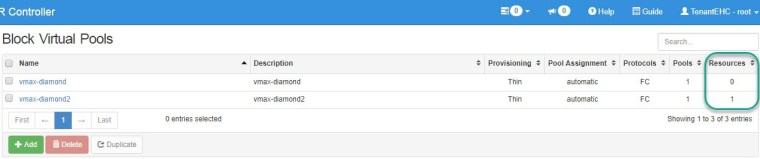
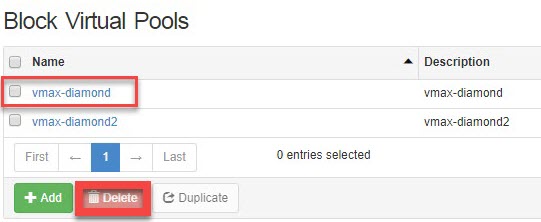
In the ViPR UI, navigate to Virtual Assets > Block Virtual Pools and confirm the Volume resources are now displaying as zero and the volume(s) now resides on the new vPool, then proceed to delete the Old vPool.
Renaming the new vPool with the old vPool name results in a successful EHC StaaS provisioning task utilizing the original Storage Reservation Policy (SRP).
Rename the newly created ViPR vPool to ‘Old pool name’ (as per this example: ‘vmax-diamond’)


Provision a new volume from EHC StaaS and perform vRO & ViPR post-validation checks. In this example a new EHC Datastore was provisioned from the new ‘vmax-diamond’ vPool and the correct SRP was utilized.Provision a new volume from EHC StaaS and perform vRO & ViPR post-validation checks.