This post will provide a step-by-step walk through installation of vRA 7.1, utilising the vRA wizard based install and configuration utility.
This example focuses on the ‘Enterprise Install’ for a distributed, highly-available vRA instance, using the wizard-driven walk through for the installation. The wizard helps to drive such tasks as importing the user generated certificates, creates your vRA SQL database and automatically fixes any issues on the IaaS Windows machines encountered during validation, for example removing MS patches that impede the install or fix IIS related configurations.
This post does not cover pre-requisite tasks such as:
- Deploying the vRA appliance.
- Provisioning & joining domain for the required Windows 2012r2 servers detailed on the infrastructure list below, SQL|Web|DEM|Agent machines.
- SQL server installation.
- DNS entries for all the components including virtual IP addresses.
- Ensuring NTP & time is correct across all related components.
- IaaS associated user accounts.
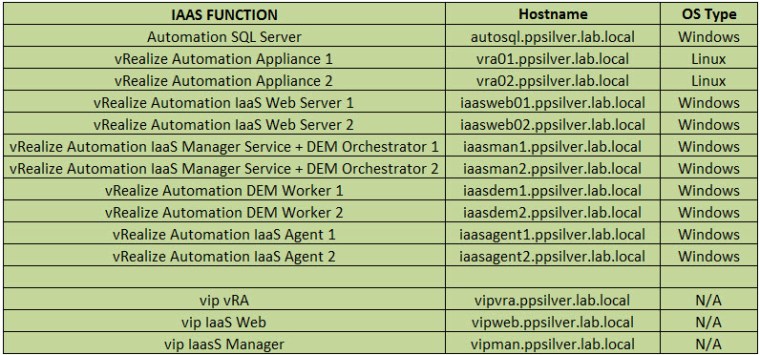
IaaS Infrastructure List:
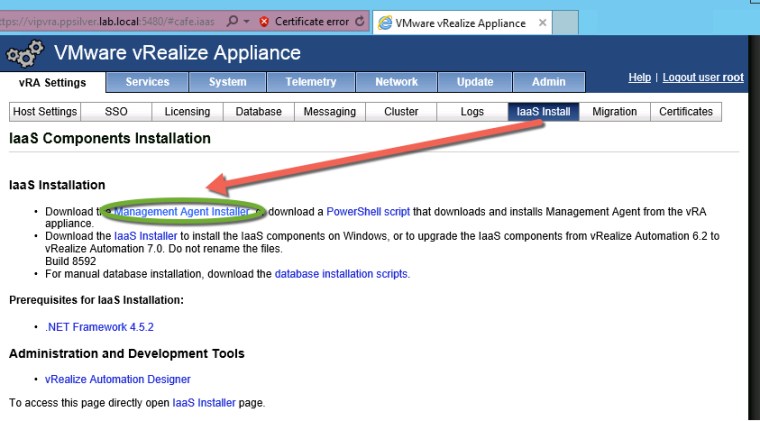
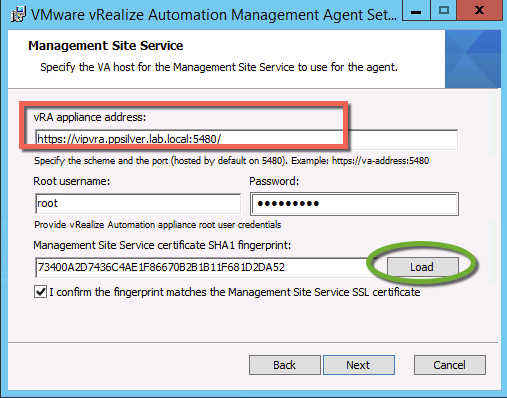
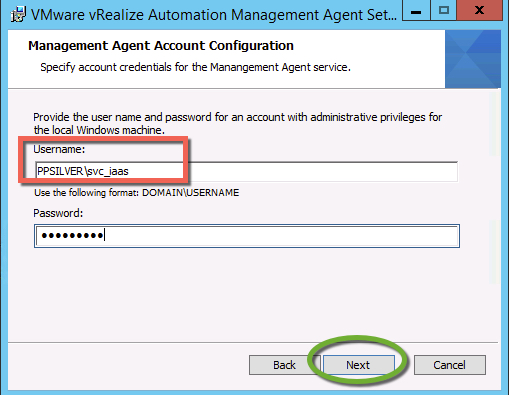
Begin by performing the following steps on all of the eight Windows IaaS machines in order to install the vRA management agent, which can be downloaded by browsing to vRA e.g https://vipvra.ppsilver.lab.local, this allows vRA to auto-discover these components during install:
Note: this initially requires cancelling the vRA install wizard.
Reinitialise the vRA installation wizard by SSH to vRA logging in as root and run the following command:
vcac-vami installation-wizard activate

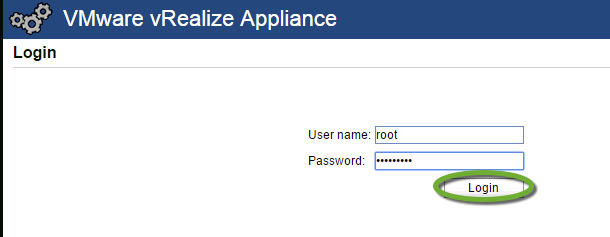
Browse to vRA https://vipvra.ppsilver.lab.local, login as root and the installation wizard will again automatically launch:
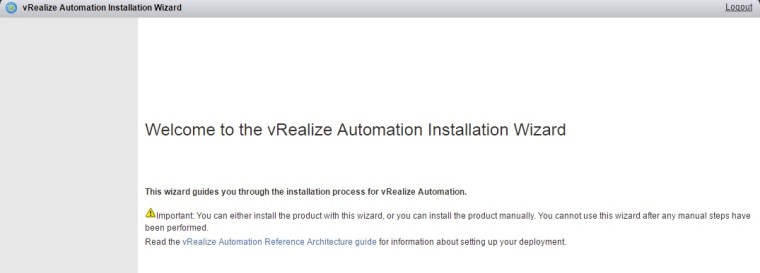
Click NEXT to continue with the wizard driven install:
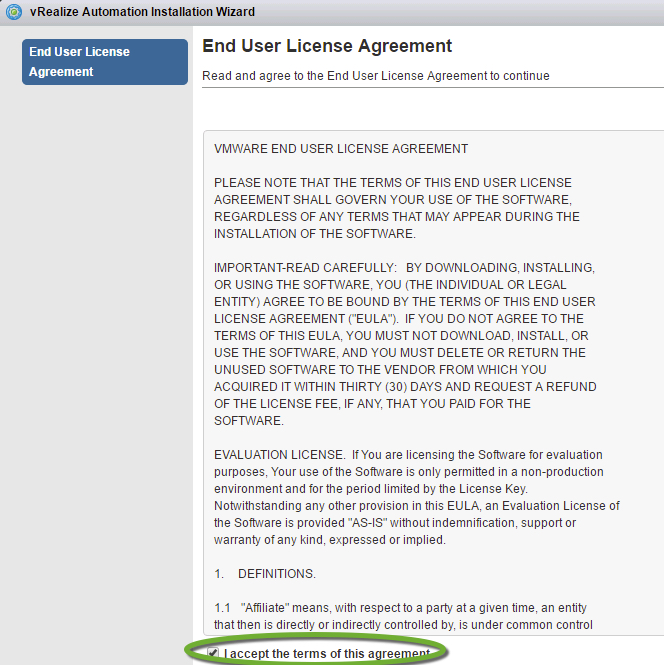
Accept the EULA:
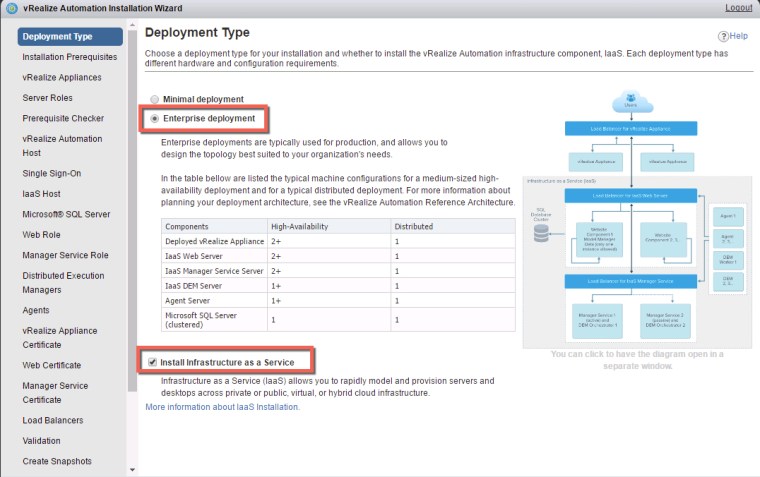
Chose ‘Enterprise Deployment’:
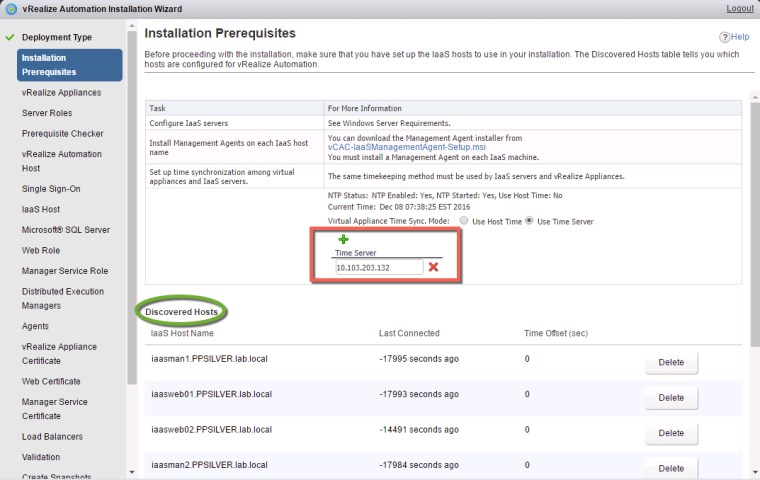
The wizard automatically locates the IaaS components which have the agent installed. Add your NTP configuration:

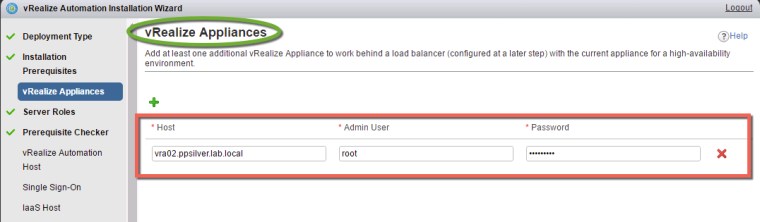
Add the second vRA appliance and accept the certificate:
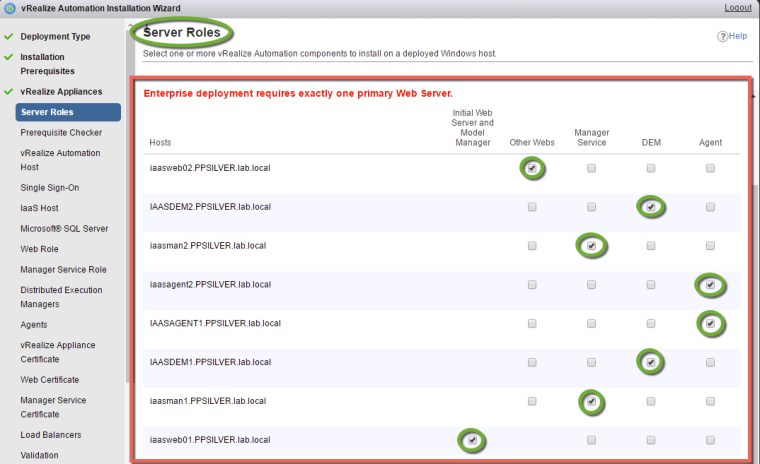
Match the IaaS hosts to their respective roles and click next:
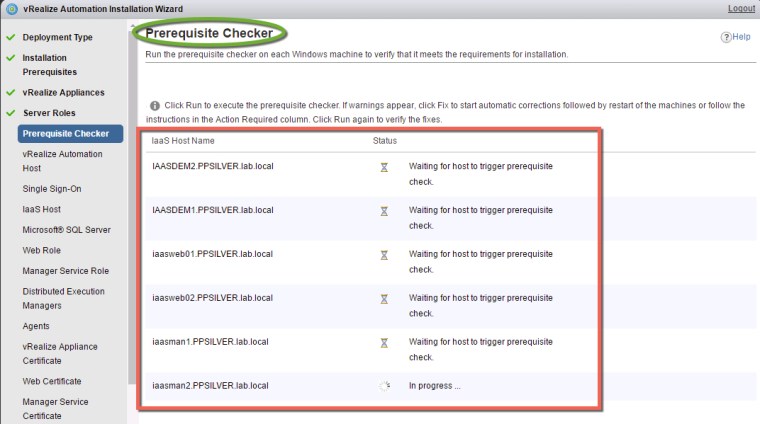
Run the prerequisite checker on the windows hosts, this allows the wizard to confirm all the required features and configurations are present on the hosts:
Click ‘Fix’ to automatically remediate any required components or configurations on the Windows IaaS hosts:

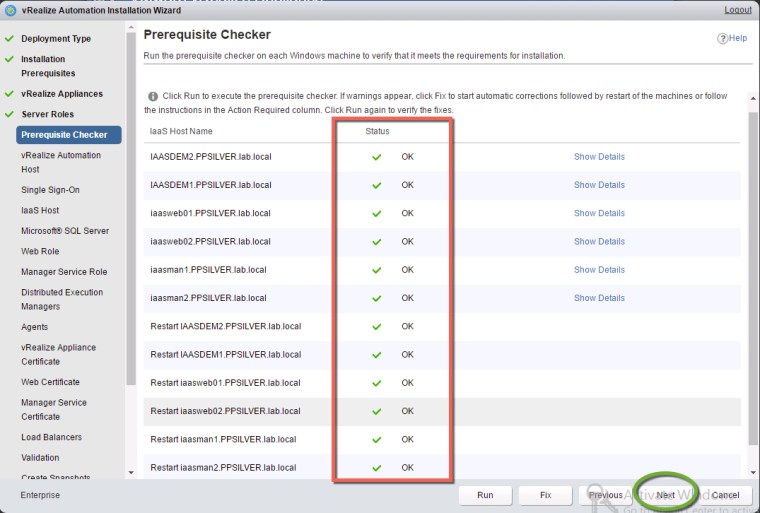
Pre-req successful, click Next to continue:
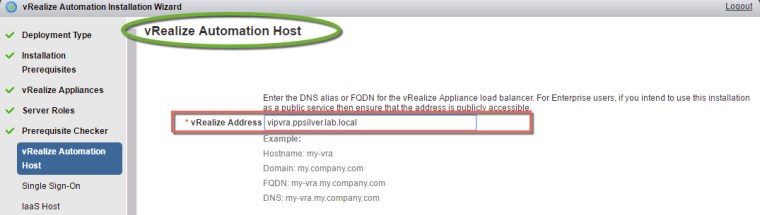
Add the vRA VIP FQDN information:
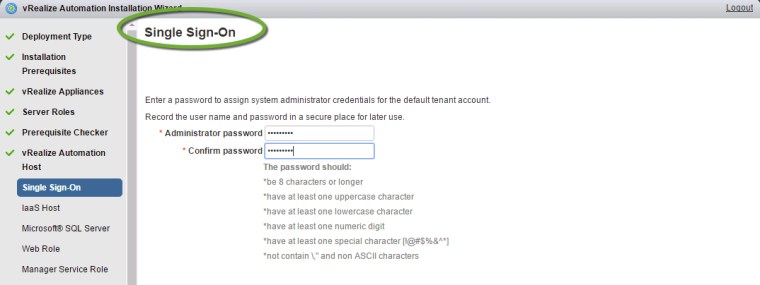
Provide the SSO details to do the initial login to vRA:
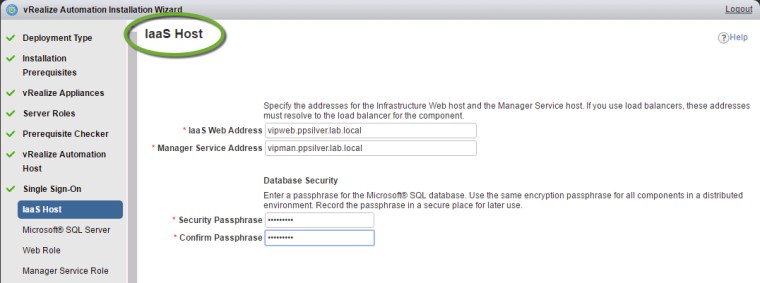
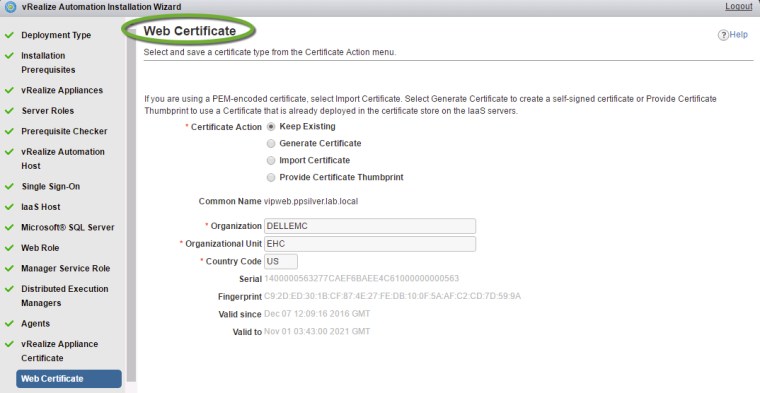
Add both the Web & Manager VIP FQDN information and the secure passphrase:
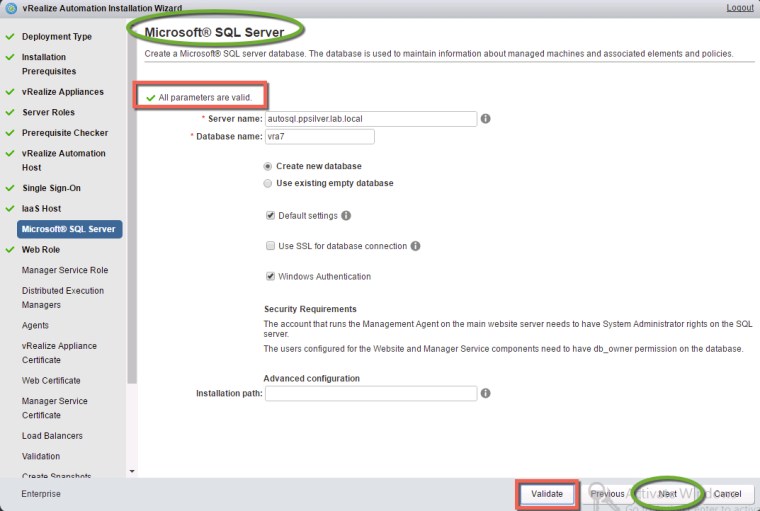
Enter the SQL Server being used and the database name you wish to use, the install wizard will create this new database for you. Click ‘Validate’ to confirm communications with SQL:
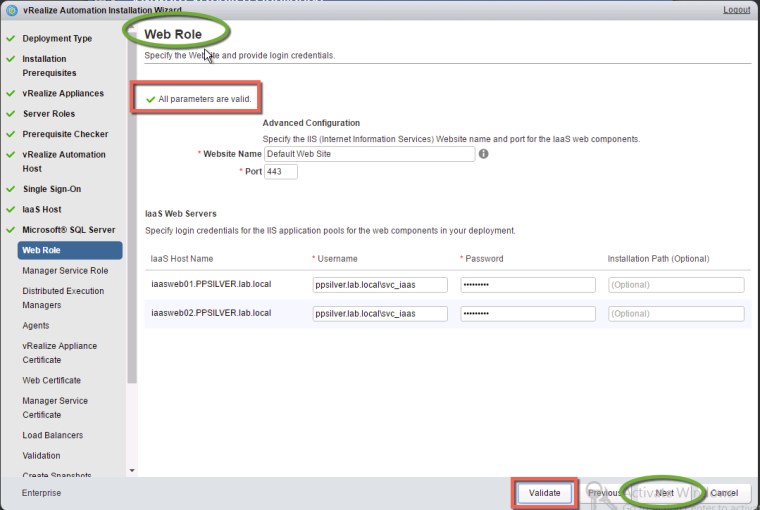
Enter the service account being used for IaaS:
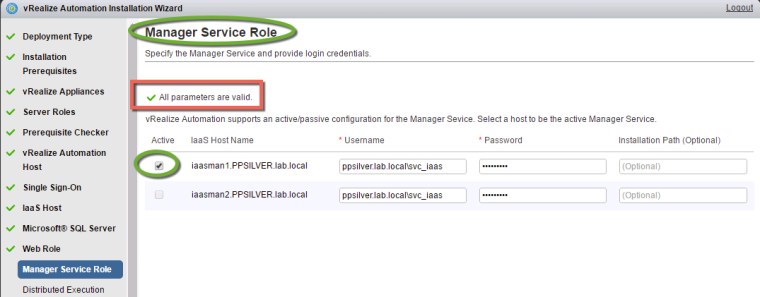
Again provide the service account details and select the active Manager host:
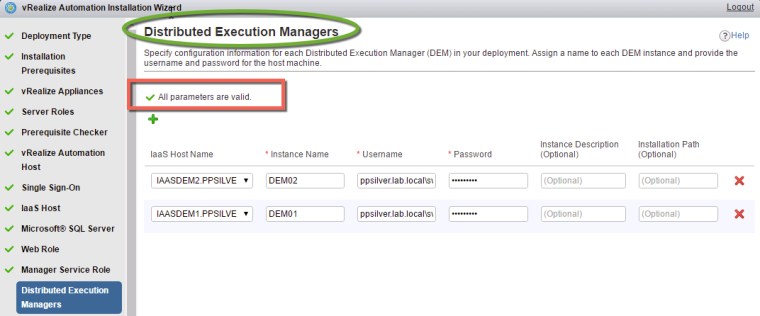
Assign Names to the Distributed Execution Managers and enter a service account to use:
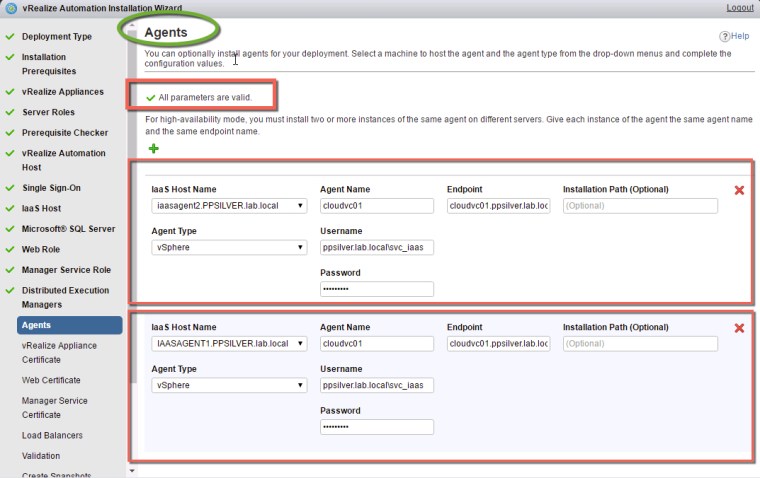
Chose vSphere as the Agent type to install on the Agent hosts and supply the vCenter endpoint details:
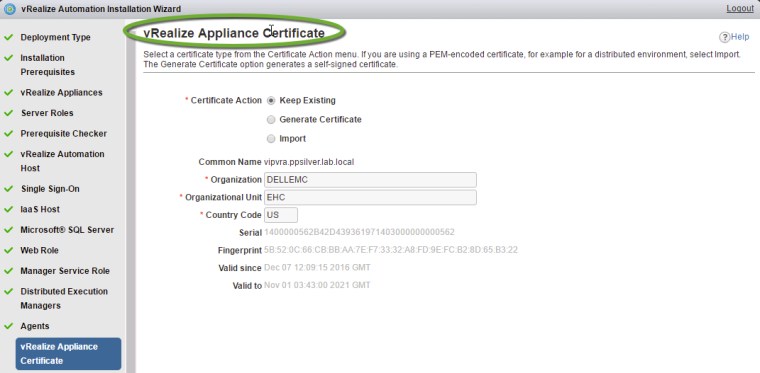
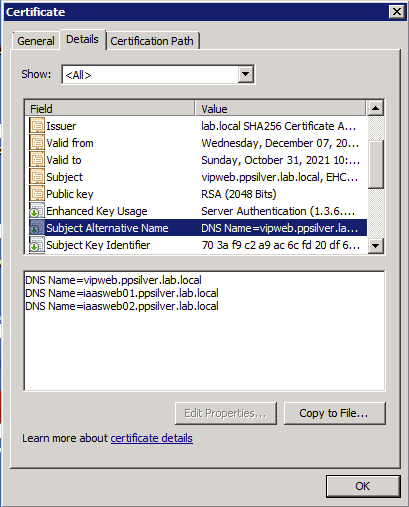
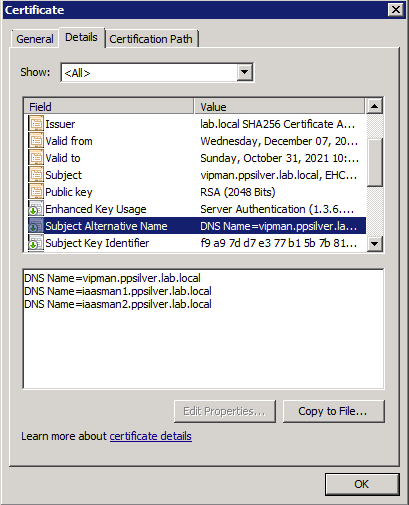
Before completing the certificate import ensure your SAN attributes are correct:

Import the generated certificate:

Import WEB server certificate:

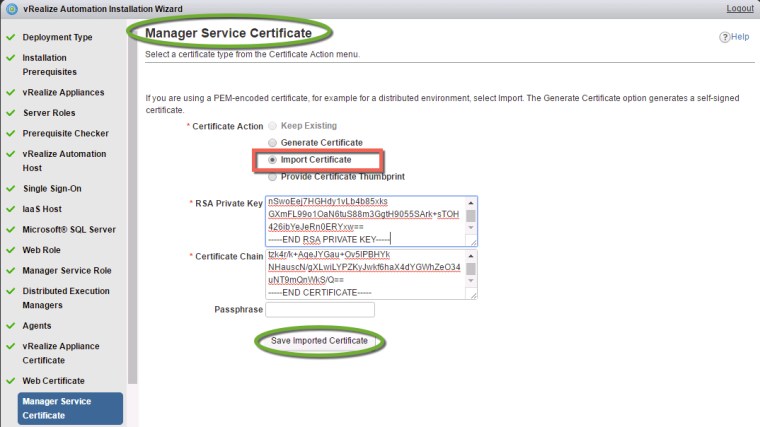
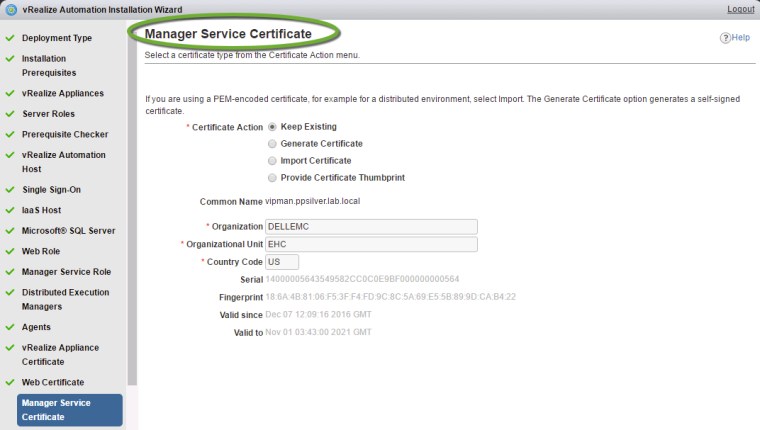
Import Manager certificate:
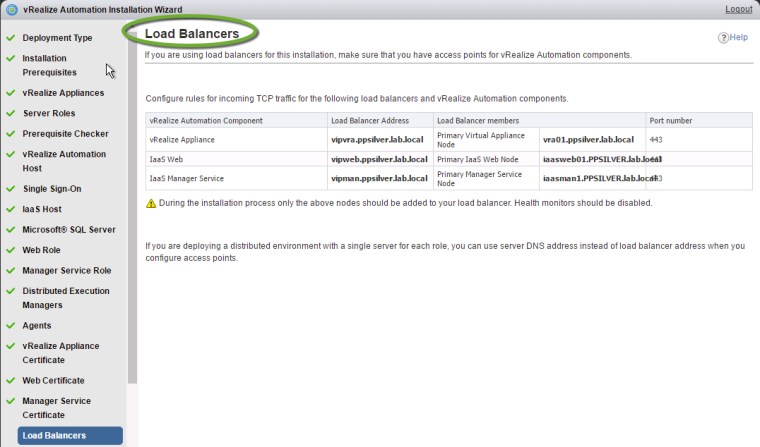
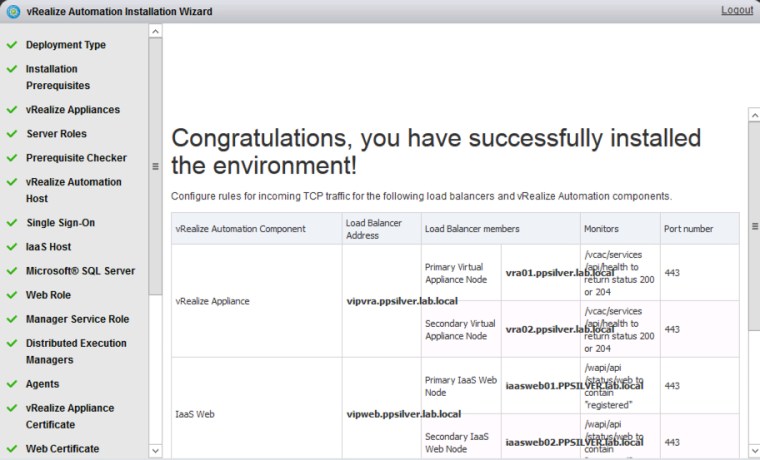
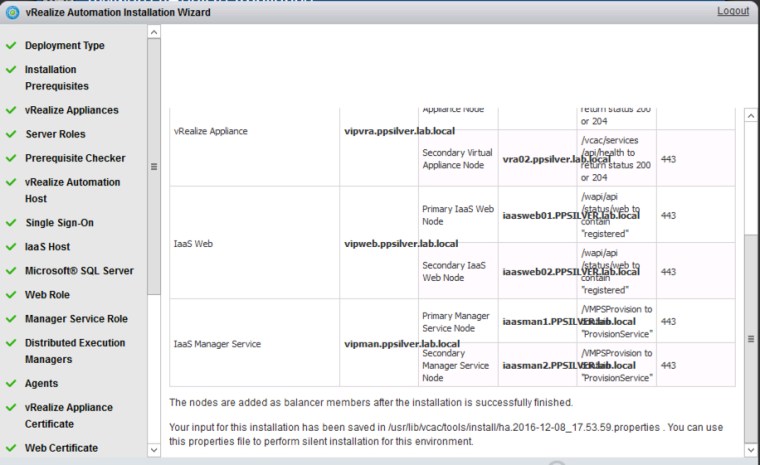
Confirm load balancer details are correct:
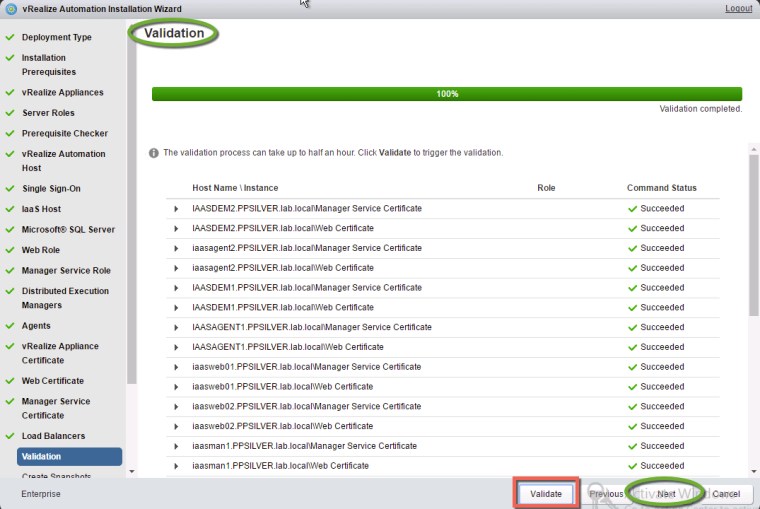
Run the Validation of all the config details entered, this may take 10 minutes or so:
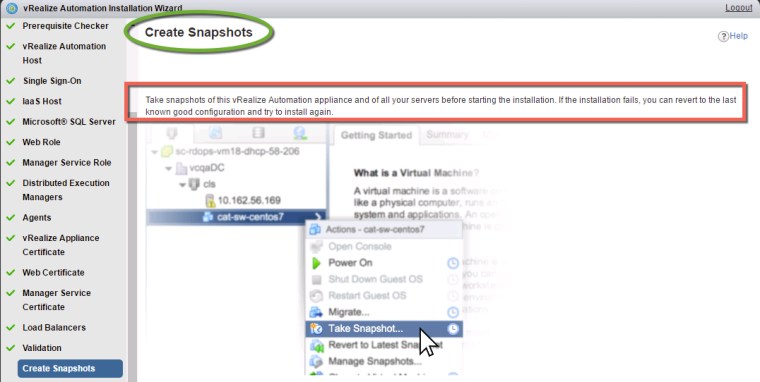
Once validation successfully completes ensure you take a snapshot of all the IaaS virtual machines including SQL, this allows for a re-run of the install in the event of failure:
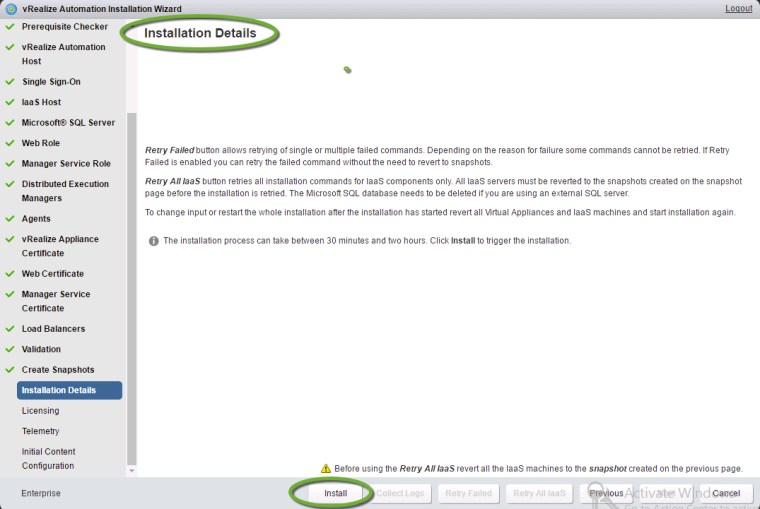
Proceed with the install, this can take 45~ minutes:
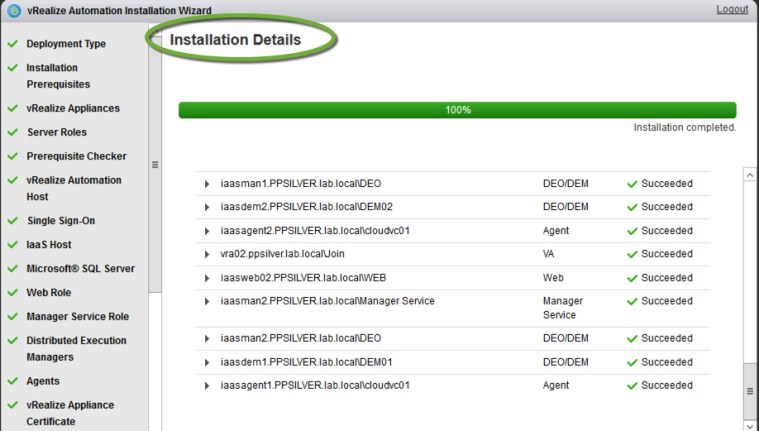
Install complete:
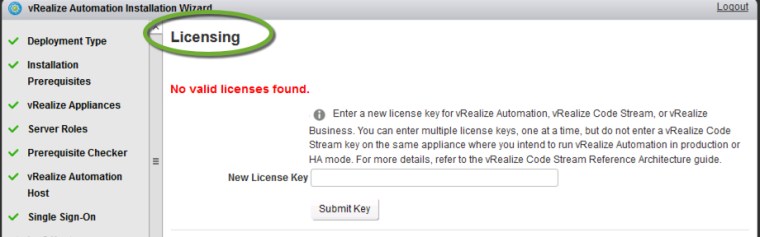
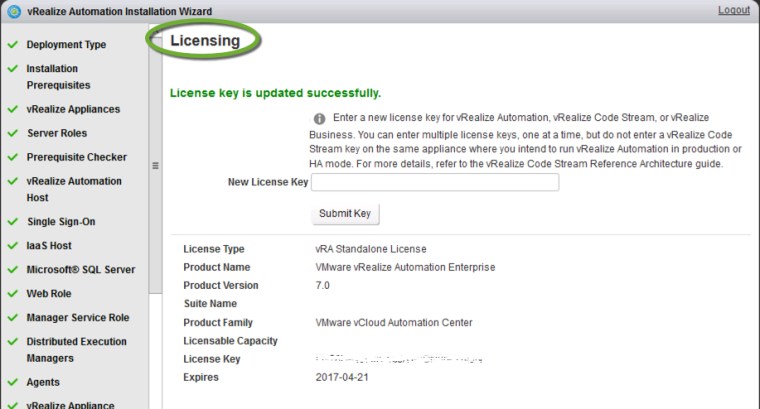
Assign license:

Congratulations!:
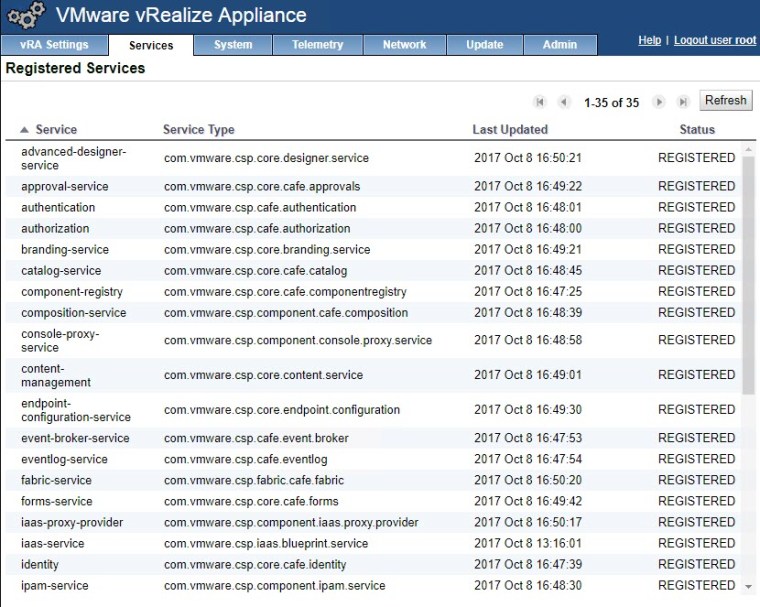
Validate the services are listed as registered:
Navigate to the vRealize Appliance management console by using its fully qualified domain name, https://vra-va-hostname.domain.name:5480/
The system is ready to use!


1 Comment »