VCF
VCF 4.1 ON VXRAIL – EXPAND A CLUSTER (ADD NODE)
In this post I will provide an example walk-through of the process for adding a new VxRail node to an existing VCF on VxRail ‘VI Workload Domain (WLD)’. At a high level there are […]
Virtualization & Storage

In this post I will provide an example walk-through of the process for adding a new VxRail node to an existing VCF on VxRail ‘VI Workload Domain (WLD)’. At a high level there are […]
In this post I will provide an example walk-through of the process for adding a new VxRail node to an existing VCF on VxRail ‘VI Workload Domain (WLD)’.
At a high level there are two key integrated procedures to follow, leveraging:
This example begins with a 3 node VCF on VxRail ‘VI Workload Domain’ and we expand with one additional host.
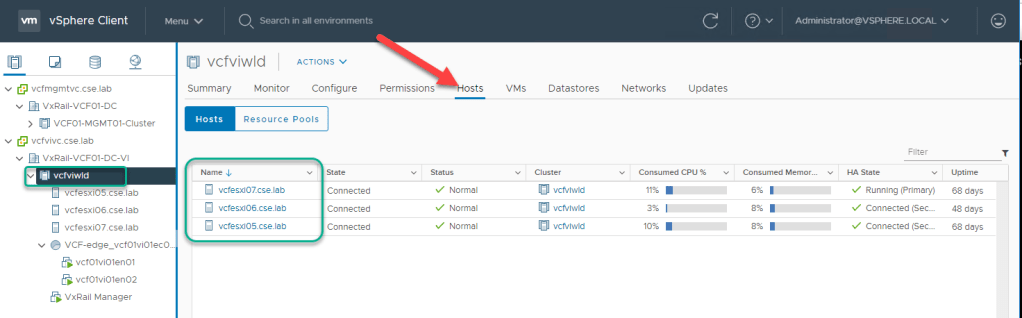
Logging into vCenter & VxRail Mgr we can see the existing 3 node cluster:
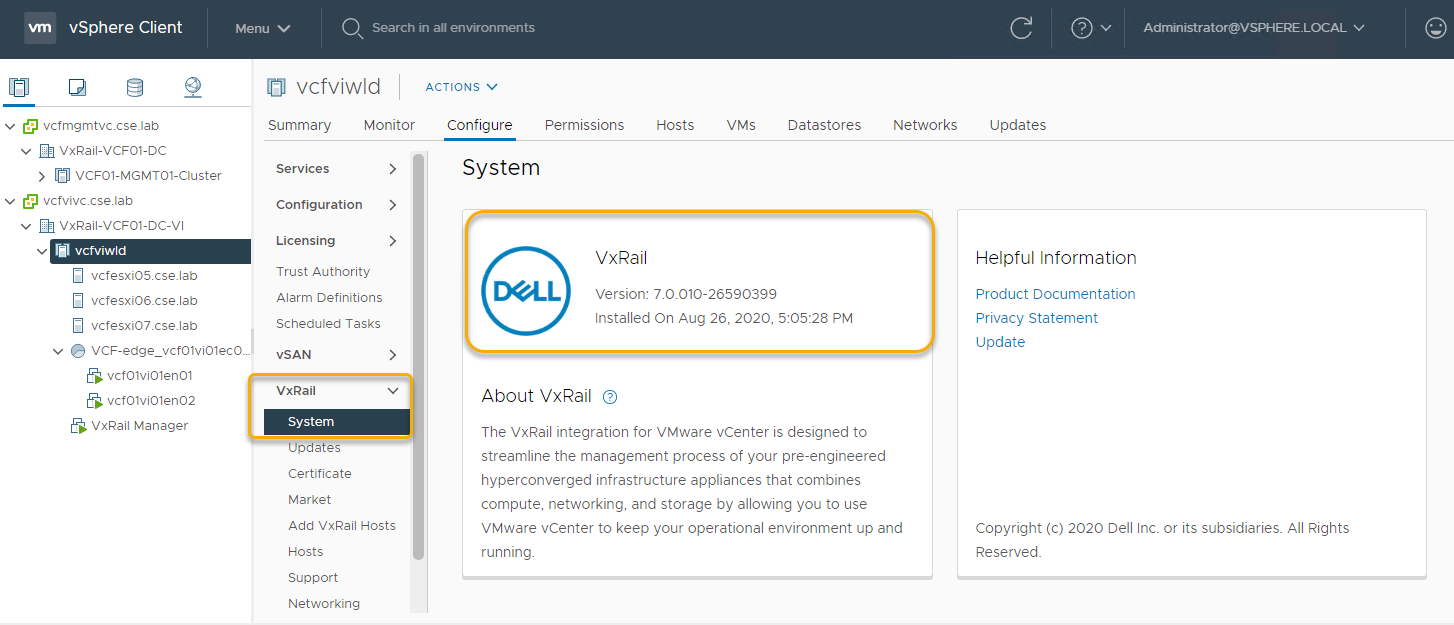
Navigating to Configure->VxRail->System in vCenter we can view additional cluster details such as the current running VxRail code version which the new host needs to be imaged to:
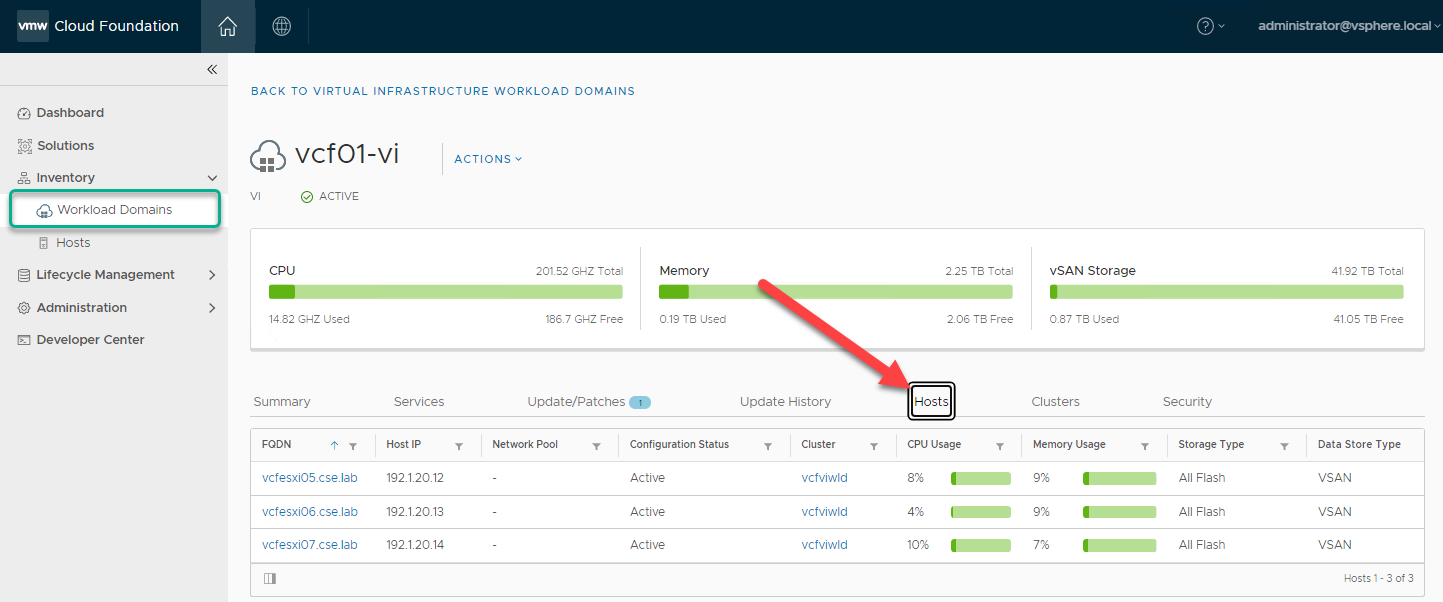
From the SDDC Manager dashboard we can also confirm the current VI WLD configuration which consists of 3 hosts. Inventory->Workload Domains->VI WLD->Hosts:
To begin the VI WLD host expansion we leverage the VxRail Manager plugin in vCenter to expand the VxRail Cluster.
Note: you can add up to 6 hosts at a time.
Click on the VxRail cluster in vCenter to which we are adding a host, click on the tab Configure->Add VxRail Hosts from here you can view the newly discovered host. Click on the ‘ADD Host‘ button in the top right corner to begin the expansion process:
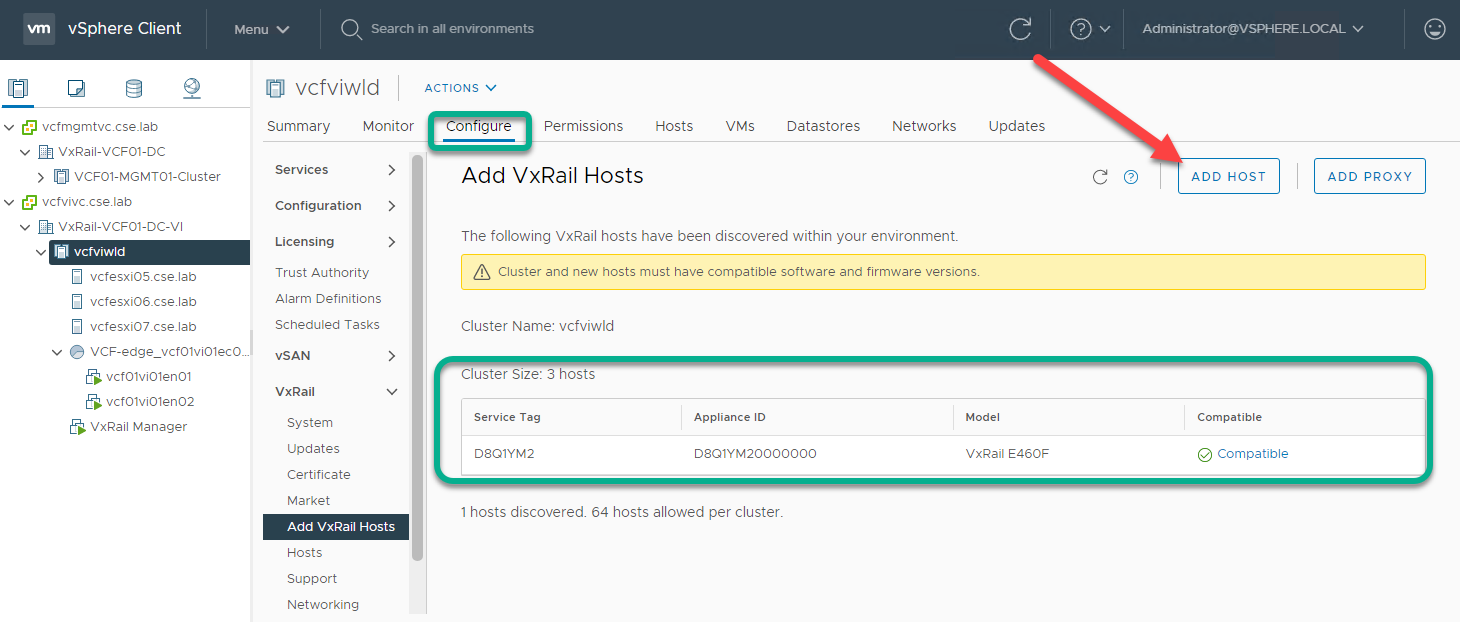
Note: ensure the DNS entries have been created for the new ESXi hosts and both forward and reverse lookups are resolving.
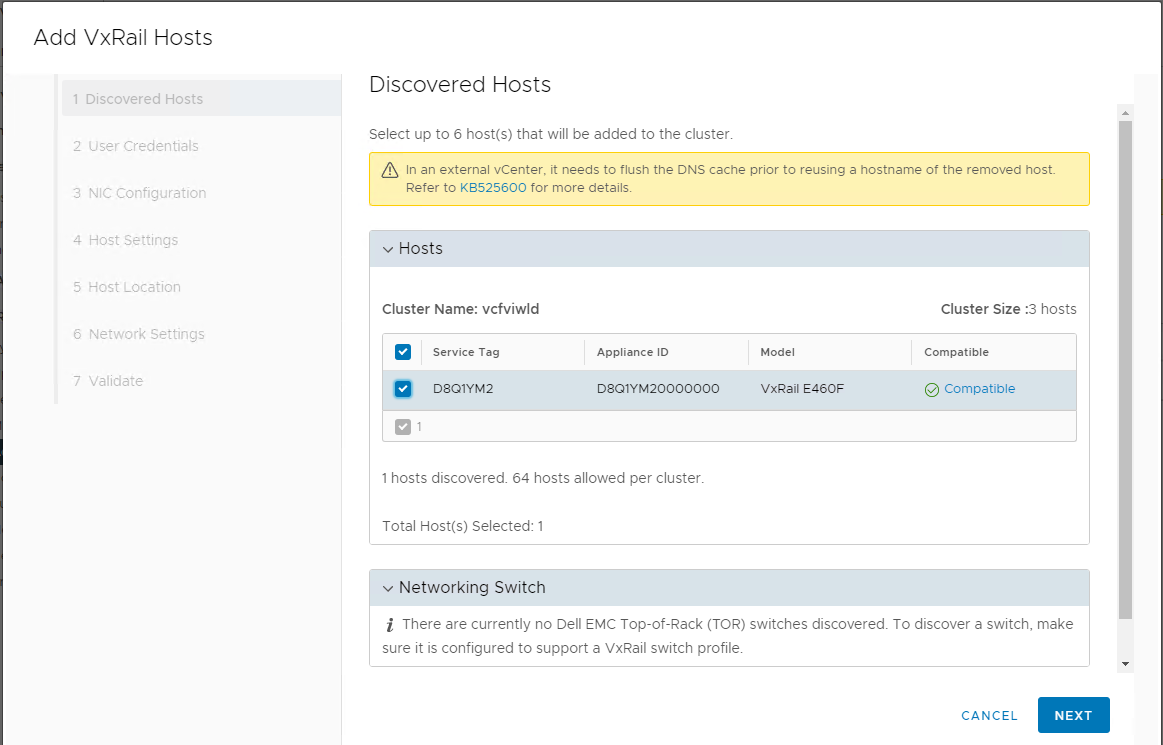
The Add Hosts wizard initial screen displays the discovered host, select the Host and click NEXT:
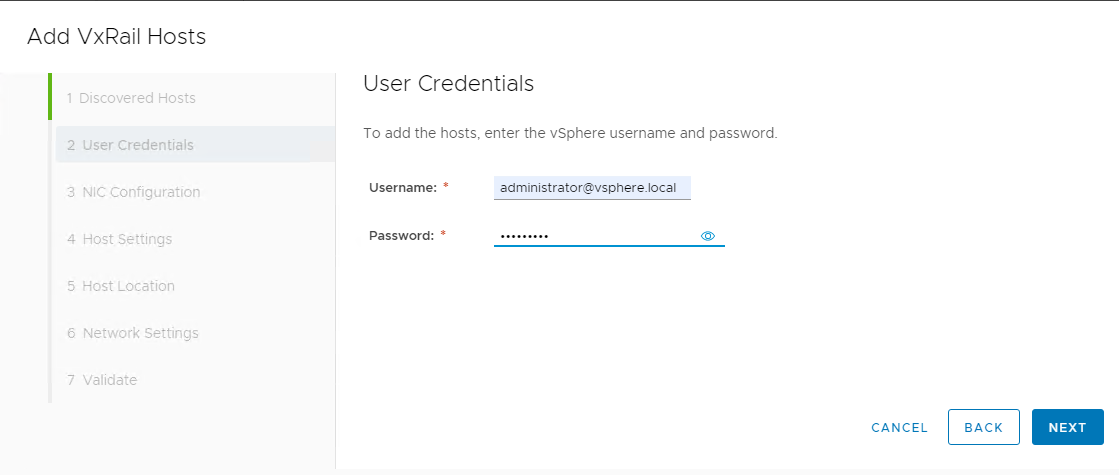
Enter the vSphere SSO credentials:
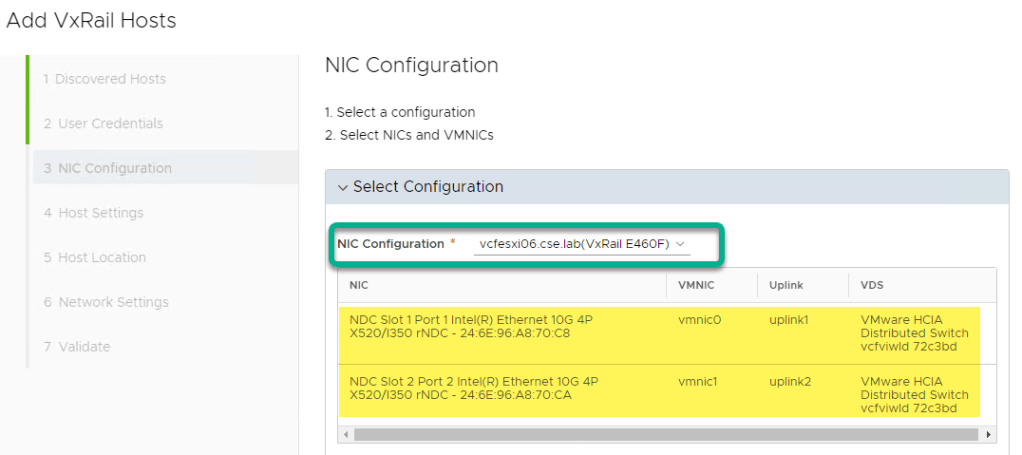
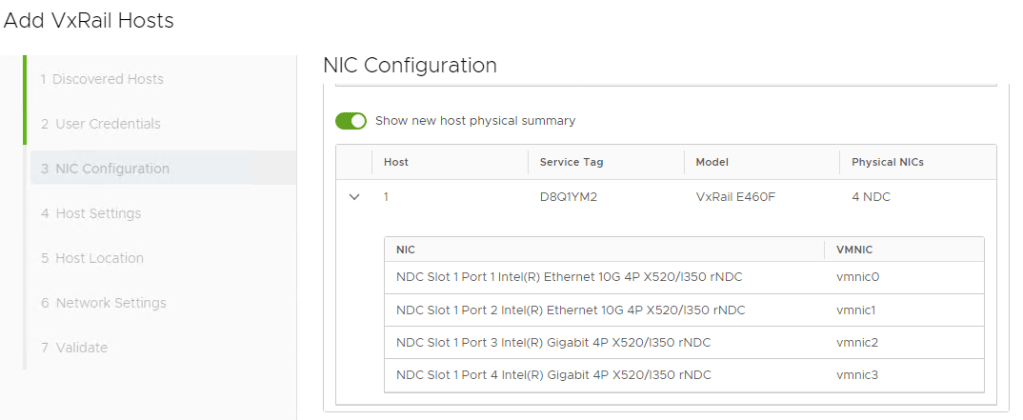
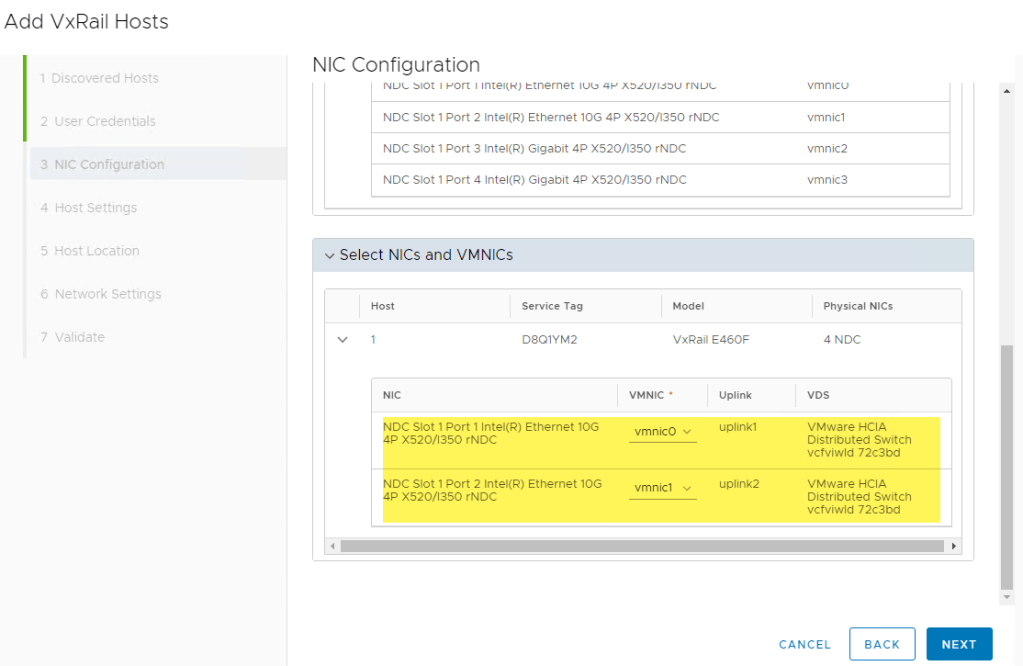
NIC Configuration – select config based on similar profile of existing cluster node:
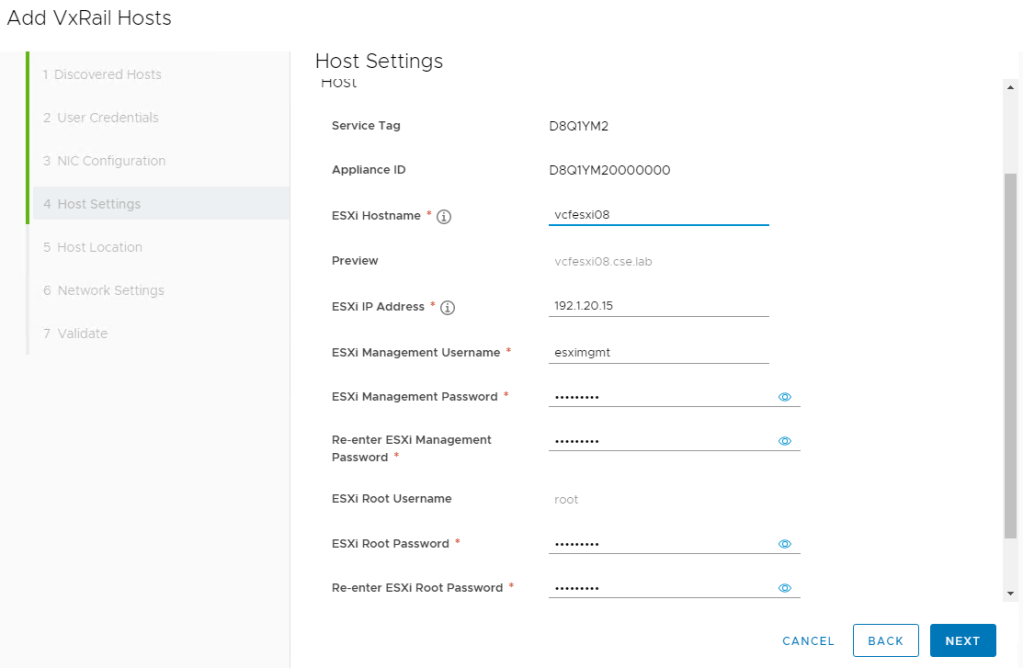
Enter the ESXi & Local Mgmt a/c credentials and the associated ESXi Hostname (pre-configured in DNS). Click NEXT to continue:
Note: useful cmd to run on one of the existing ESXi hosts to validate the local users originally created, this will help to identify the ‘Management’ user: esxcli system account list
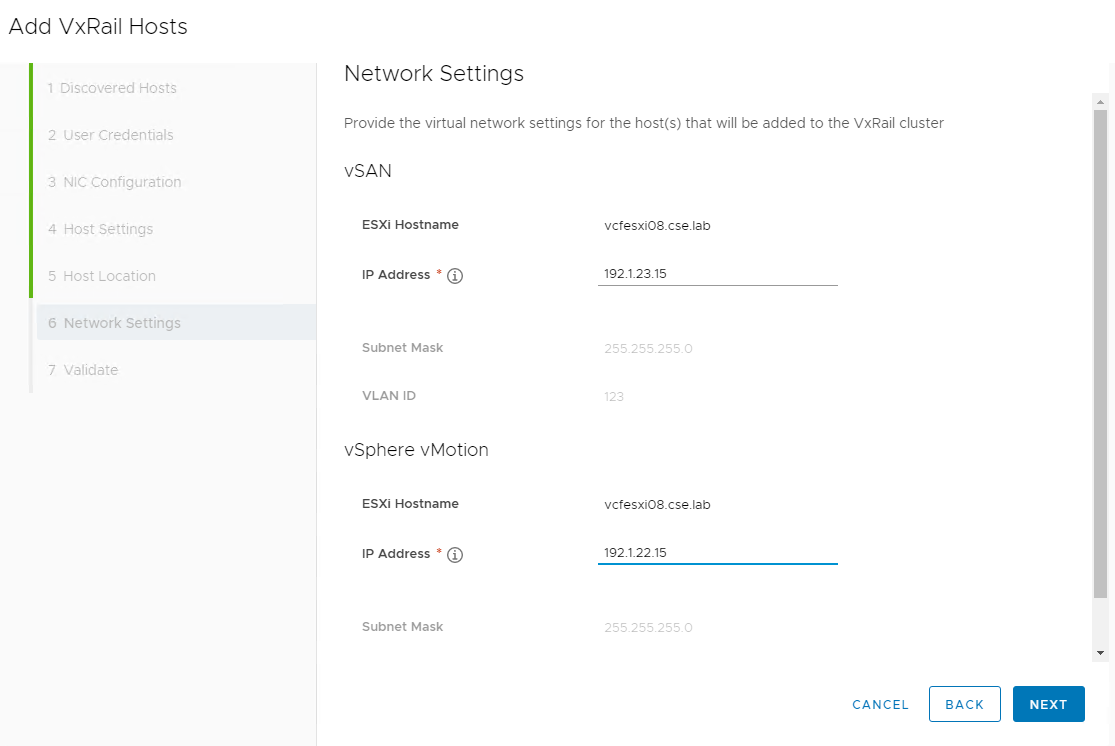
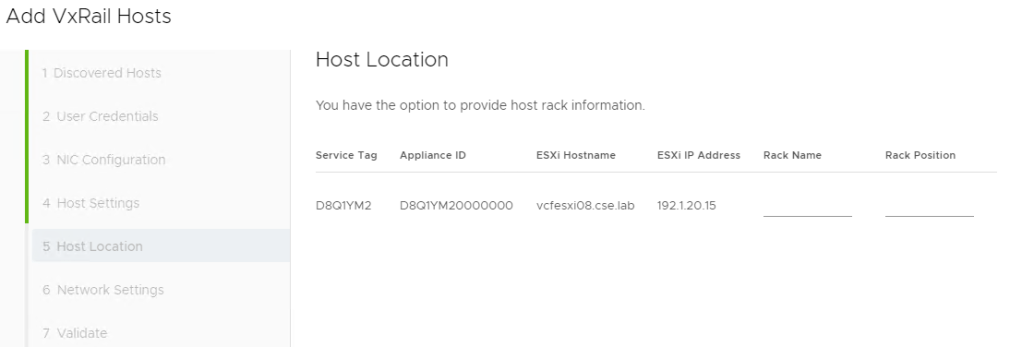
Enter the required ESXi, vMotion & vSAN IP details for the new host (unless the IP Pool has free entries which can be leveraged), click ADD for each IP entry and click NEXT to continue:
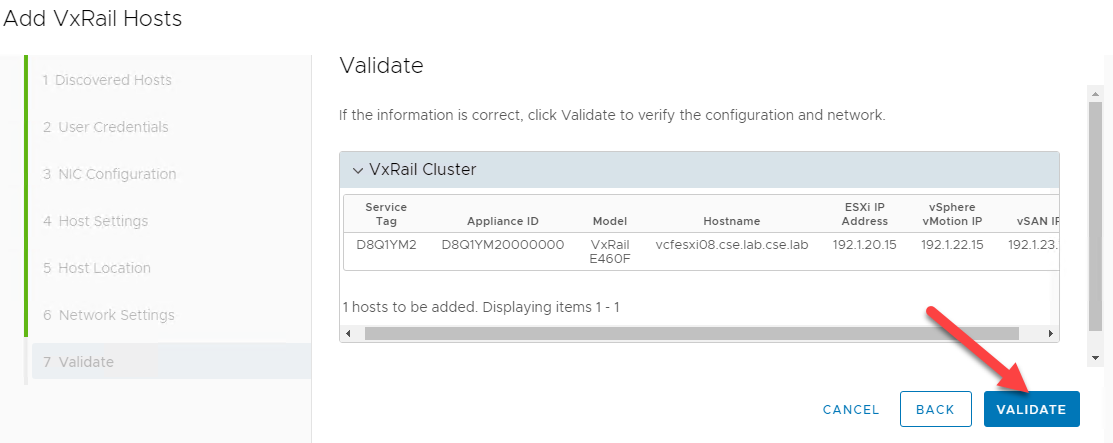
Review all the config details entered. Once you are happy with the config entered click on the VALIDATE Button to begin the validation process:
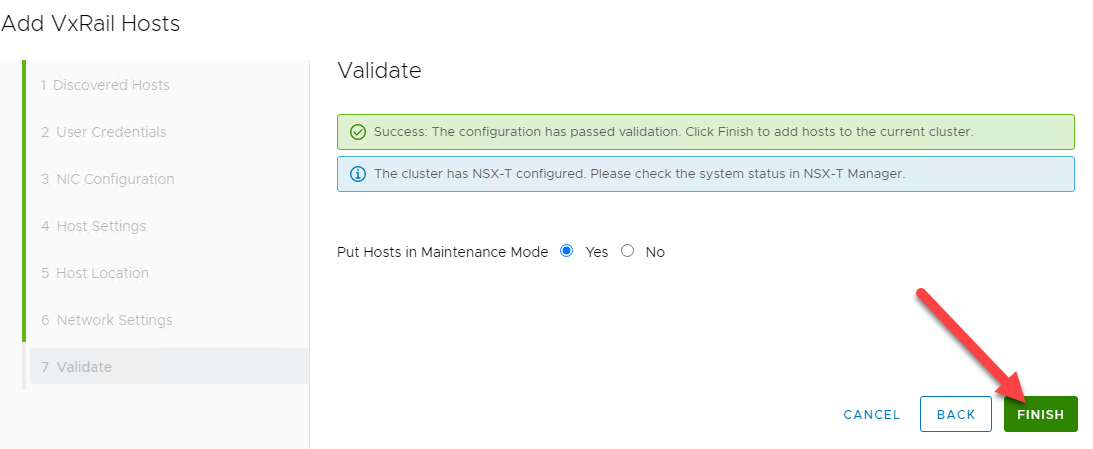
Click the check box for Maintenance Mode. This is required as SDDC manager will be performing additional tasks post the VxRail expansion, such as NSX component installation. Once validation completes successfully click on the FINISH button which in turn initiates the VxRail ADD HOSTS workflow:
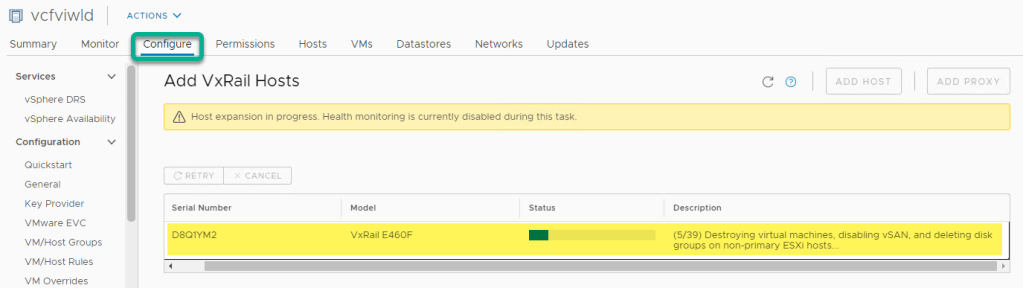
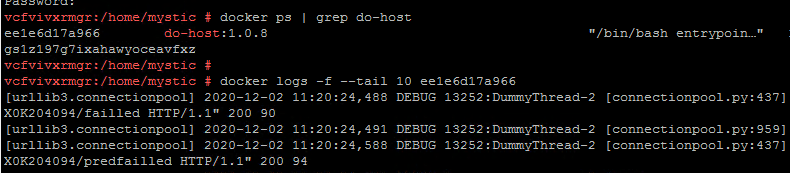
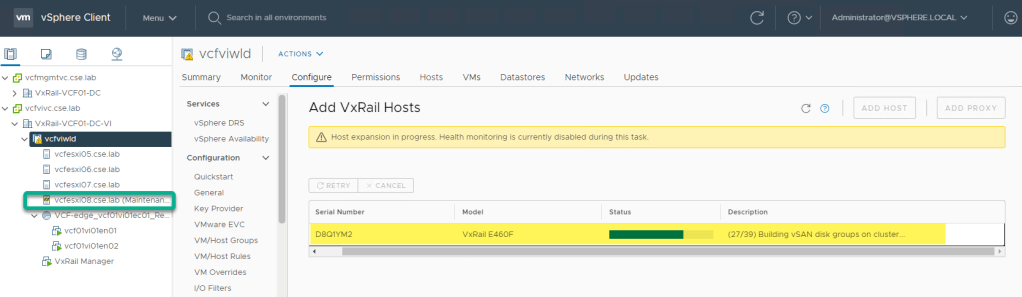
Monitoring progress of the workflow from vCenter & VxRail Mgr.:
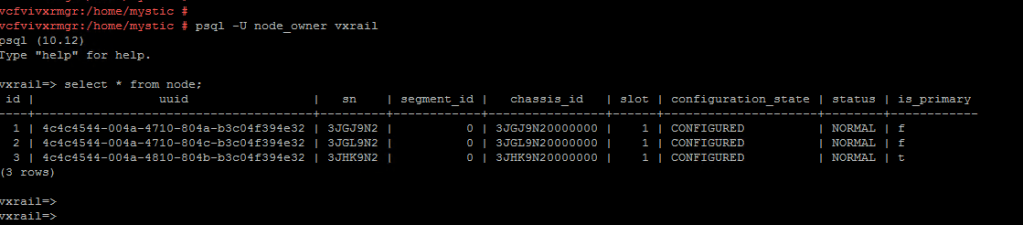
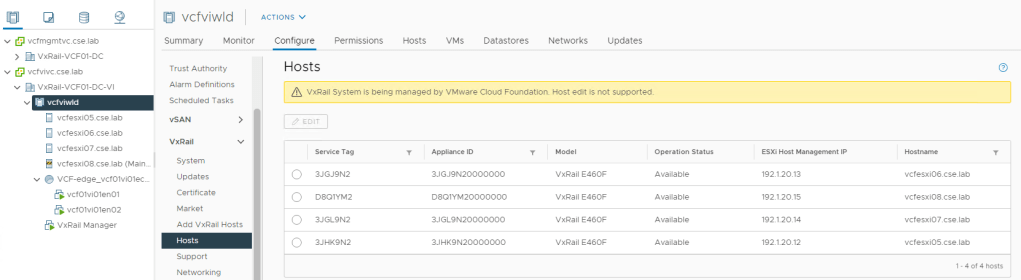
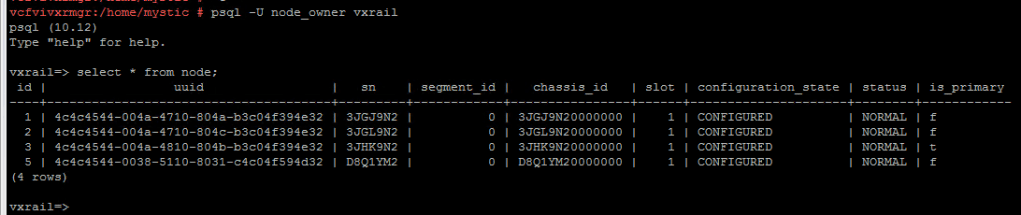
4th Host successfully added to the VxRail cluster:
psql -U node_owner vxrail
select * from node;
The second part of this procedure leverages the SDDC Manager to add this new 4th VxRail Host to the VI WLD in VCF.
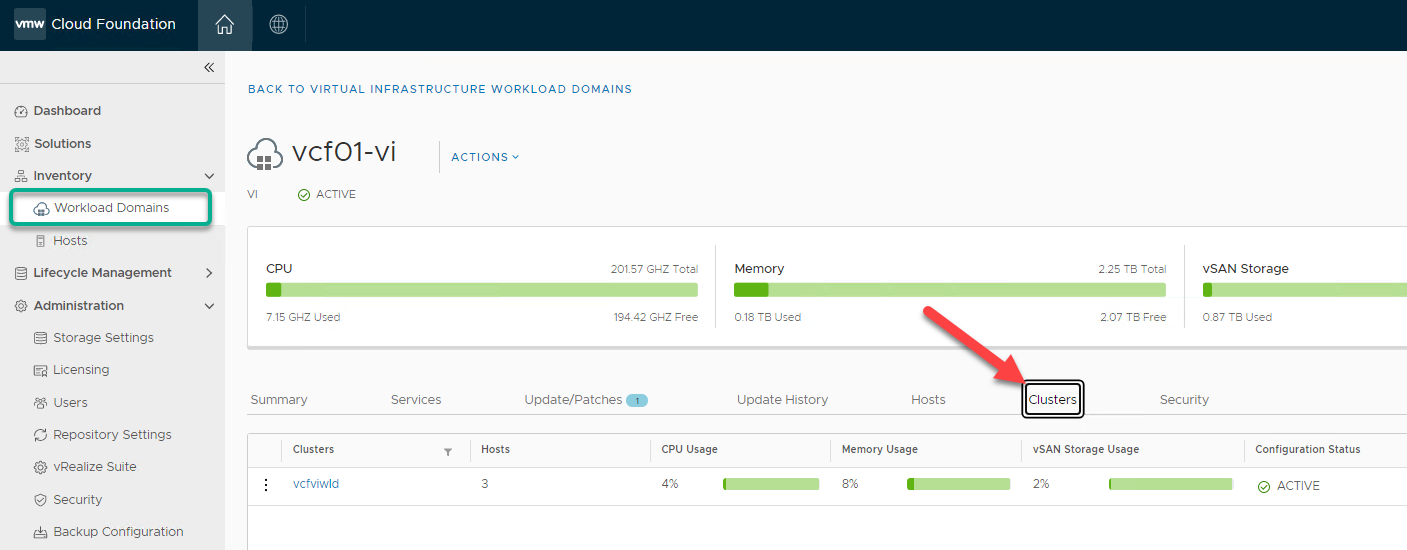
From the SDDC Manager dashboard navigate to Inventory->Workload Domains->VI WLD (vcfviwld)->Clusters->VI WLD (viwld01):
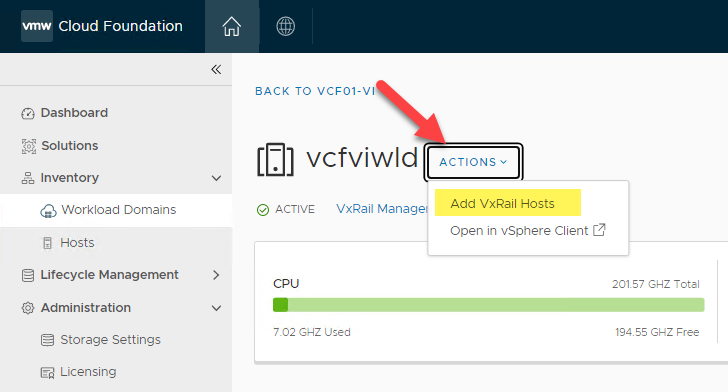
From the vcfviwld cluster dashboard click on the ACTIONS button and choose ‘Add VxRail Hosts’ option:
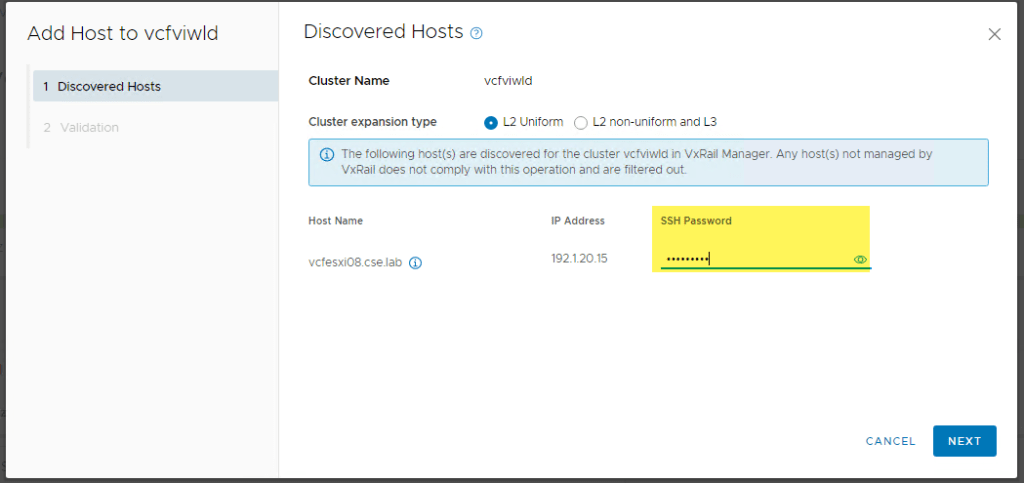
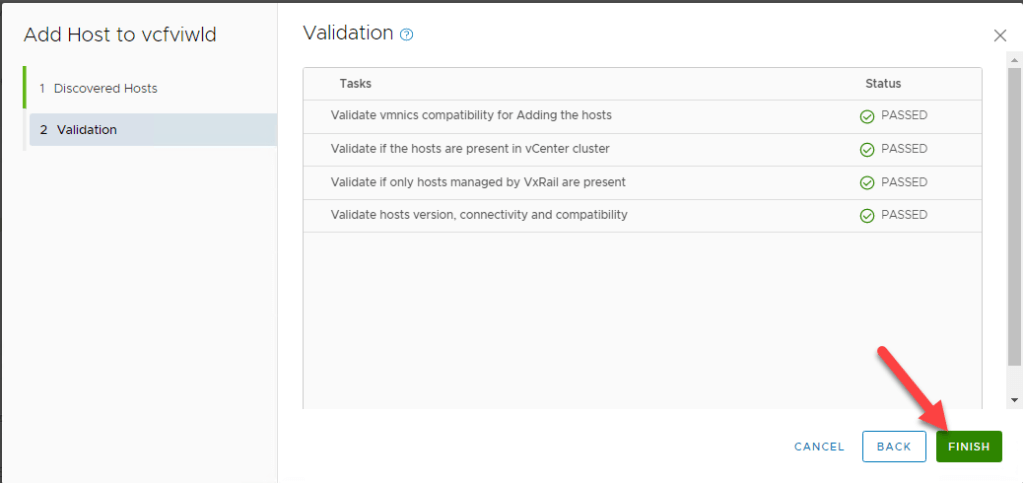
The SDDC Manager ‘Add Host’ wizard has detected the newly added host in VxRail Manager, simply enter the ESXi host SSH password and click NEXT. Once validation completes click FINISH to kick off the SDDC Workflow:
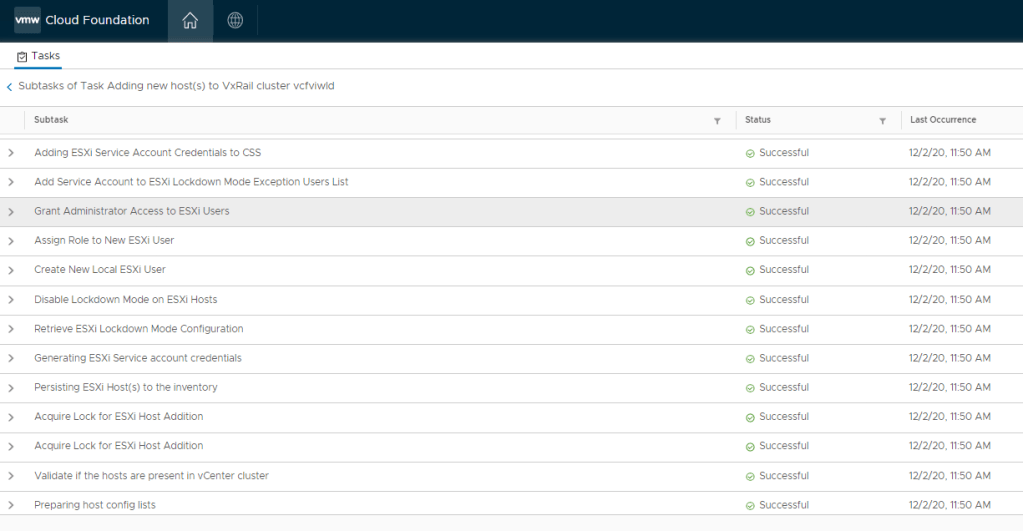
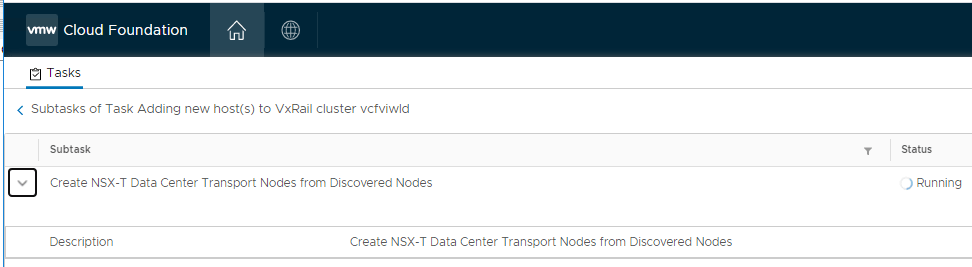
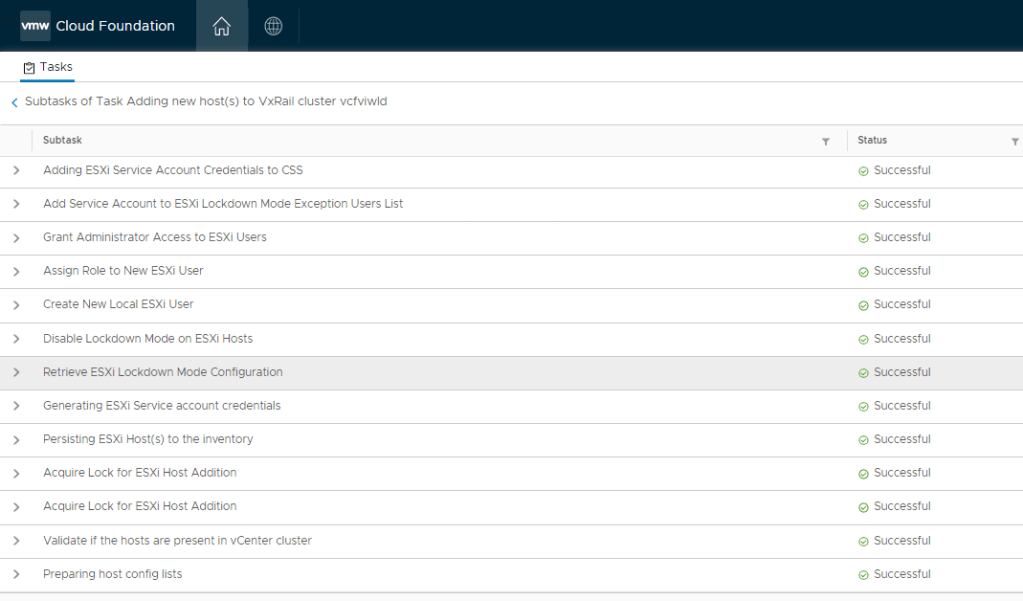
From the Tasks pane we can view the list of steps the workflow is executing and track progress of the workflow:
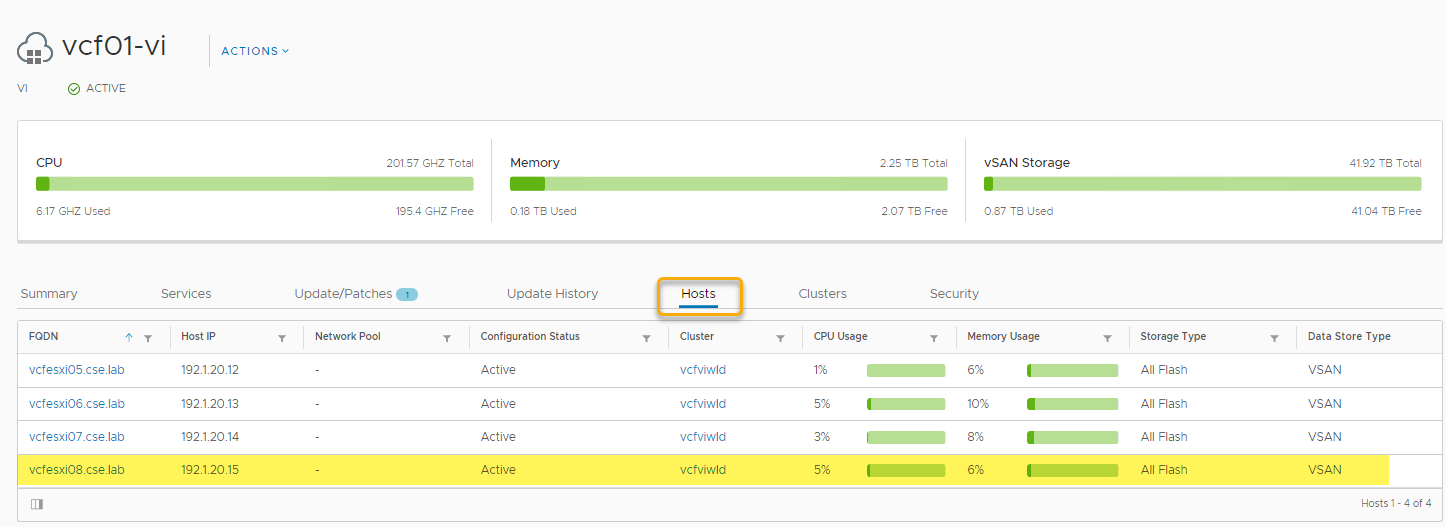
Host successfully added to the VI WLD:
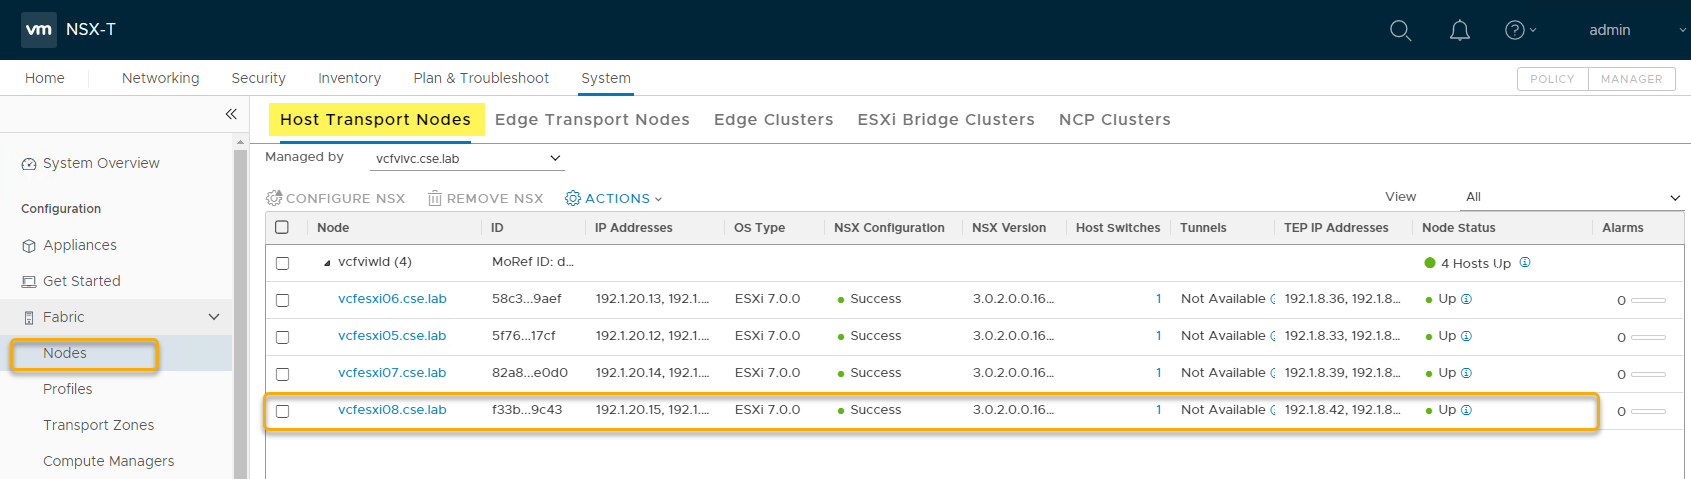
View from NSX-T Manager of newly added Transport Node:
Ensure to Add vSphere licenses to the new hosts.
Note: this is an example for reference only please use the VxRail installation procedures provided by Dell EMC.


1 Comment »