VxRail
VxRail Local Update – 4.7.300 -> 4.7.410
In this post I will step through the process of upgrading to 4.7.410 from 4.7.300 using the VxRail Manager plugin Local Update method, this method allows the user to upload […]
Virtualization & Storage

In this post I will step through the process of upgrading to 4.7.410 from 4.7.300 using the VxRail Manager plugin Local Update method, this method allows the user to upload […]
In this post I will step through the process of upgrading to 4.7.410 from 4.7.300 using the VxRail Manager plugin Local Update method, this method allows the user to upload the new software bundle from local storage which can be useful in scenarios where the VxRail does not have internet access. This example is based on a vanilla install of 4.7.300 using an internal vCenter, with no customization or running production workloads, always refer to official procedures before executing an upgrade as there may be certain nuances that may affect your environment.
Begin by logging into vCenter Server using HTLM5 Client:
Check that no issues exist before proceeding with the upgrade, it is important the cluster is in a healthy state before proceeding with the upgrade:
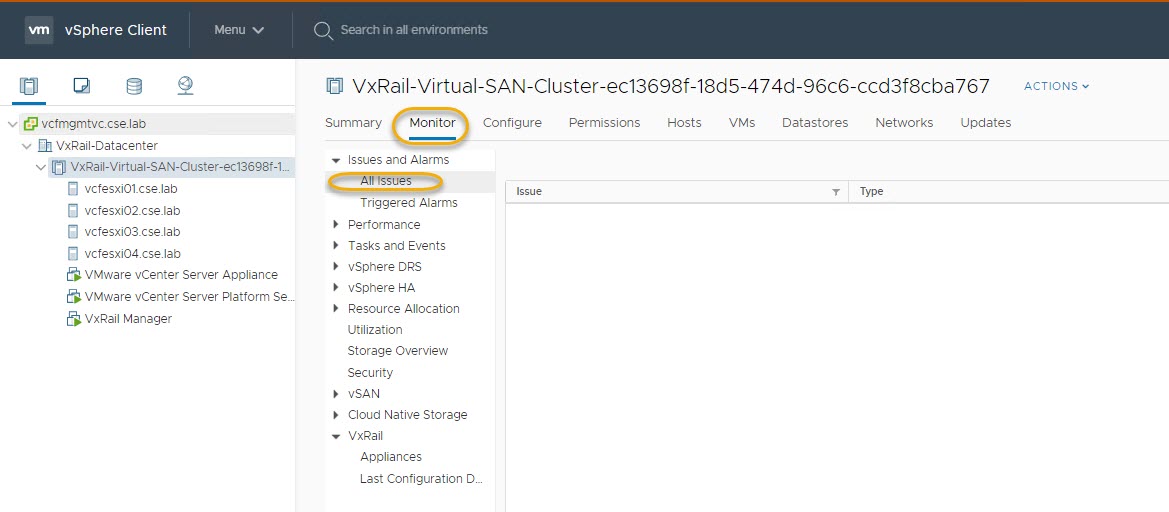
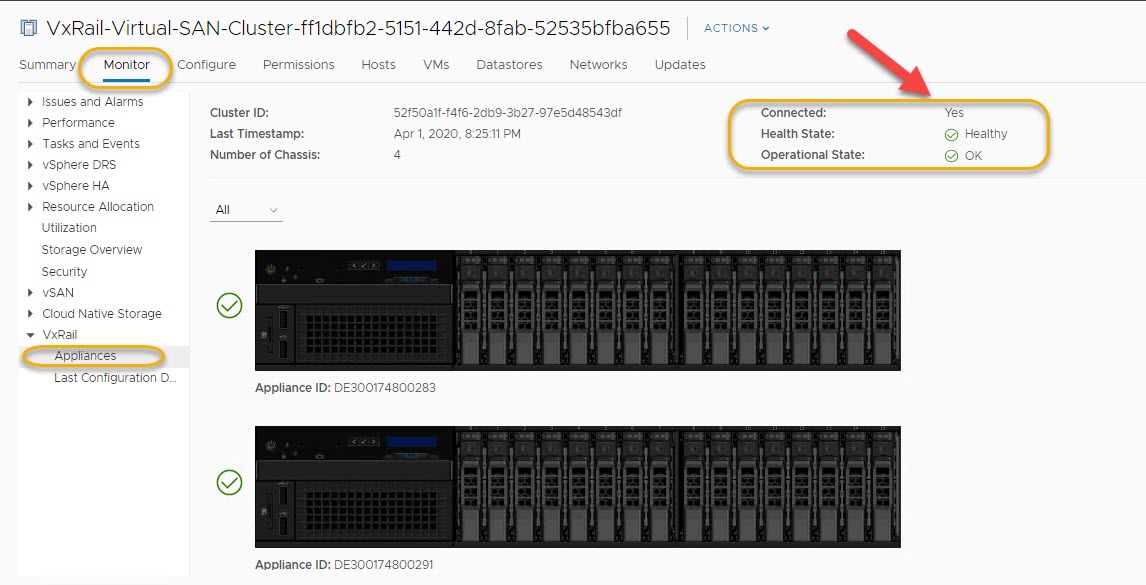
Confirm the cluster is in a healthy state:
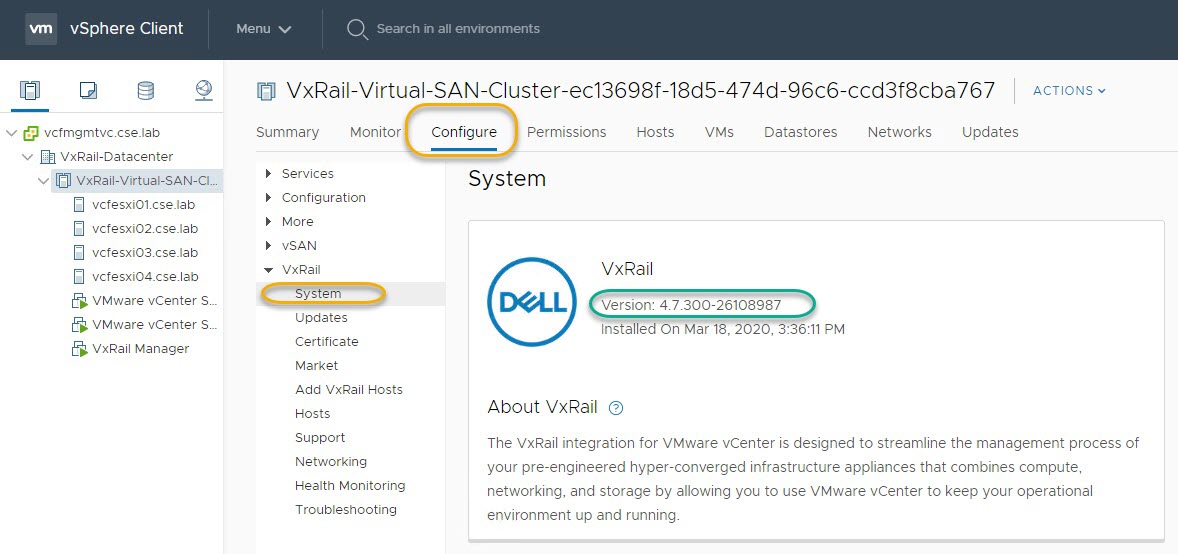
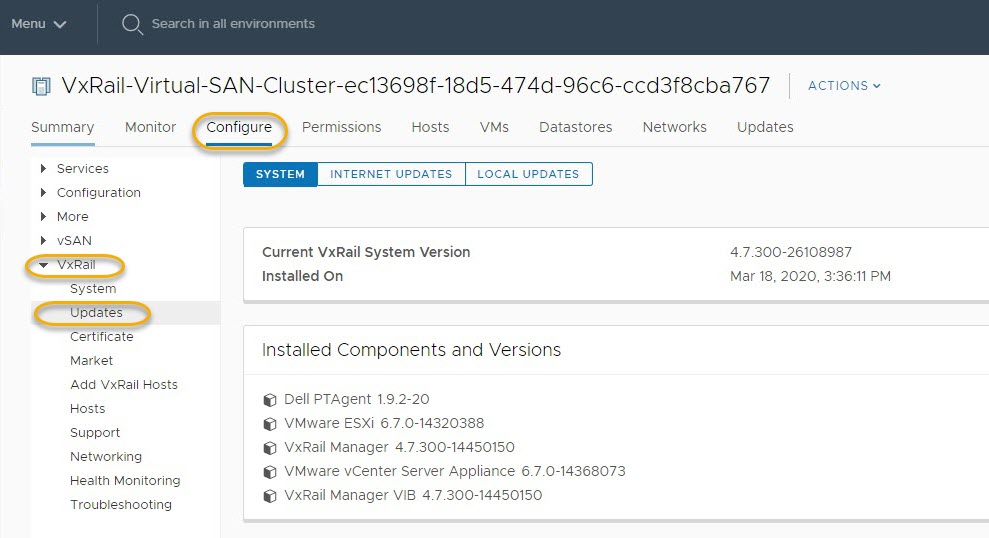
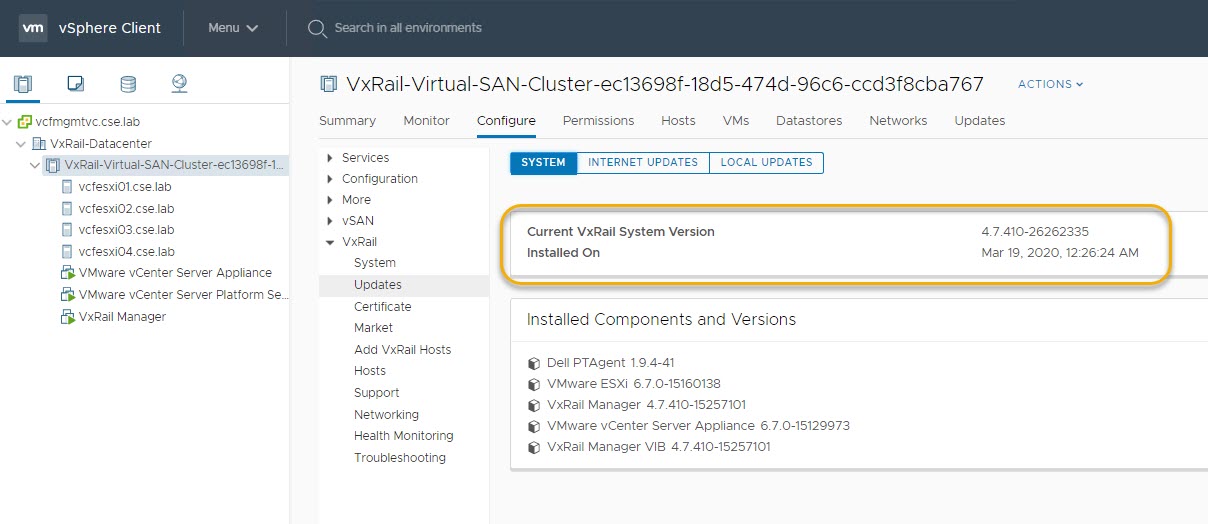
Confirm the existing code level is as expected; in this example the running code version is 4.7.300:
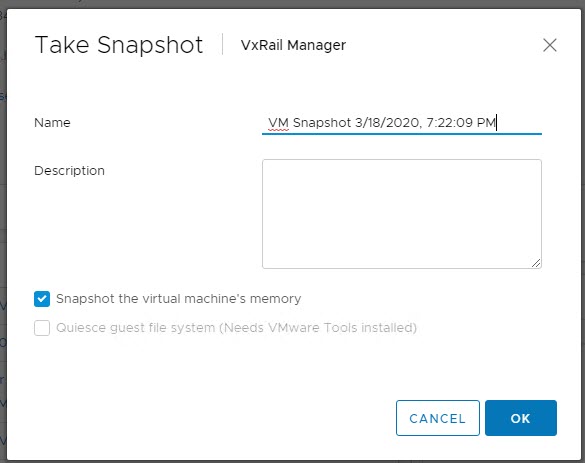
Take a snapshot of the service VM’s ( VxRail Manager, vCenter Server, Platform Services Controller):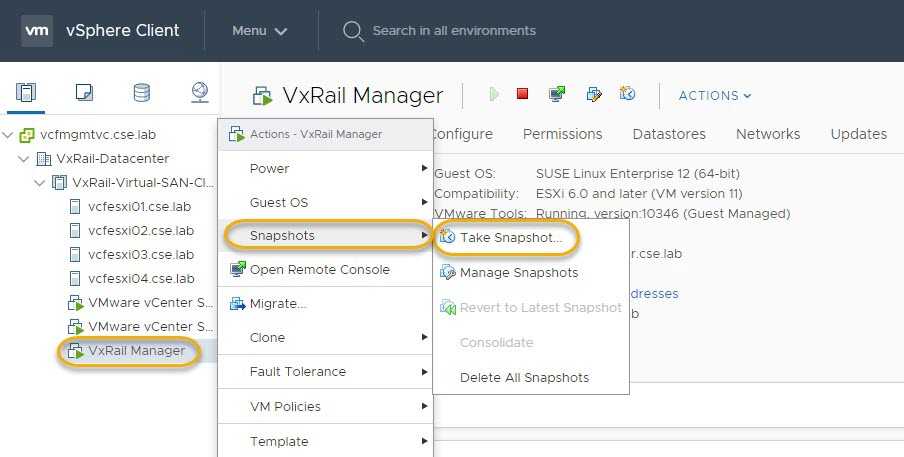
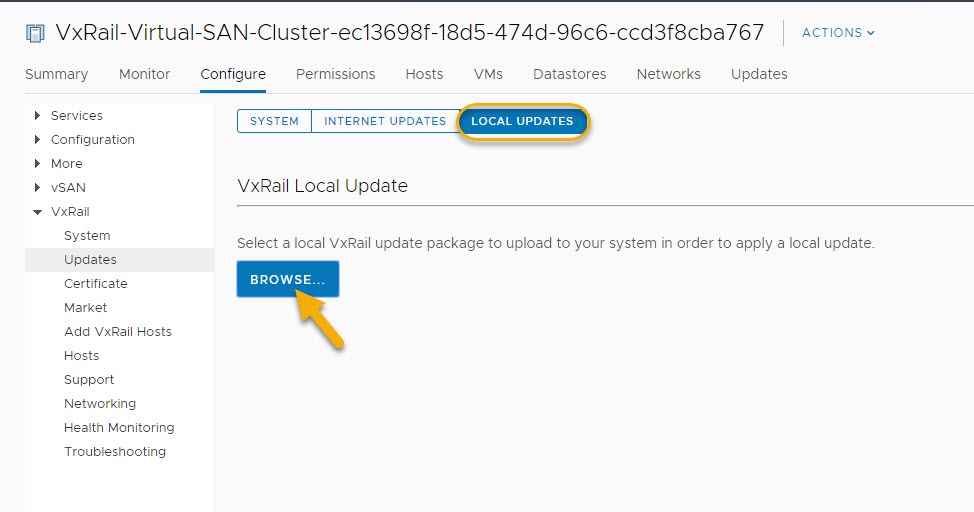
Navigate to the VxRail Updates window:
Click VxRail Cluster > Configure > VxRail > Updates
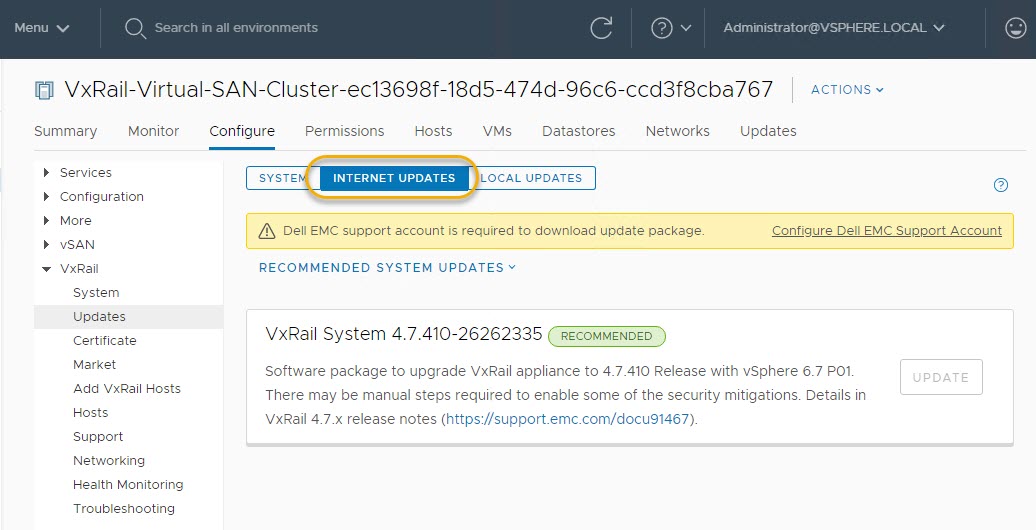
As you can see 4.7.410 is prompted in the Internet Updates as a target, in this example we are using Local Updates so we click on LOCAL UPDATES.
Click LOCAL UPDATES and BROWSE:
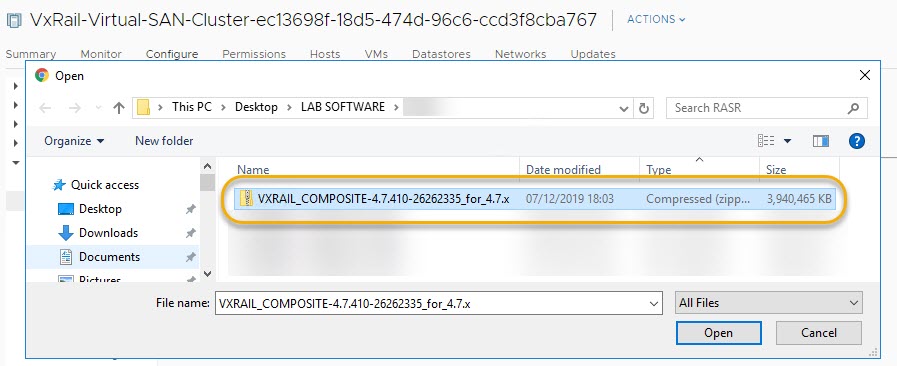
Navigate to the upgrade composite package file VXRAIL_COMPOSITE4.7.410-xxxxxxx_for_4.7.x.zip and click Open to select:
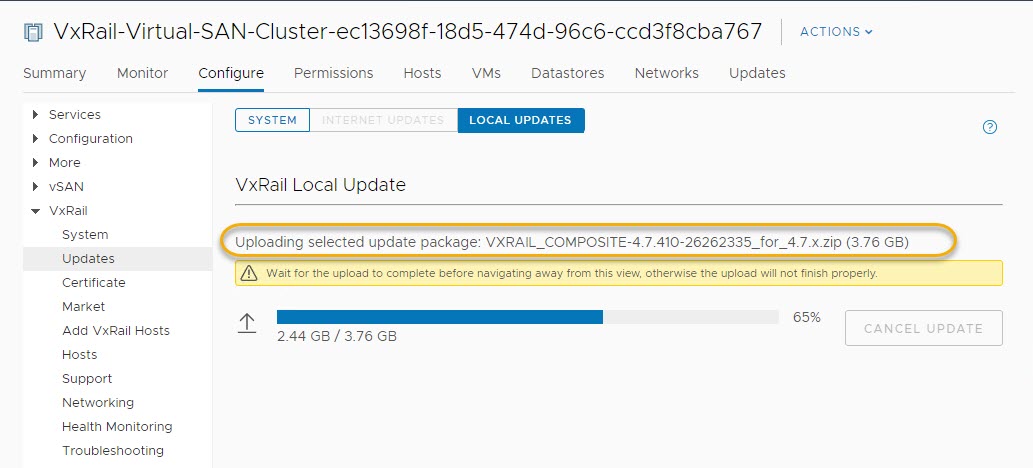
Uploading of the package to vSAN is in progress:
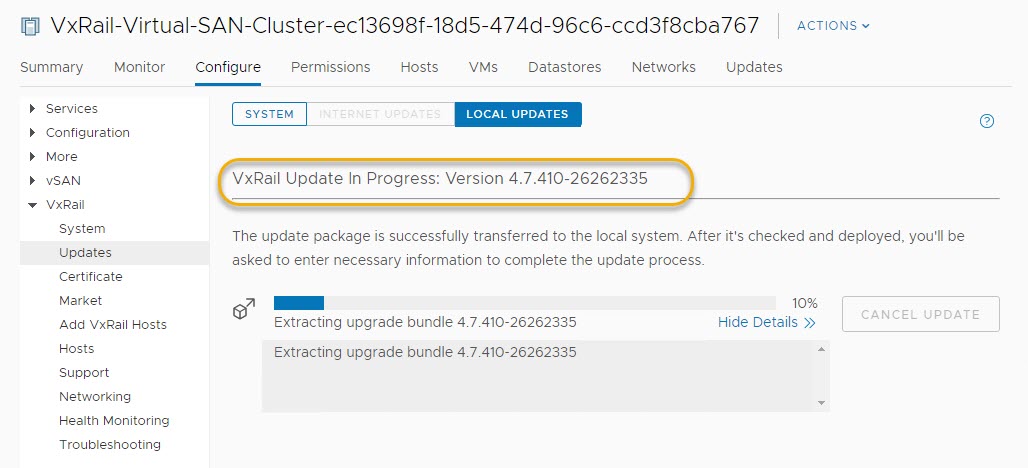
Extraction of package in progress:
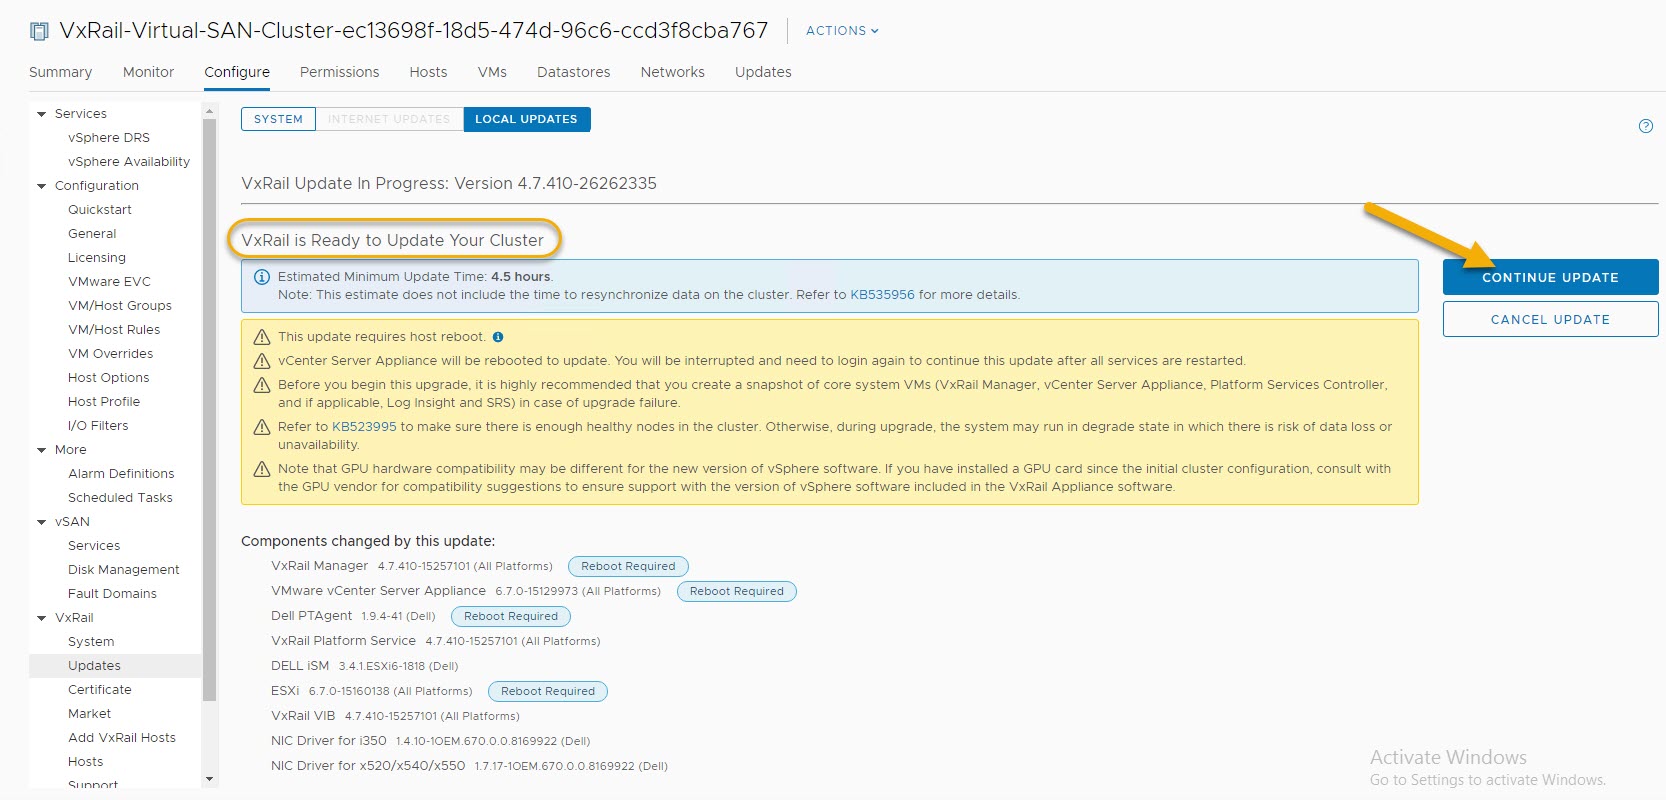
Review and click CONTINUE UPDATE (if you encounter LCM compatibility issues this KB538846 might be useful):
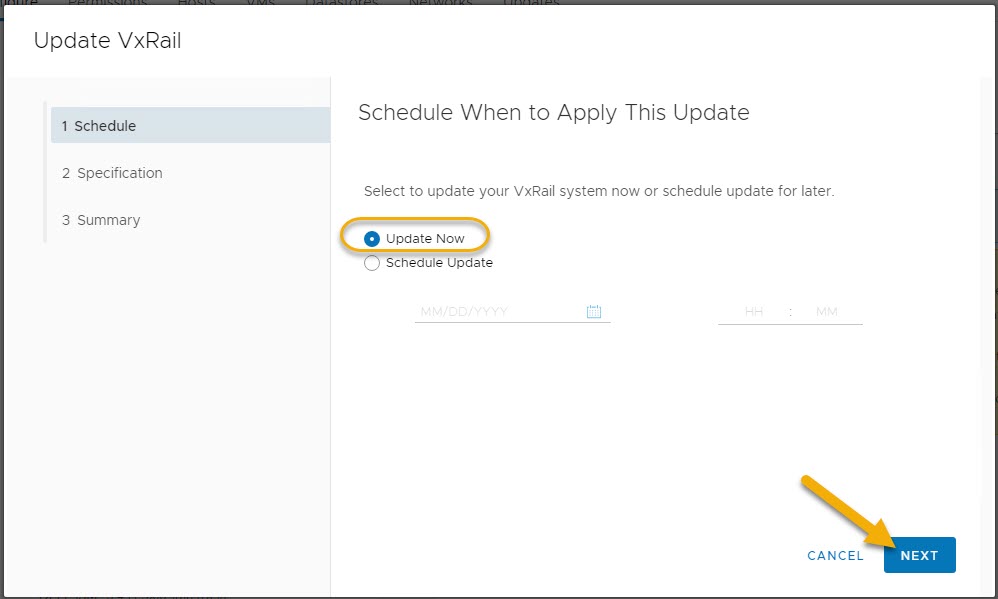
Choose Update Now or Schedule Update, in this example ‘Update Now’ was selected but you may also chose a later time to perform the upgrade by selecting Schedule Update:
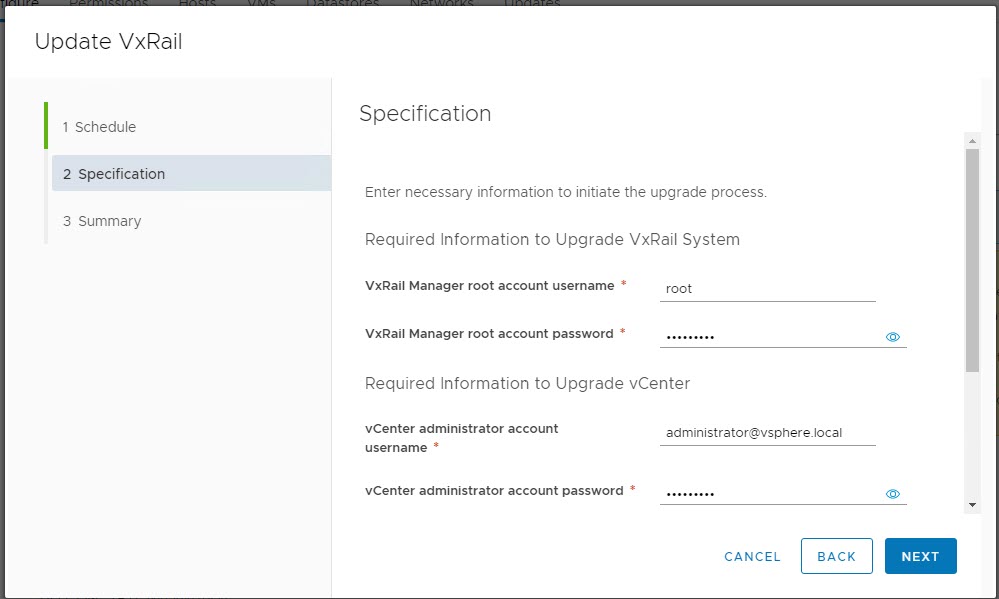
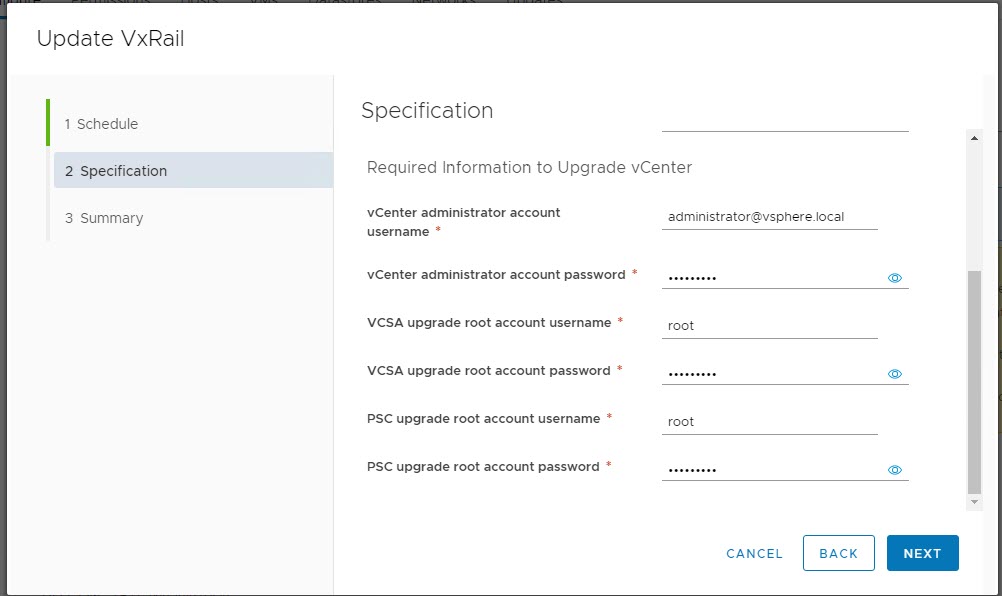
Entering the required usernames and passwords:
-VxRail Manager root
-vCenter Server administrator
-vCenter Server root
-PSC root
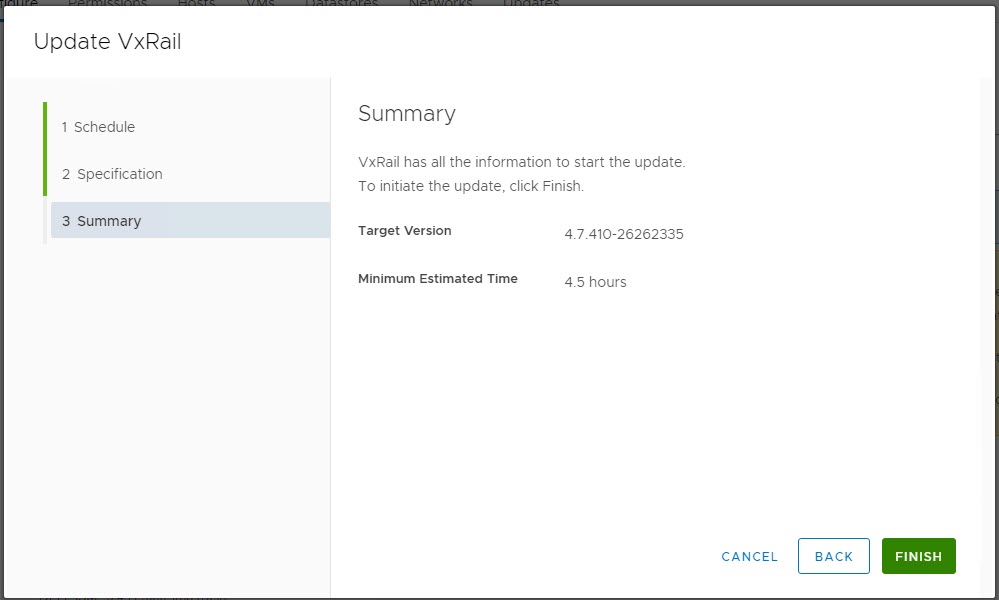
Target version and min expected time to complete the upgrade are displayed. Click FINISH to kick off the upgrade,
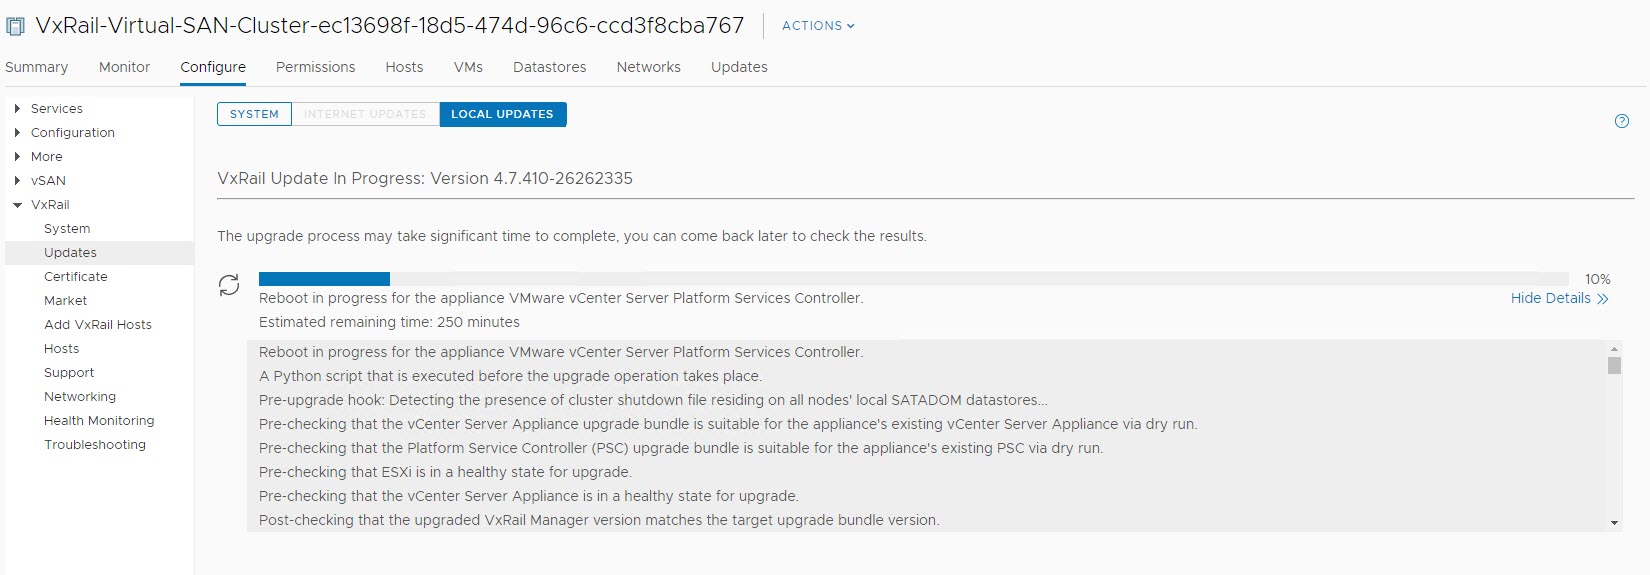
The upgrade is in progress:
VxRail Cluster > Configure > VxRail > Updates > Local Updates
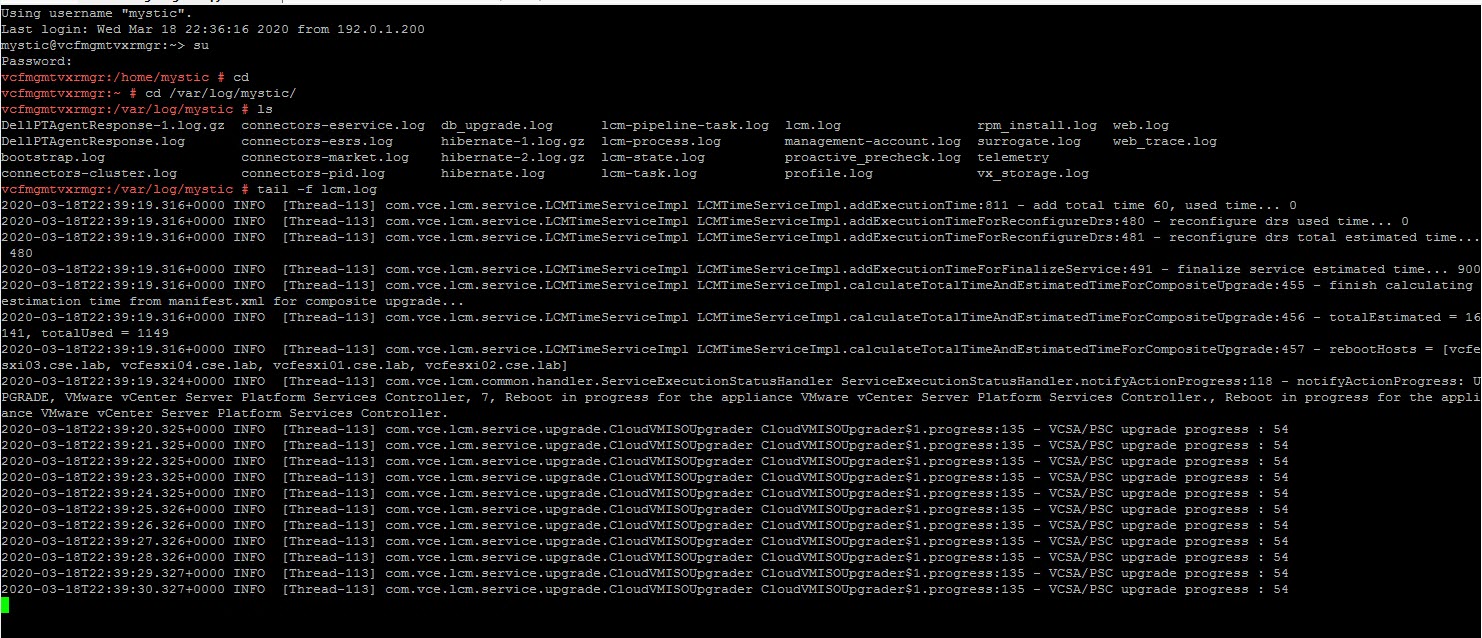
Monitoring the upgrade via the VxRail manager console:
tail -f /var/log/mystic/lcm.log
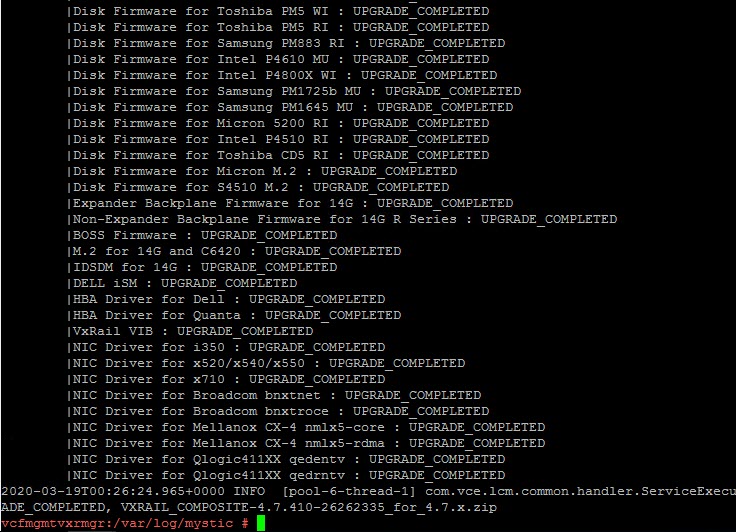
Confirm completion of the upgrade via the VxRail Manager console:
cat /var/log/mystic/lcm.log | grep UPGRADE_COMPLETED

Log back into vCenter Server using HTLM5 Client :
VxRail Cluster >Configure > VxRail > Updates
Confirmation the system is now running version 4.7.410
Check that no issues exist post upgrade:
Check on the system health:
VxRail Cluster >Monitor> VxRail > Appliances
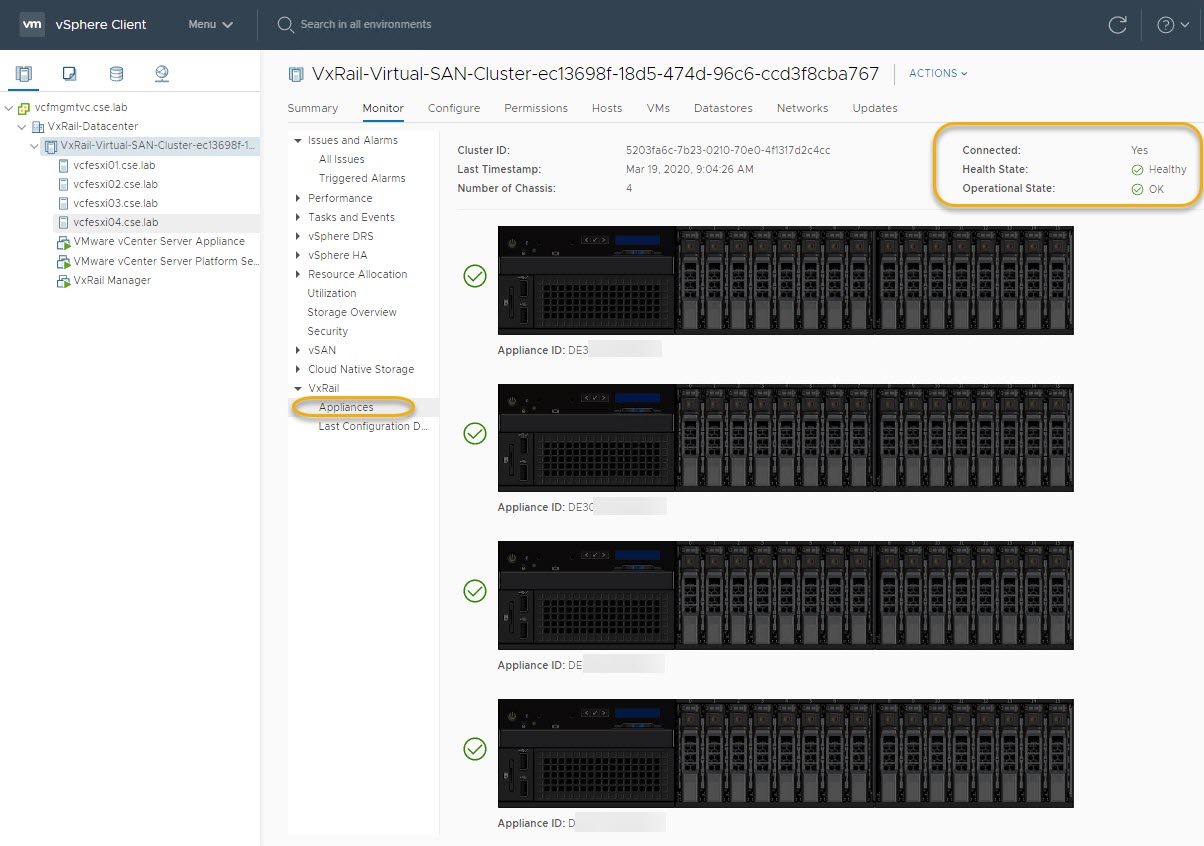
Upgrade Complete!
Note: this is an example for reference only please use the VxRail official procedures provided by Dell EMC.

