VxRail
VxRail NIM Tool
NIM Tool = Node Image Management Tool The content provides a step-by-step guide on using the VxRail NIM (Node Image Management) tool to re-image VxRail nodes with a supported code […]
Virtualization & Storage

NIM Tool = Node Image Management Tool The content provides a step-by-step guide on using the VxRail NIM (Node Image Management) tool to re-image VxRail nodes with a supported code […]
NIM Tool = Node Image Management Tool
The content provides a step-by-step guide on using the VxRail NIM (Node Image Management) tool to re-image VxRail nodes with a supported code version. Please note this post is for example purposes only; please refer to SolVe online procedures for the supported guidance as it varies depending on the VxRail model and software version used. NIM is supported on 14G, 15G and 16G platforms.
The NIM tool has two main components; the NIM tool client & the associated NIM ISO. The NIM client executable which is run from a Windows shell and drives the whole process by entering all the required parameters. This example here uses Windows 2019, for a list of supported Windows versions please refer to the SolVe procedure. The windows machine running the NIM client requires comms to the VxRail hosts iDRAC connection. The NIM ISO is a bootable image and contains all the payload required to image a VxRail node (firmware, disk fw, drivers, operating system image, appliance OVA, and node image management tool scripts). The ISO needs to be placed on a directory with SMB or NFS file sharing capabilities (deafult location in this example). Also note that the minimum iDRAC version that the node image management tool supports is 3.34.34.34.
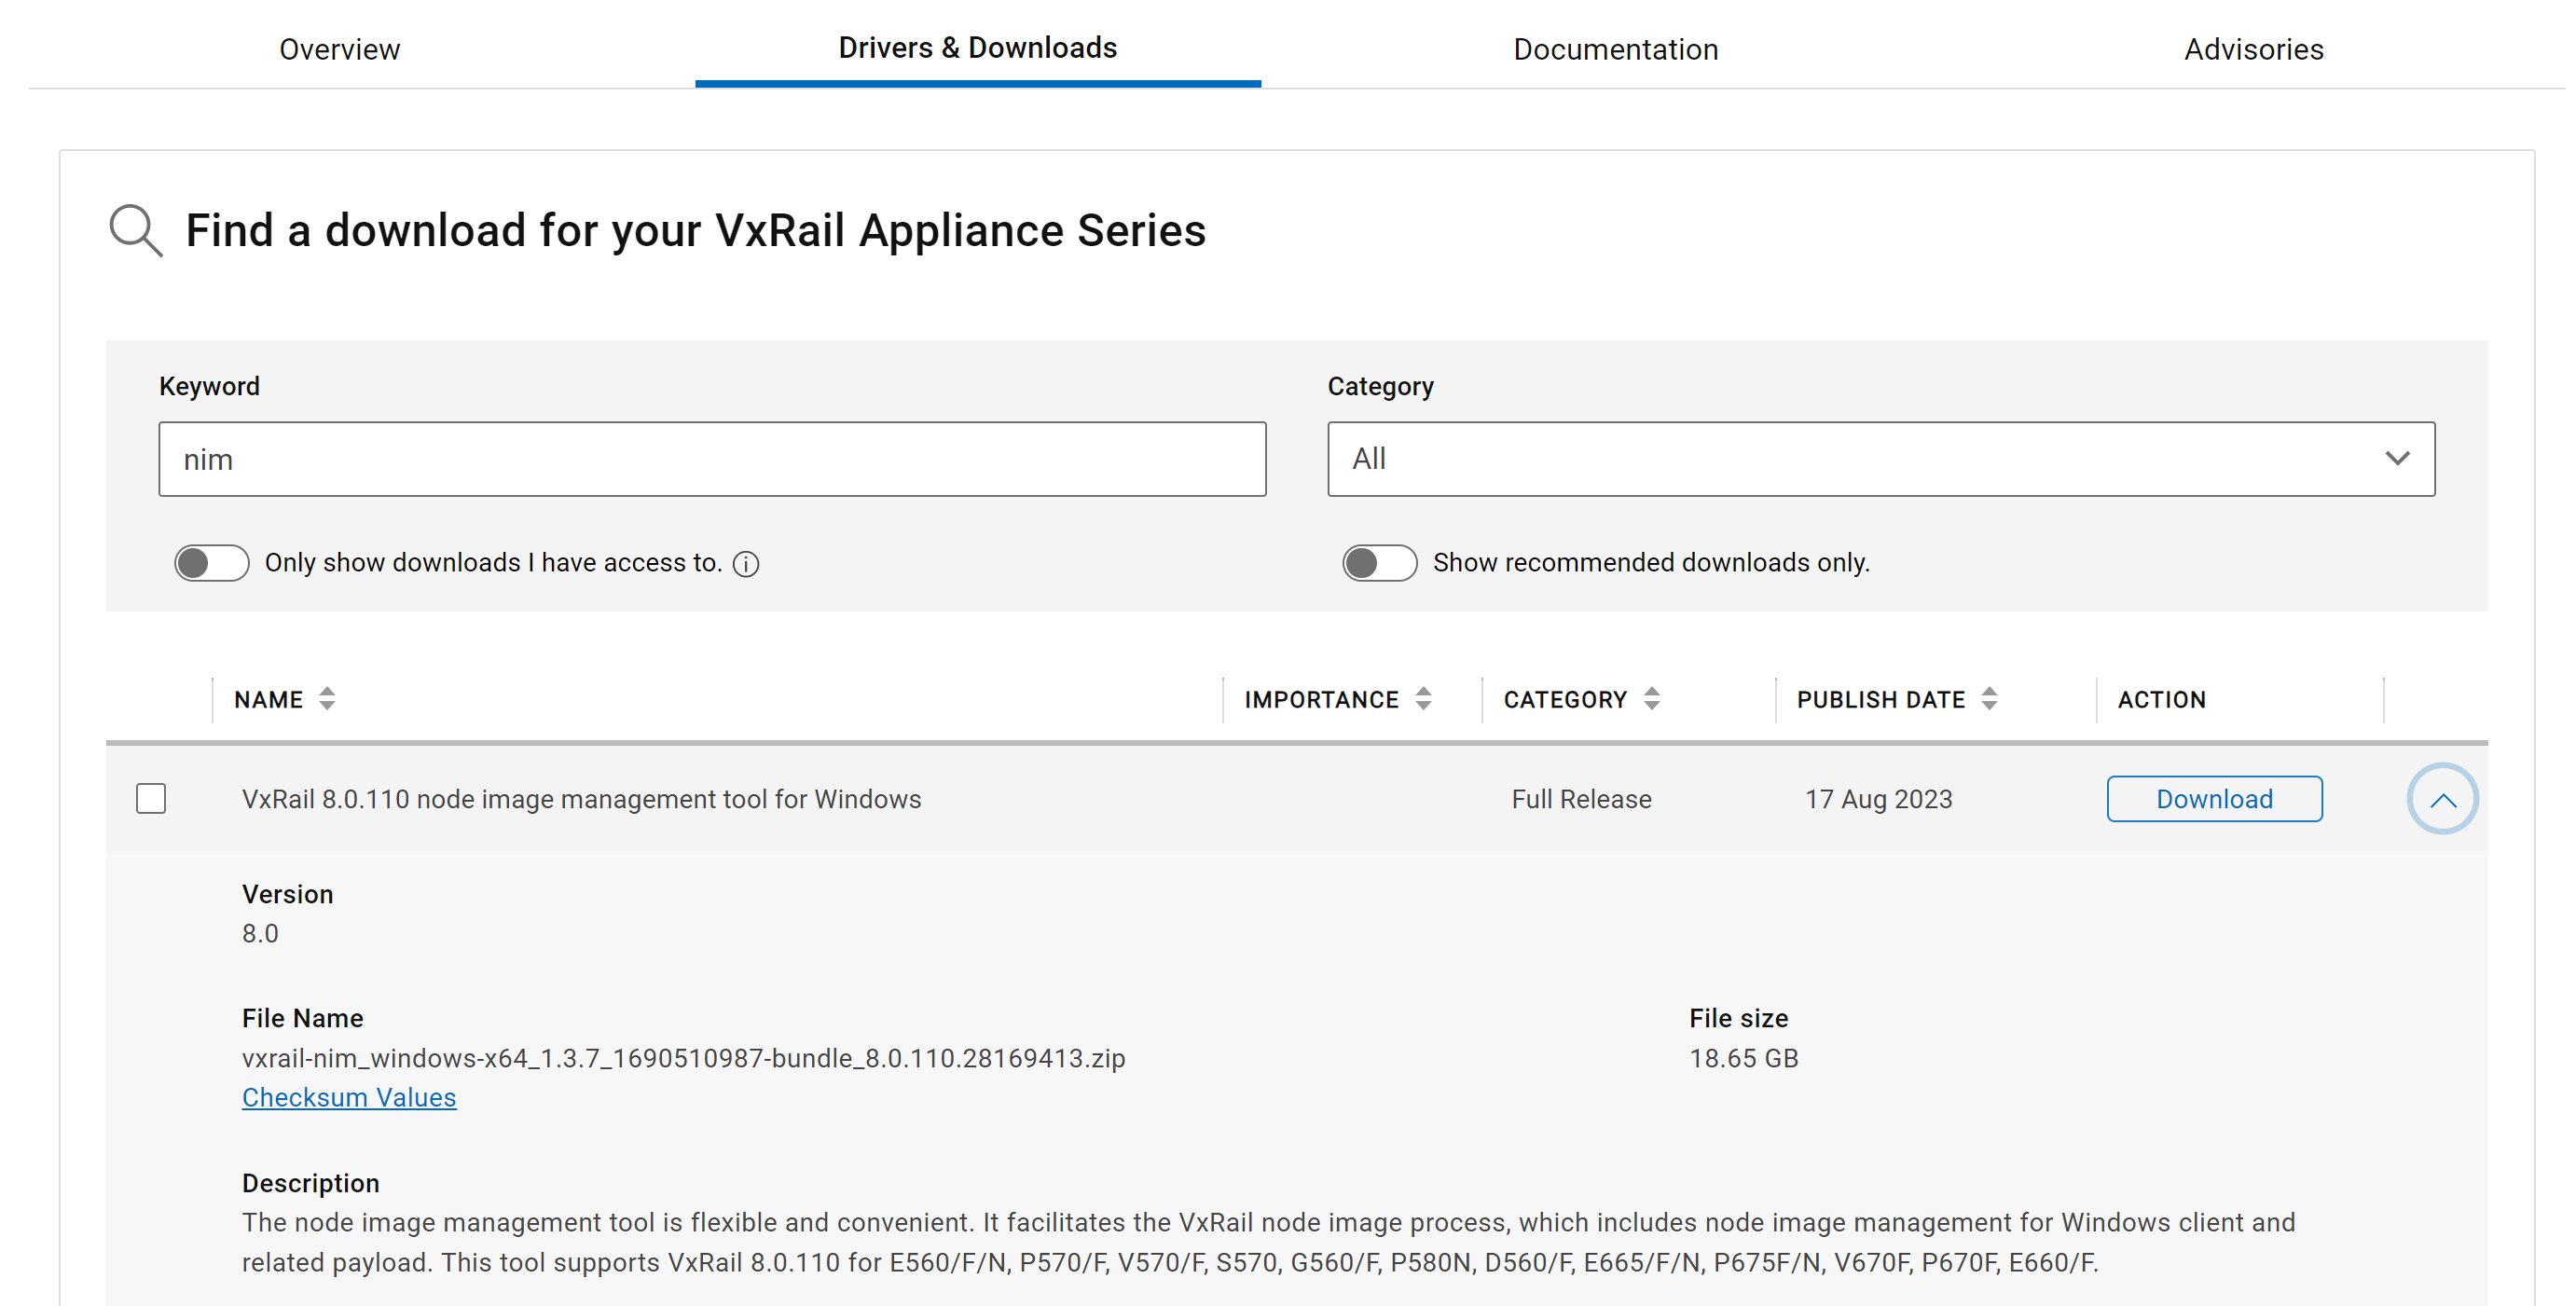
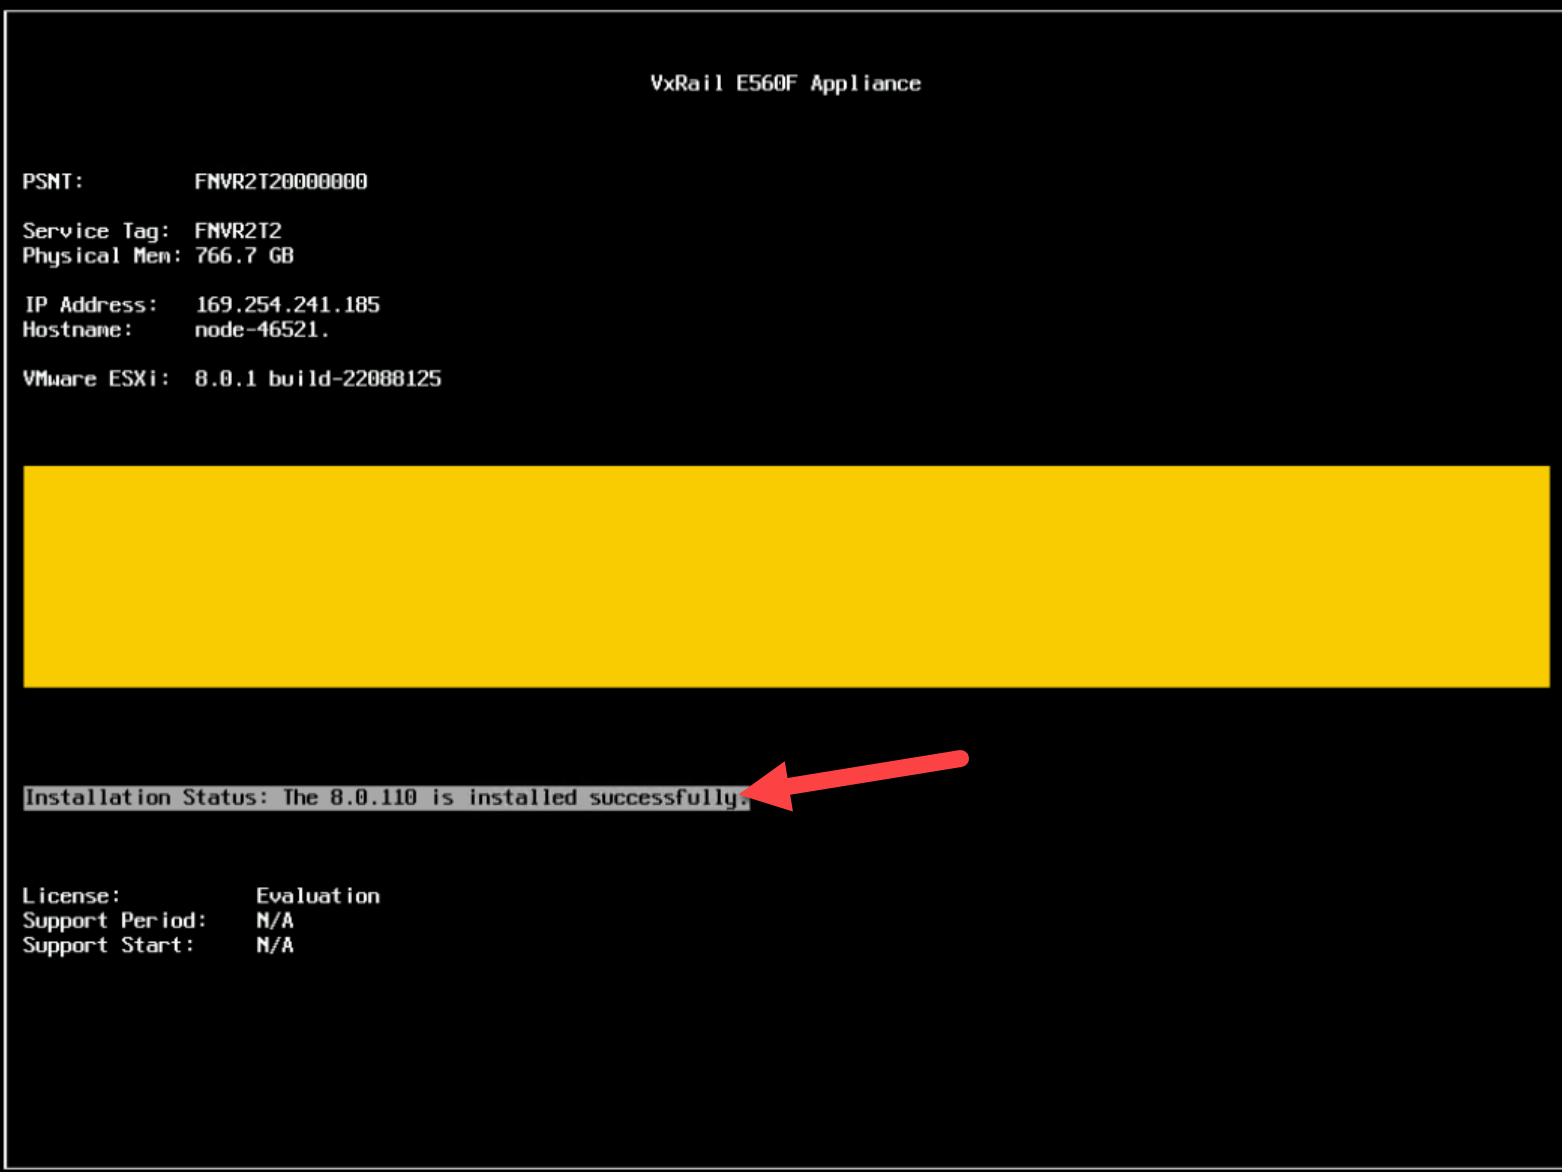
Begin by downloading the NIM Tool from the VxRail support site. This example showcases re-imaging four VxRail E560F nodes to code version 8.0.110:
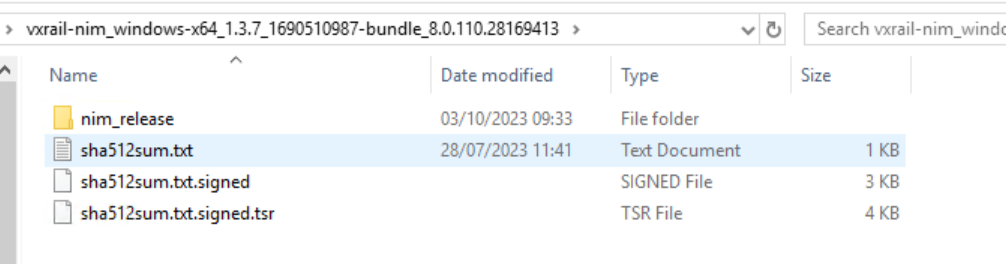
Extracting the zip exposes the following contents of the donwloaded ZIP:
Opening the ‘nim_release’ folder you will find the 8.0.110 ISO and another ZIP which needs to be extracted here:

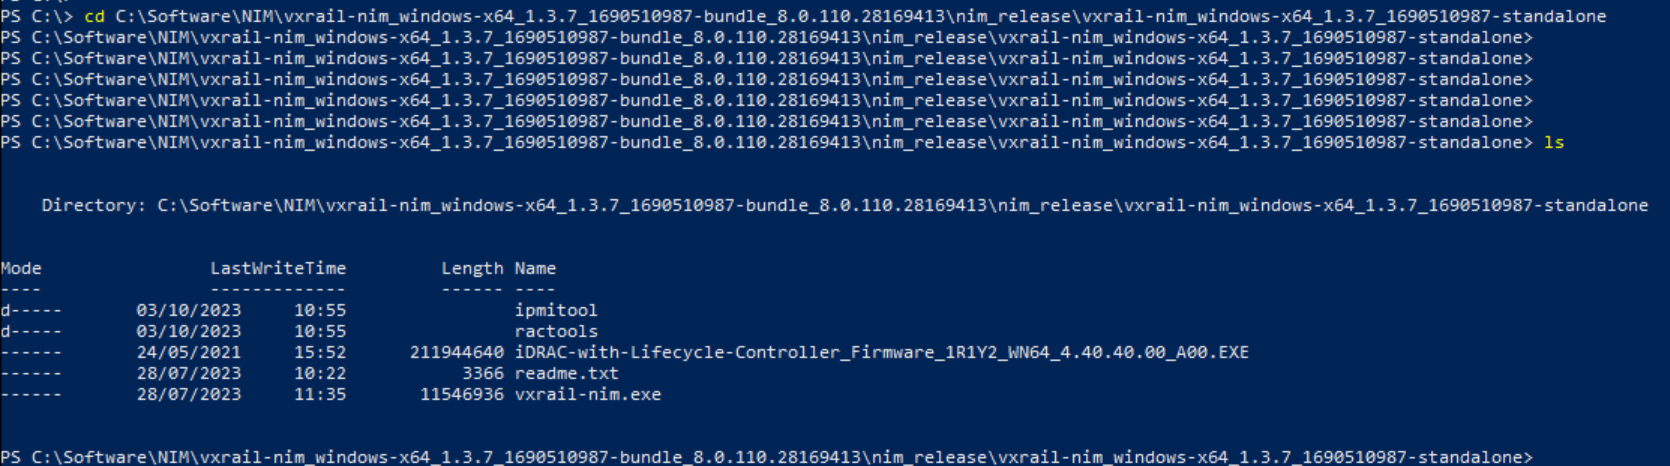
Extracting the contents from within the nim_release directory will reveal the NIM client tool and associated config files etc.:

Open a powershell as windows administrator and change directory to that of the NIM Client:
Next run the NIM client tool: .\vxrail-nim.exe --setup and provide the permissions for sharing:

Approve the file share location:

Setup the required authentications:

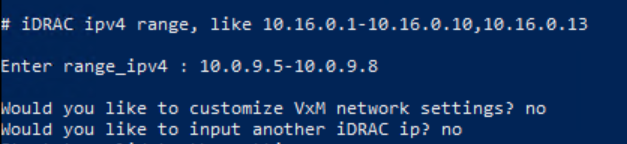
Enter the iDRAC IP range for the hosts being imaged and selecting no to VxRail Manager network setup:
Enter the iDRAC password and accept the certificate:

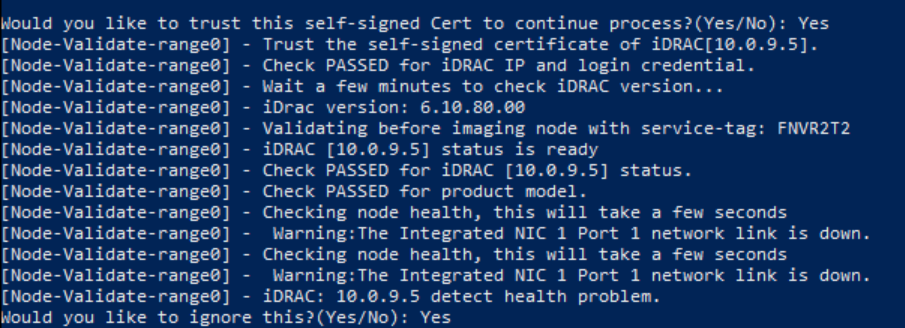
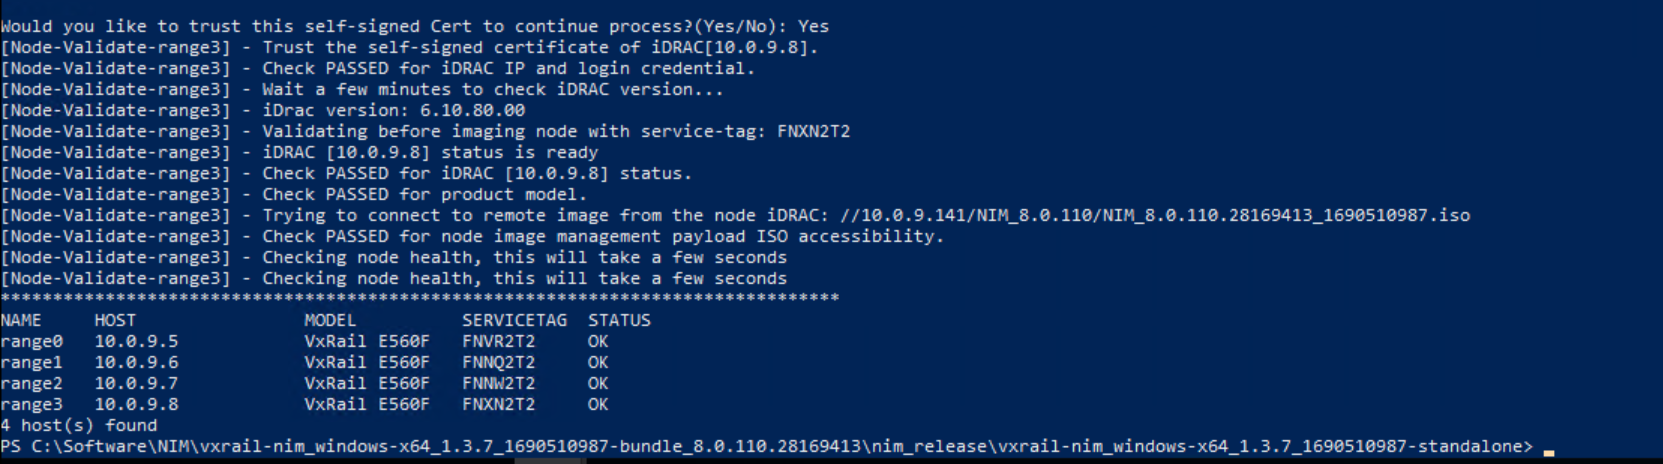
Next perfrom a validation .\vxrail-nim.exe --validate

Validation Successfull:
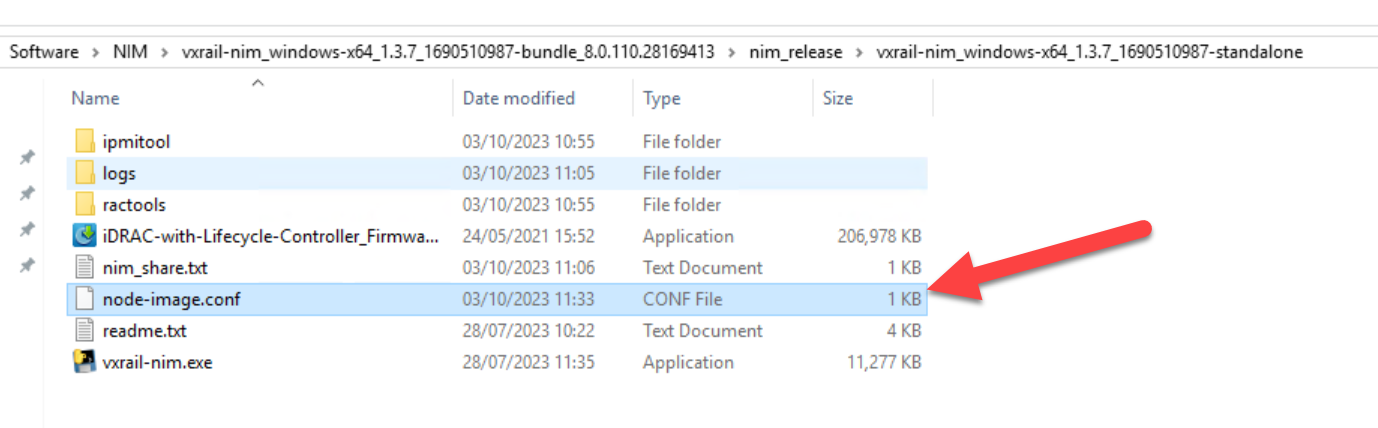
The configuration file including the parameters entered is located here:
remote_imagefile=//10.0.9.141/NIM_8.0.110/NIM_8.0.110.28169413_1690510987.iso
remote_username=Administrator
default_idrac_user=root
default_tls_verify=enable
range_ipv4=10.0.9.5-10.0.9.8
log_level=info
allow_config_idrac=yes
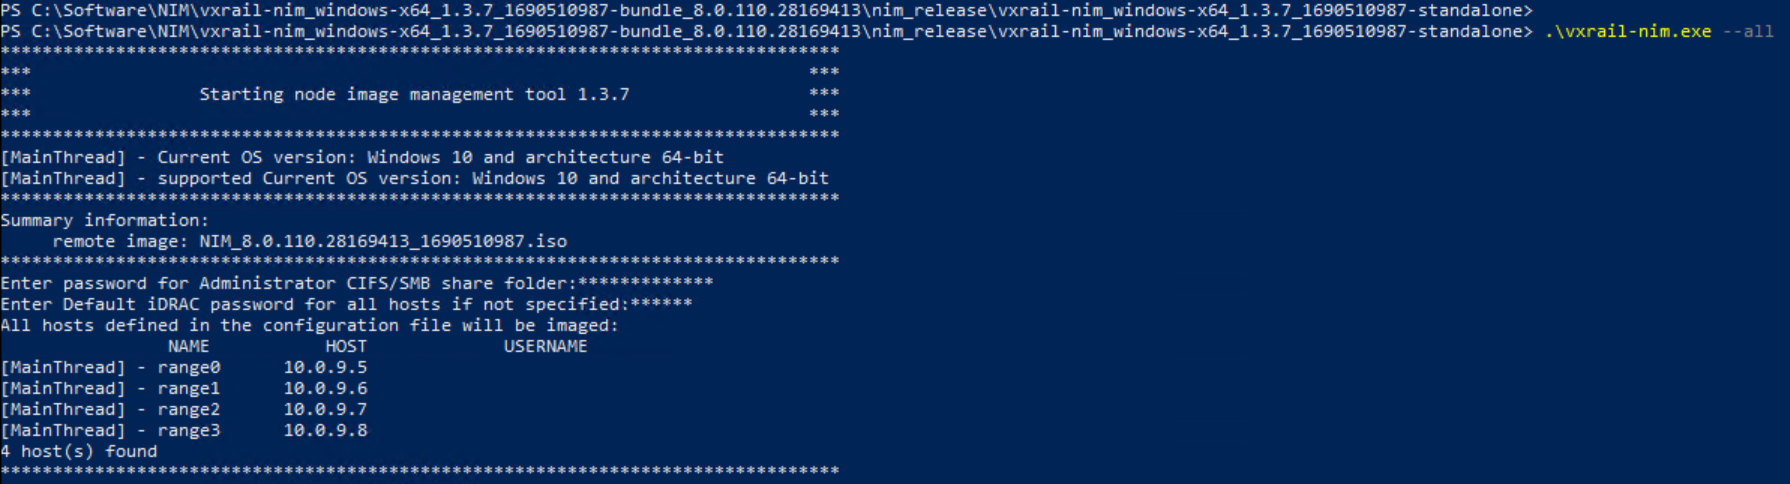
To kick off the imaging process run the command: .\vxrail-nim.exe --all
this will proceed to image all the hosts defined in the config file:
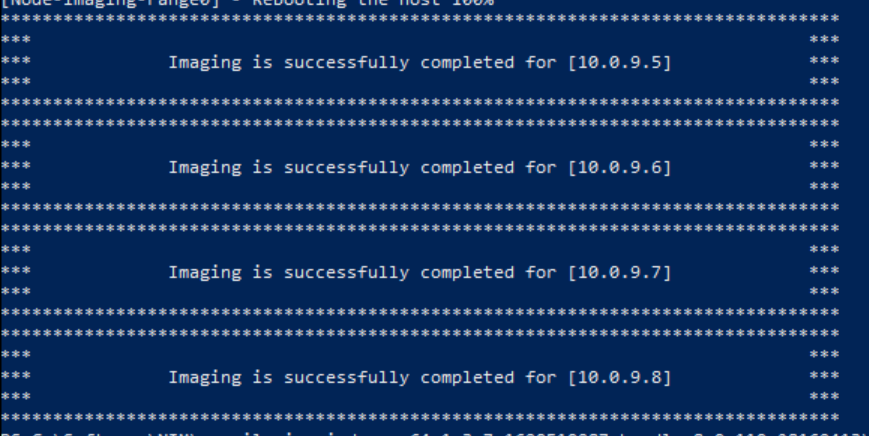
On completion you will be presented with the following screen (time taken ~2hours):
NIM client generates a logs folder where you can find the associated log files and debug as necessary:

Thanks for reading!


Thank you for the write-up! Could you share the Day 2 steps for configuring the ESXi hosts and VxRail Manager once the imaging process is finished?
Thanks Matt, I provide an example here https://davidring.ie/2023/07/06/vxrail-8-0-install-notes/