Note: this is an example for reference only please use the VxRail installation procedures & services provided by Dell. PART 1 PART 2 PART 3 PART 4 PART 5 PART 6 PART 7 PART […]
Note: this is an example for reference only please use the VxRail installation procedures & services provided by Dell.
This is the first in a series of posts coveringVCF 5.2.1 On VxRail 8.0.310. The following post provides an example walkthrough covering the process of:
Deploying a VxRail Management Workload Domain cluster
Deploying VMware CloudBuilder for VxRail
Bring-Up of VCF 5.2.1 using multi vDS design
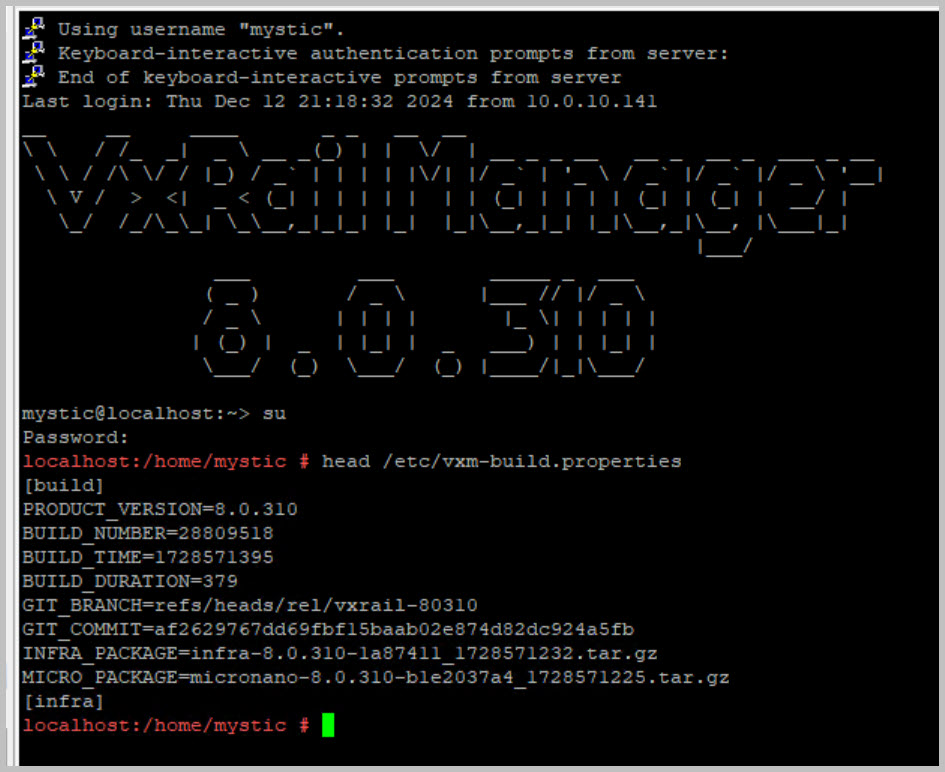
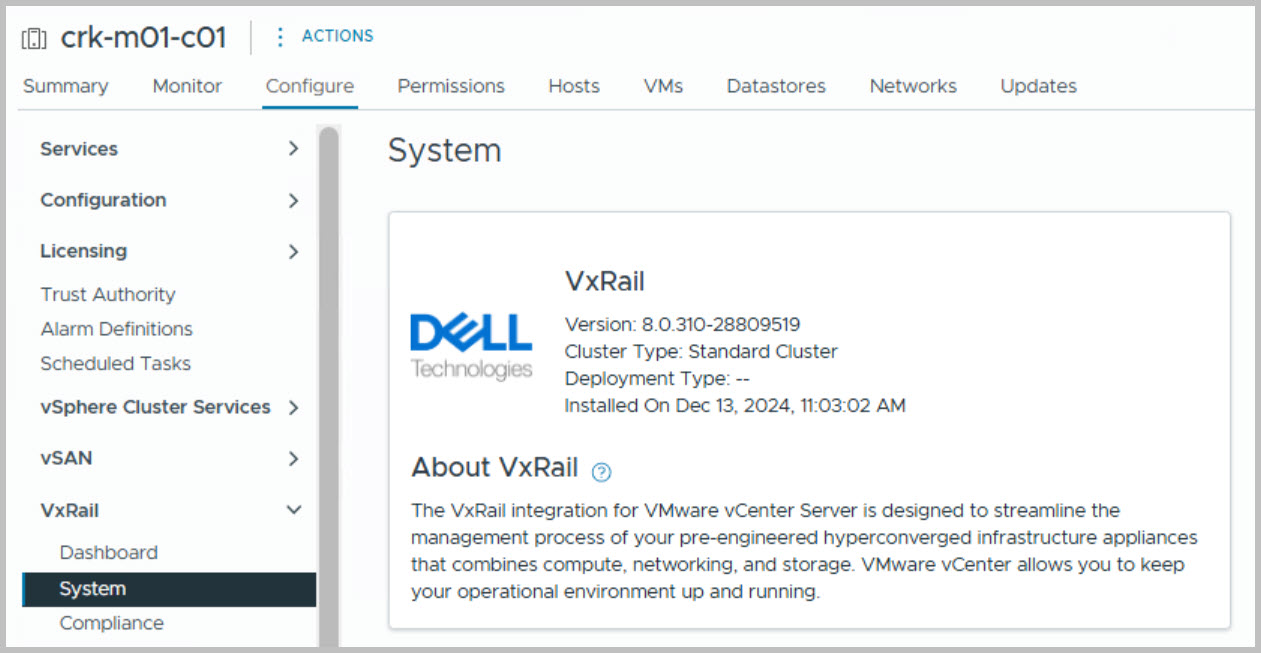
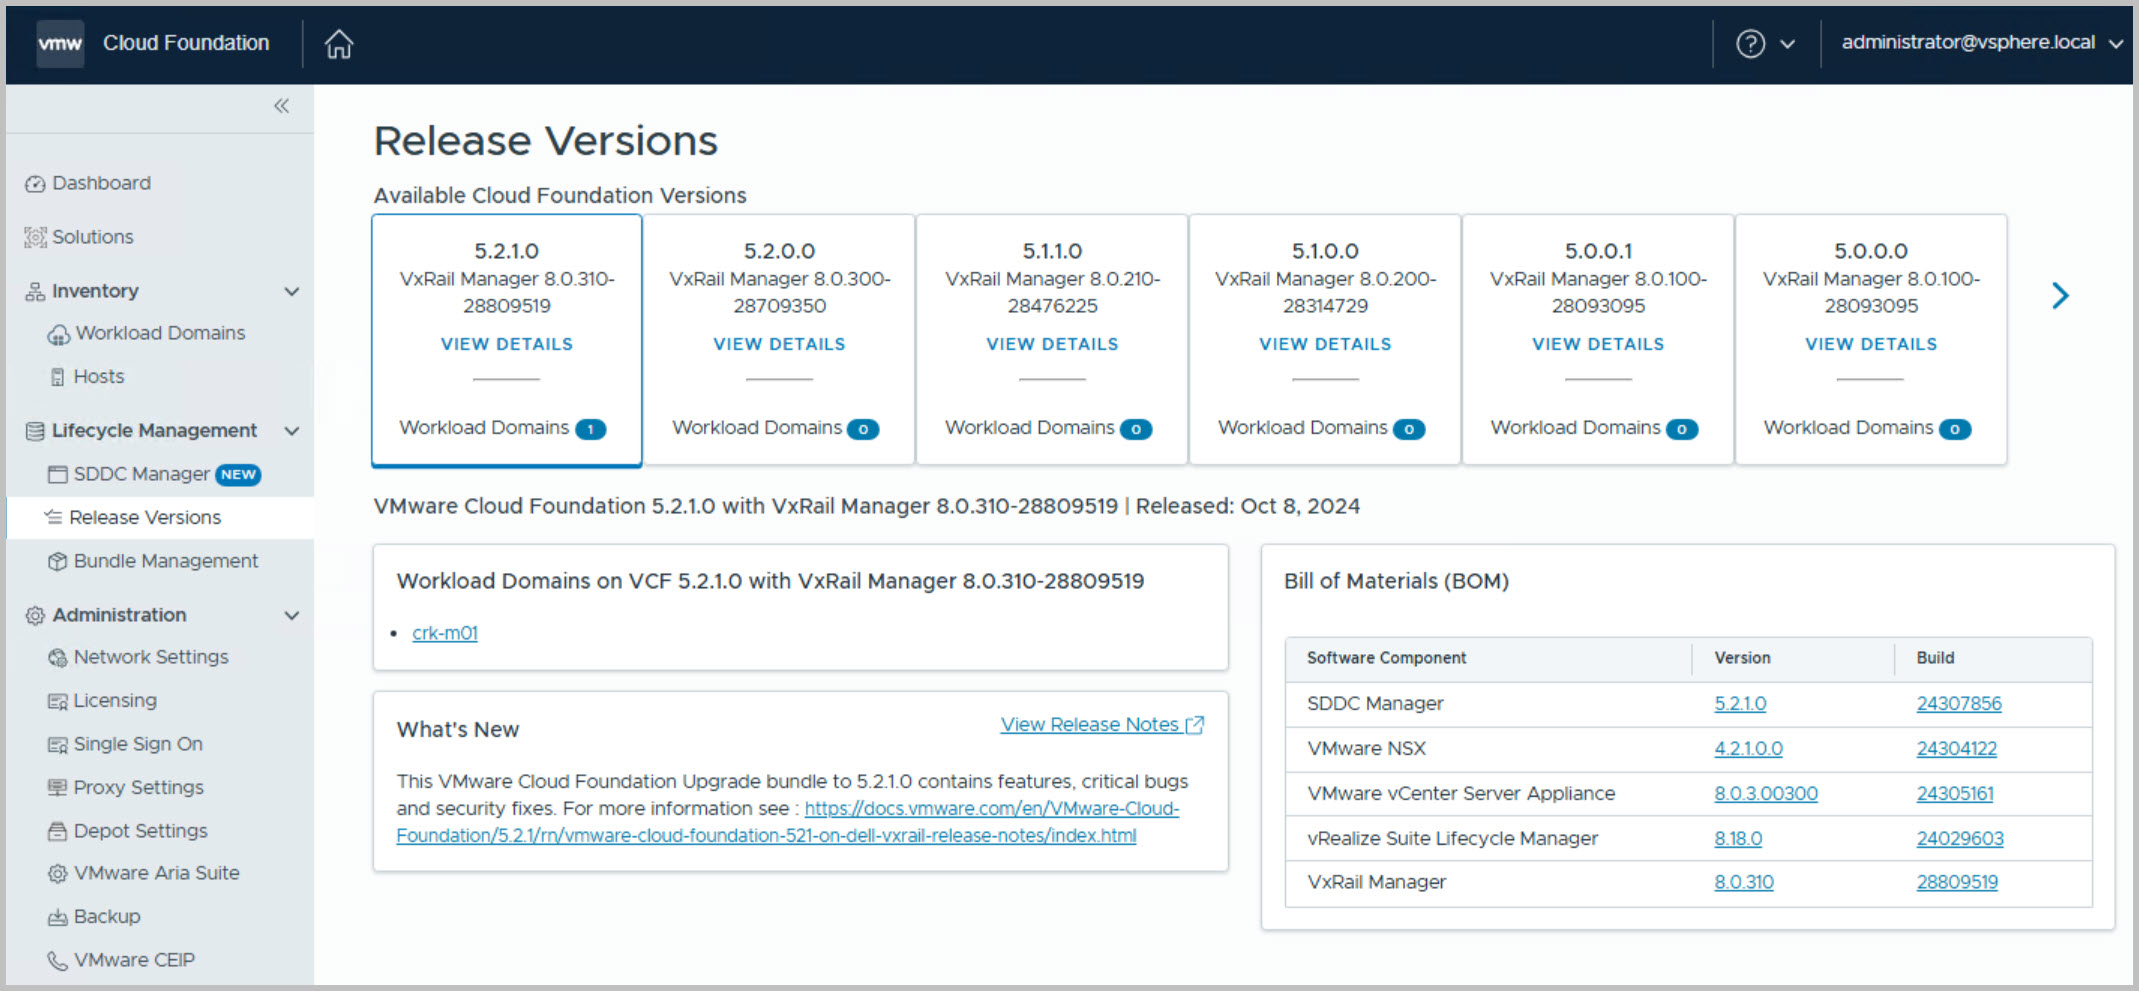
Versions used in this example are VCF 5.2.1 On VxRail 8.0.310. Release Information:
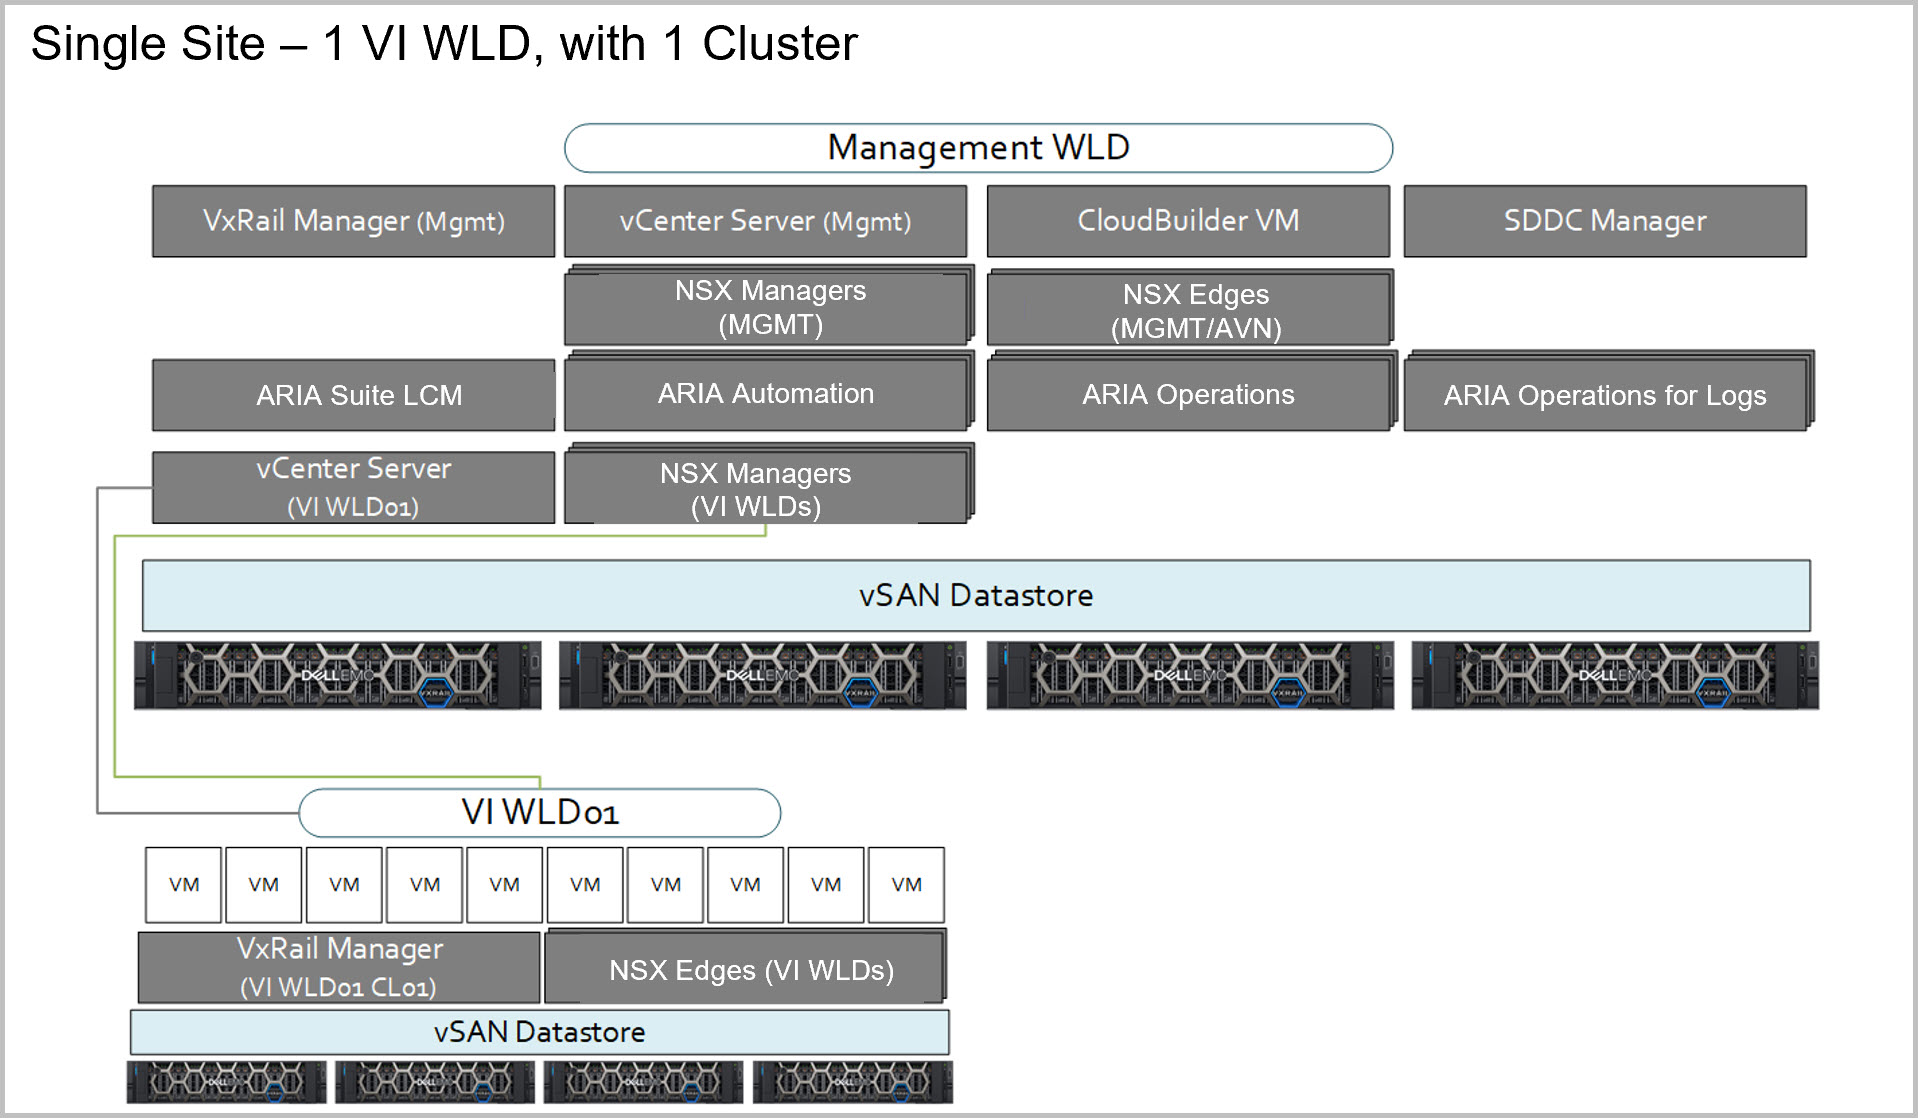
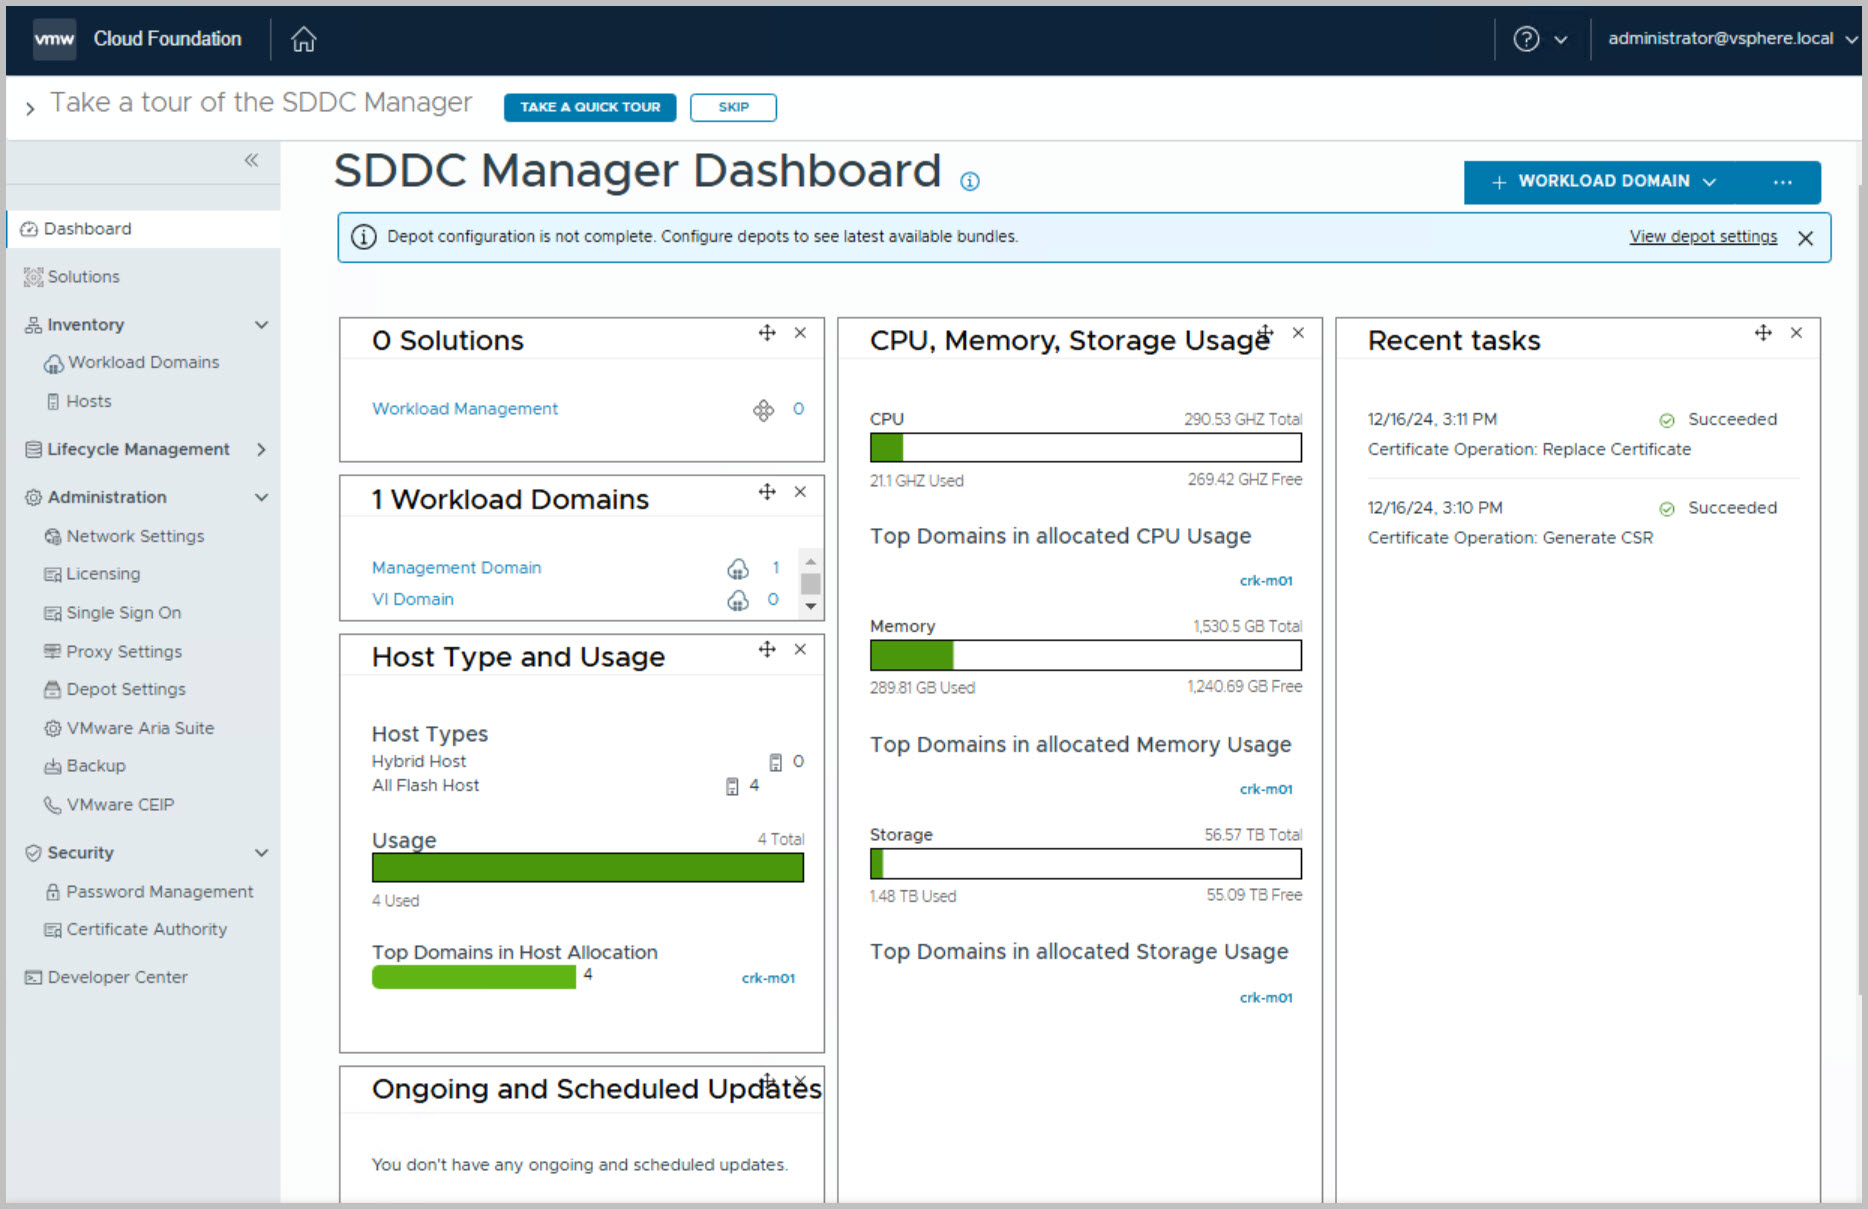
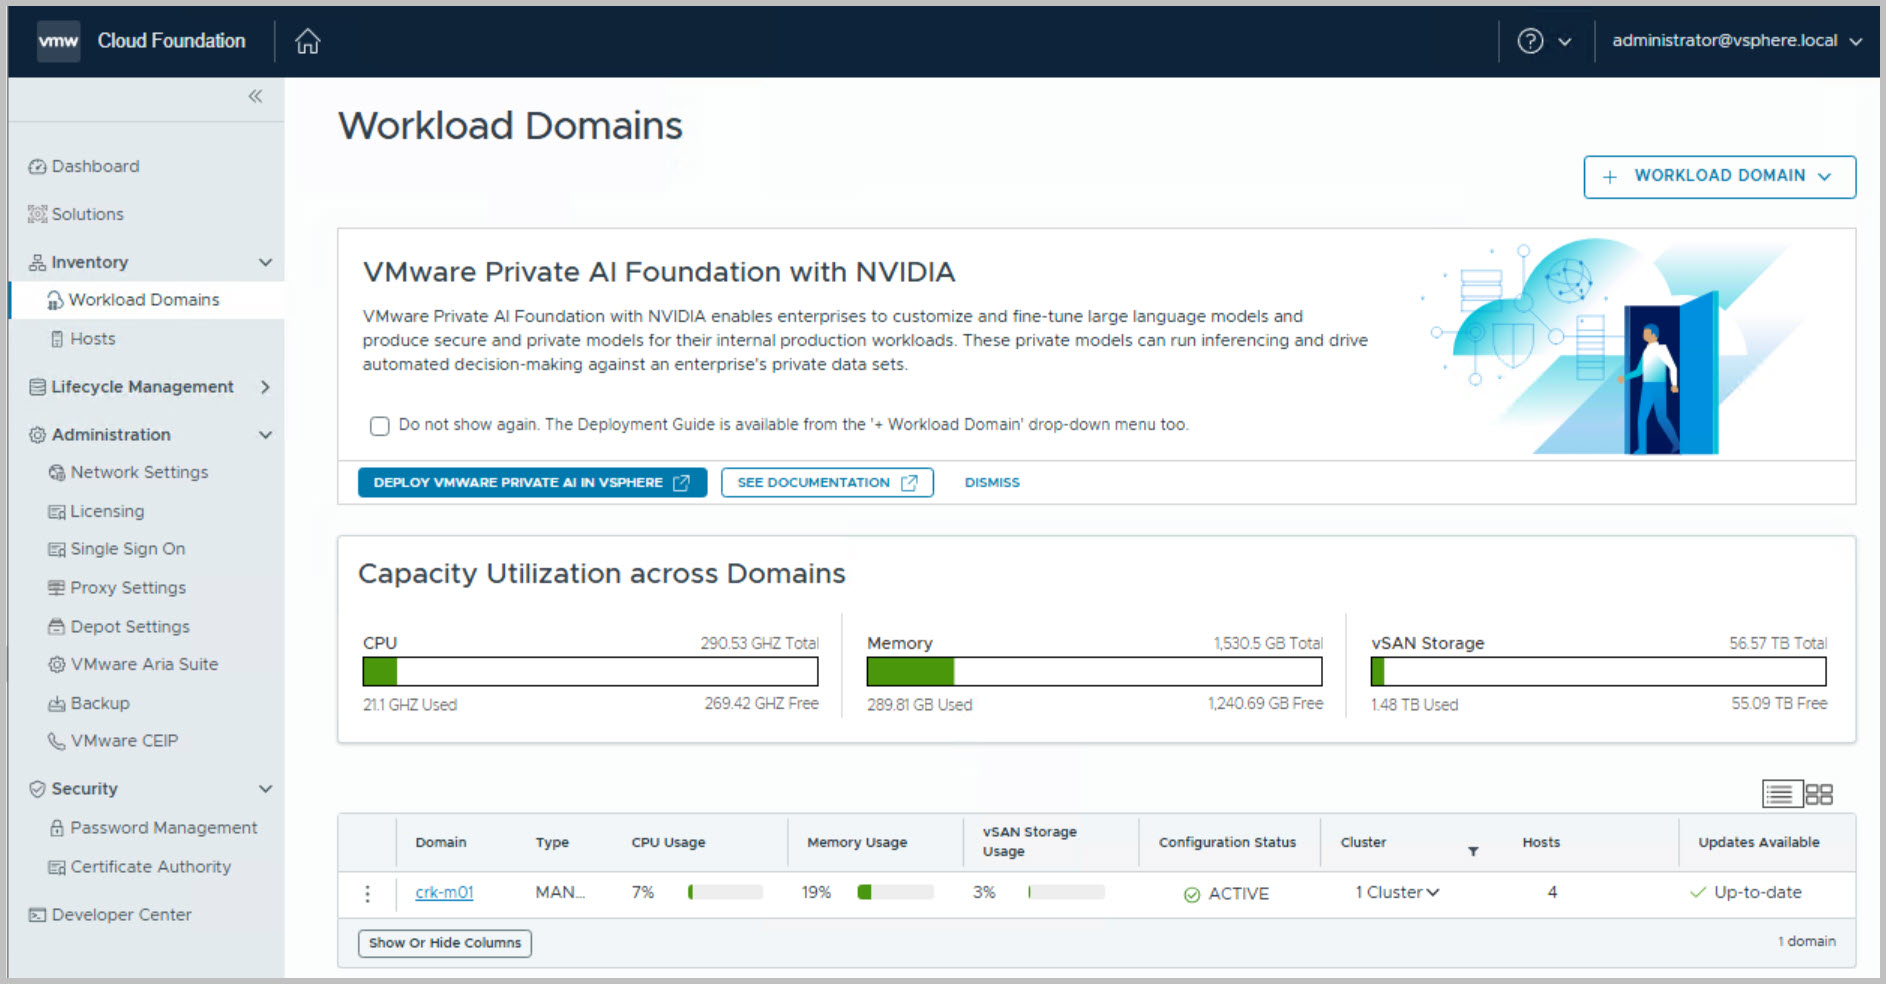
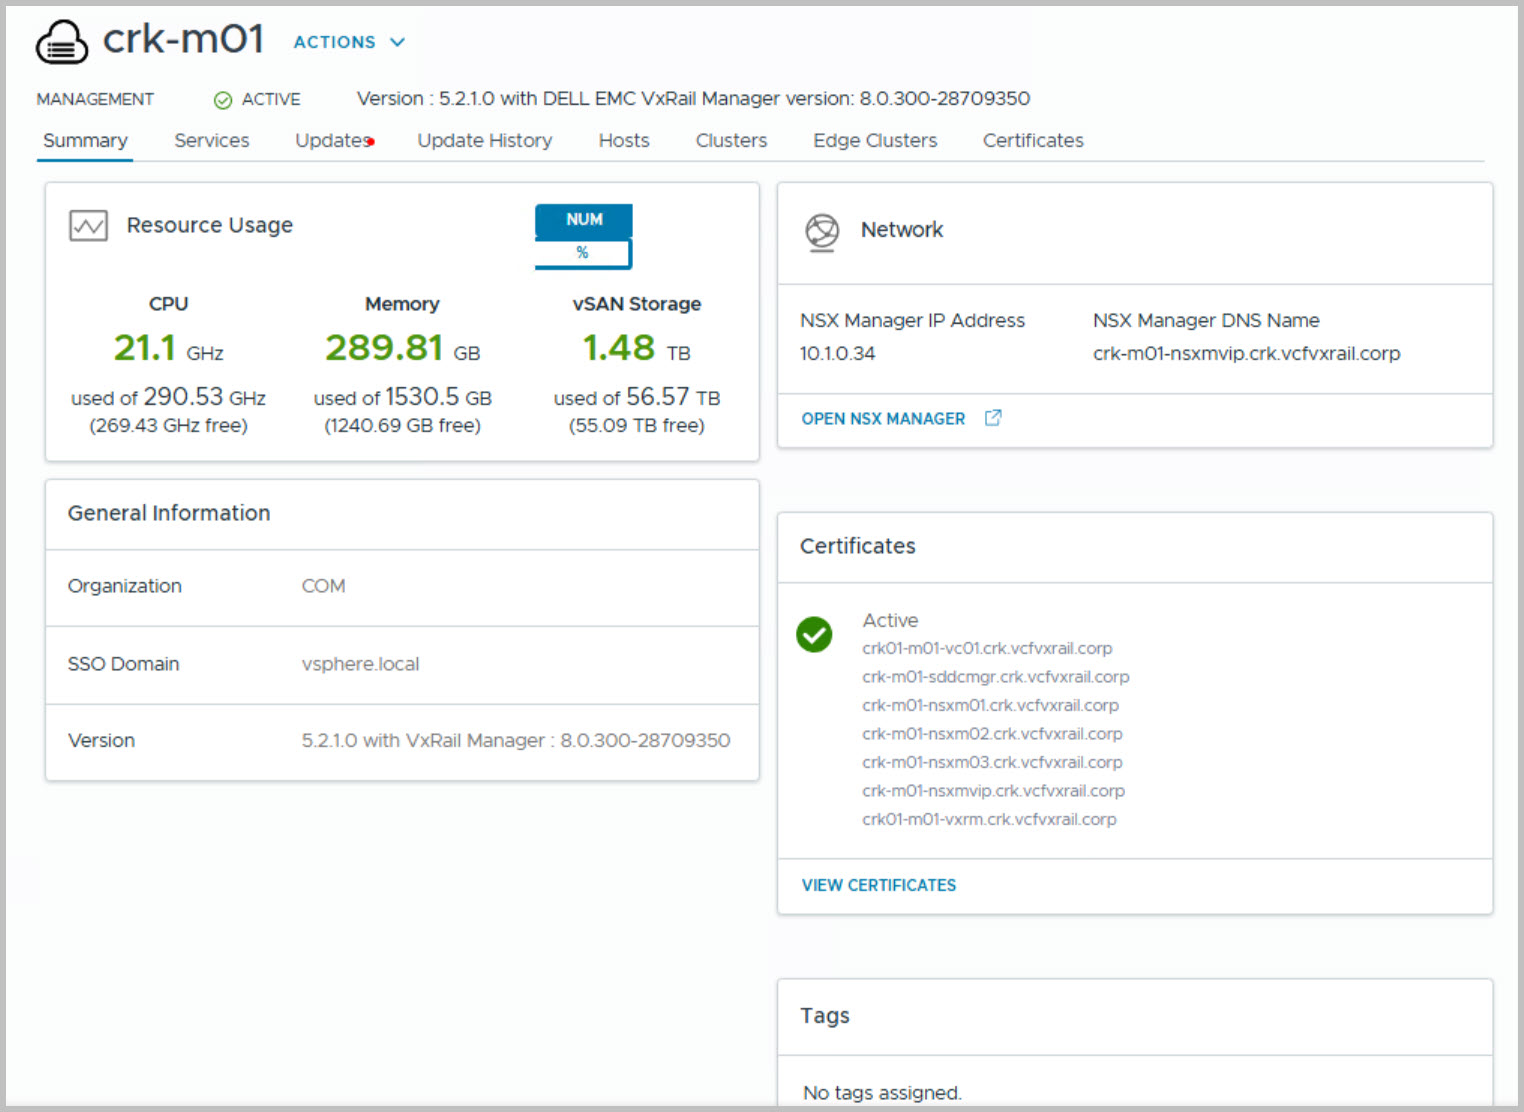
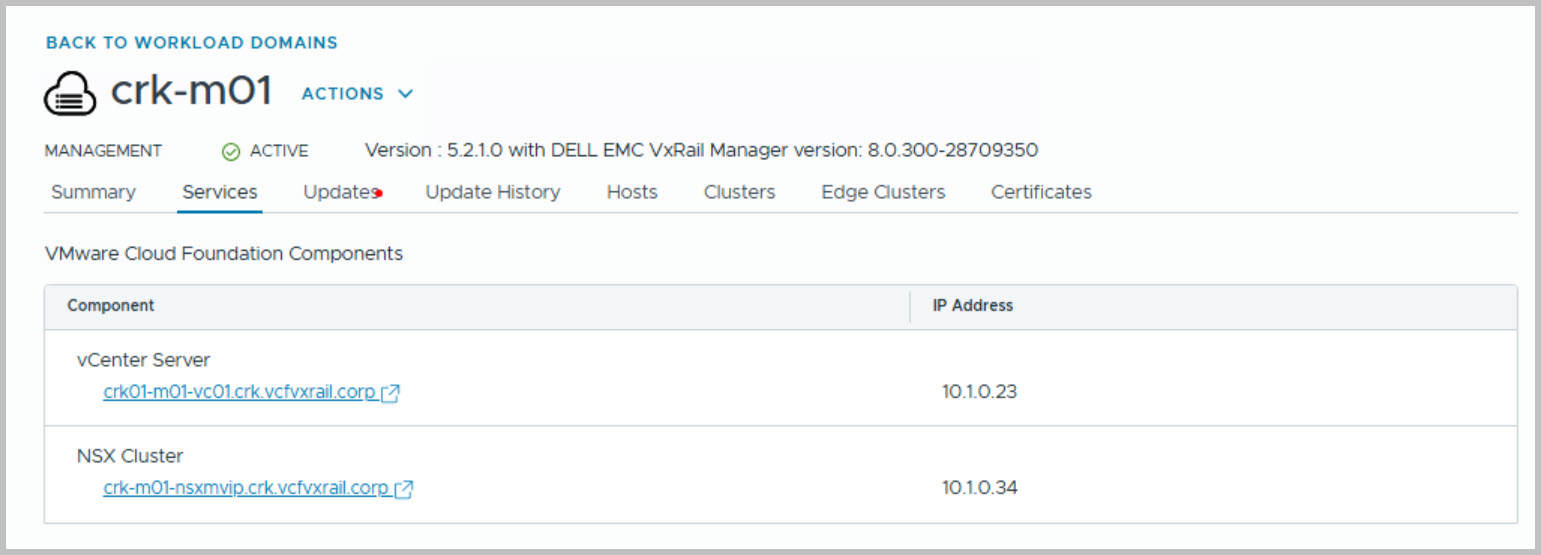
The end result of this example build is that of a single site VCF on VxRail solution including a single NSX VI Workload Domain:
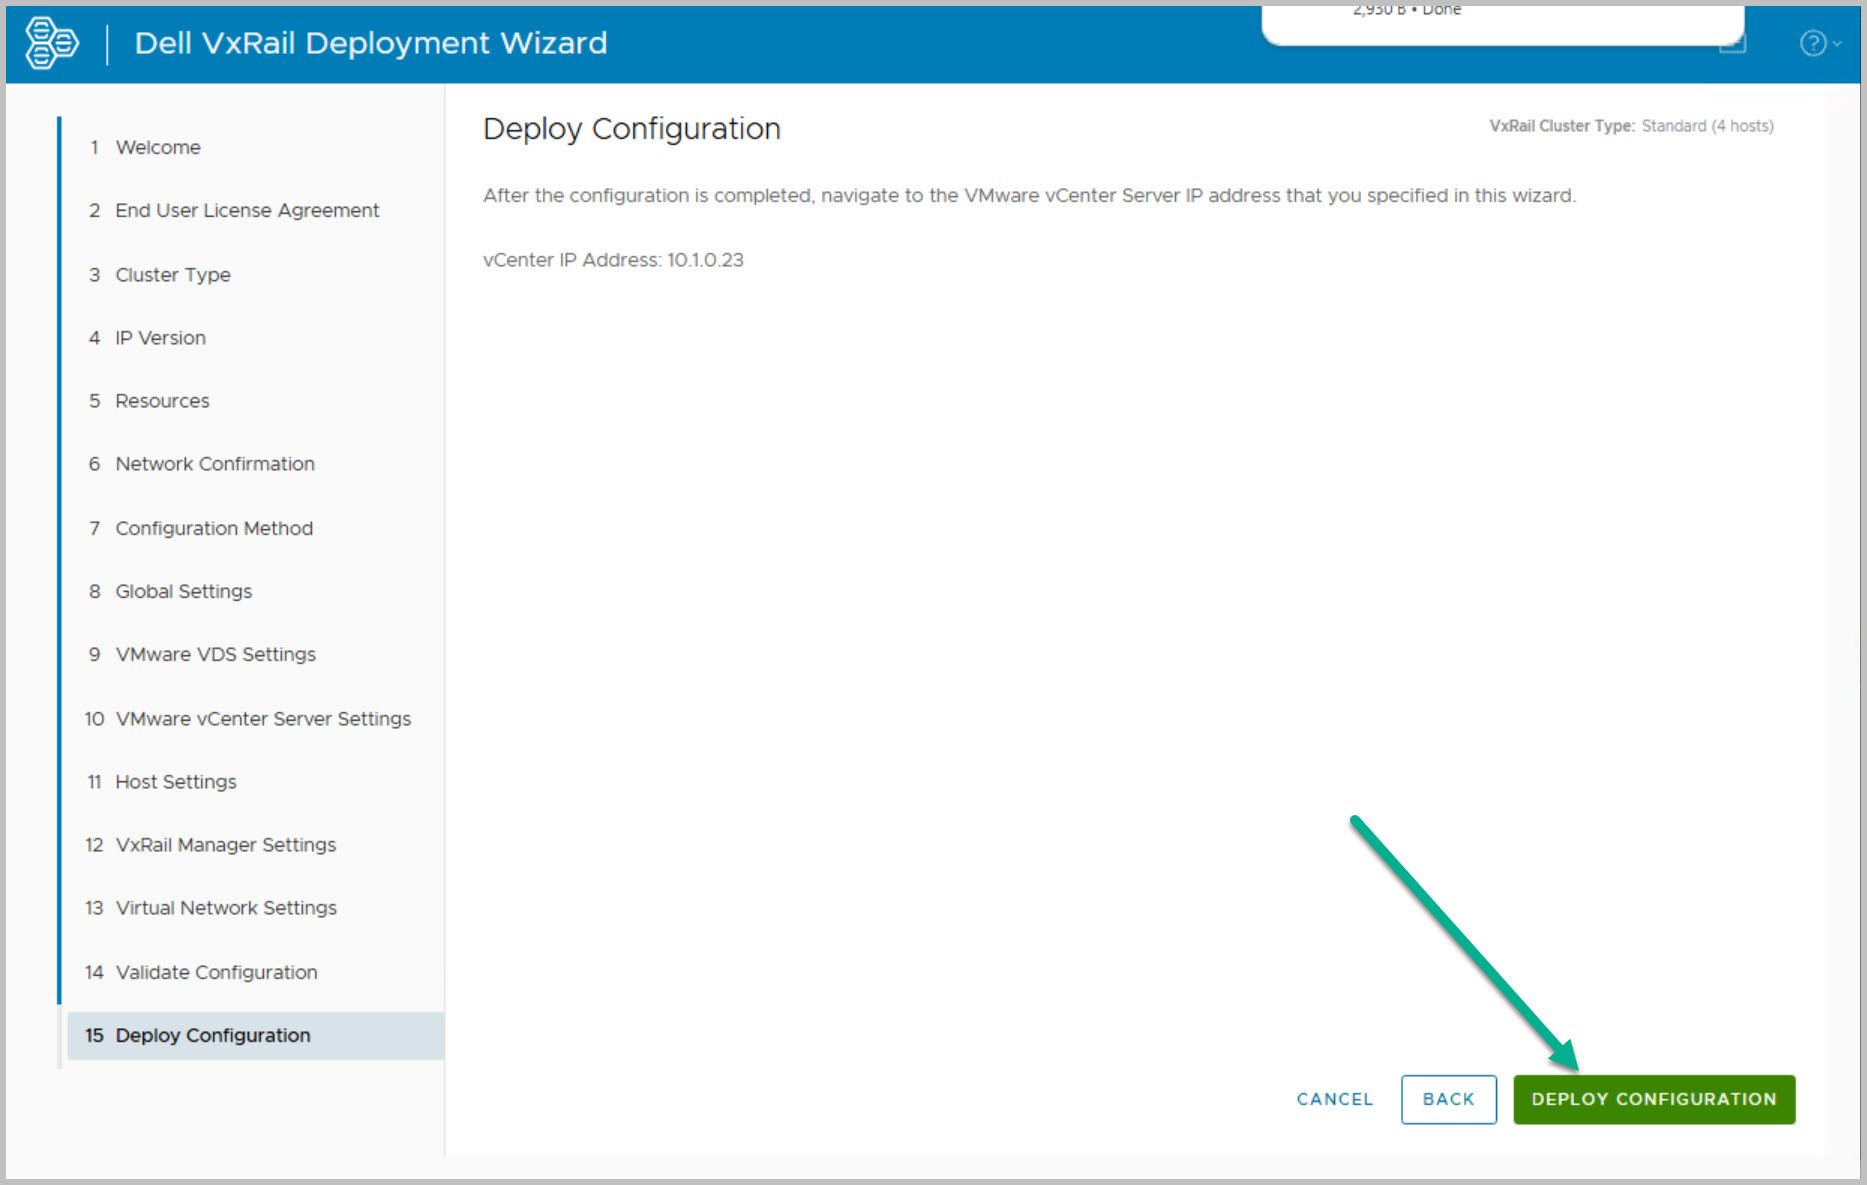
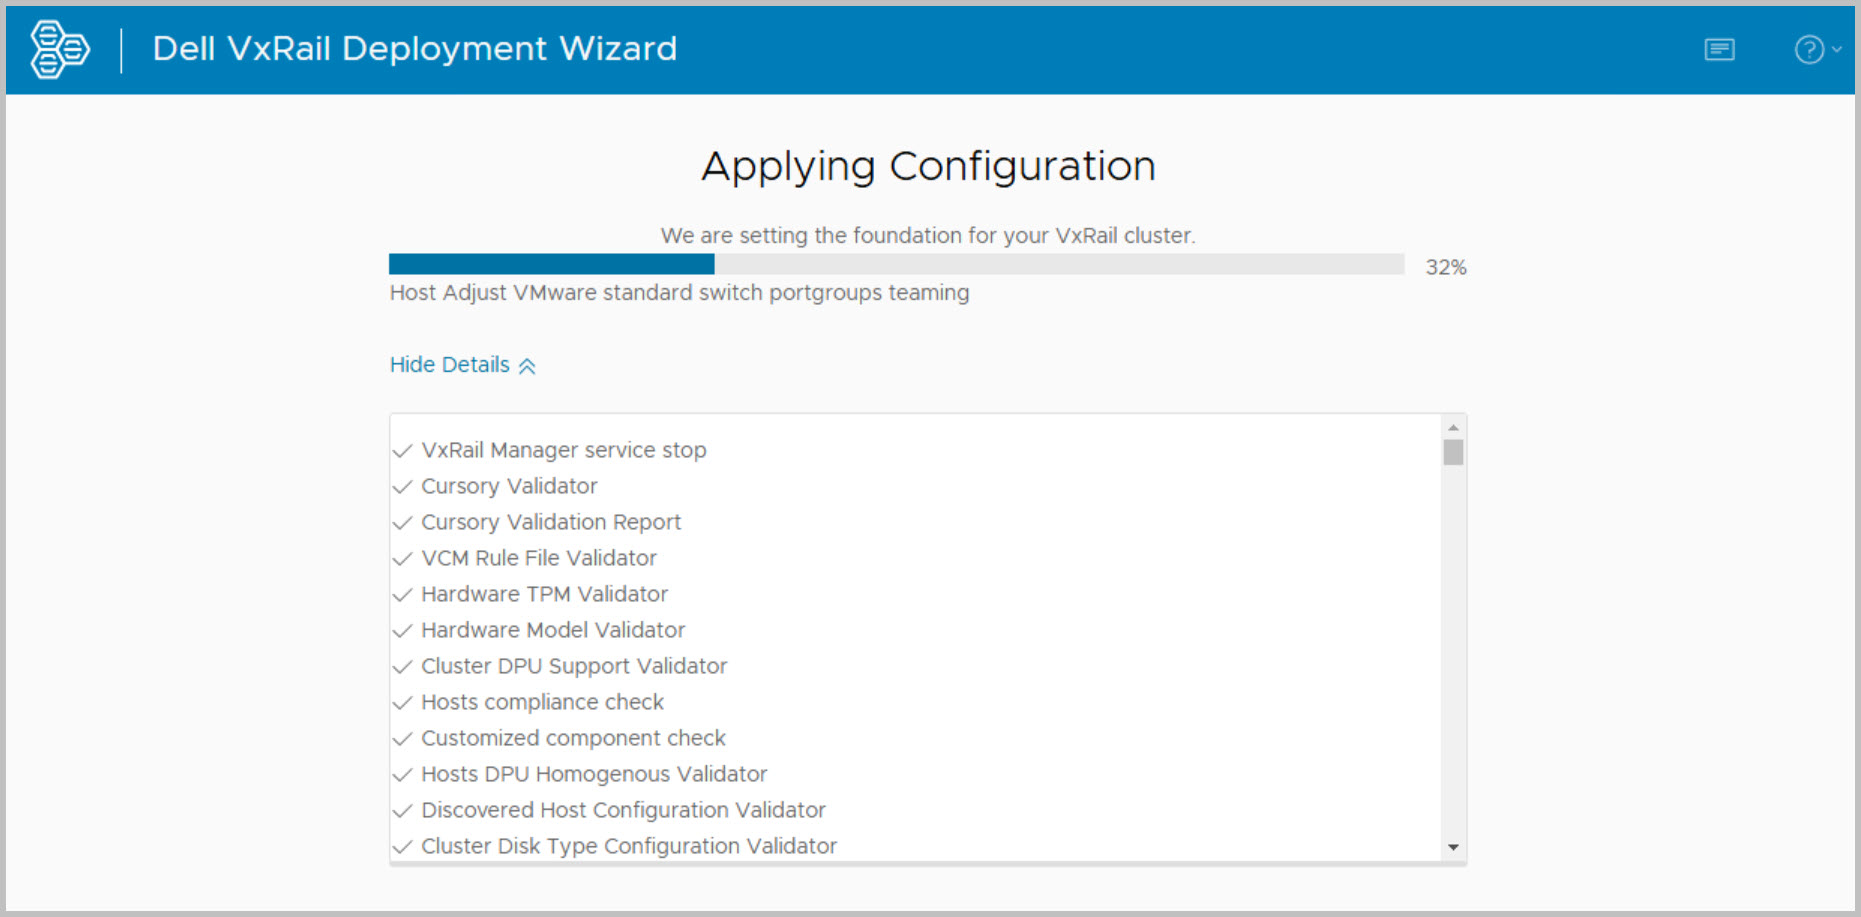
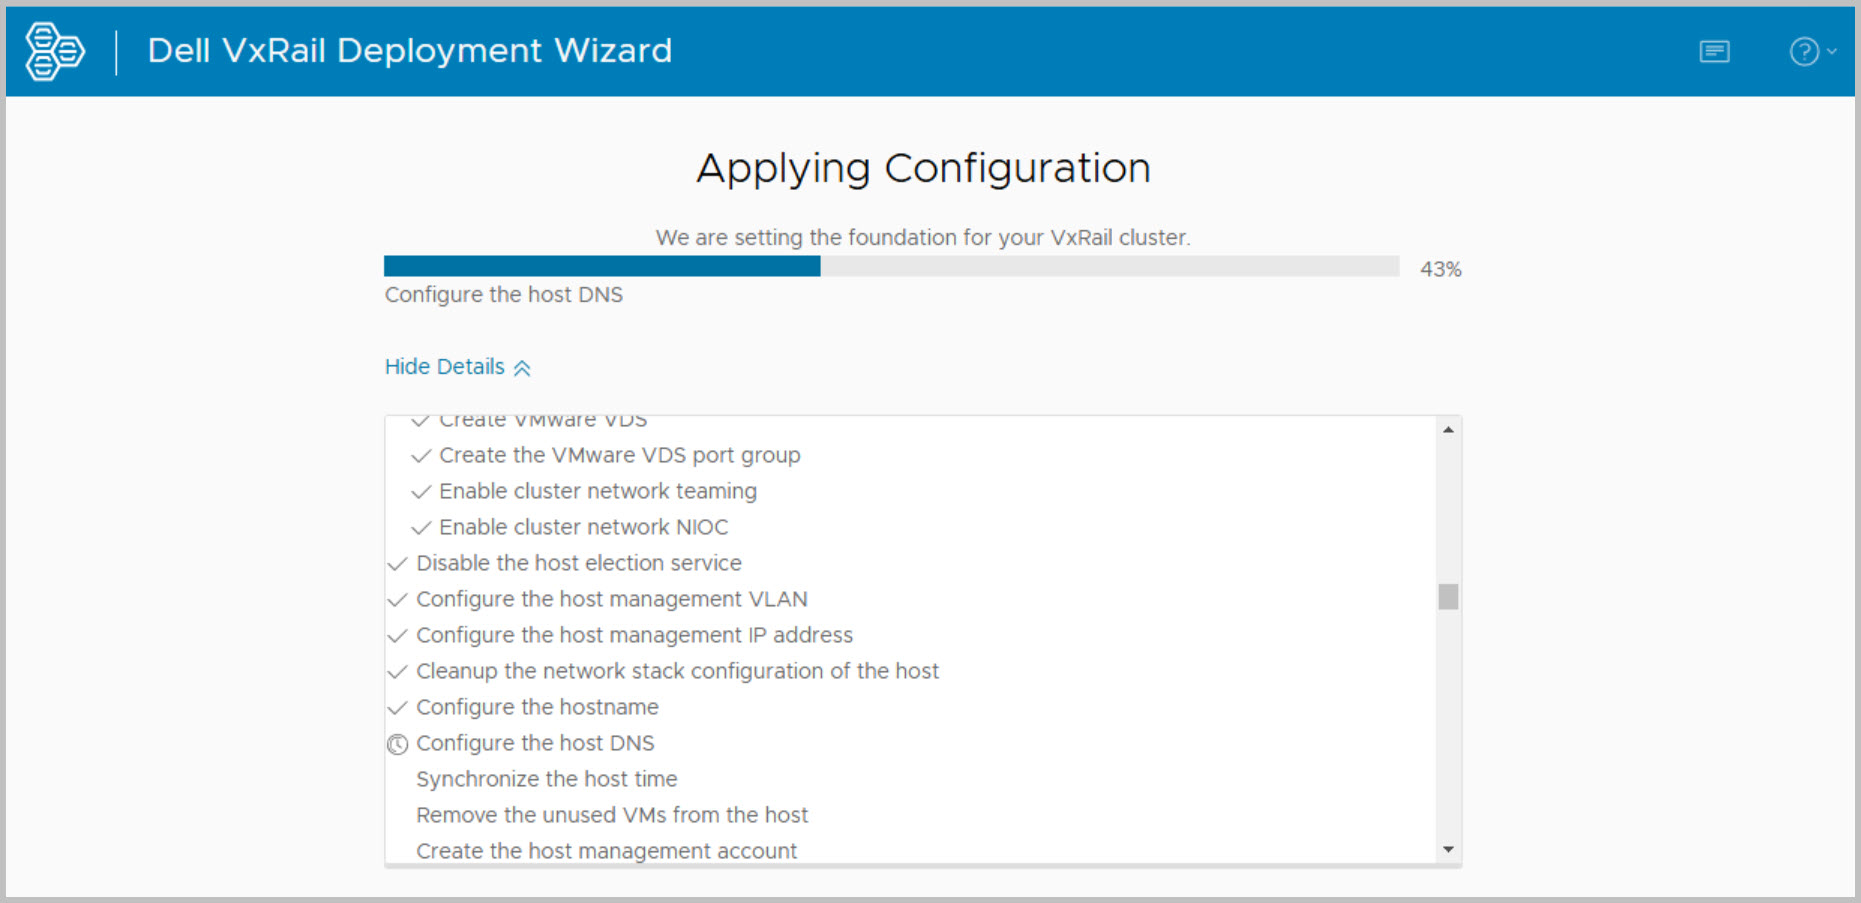
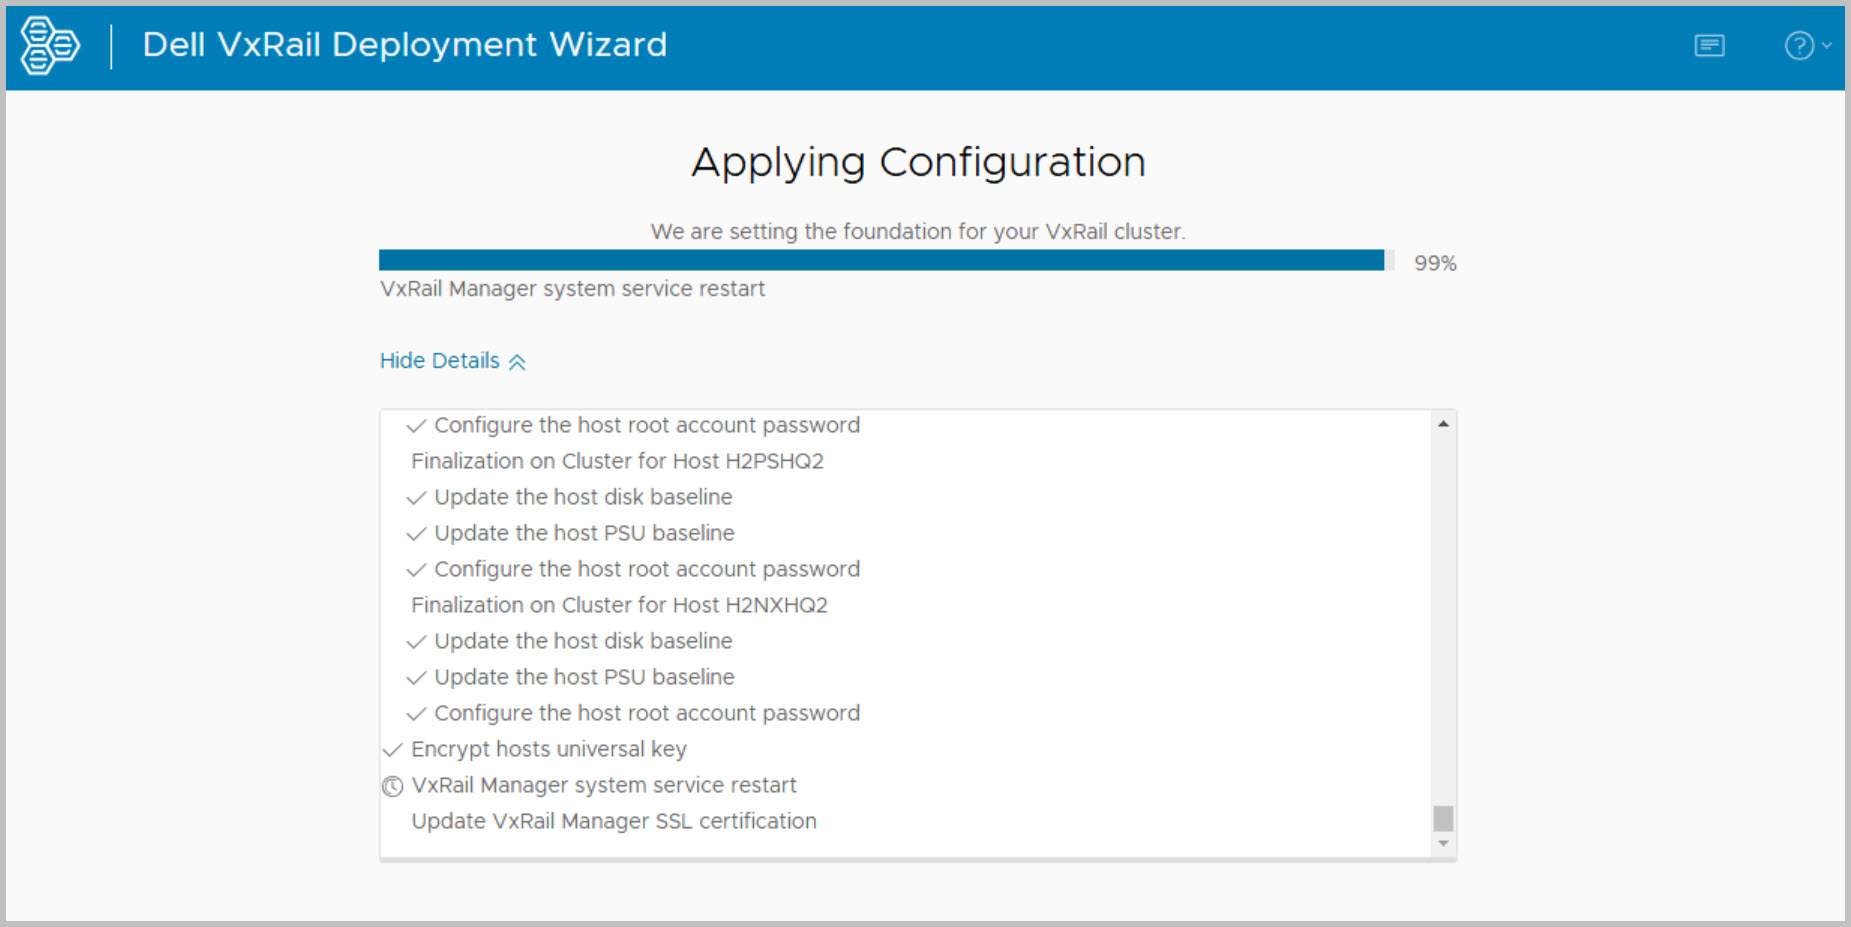
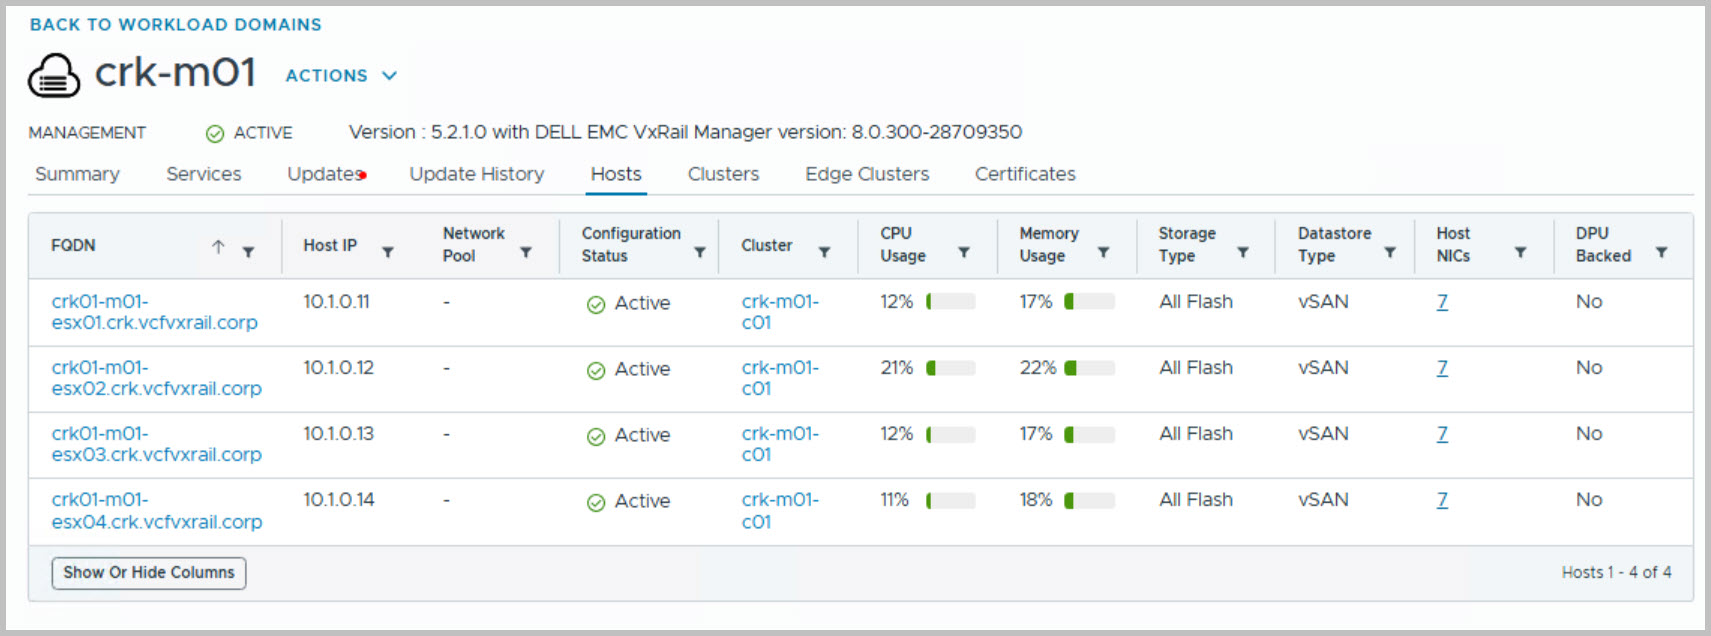
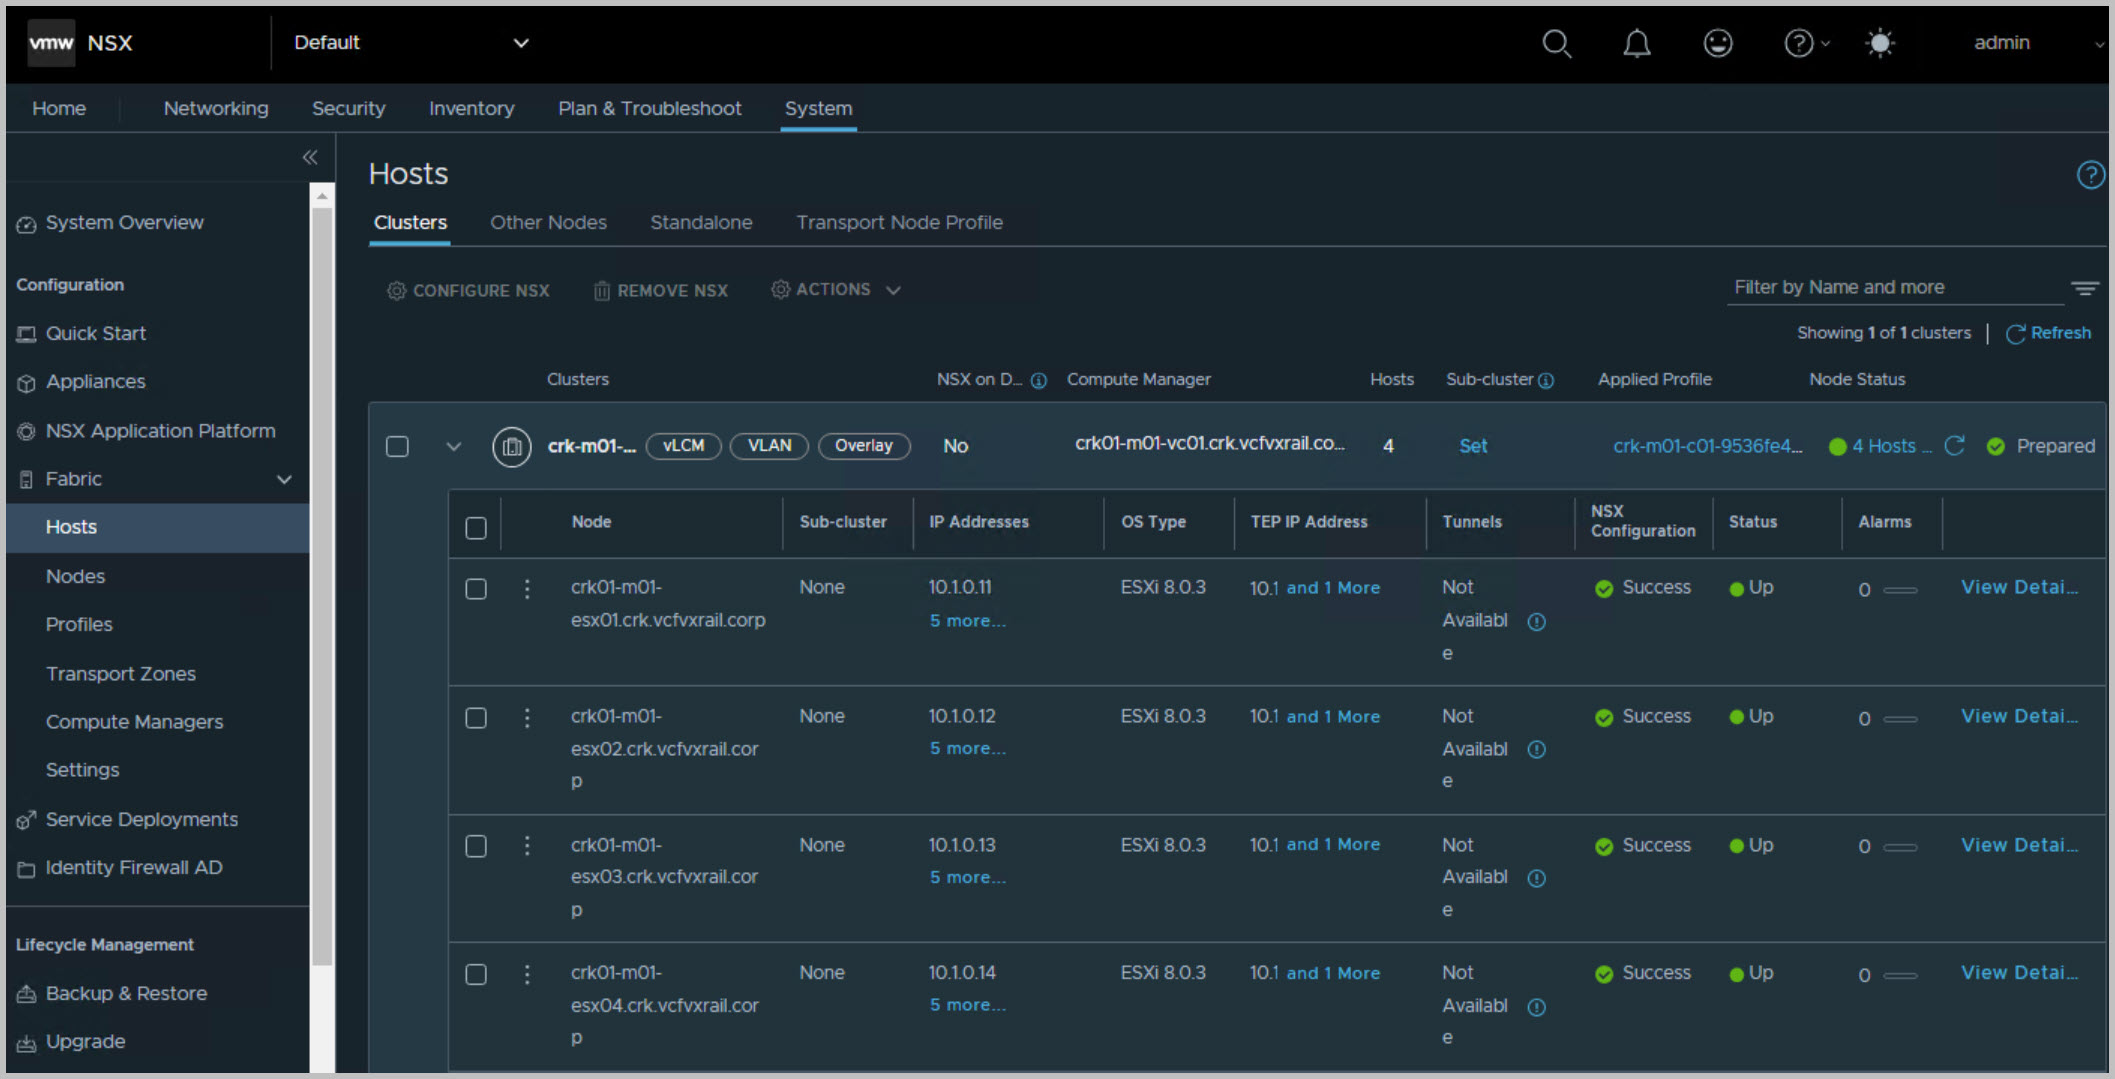
Management Workload Domain Creation
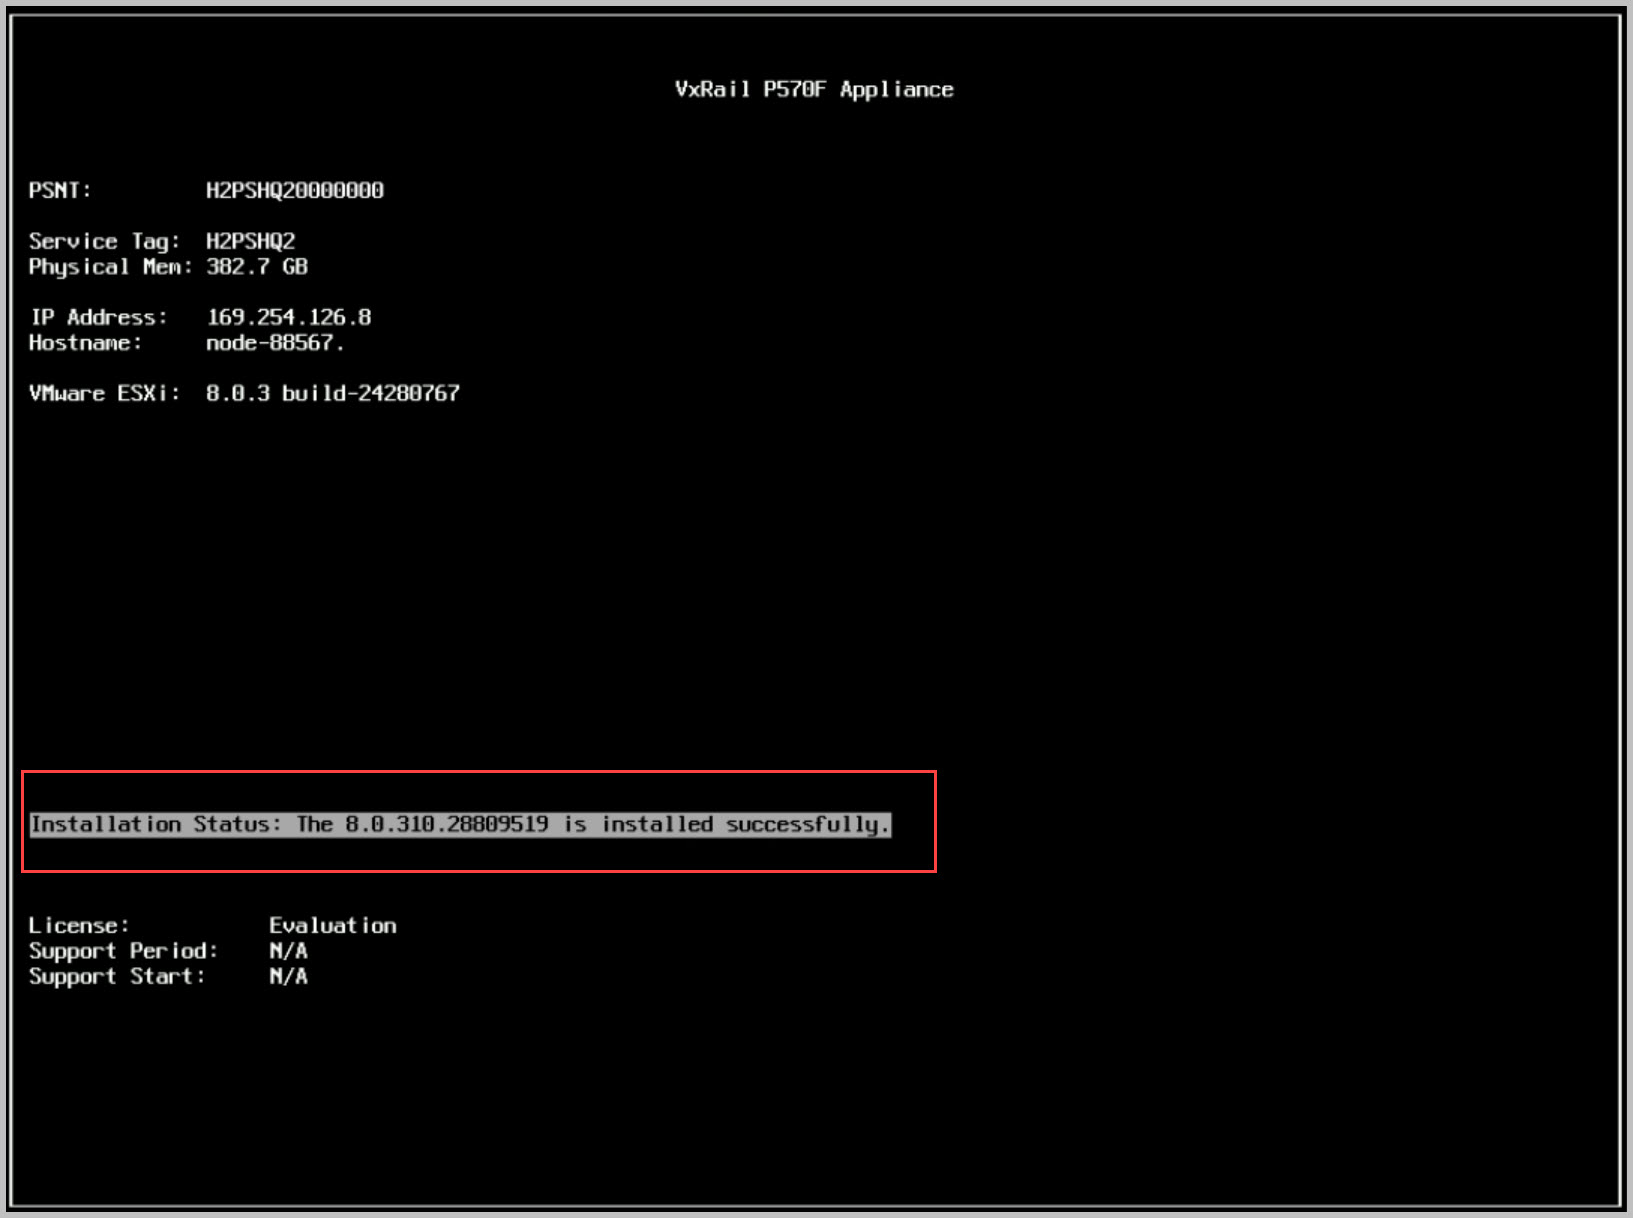
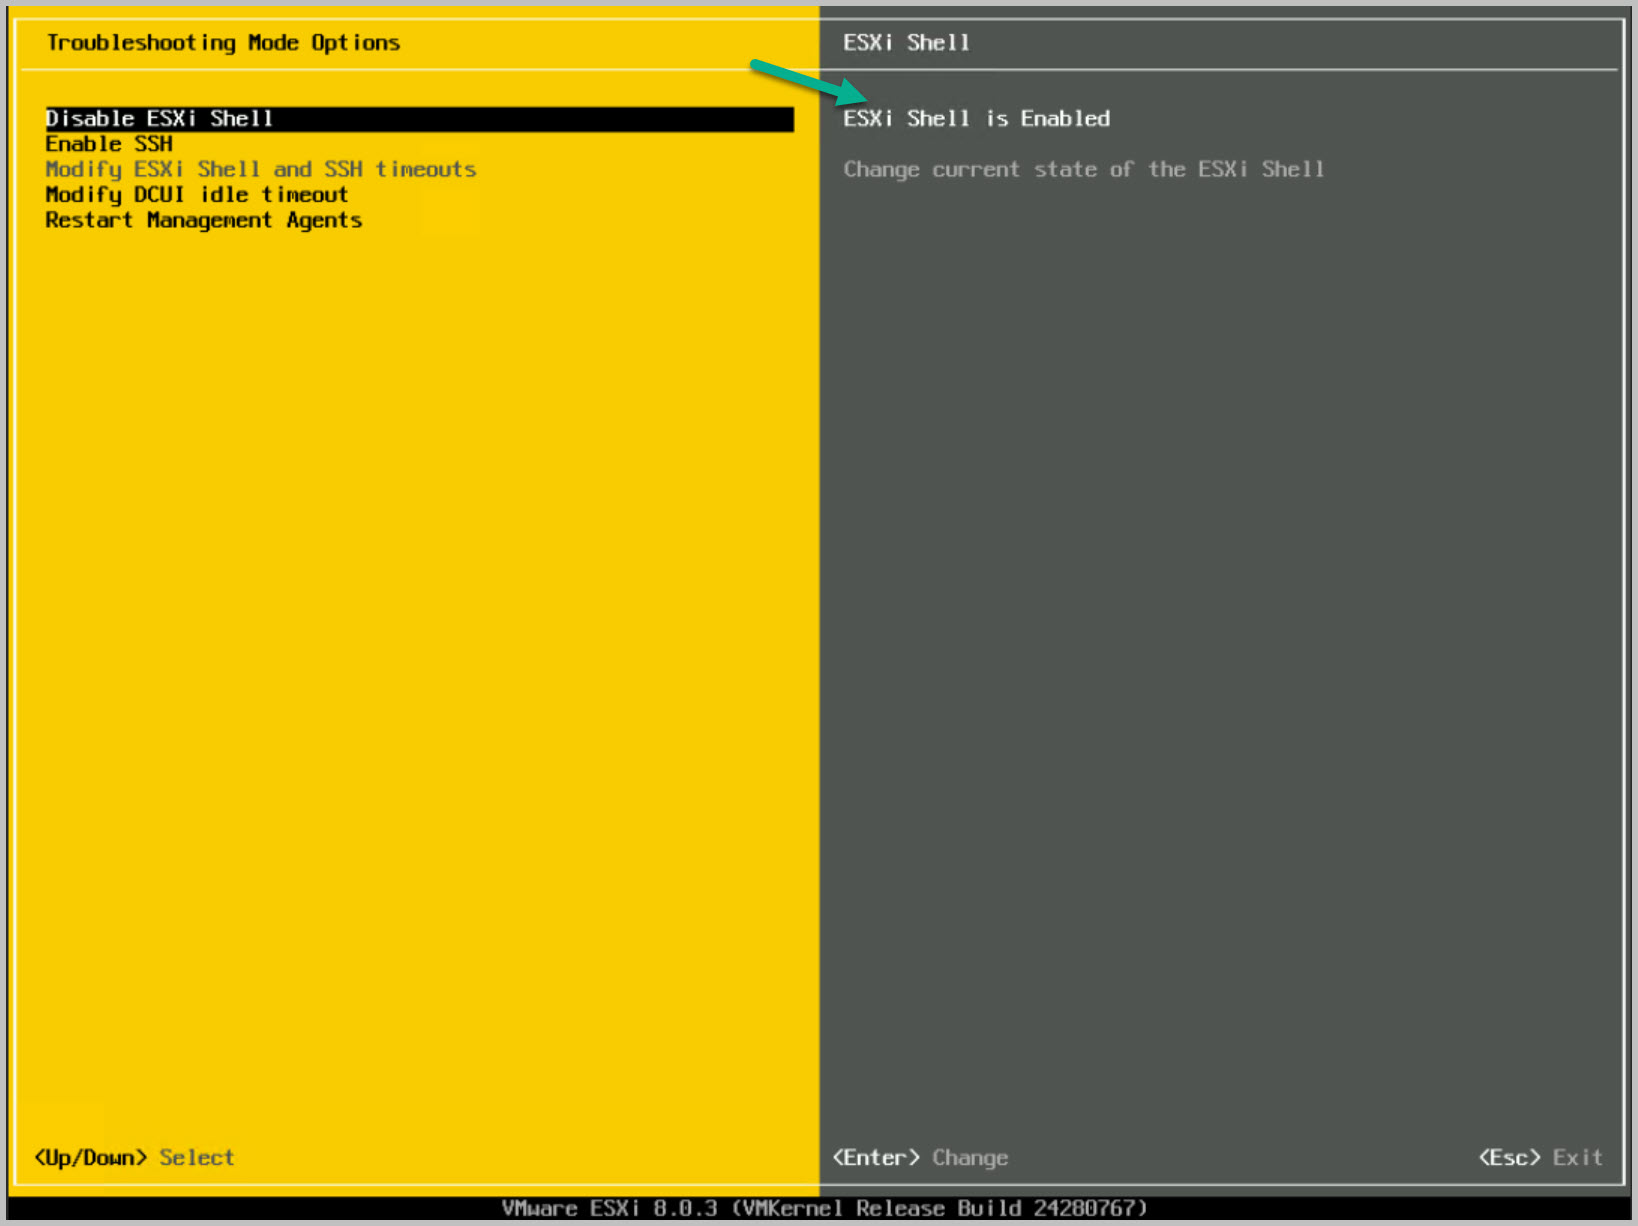
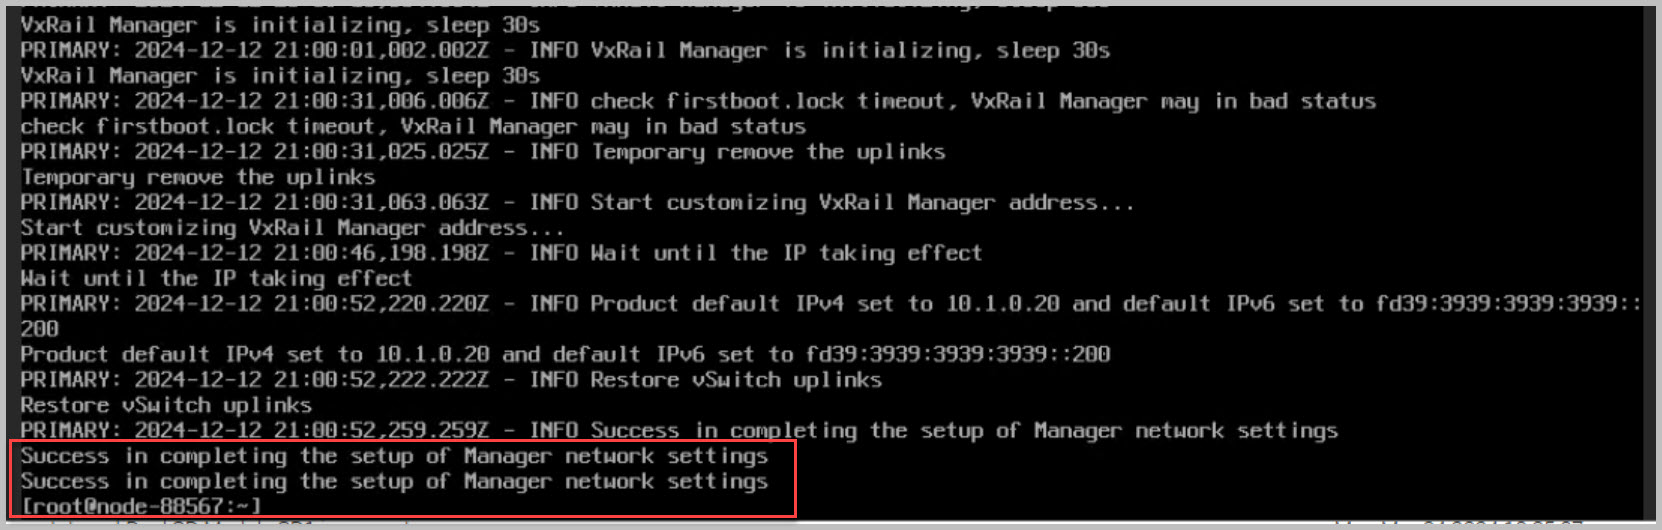
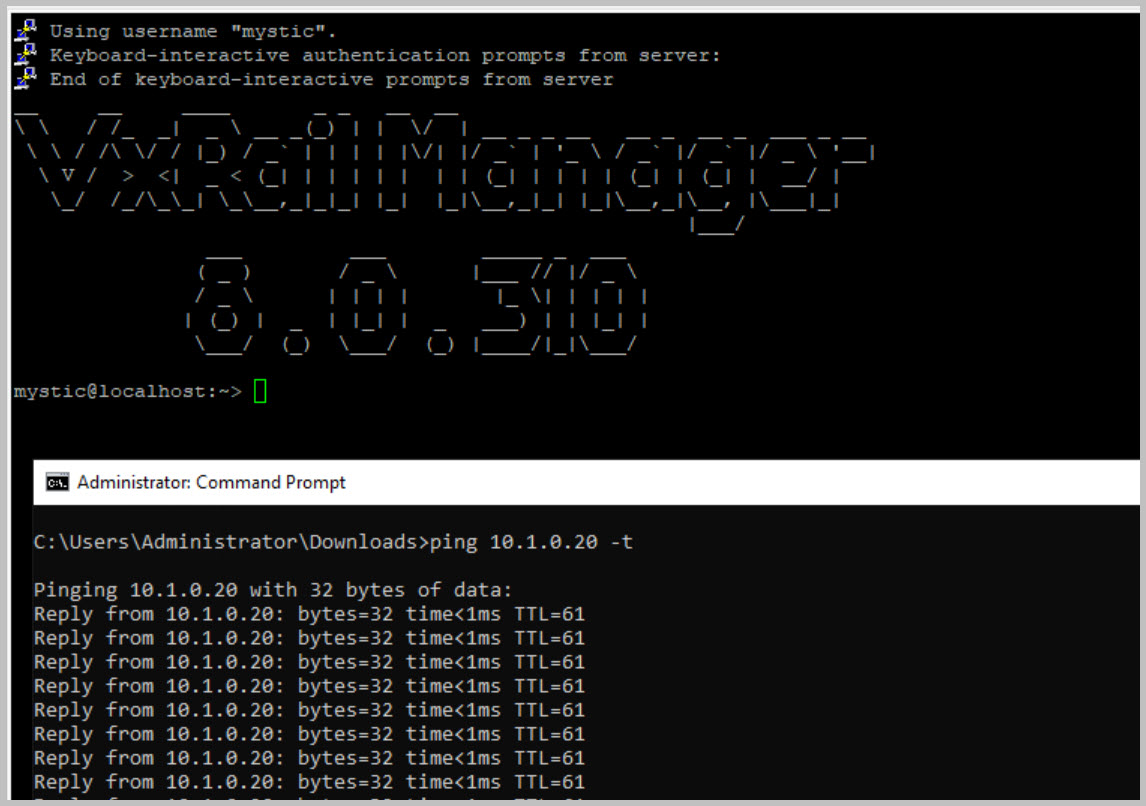
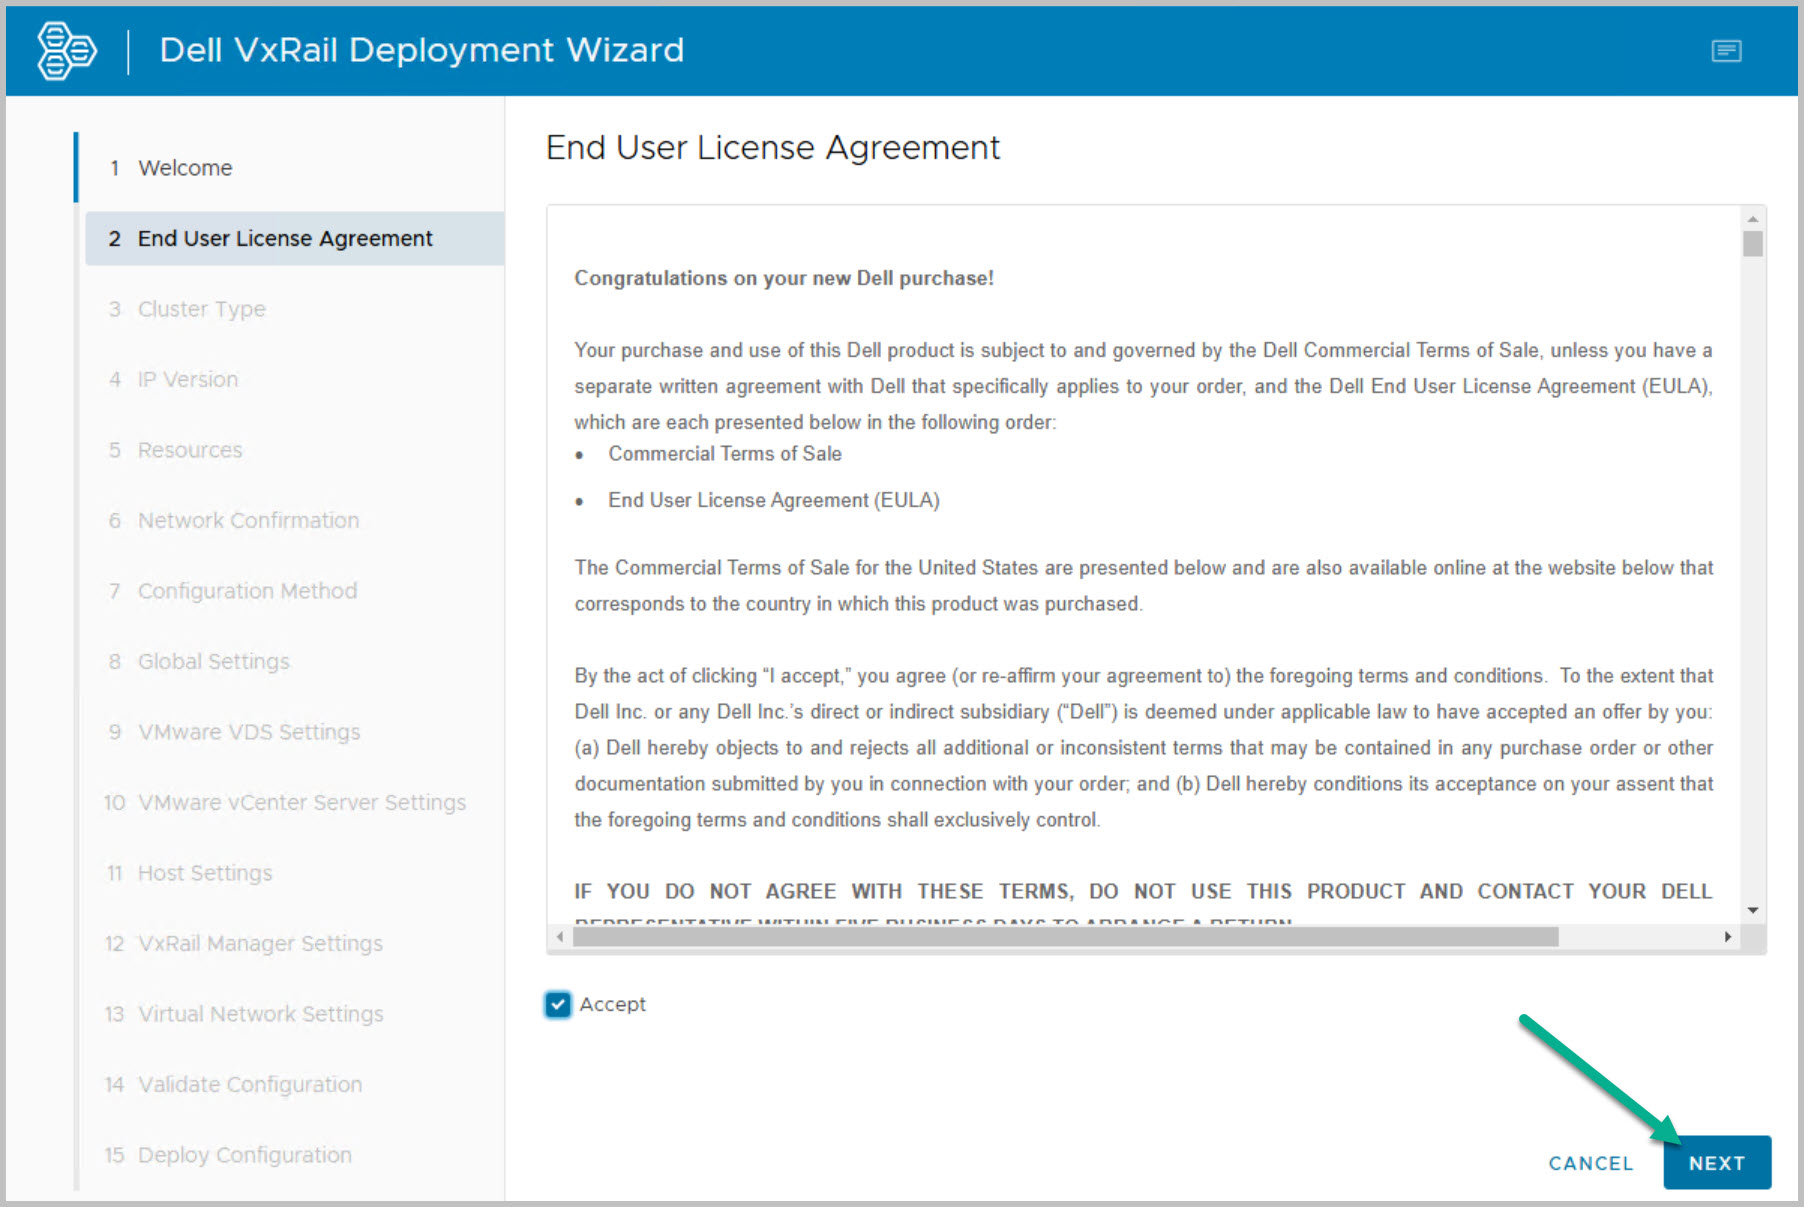
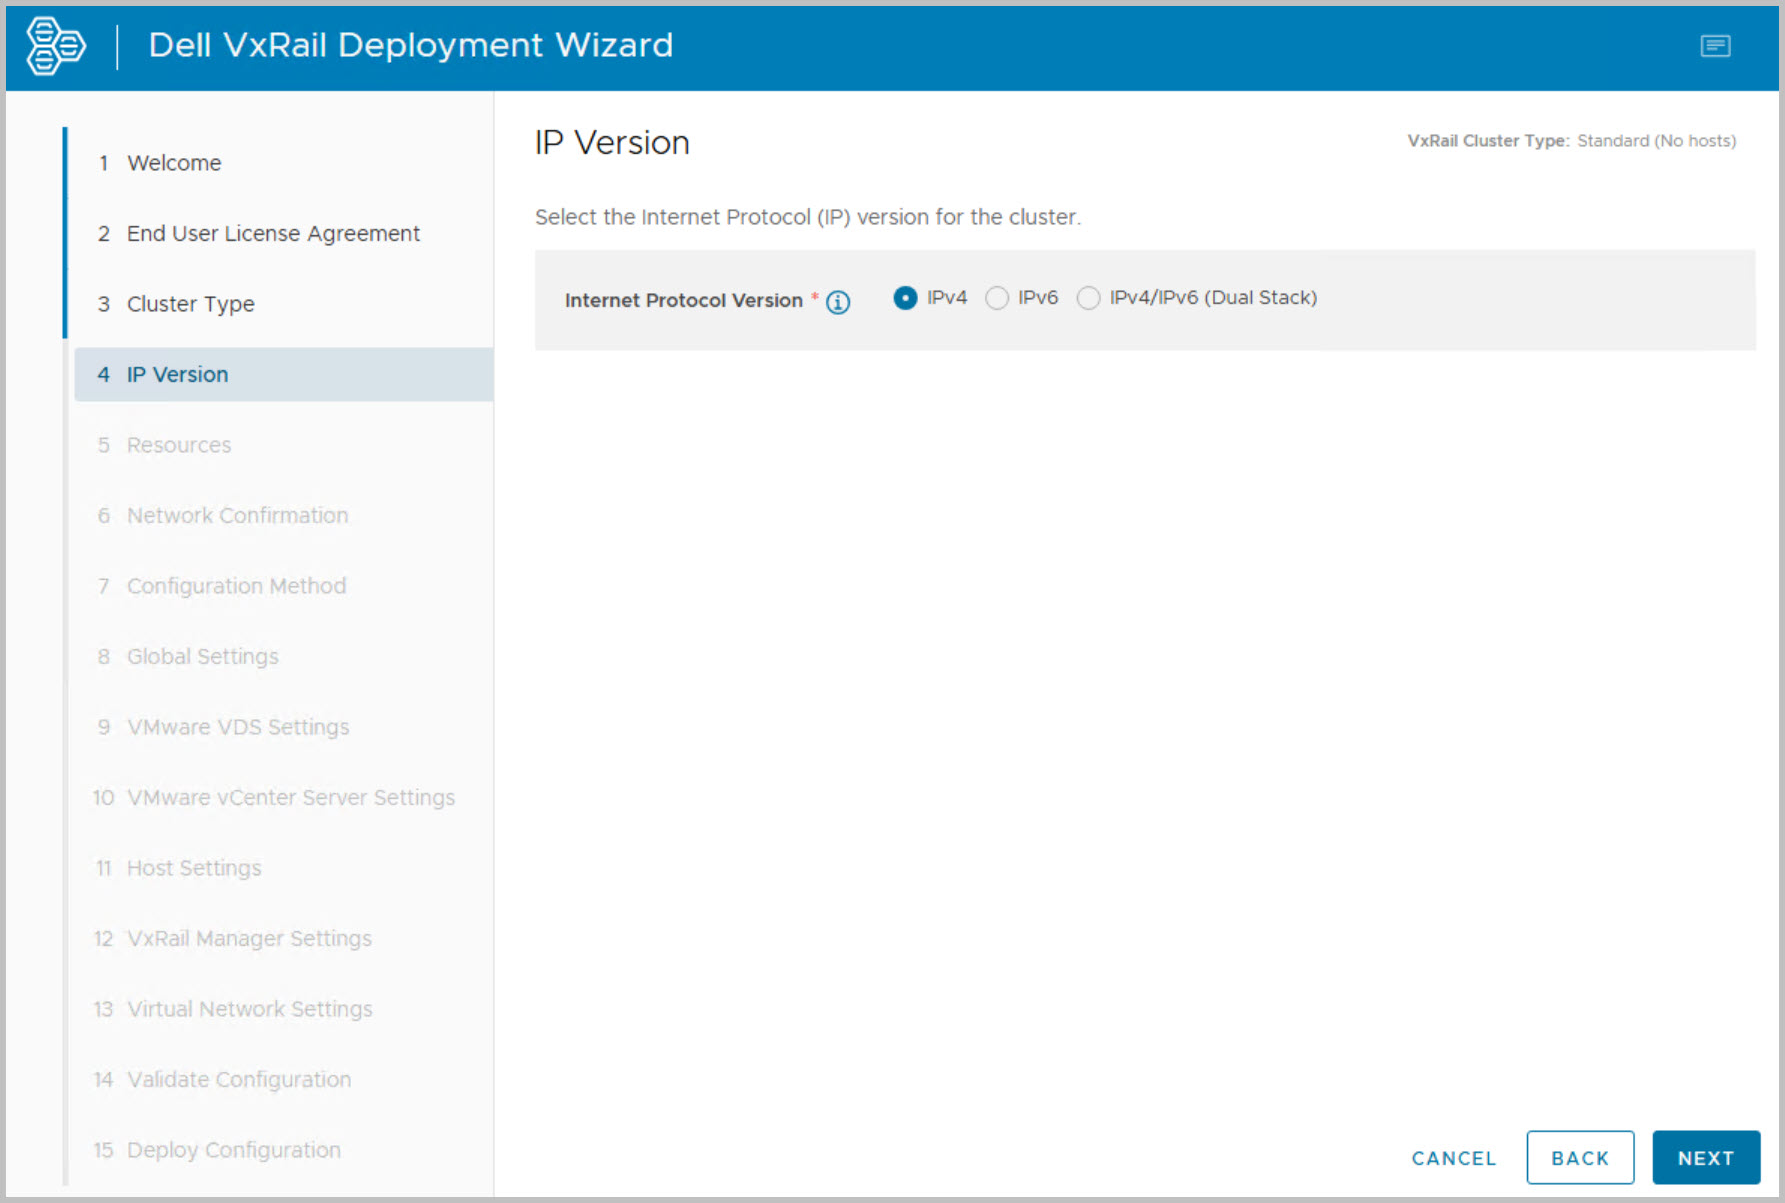
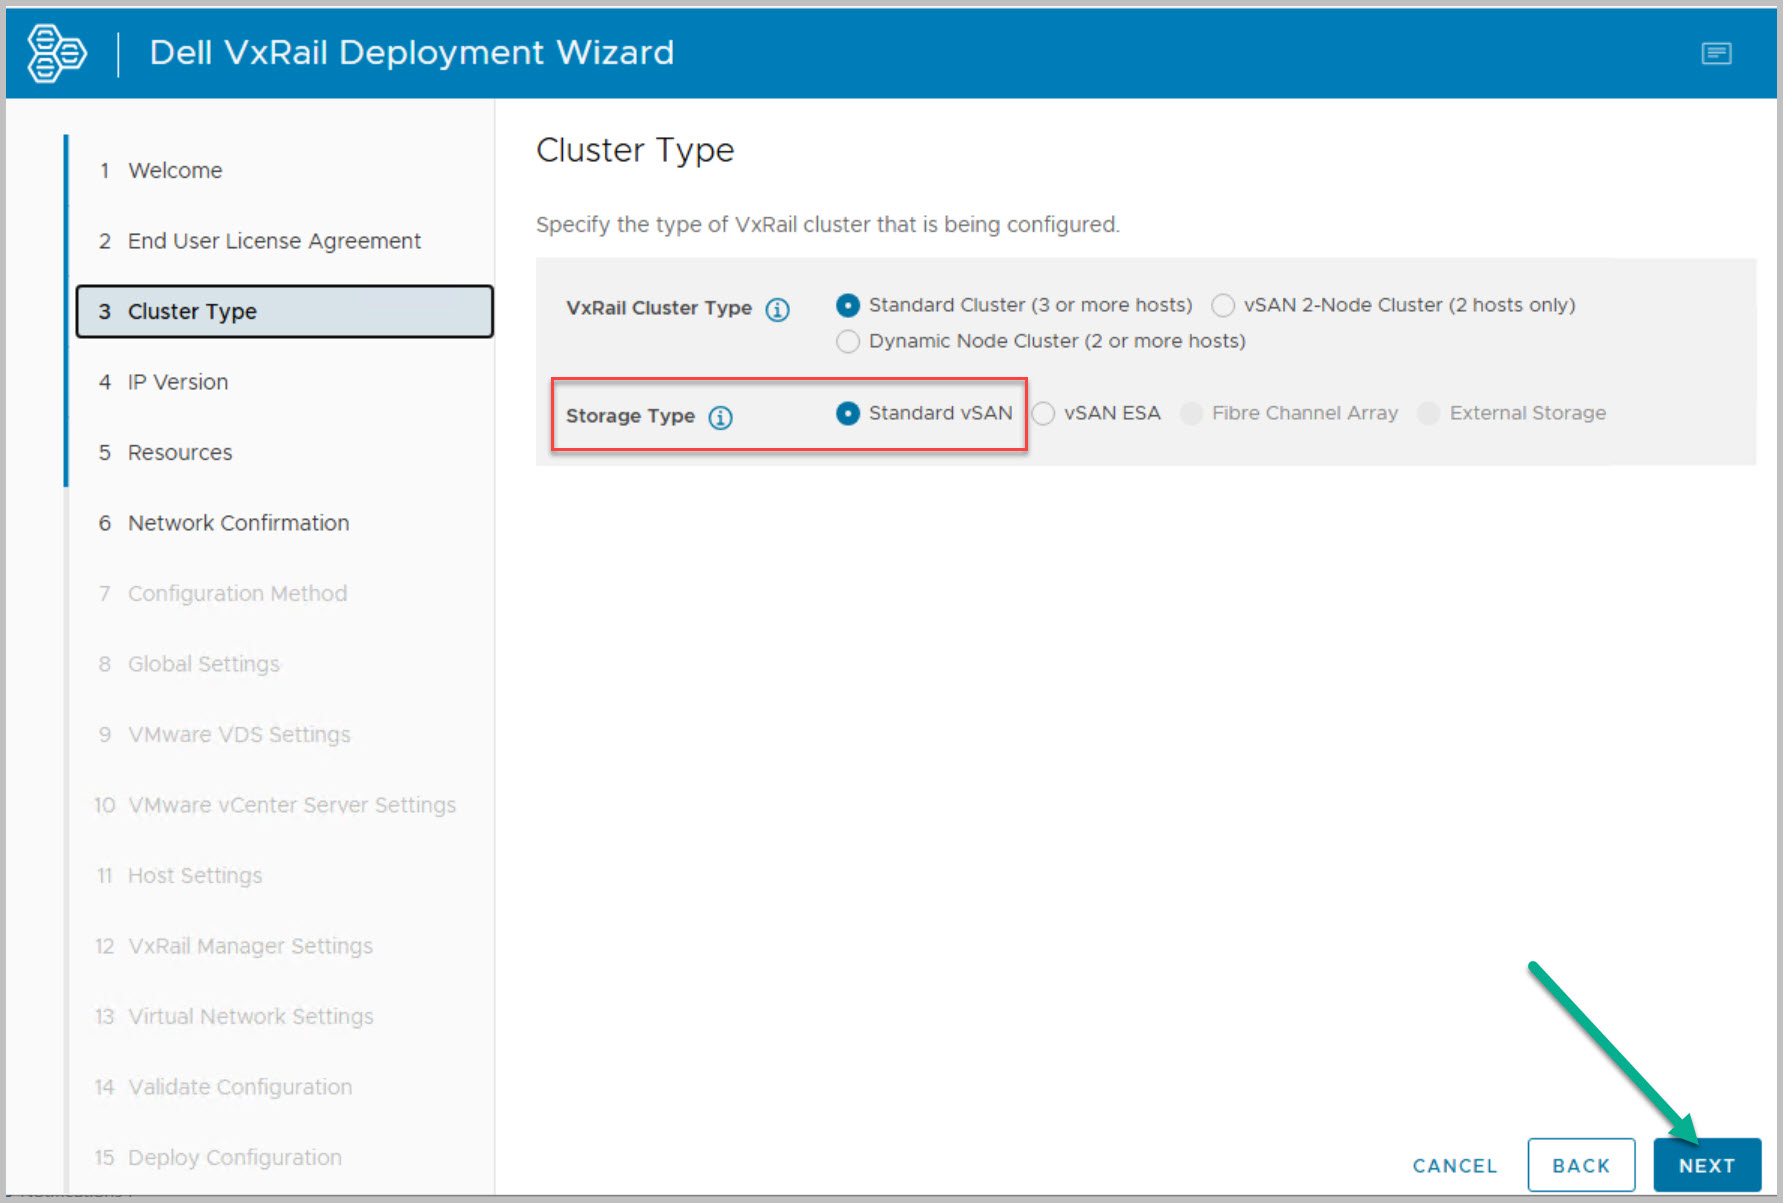
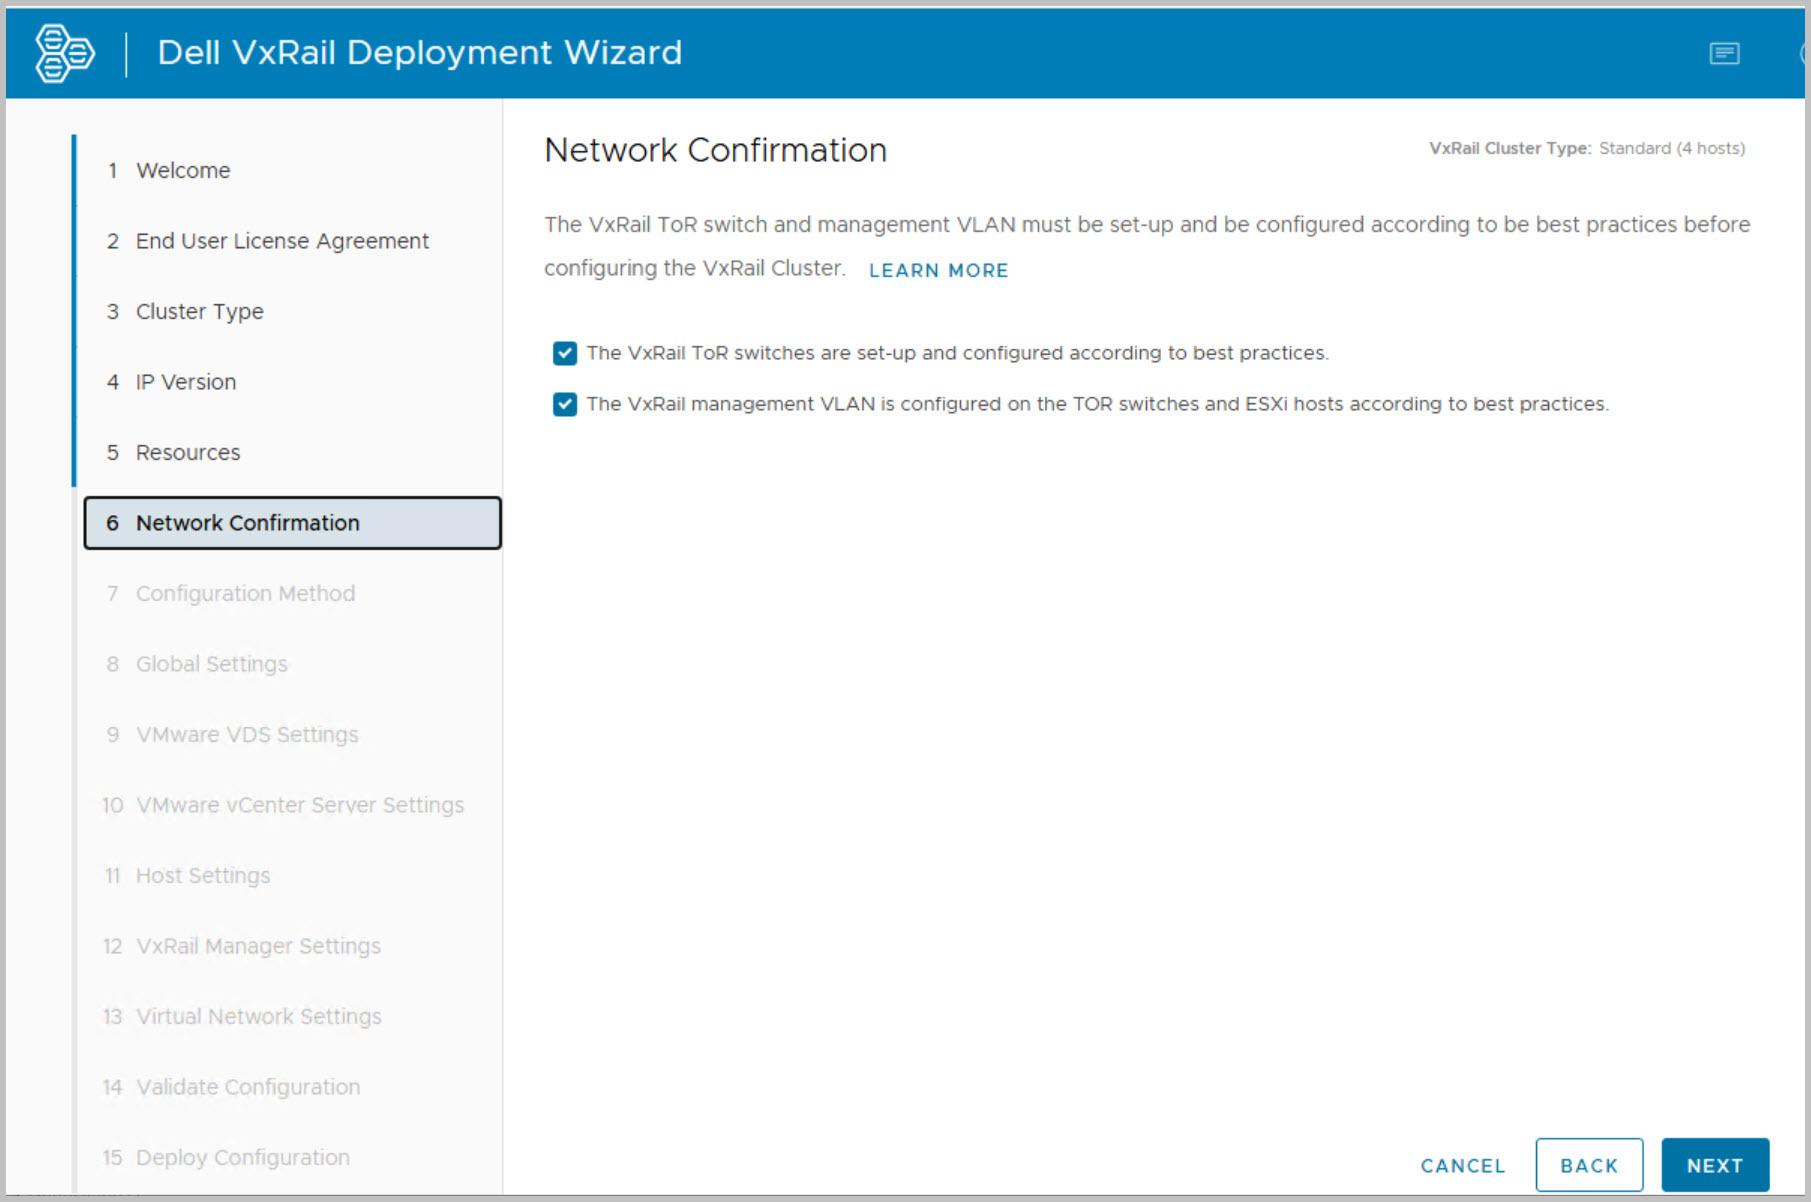
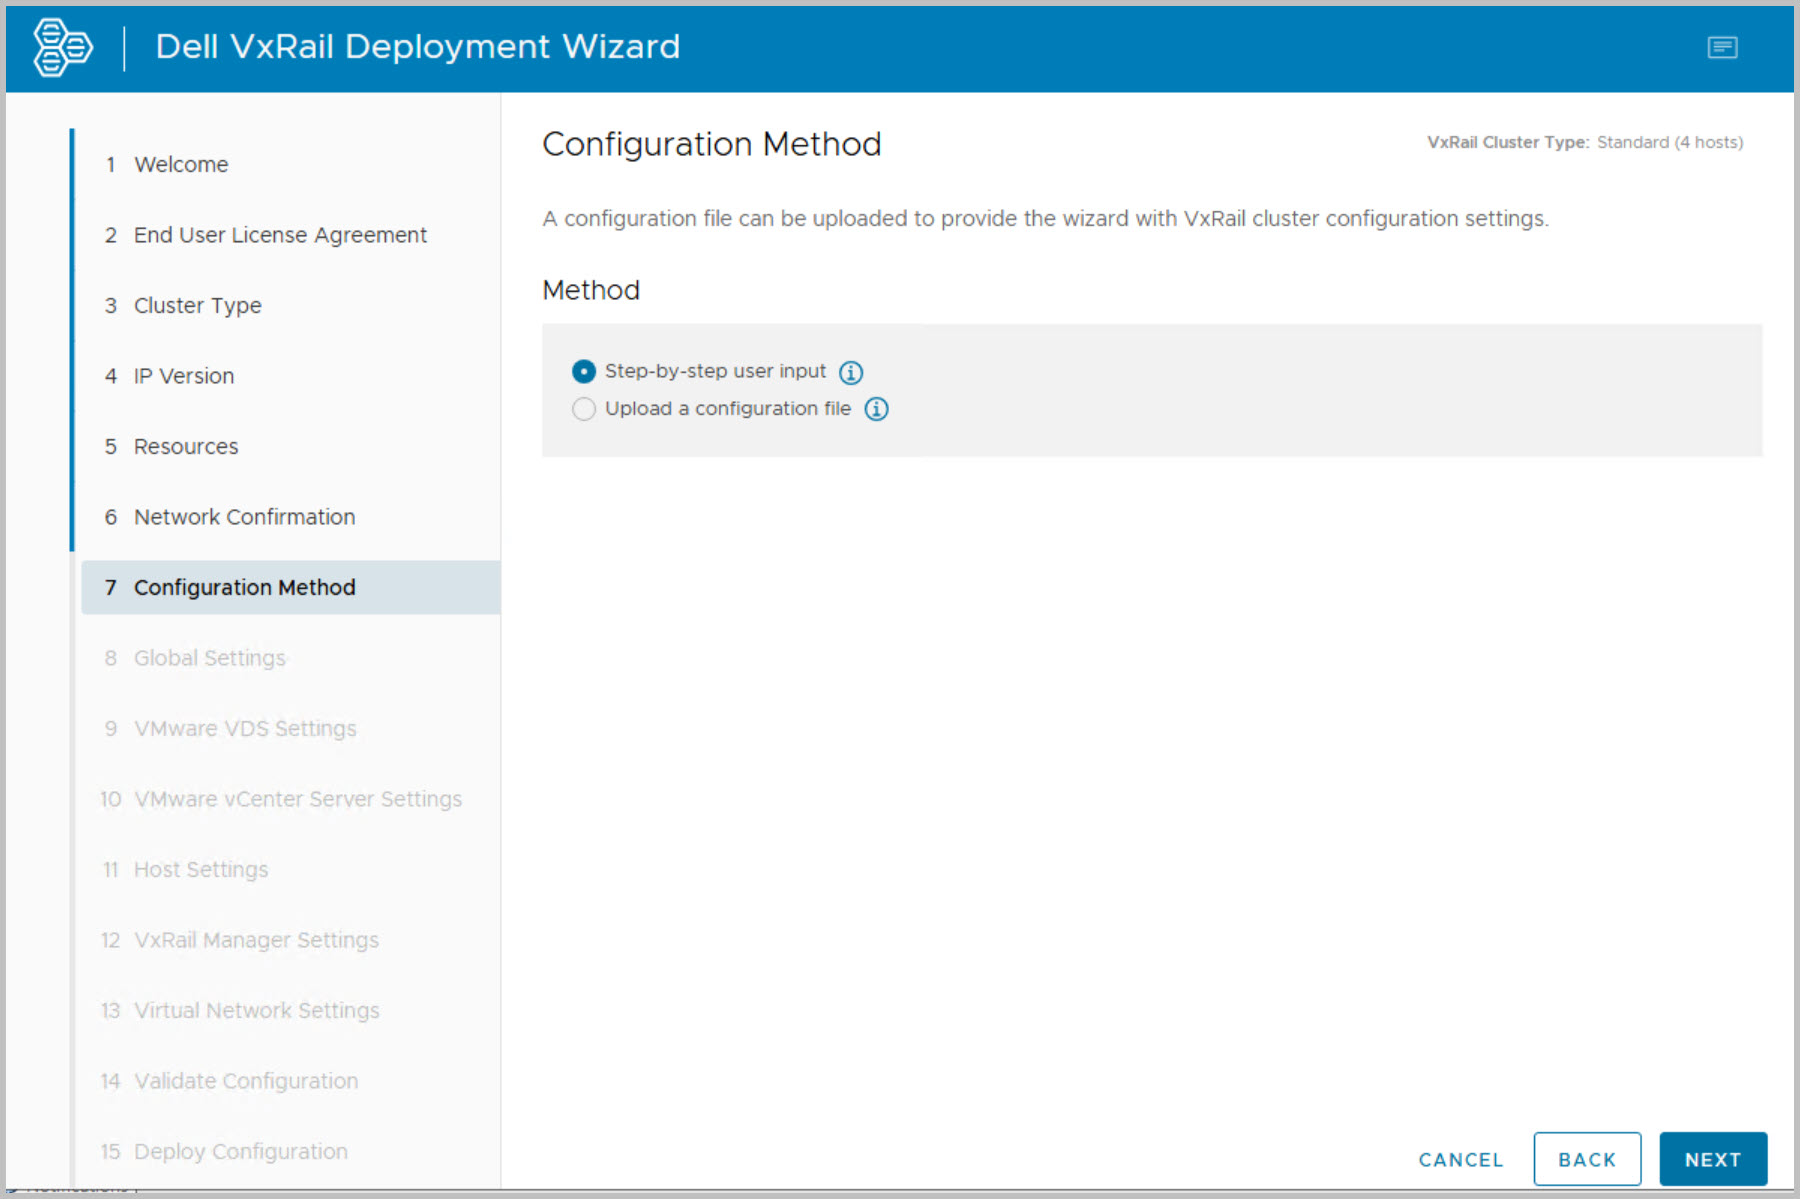
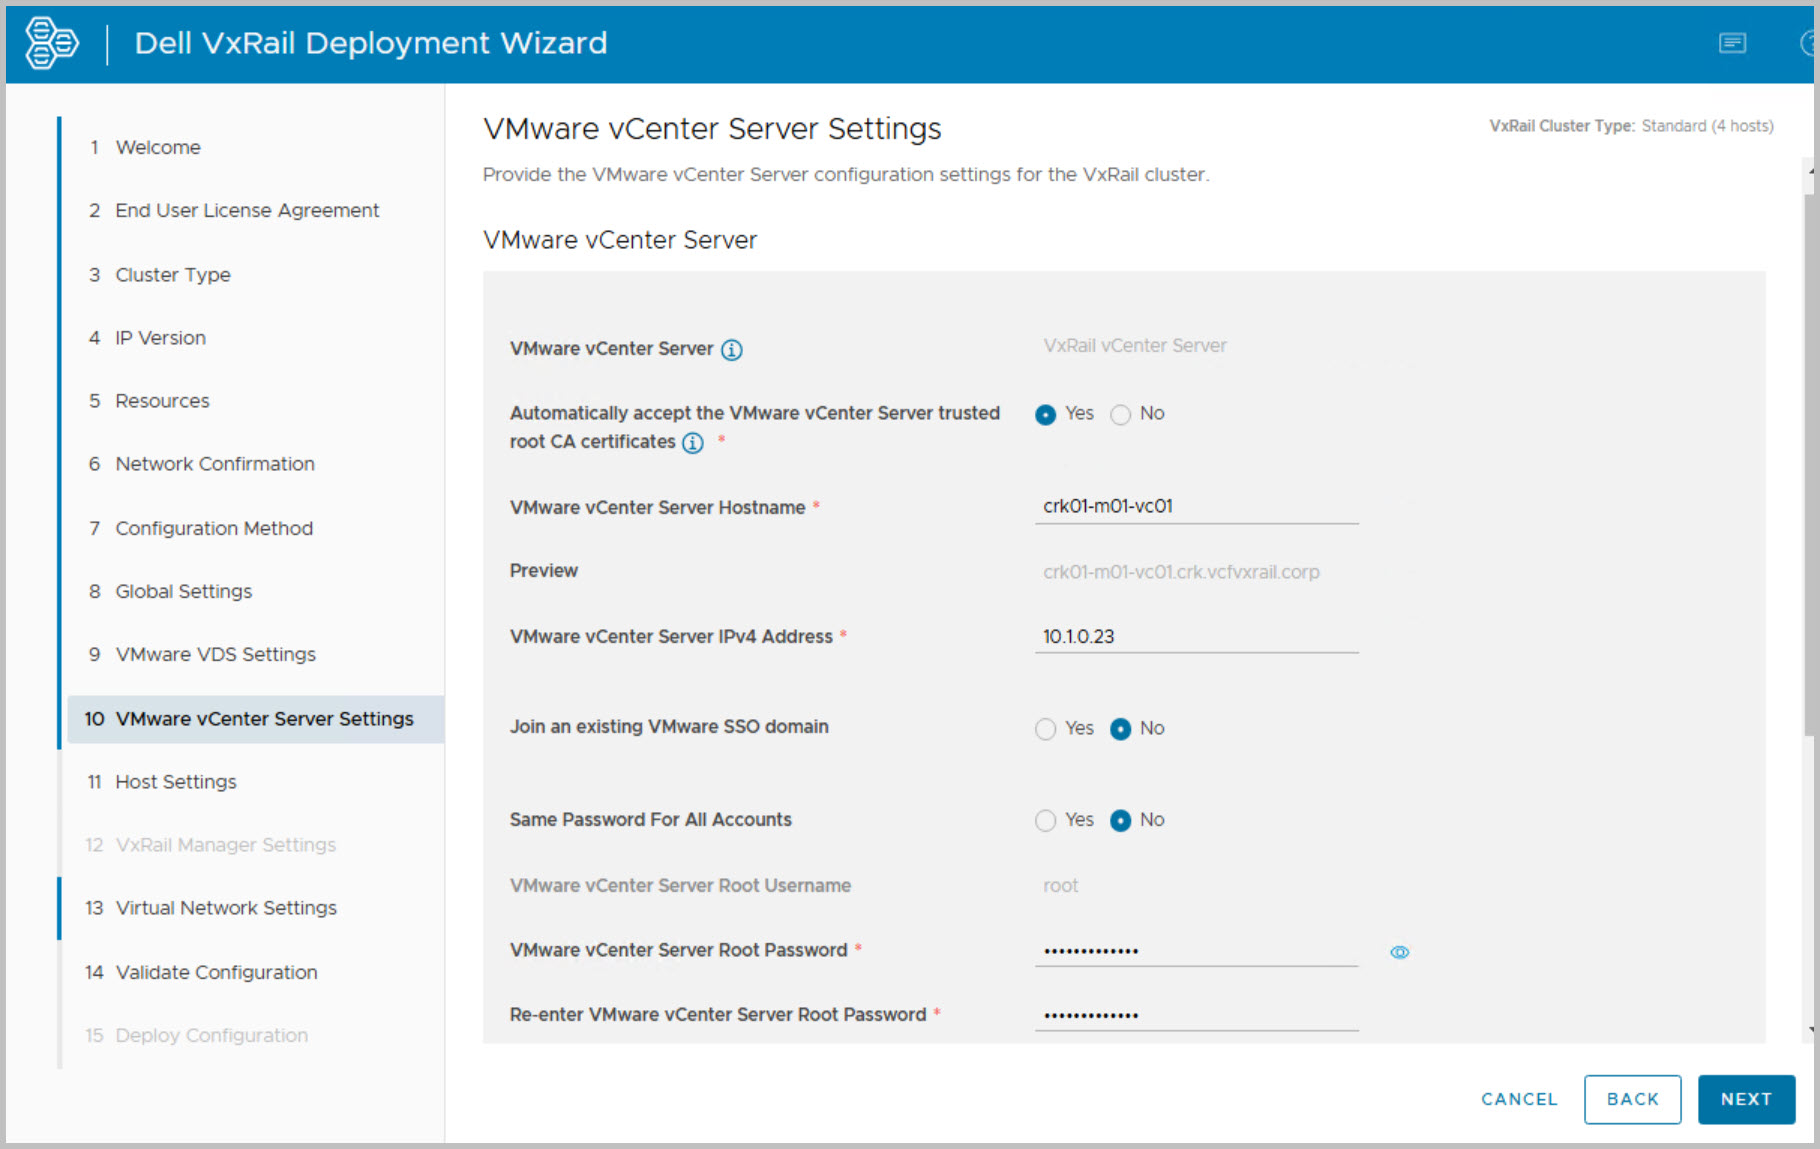
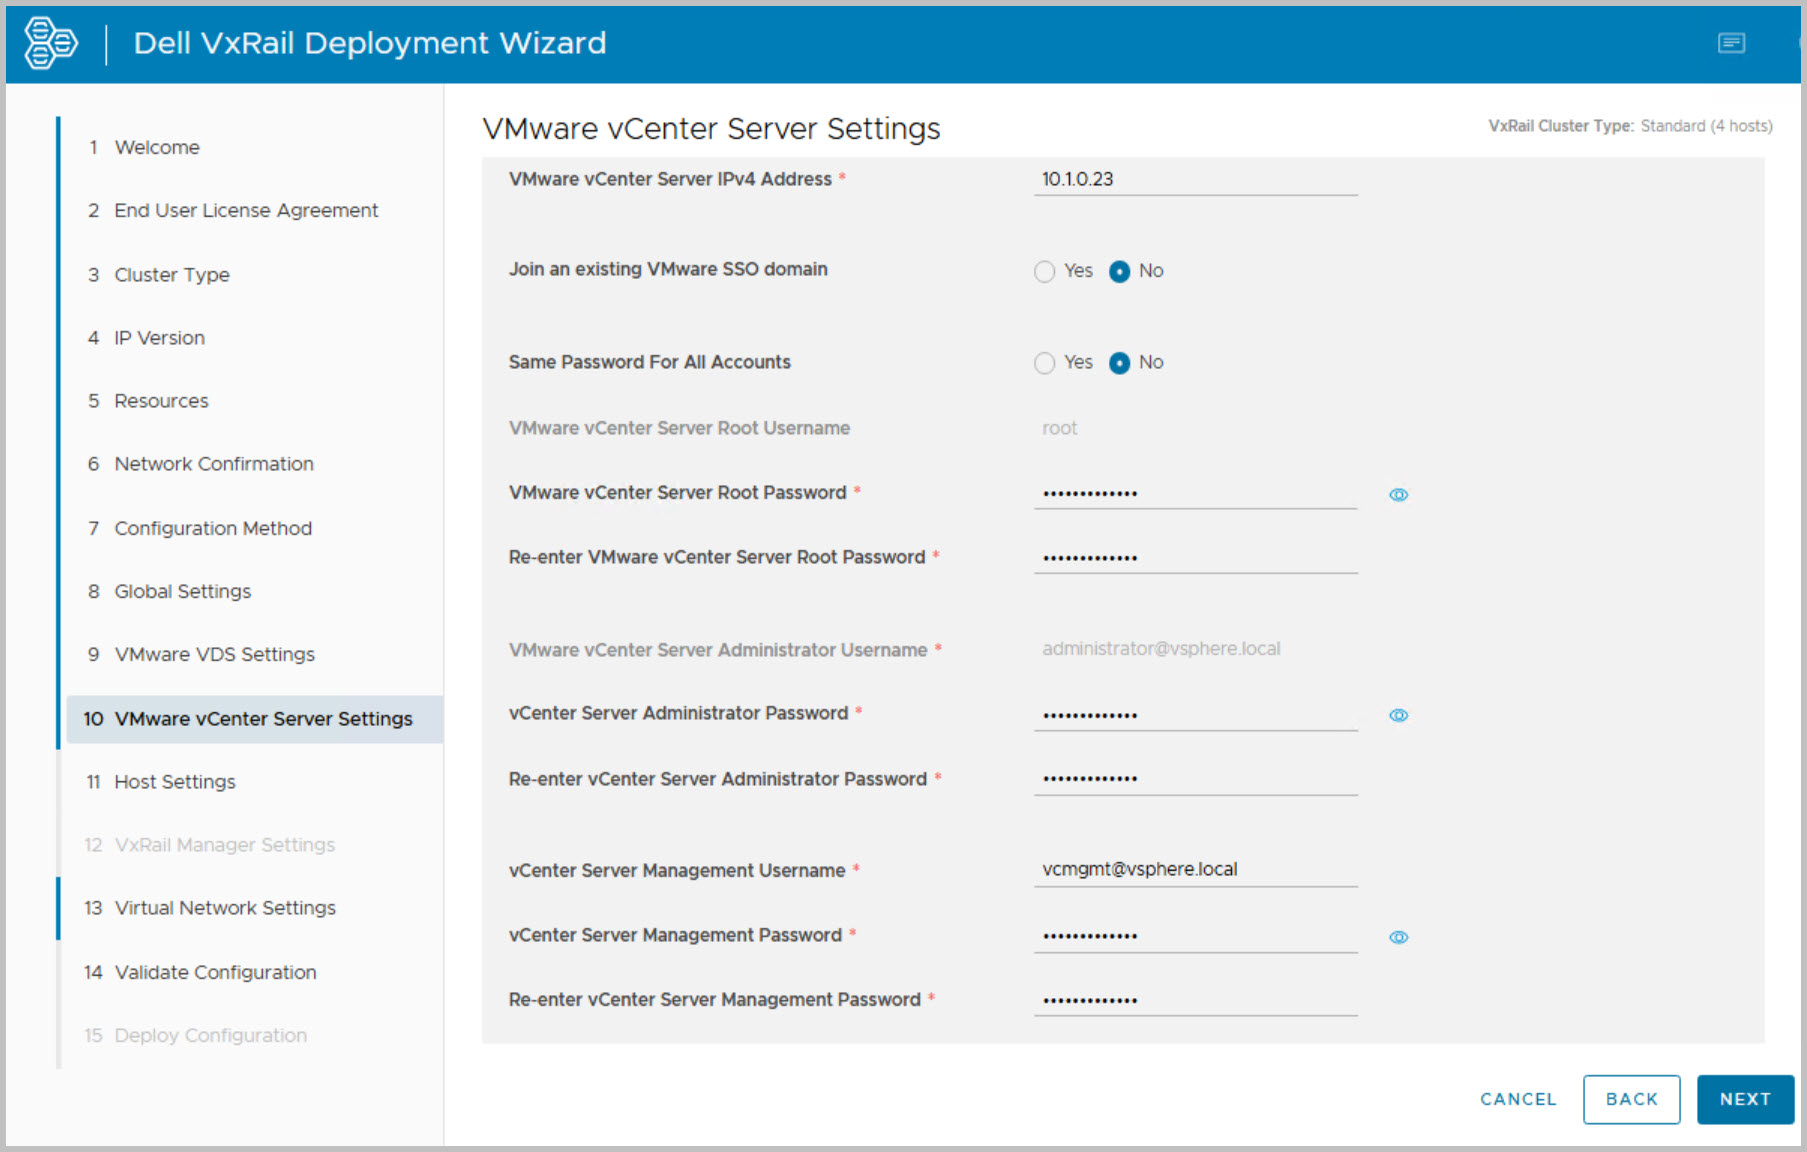
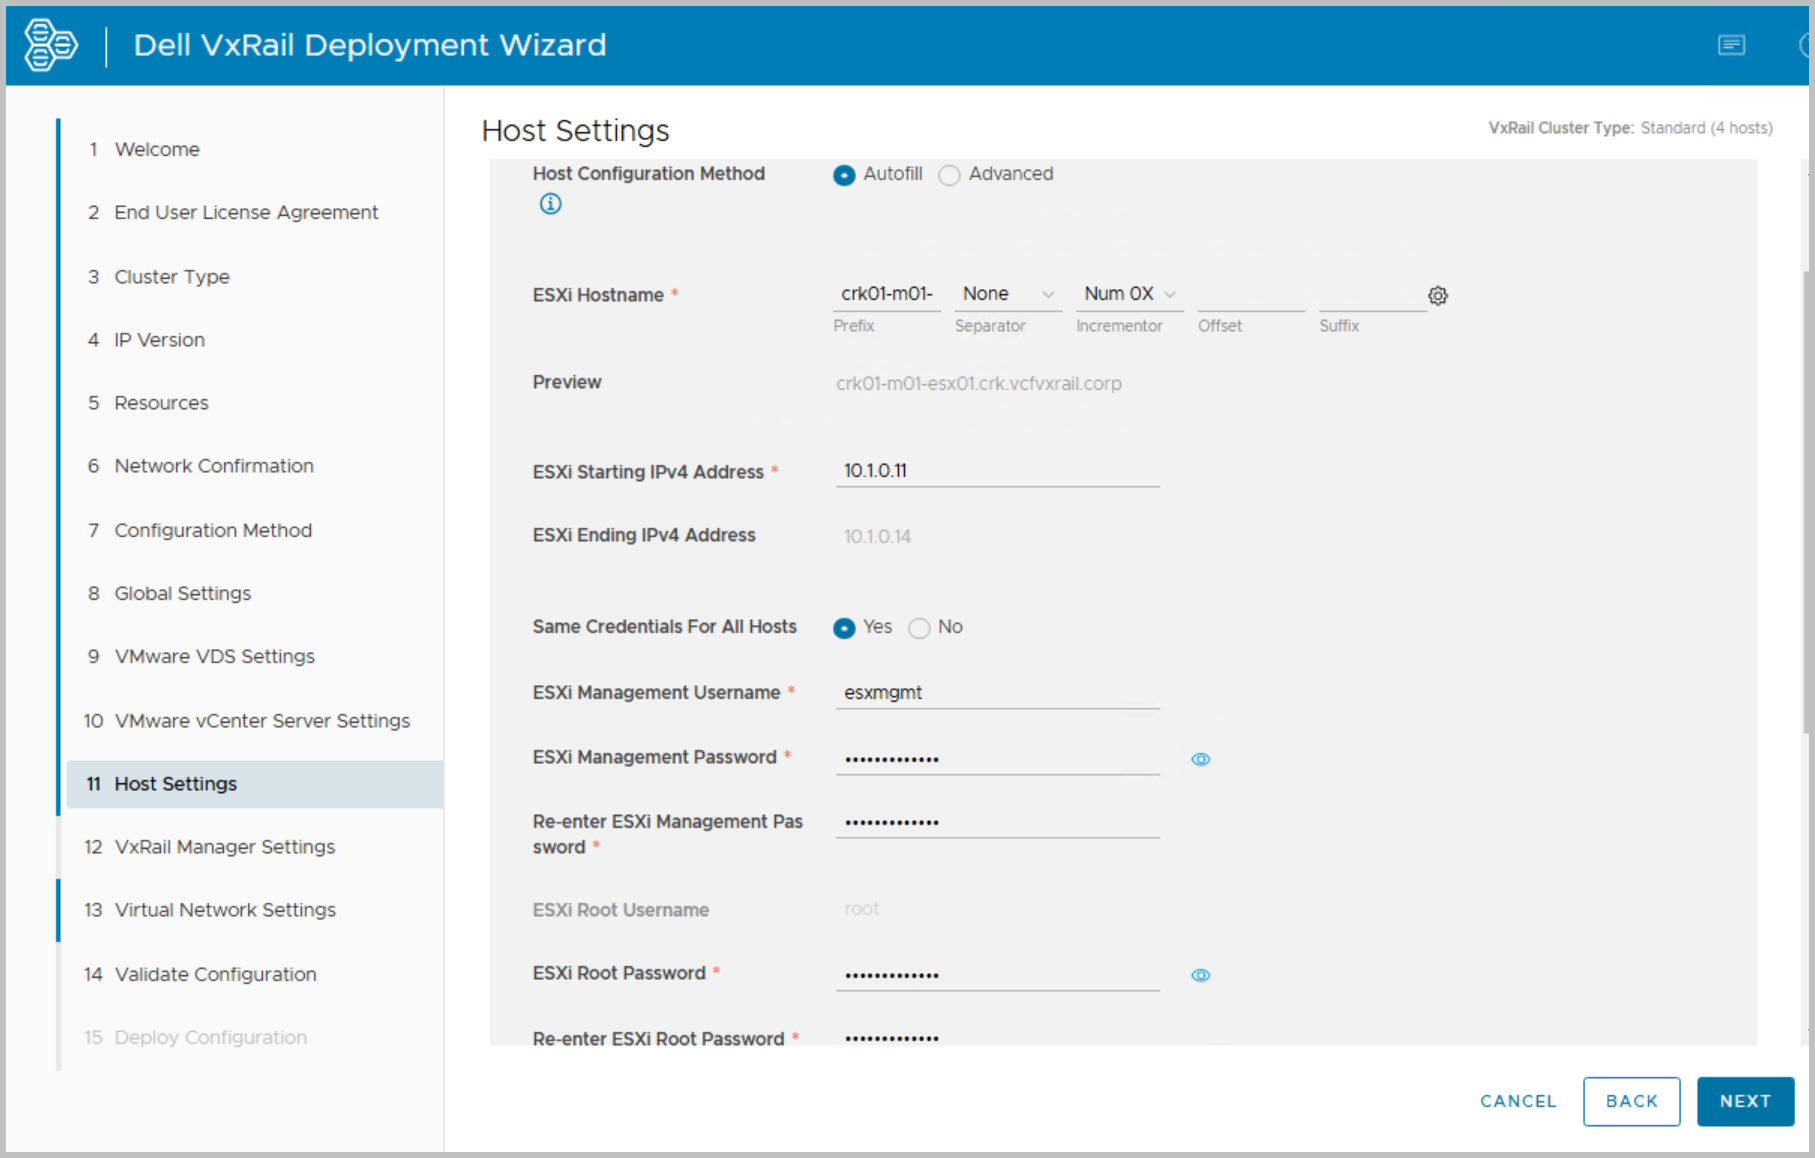
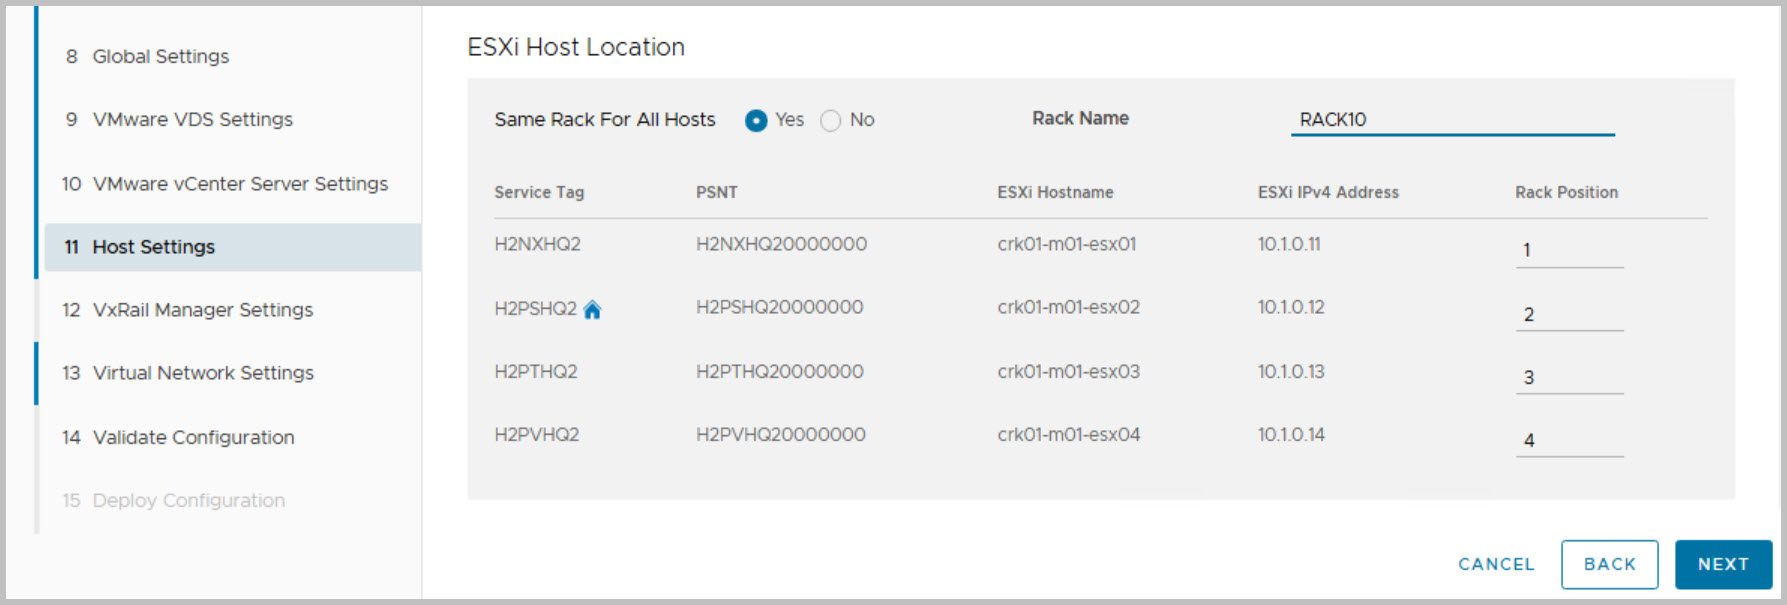
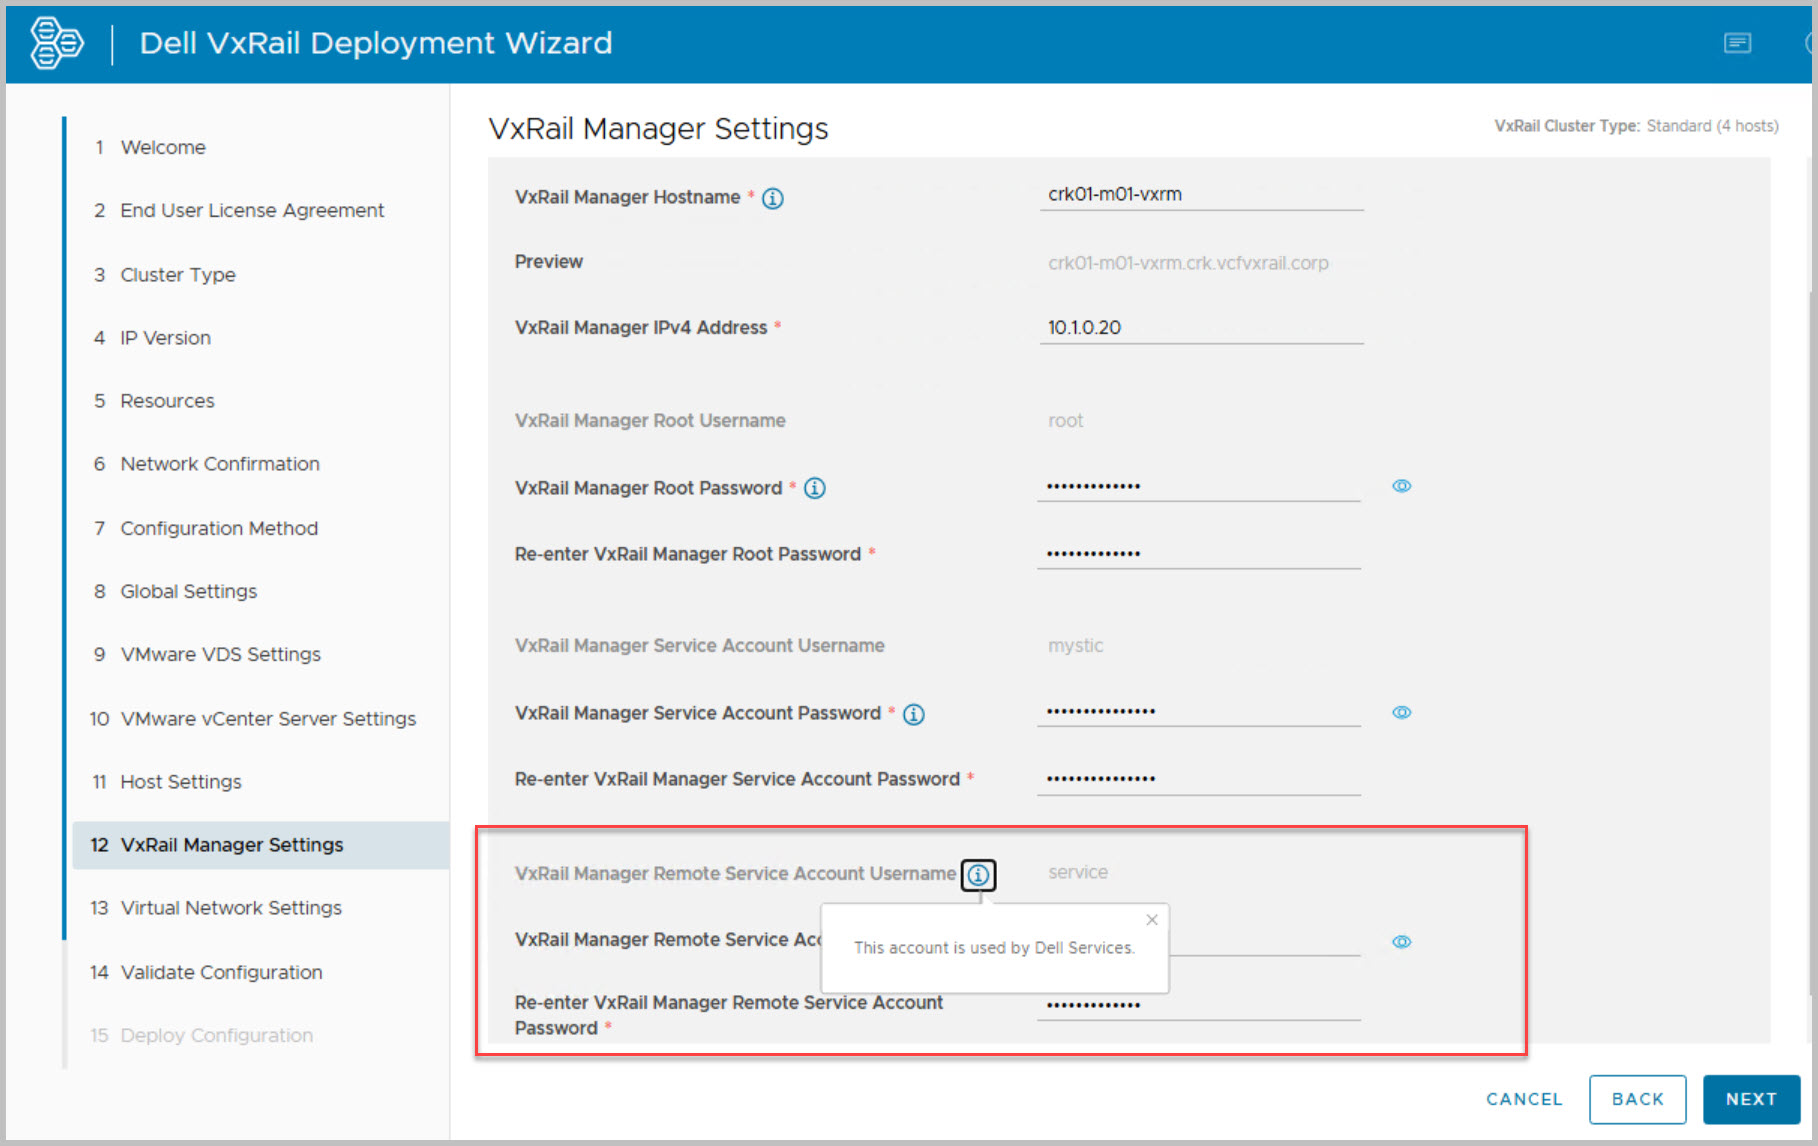
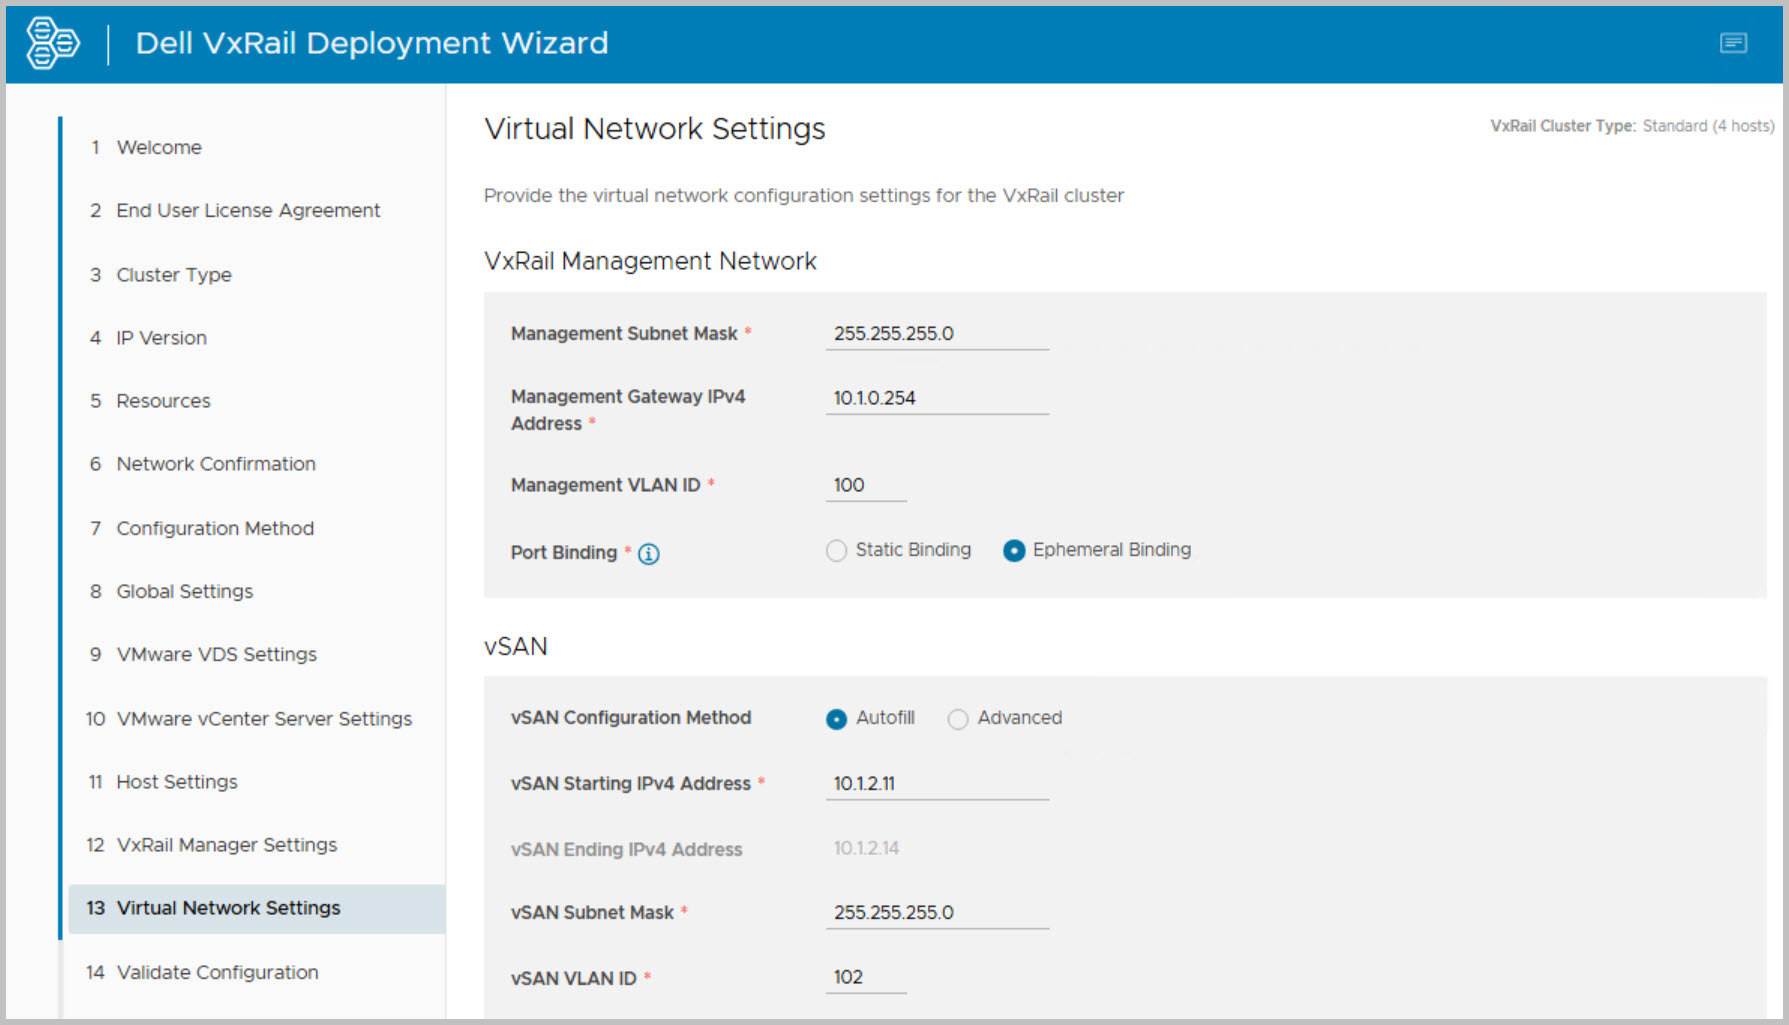
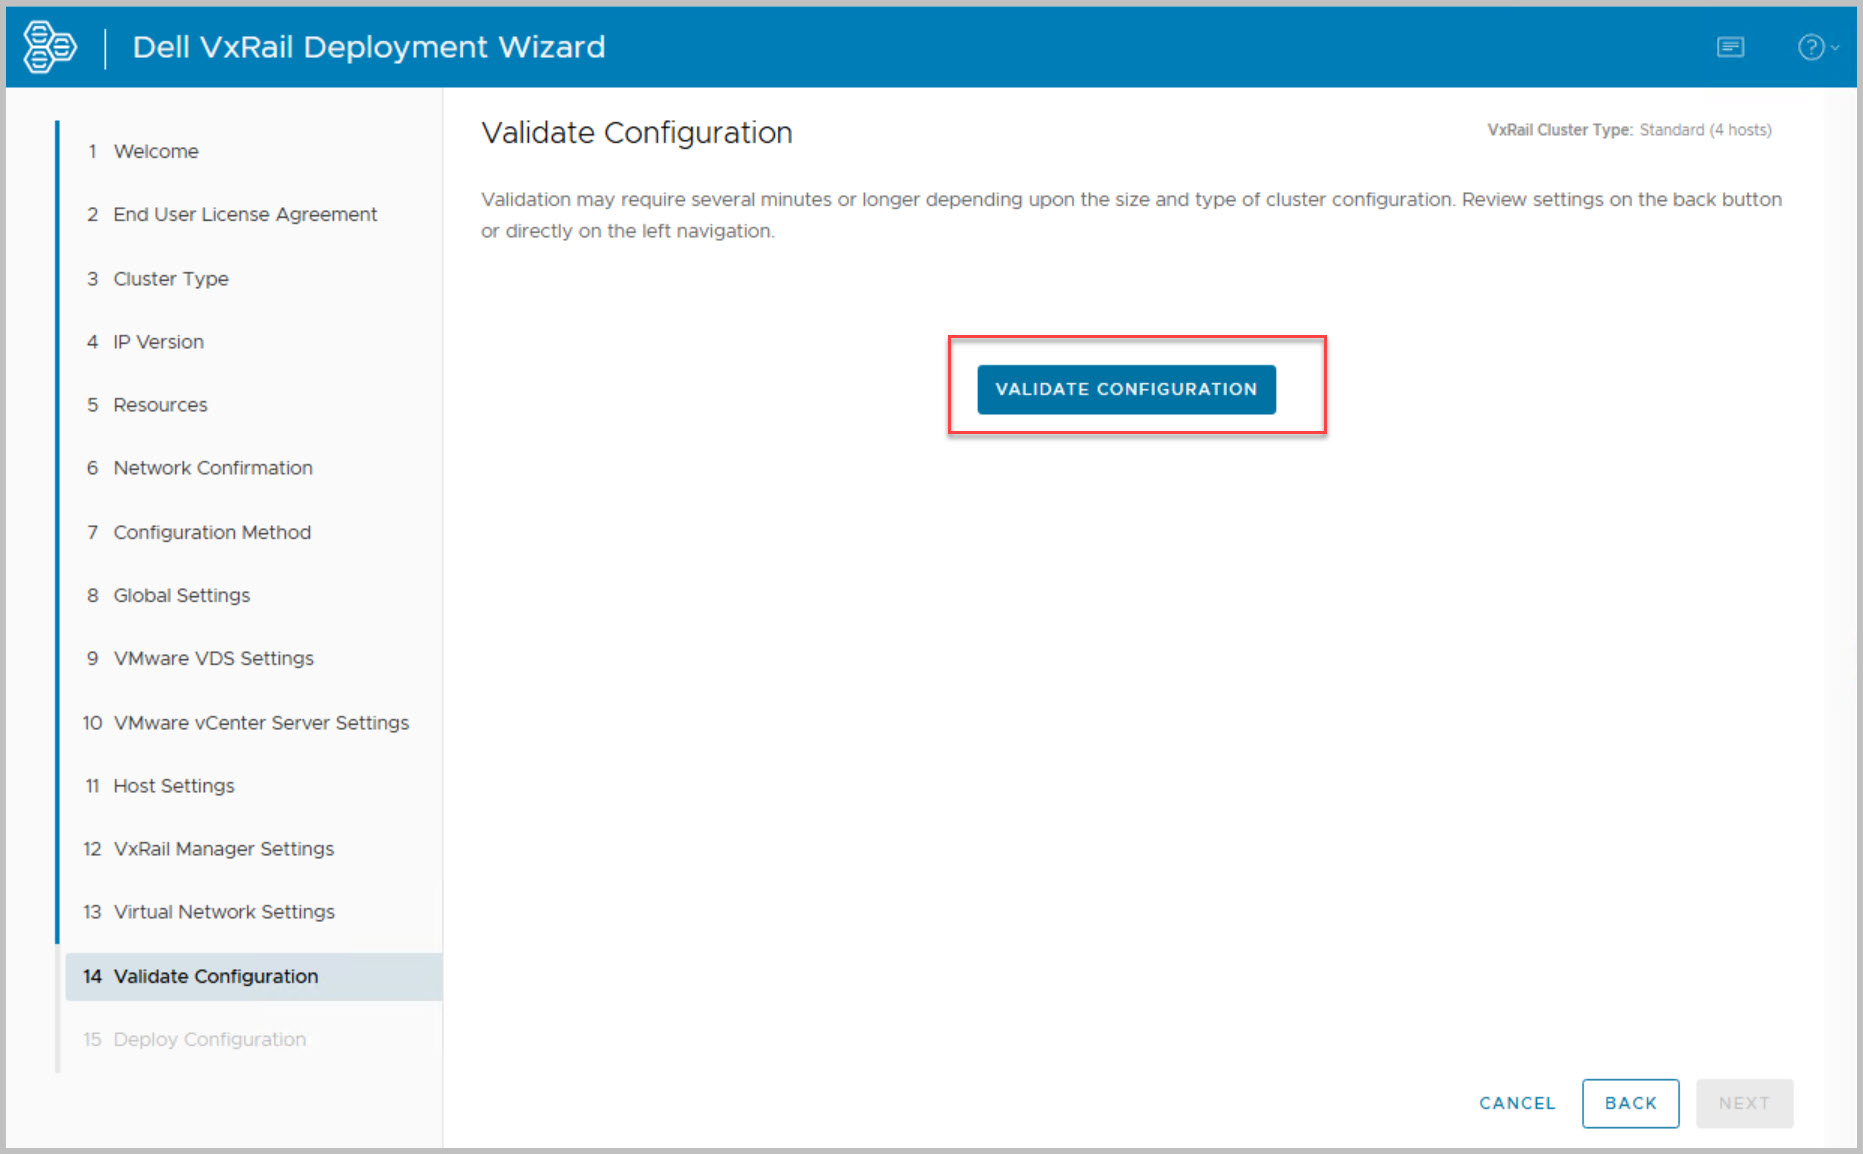
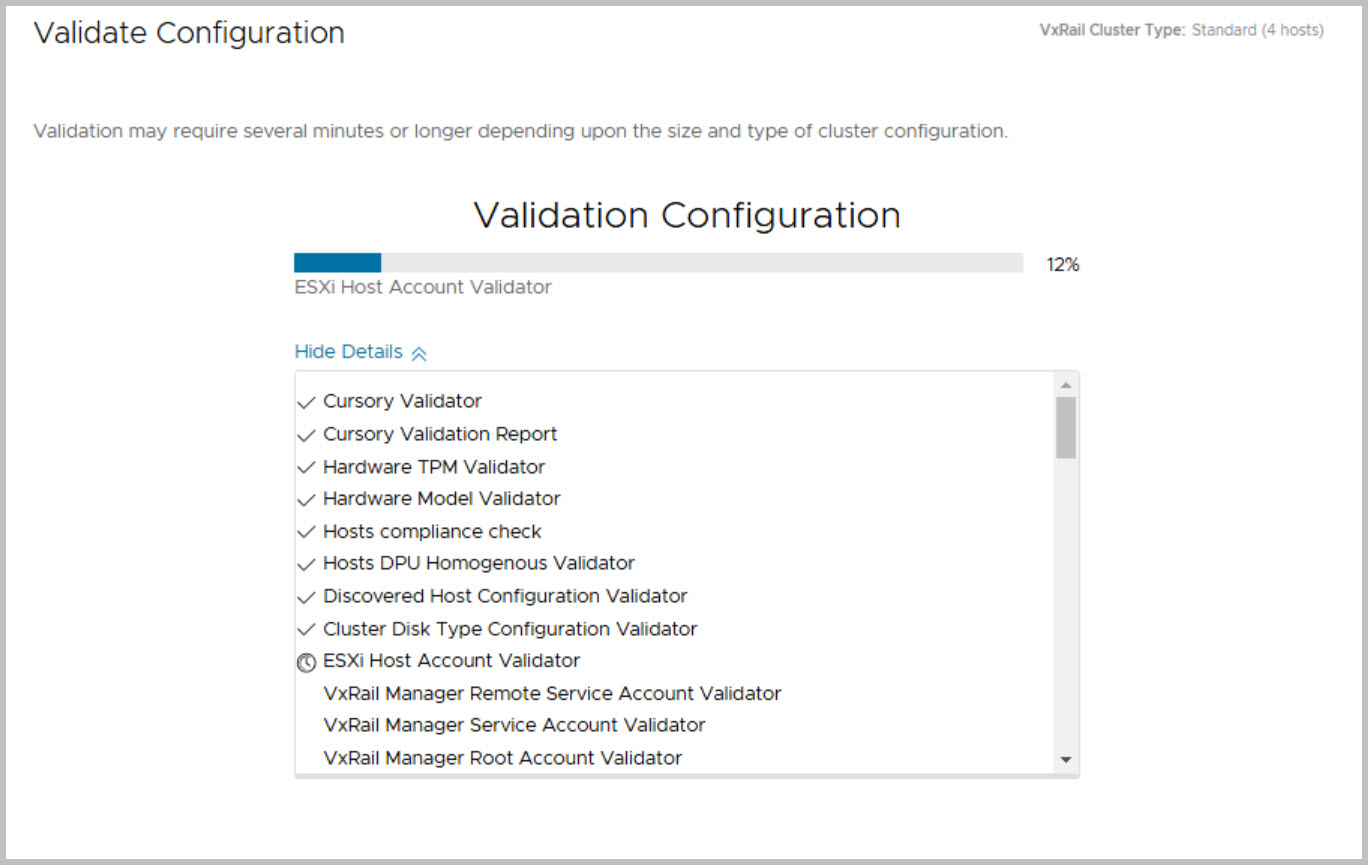
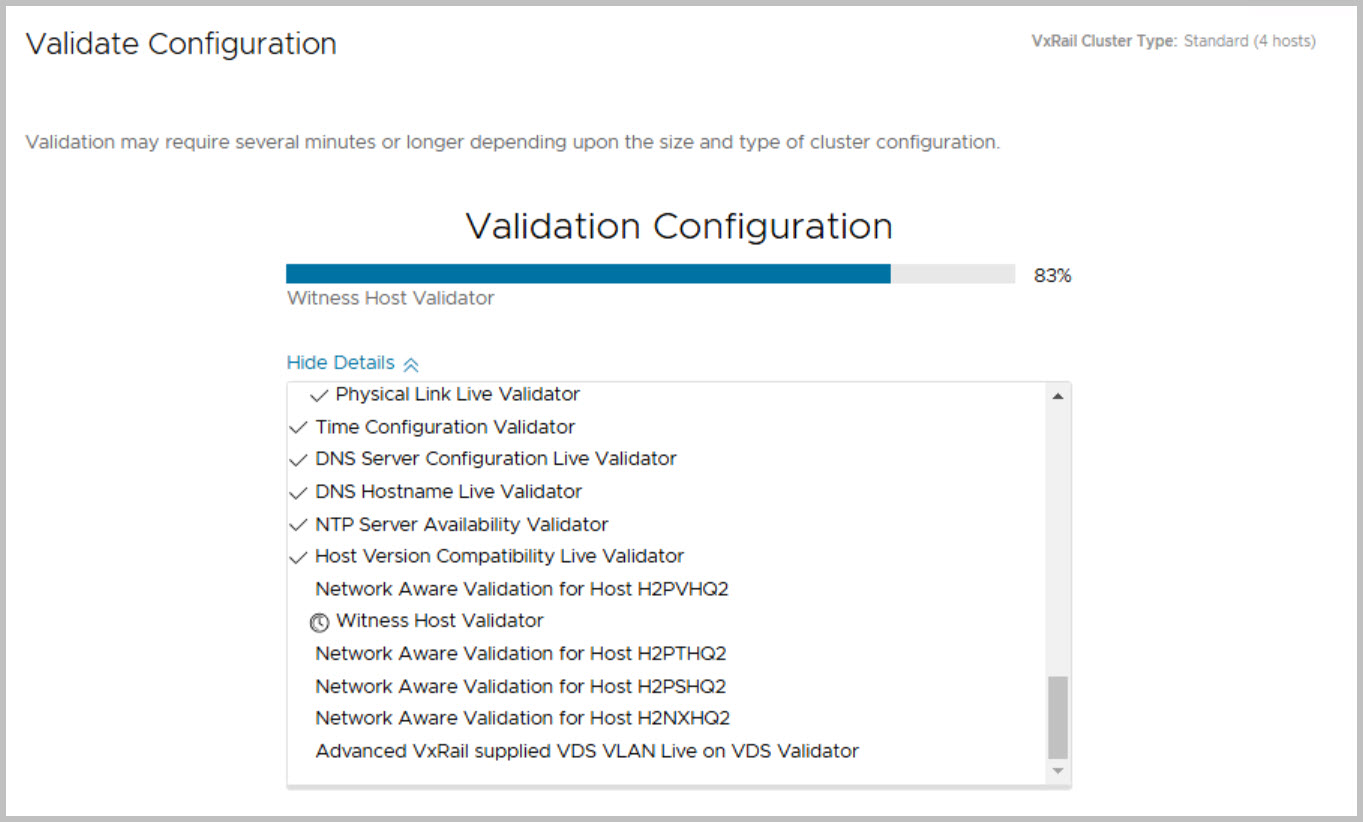
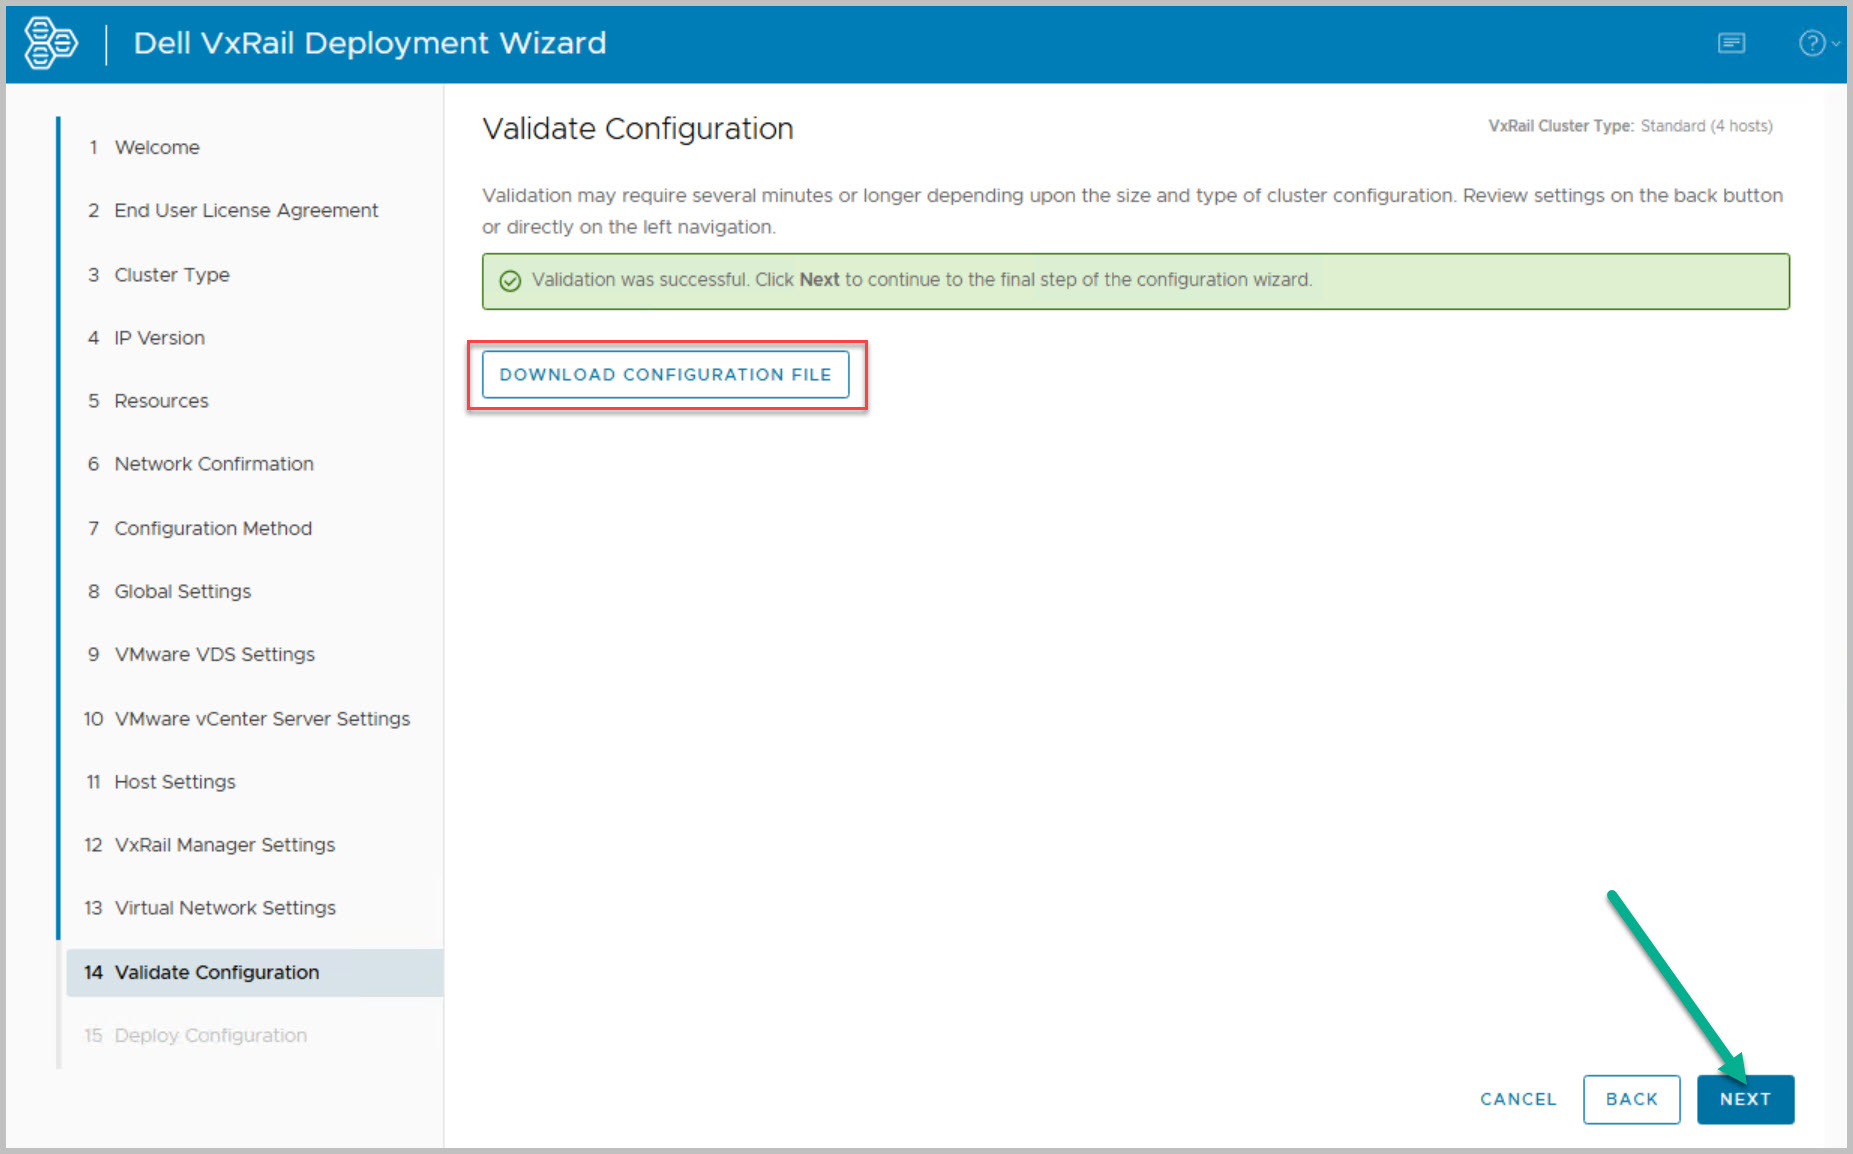
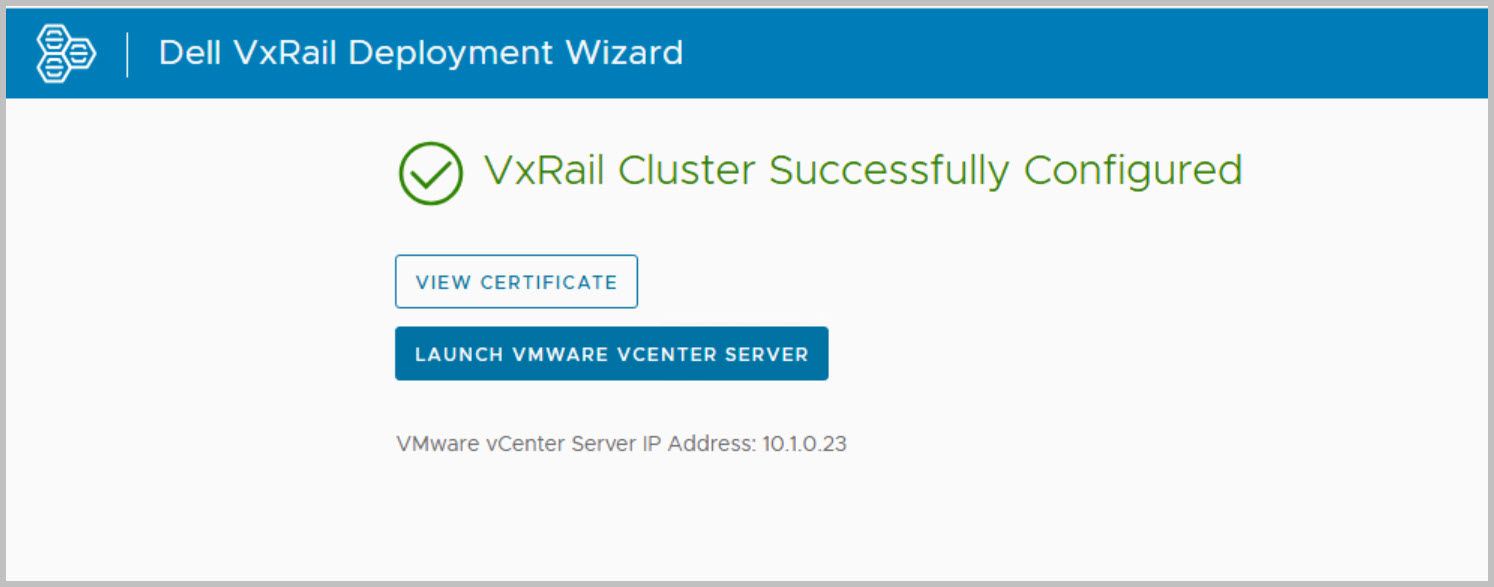
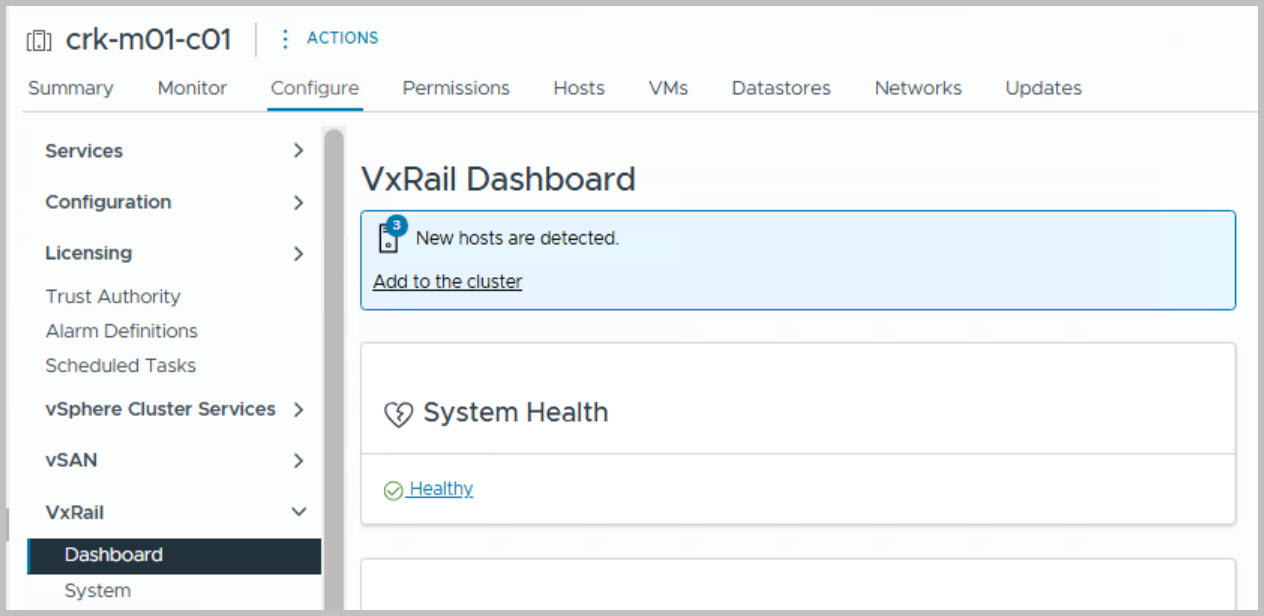
The VxRail deployment process for the Management Cluster closely resembles the standard VxRail setup, where an embedded vCenter is initially deployed. Previously, externalizing the vCenter required manual intervention through the VxRail Manager plugin in the vCenter HTML client. However, this step is now fully automated as part of the Cloud Builder bring-up process. Additionally, changing the Management port group to an Ephemeral port type after the VxRail deployment is no longer necessary. This configuration can now be selected during the VxRail deployment itself, as demonstrated in the following walkthrough. Furthermore, the SSH service on each ESXi host is disabled by default as part of the deployment process.
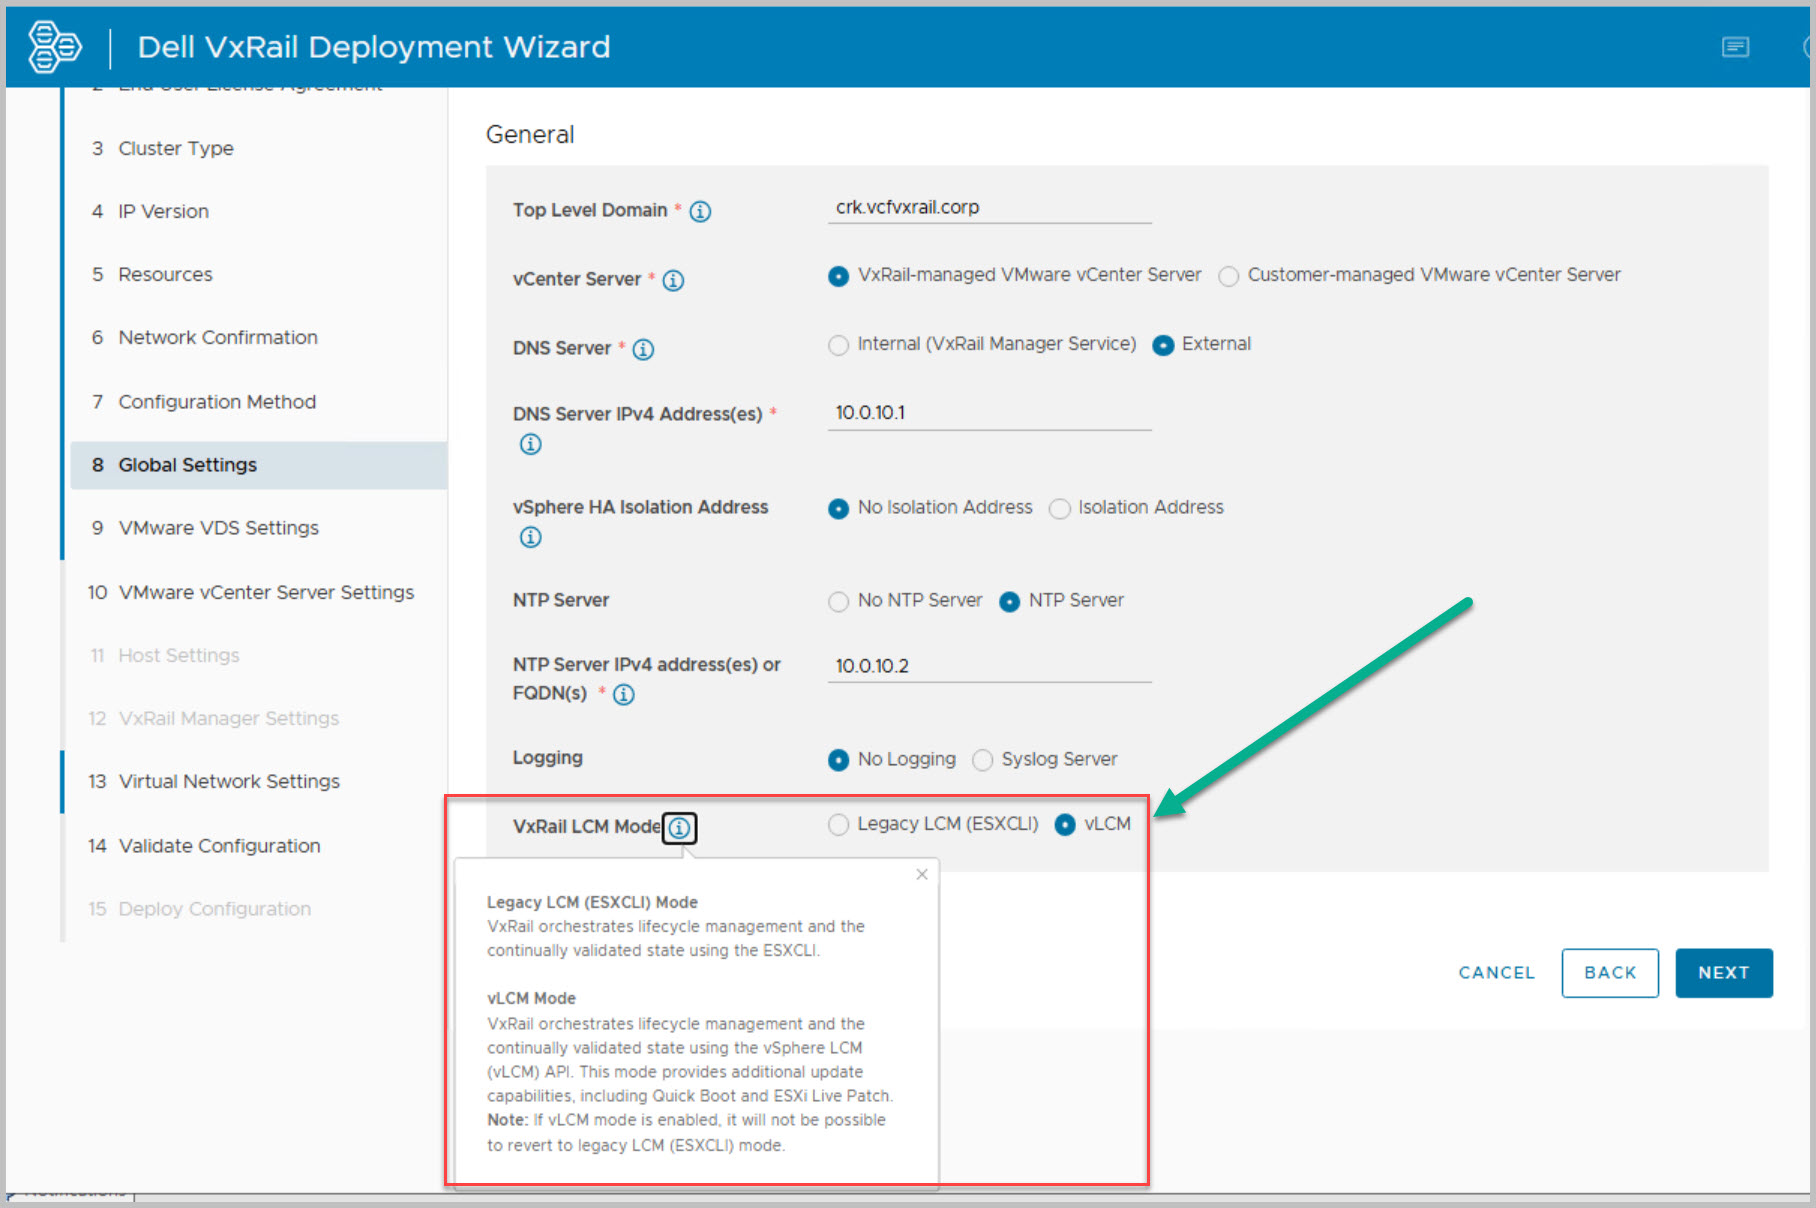
Starting with VxRail version 8.0.300, users can choose their preferred Lifecycle Management (LCM) mode—either Legacy LCM or vLCM—during the initial setup. In this example I have chosen to enable vLCM in the Mgmt WLD. vLCM can be enabled on both OSA & ESA clusters but it is important to note if the management cluster is an ESA cluster then you must enable vLCM.
Key tasks include:
Setting up the VxRail Management Workload Domain (WLD) cluster in vLCM mode.
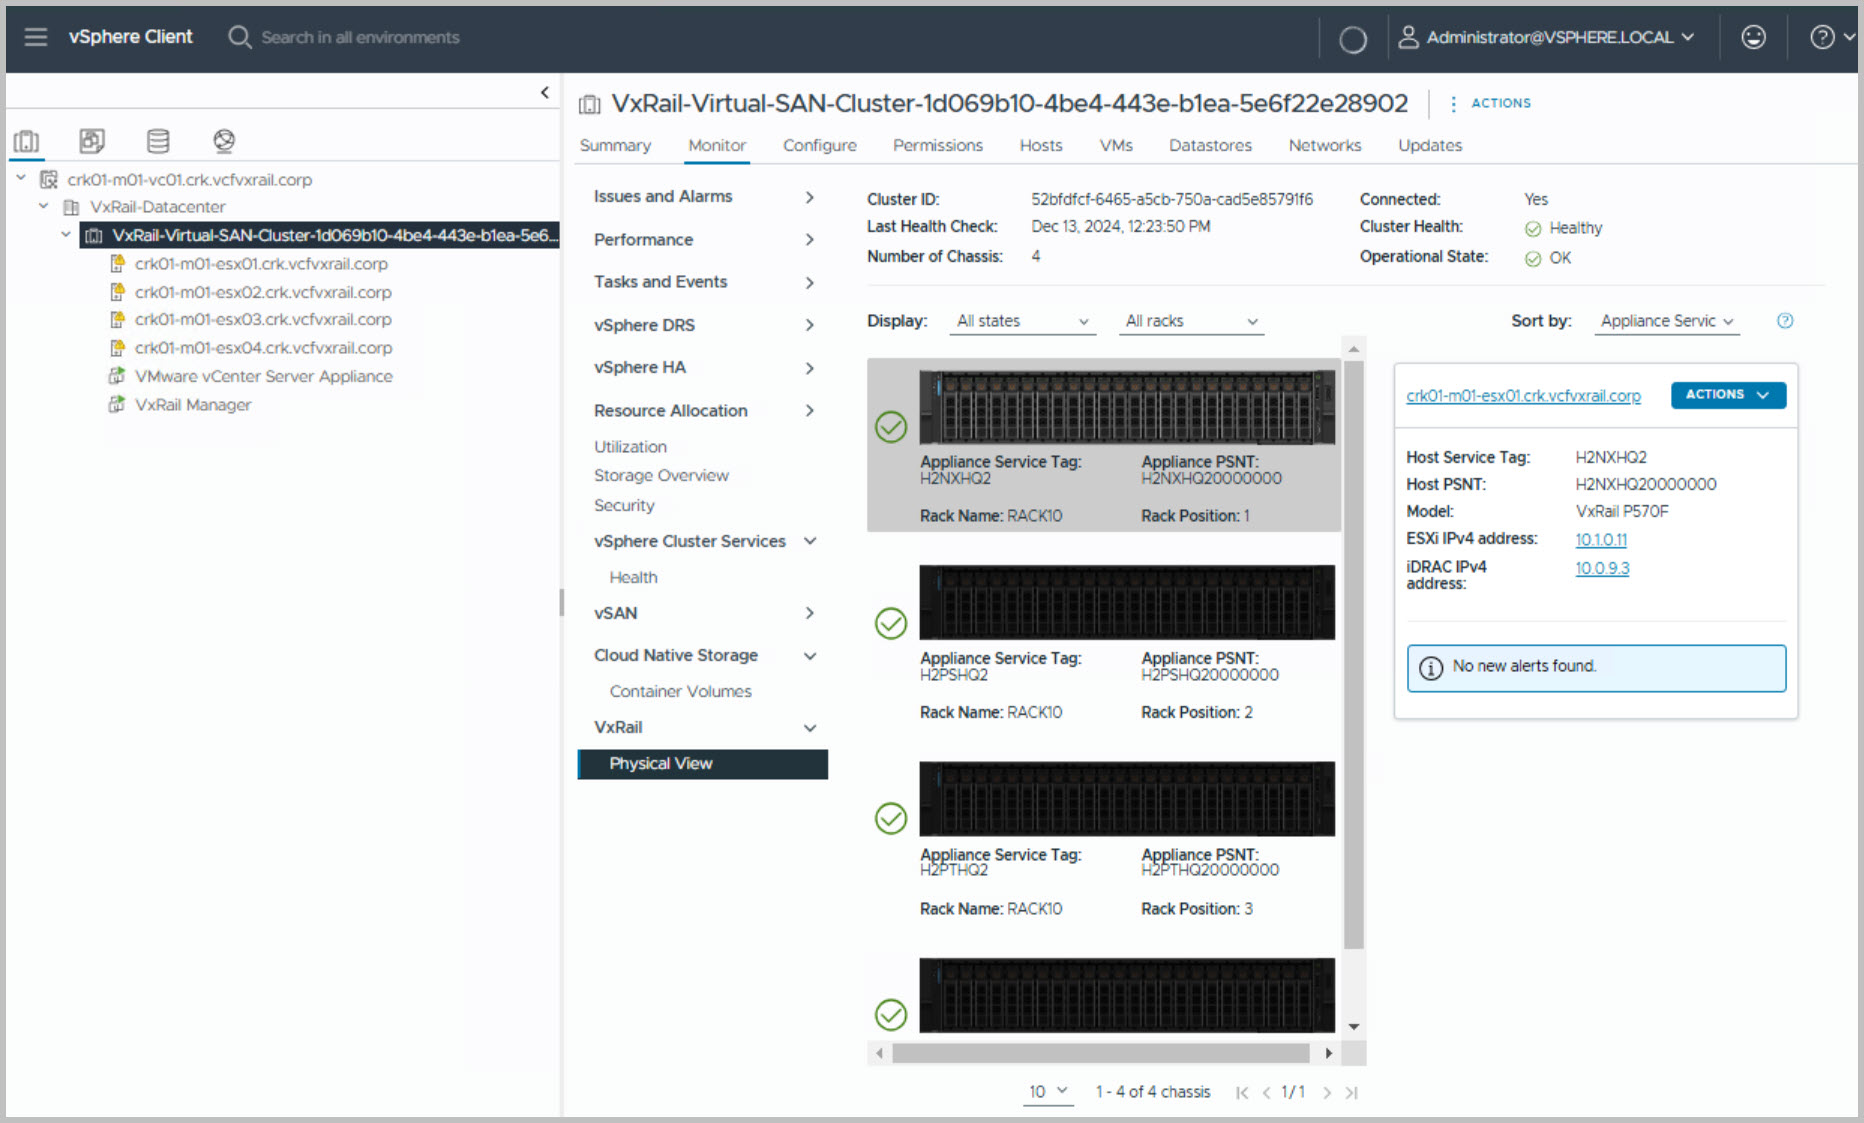
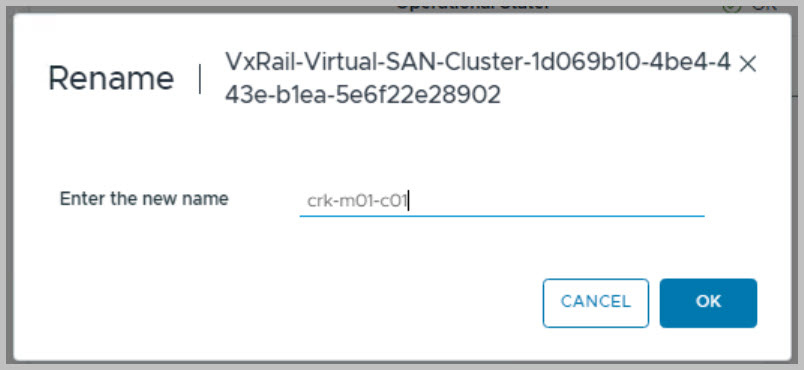
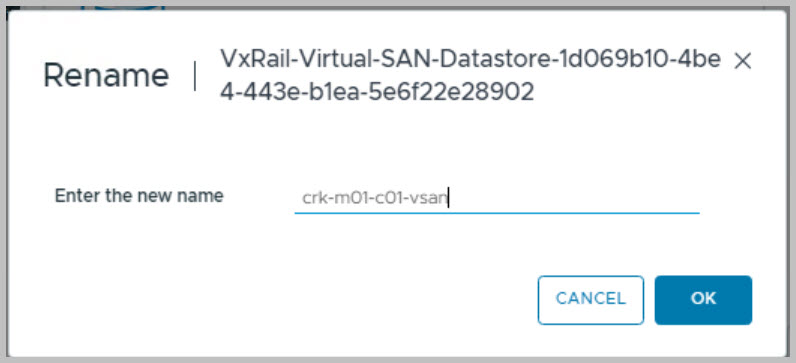
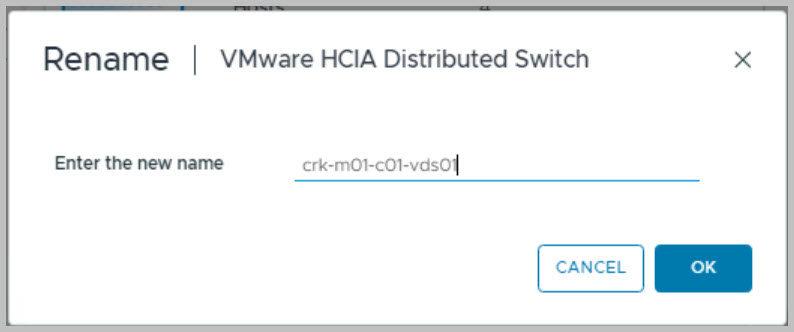
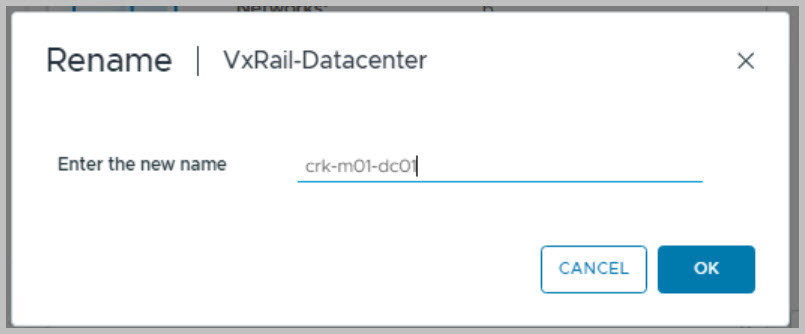
Renaming the Data Center (DC), Cluster, Virtual Distributed Switch (VDS), and vSAN.
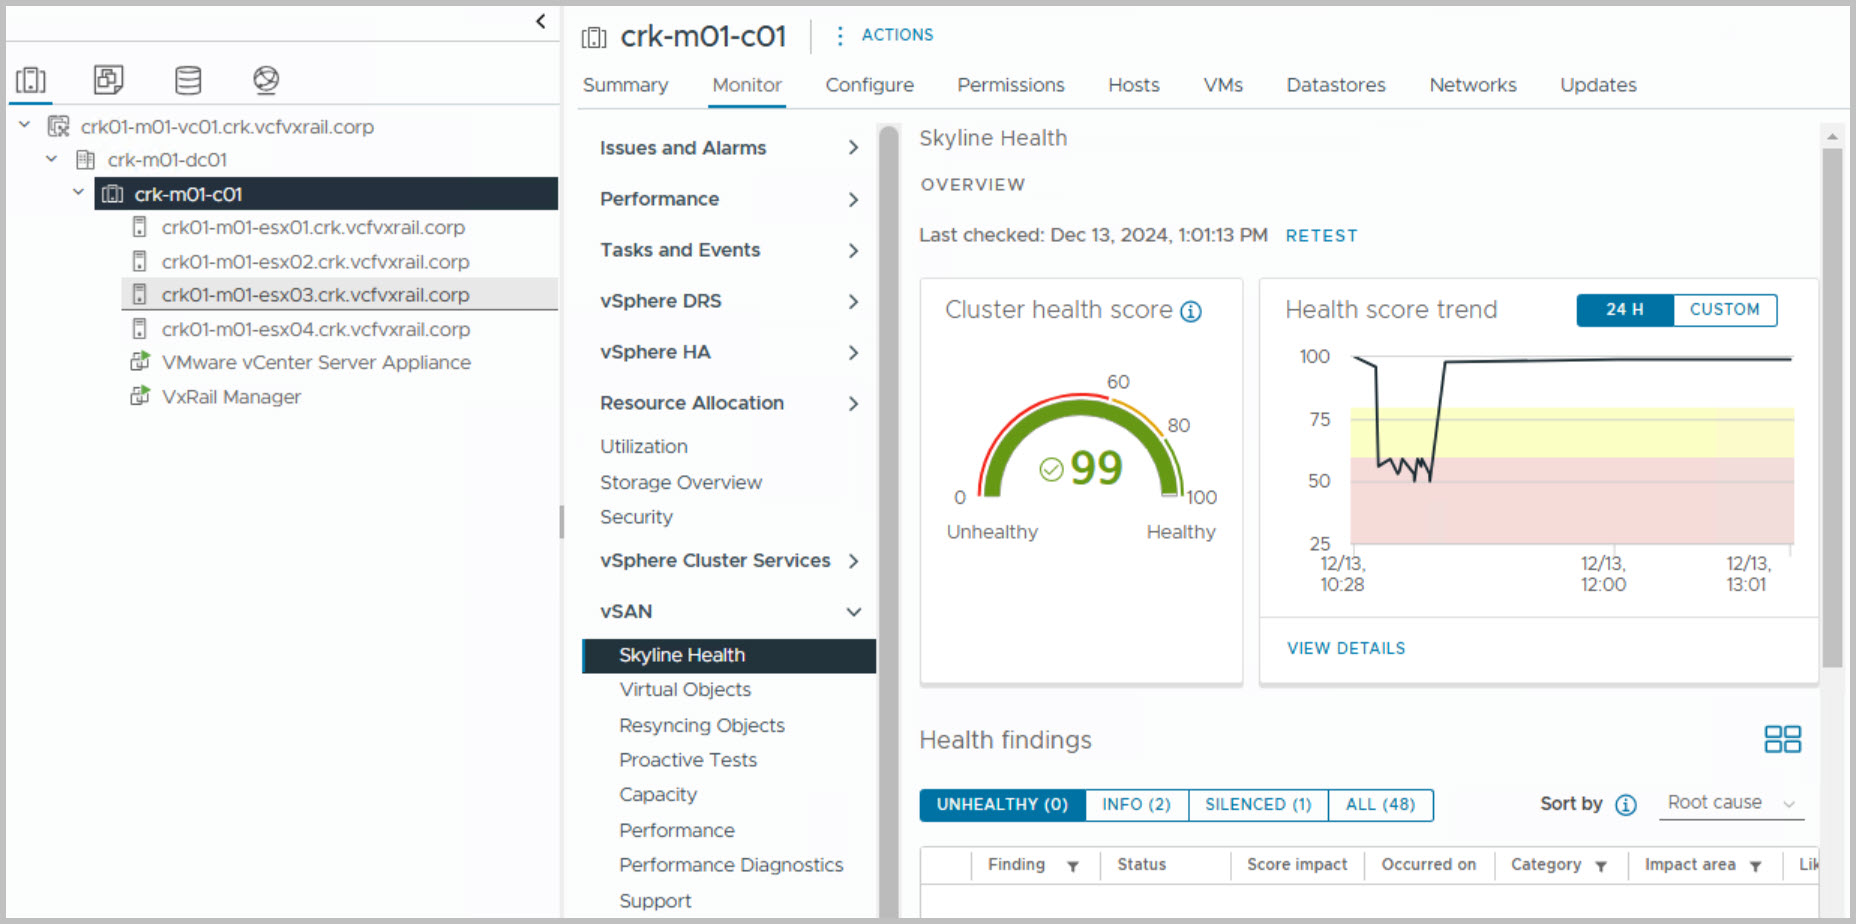
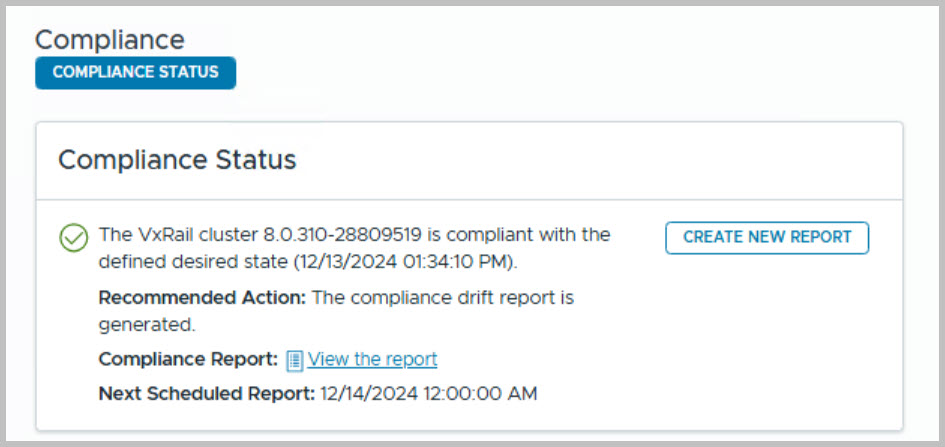
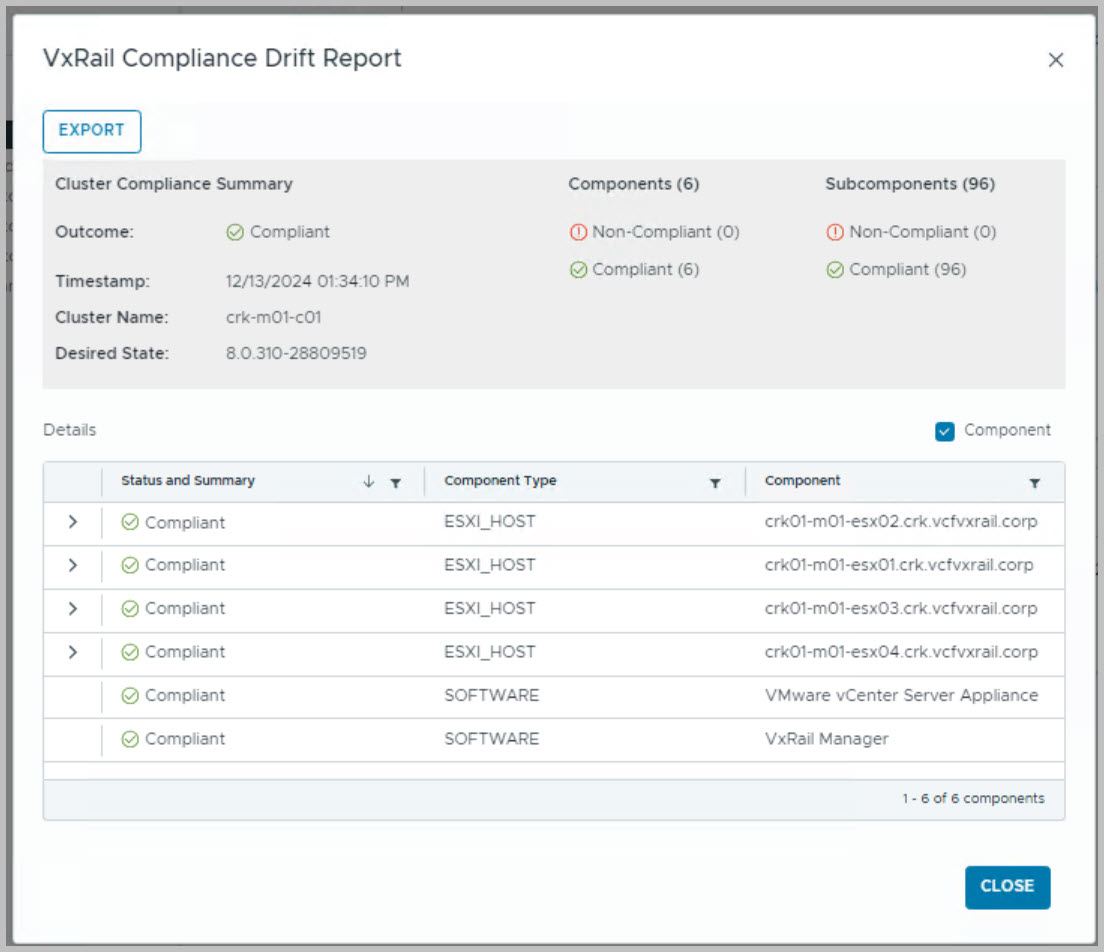
Confirming the health status in the vCenter Server vSphere Web Client, verifying vSAN health, and ensuring no vSAN components are resyncing.
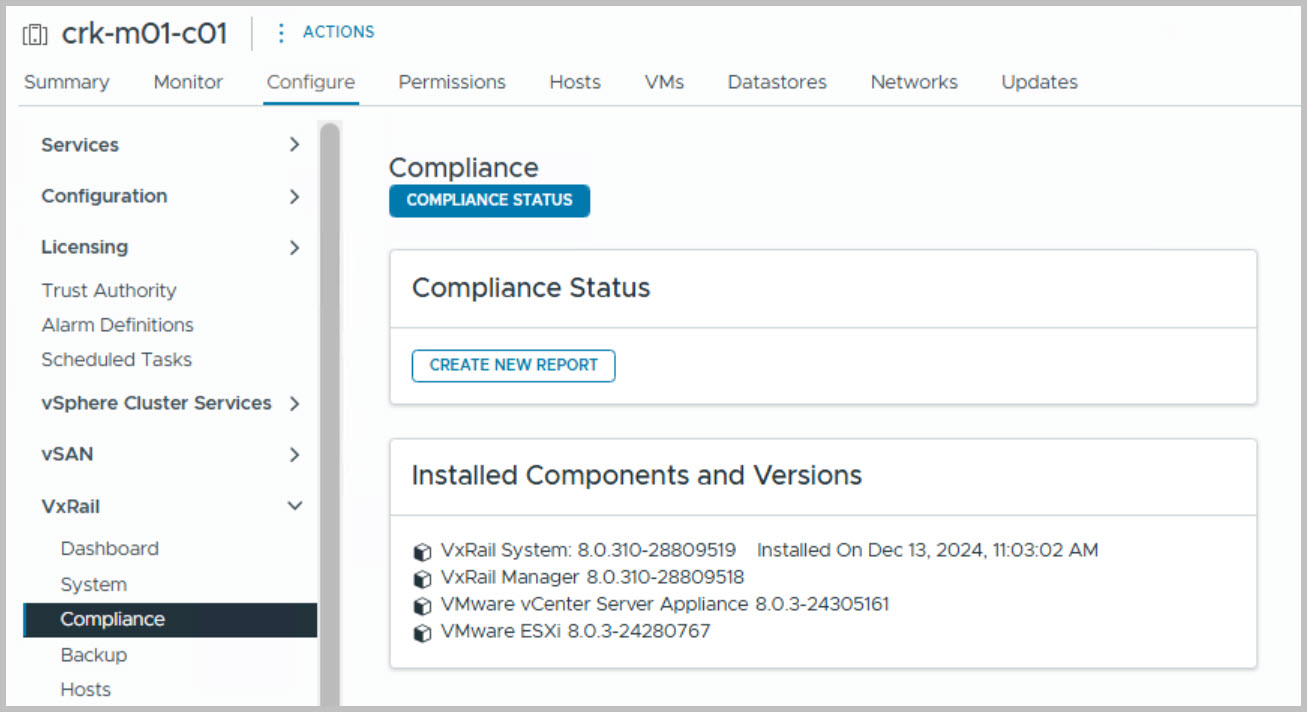
Ensuring the vSAN HCL Database is up to date (as per VMware Knowledge Base).
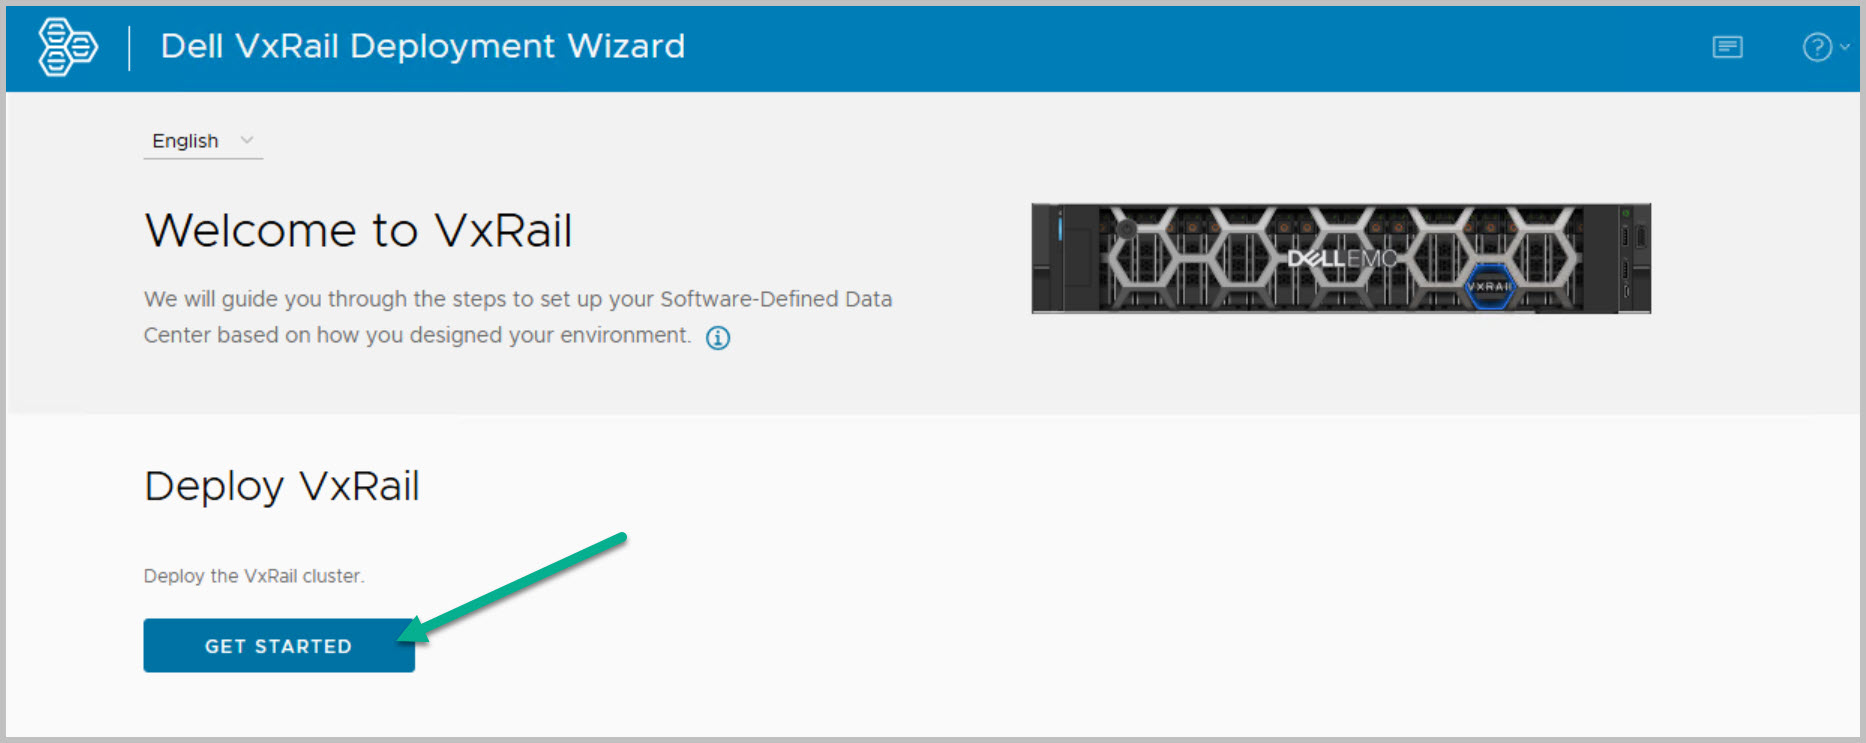
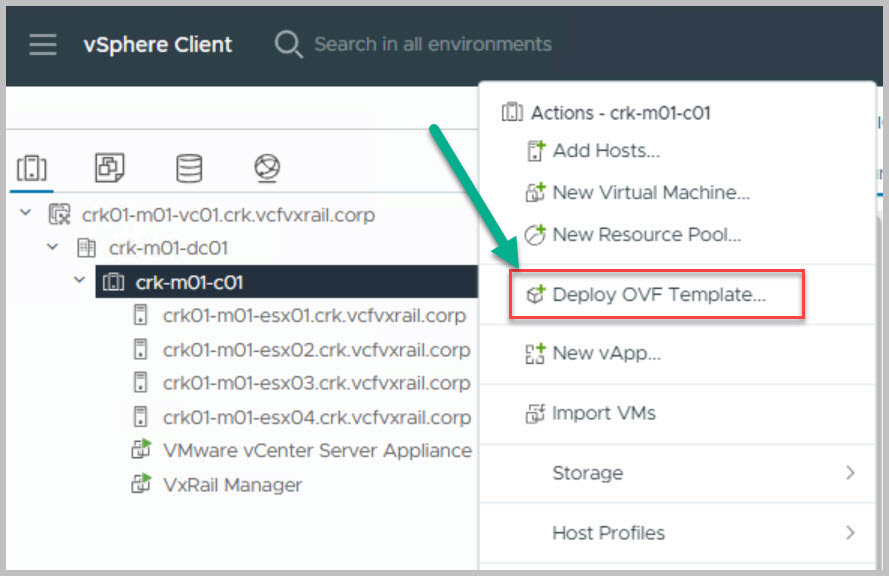
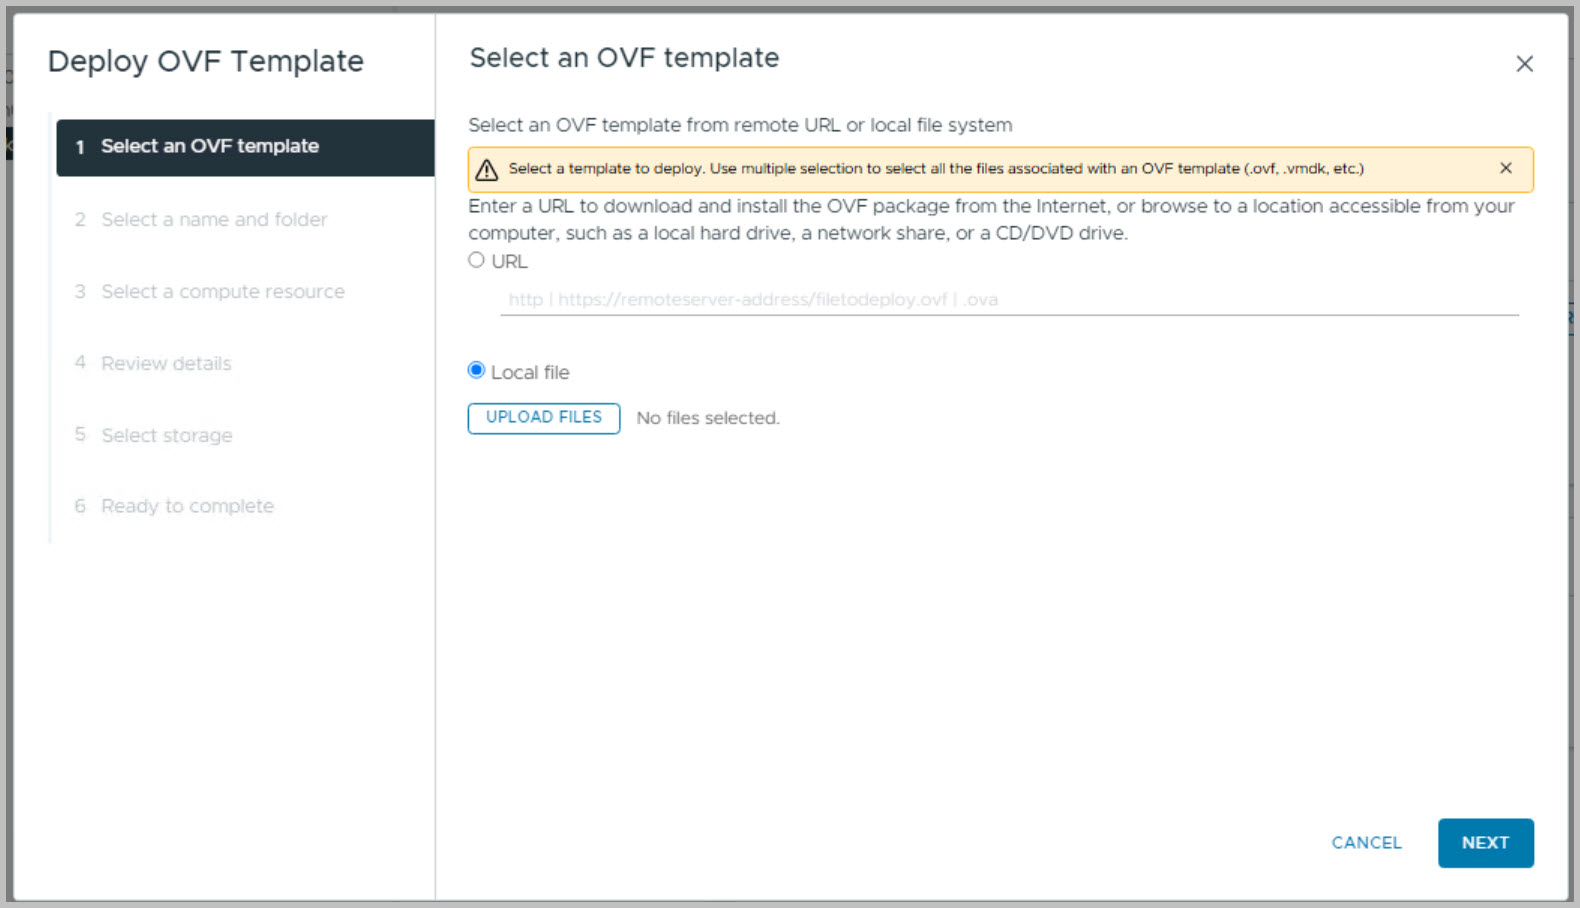
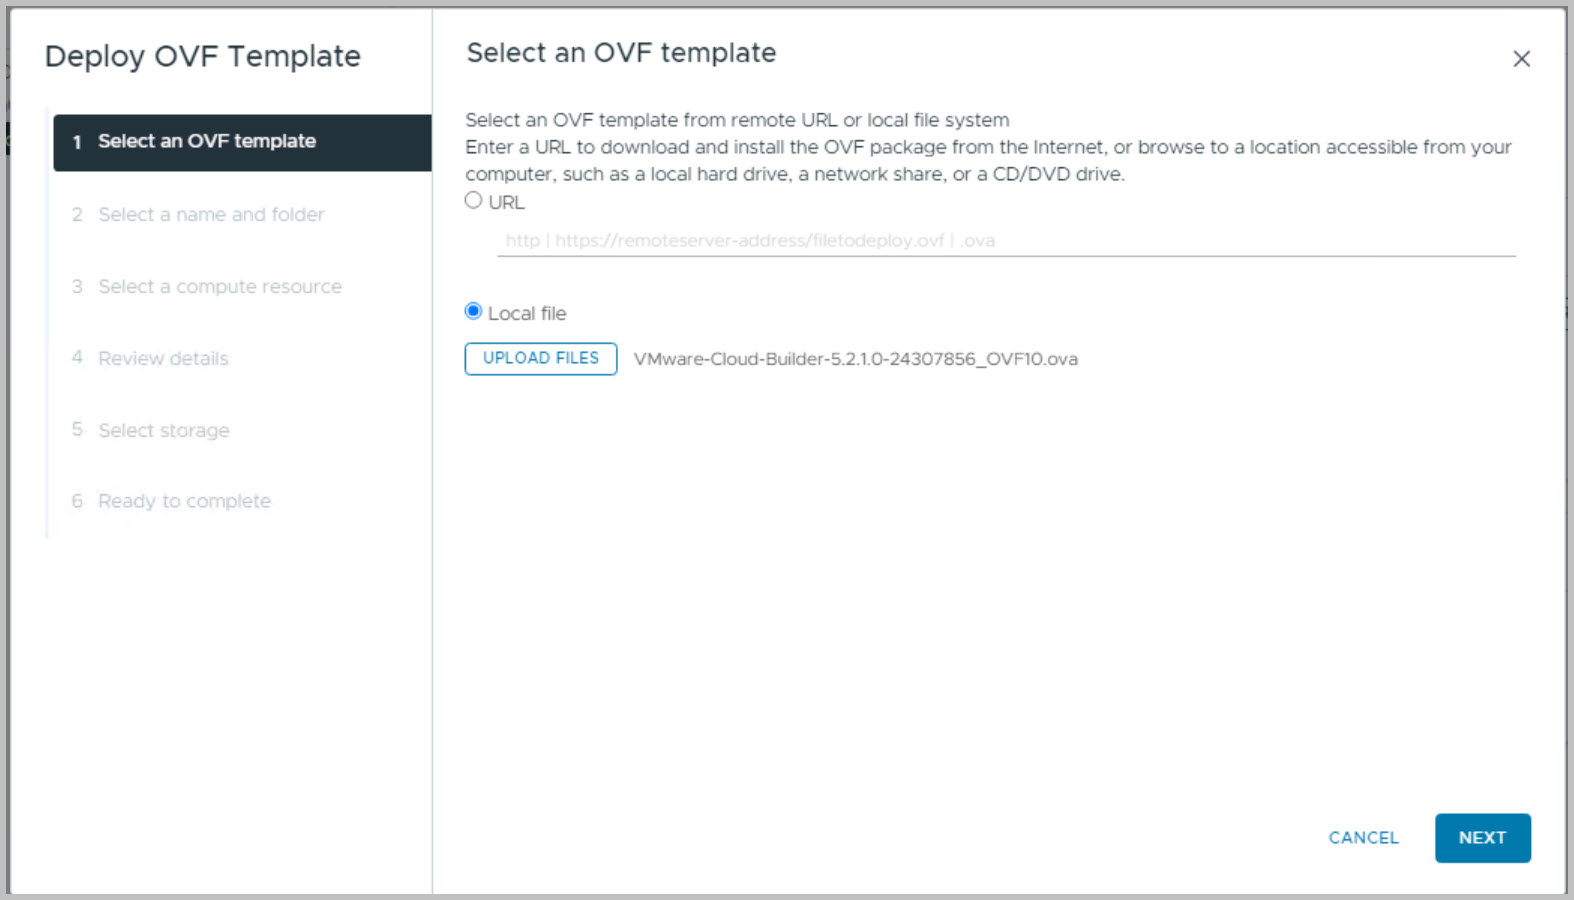
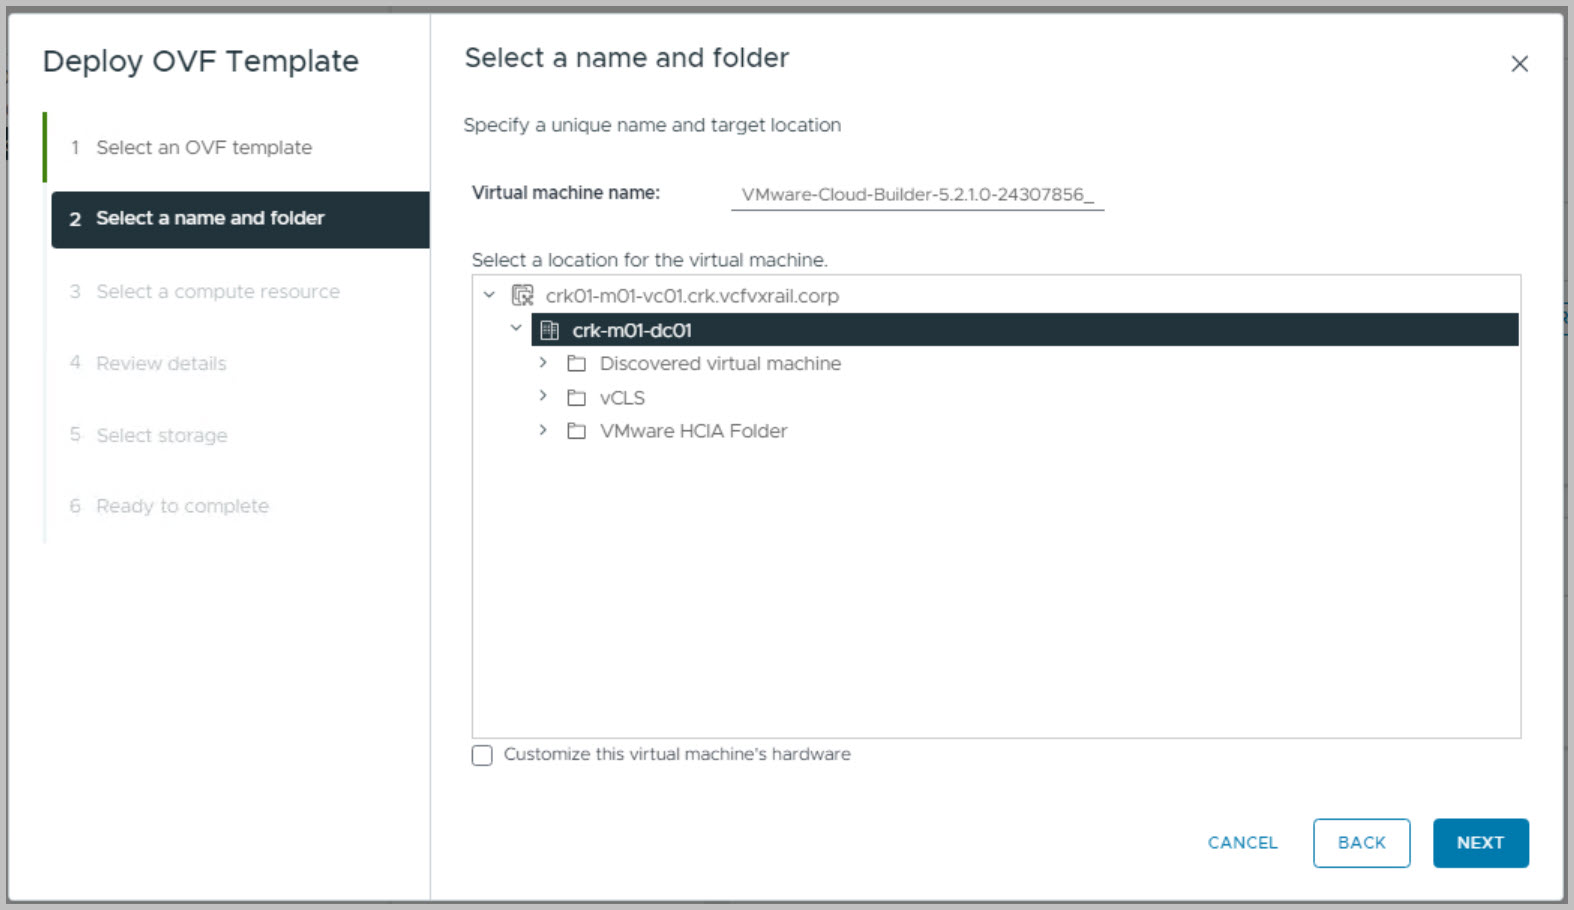
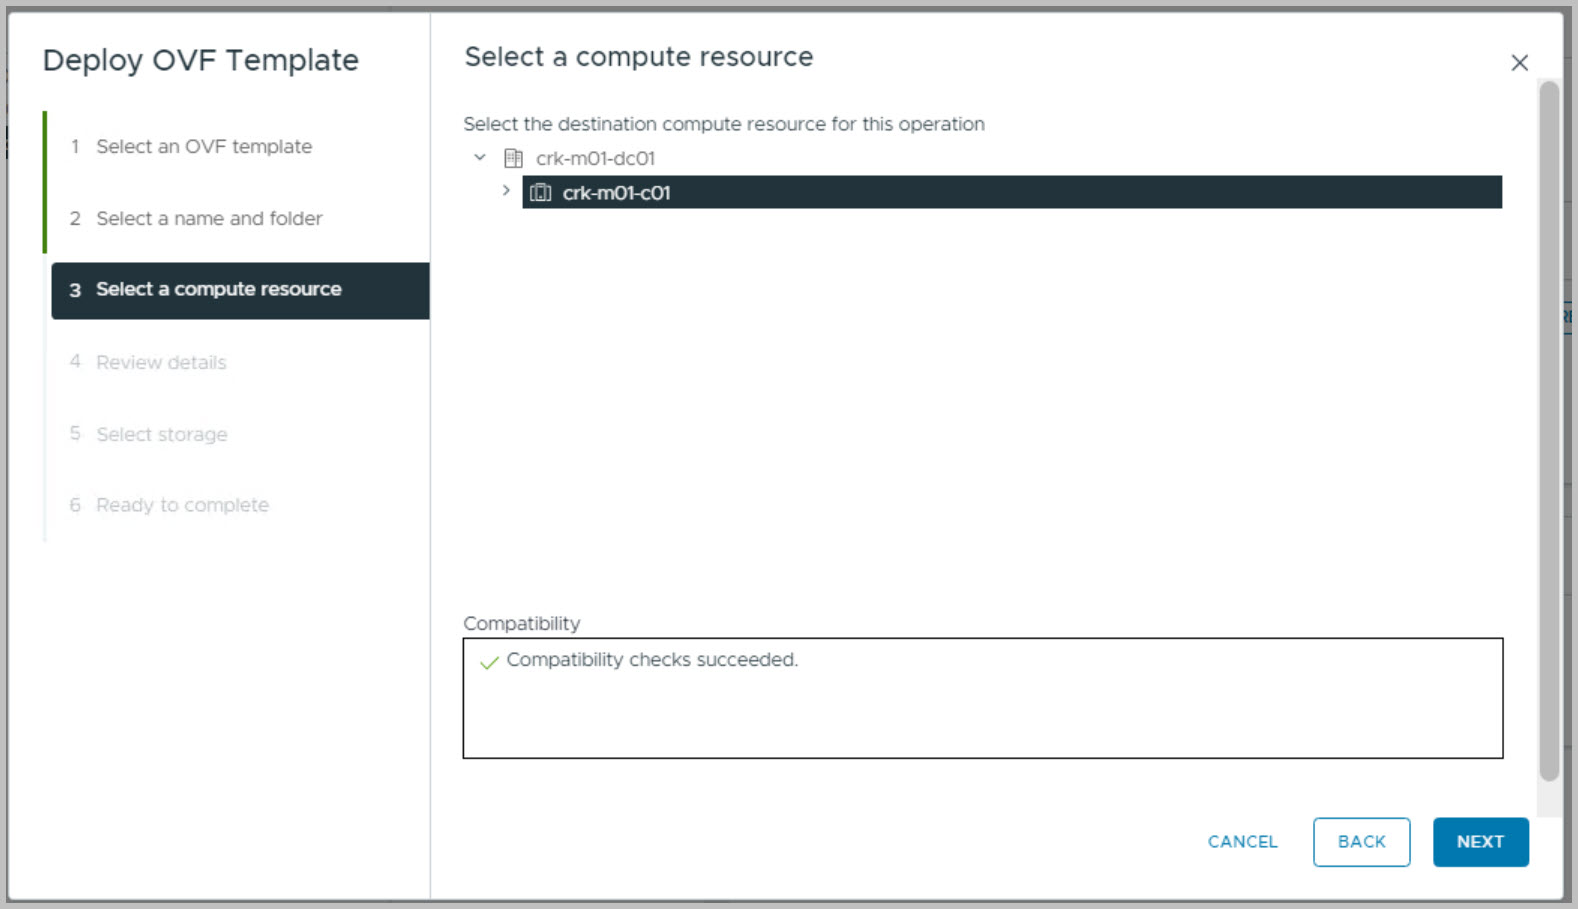
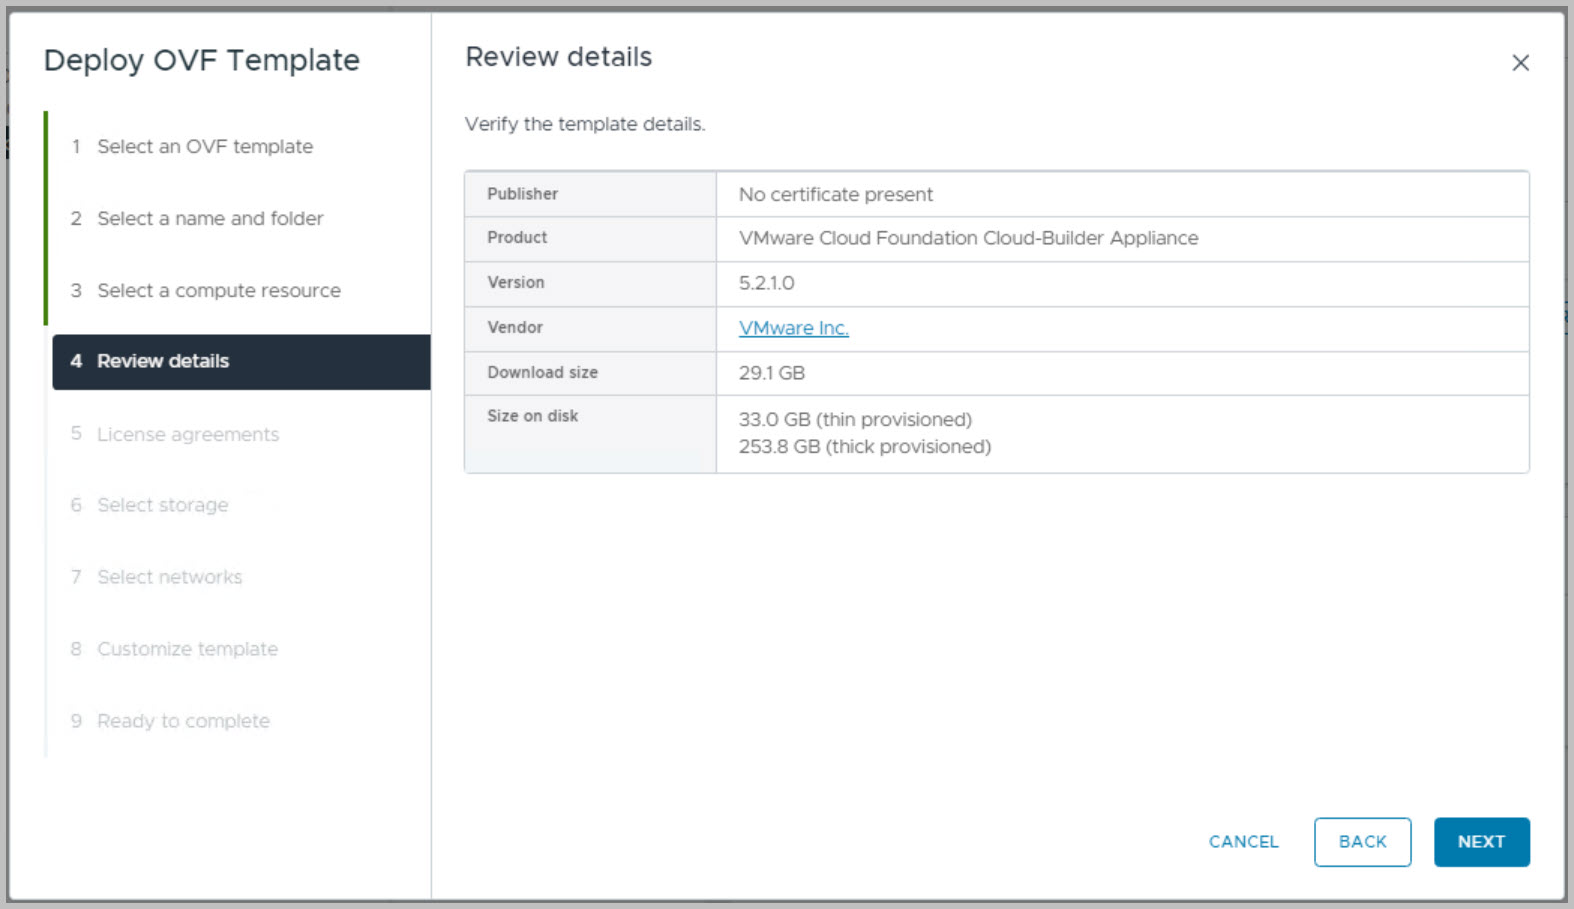
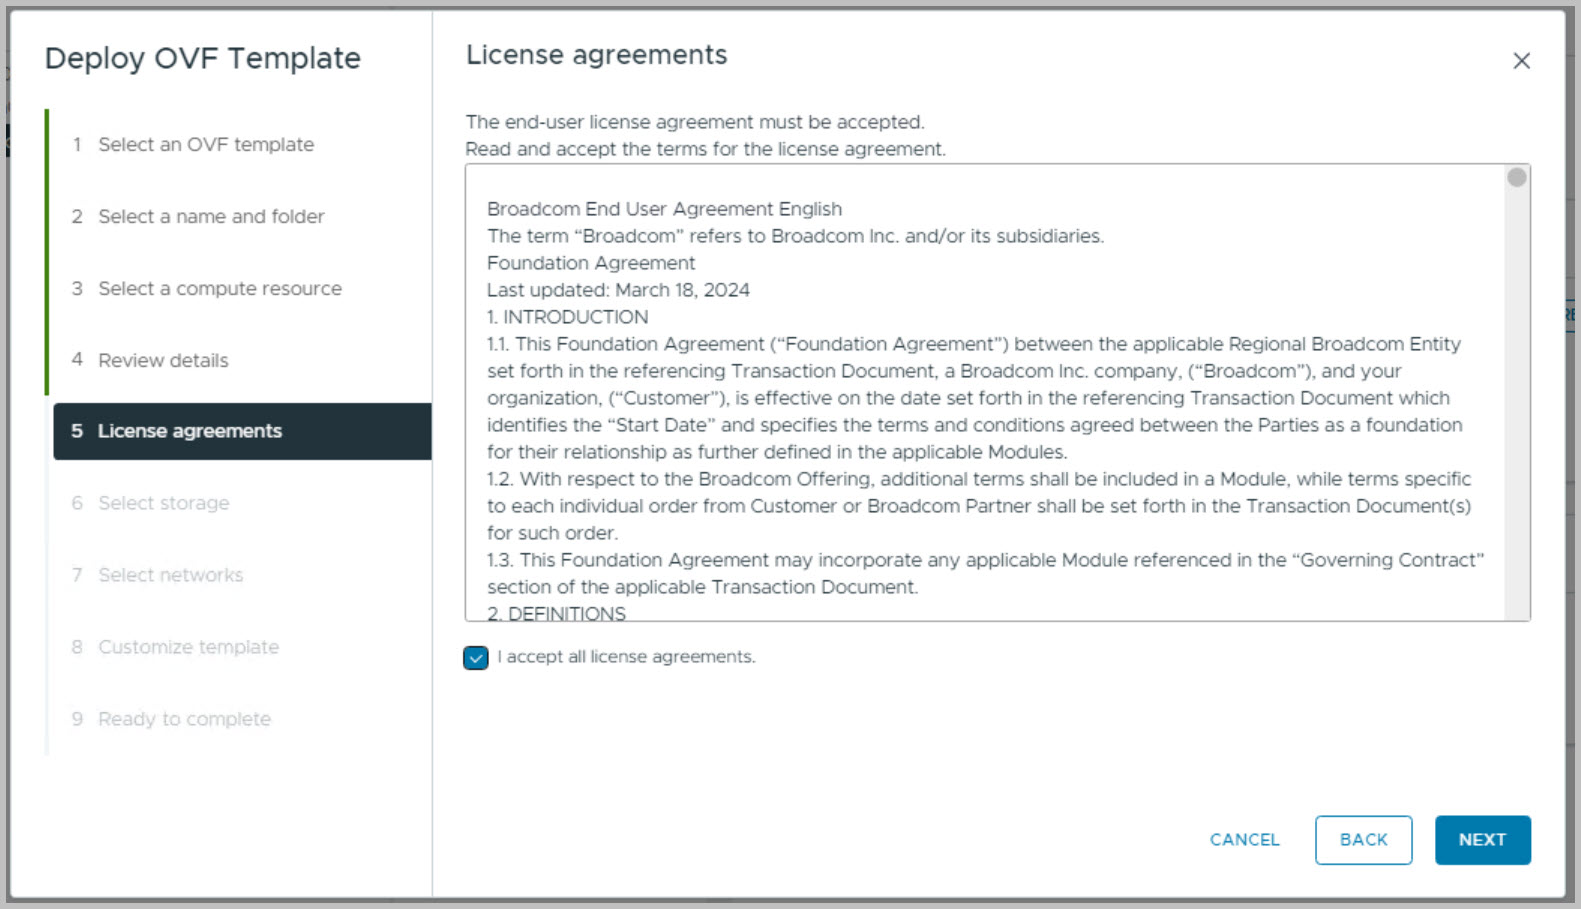
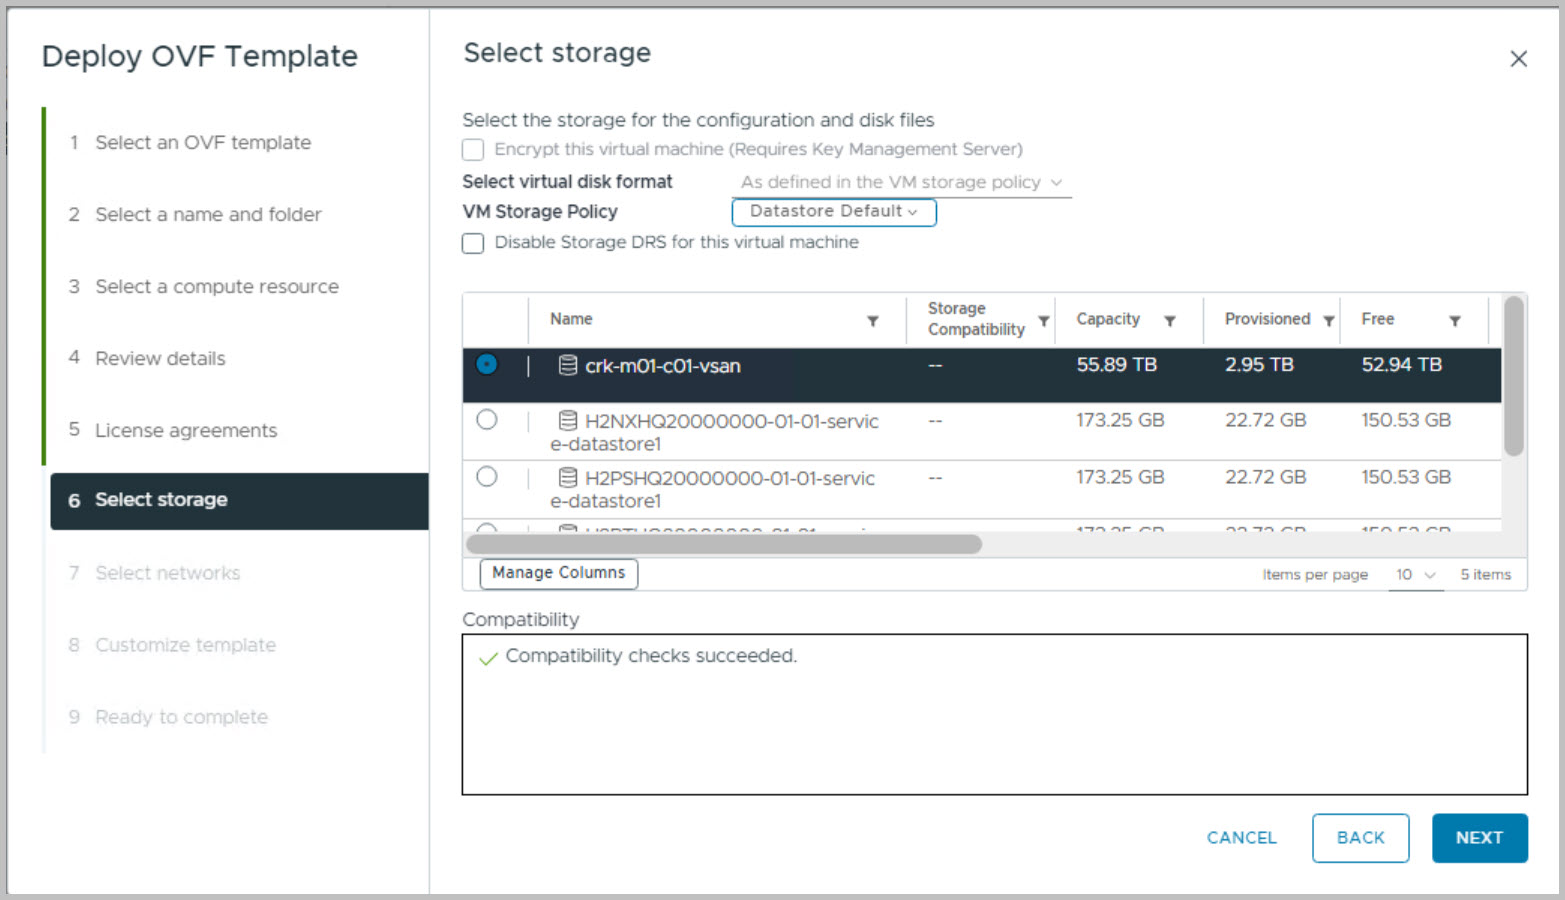
Deploy CloudBuilder
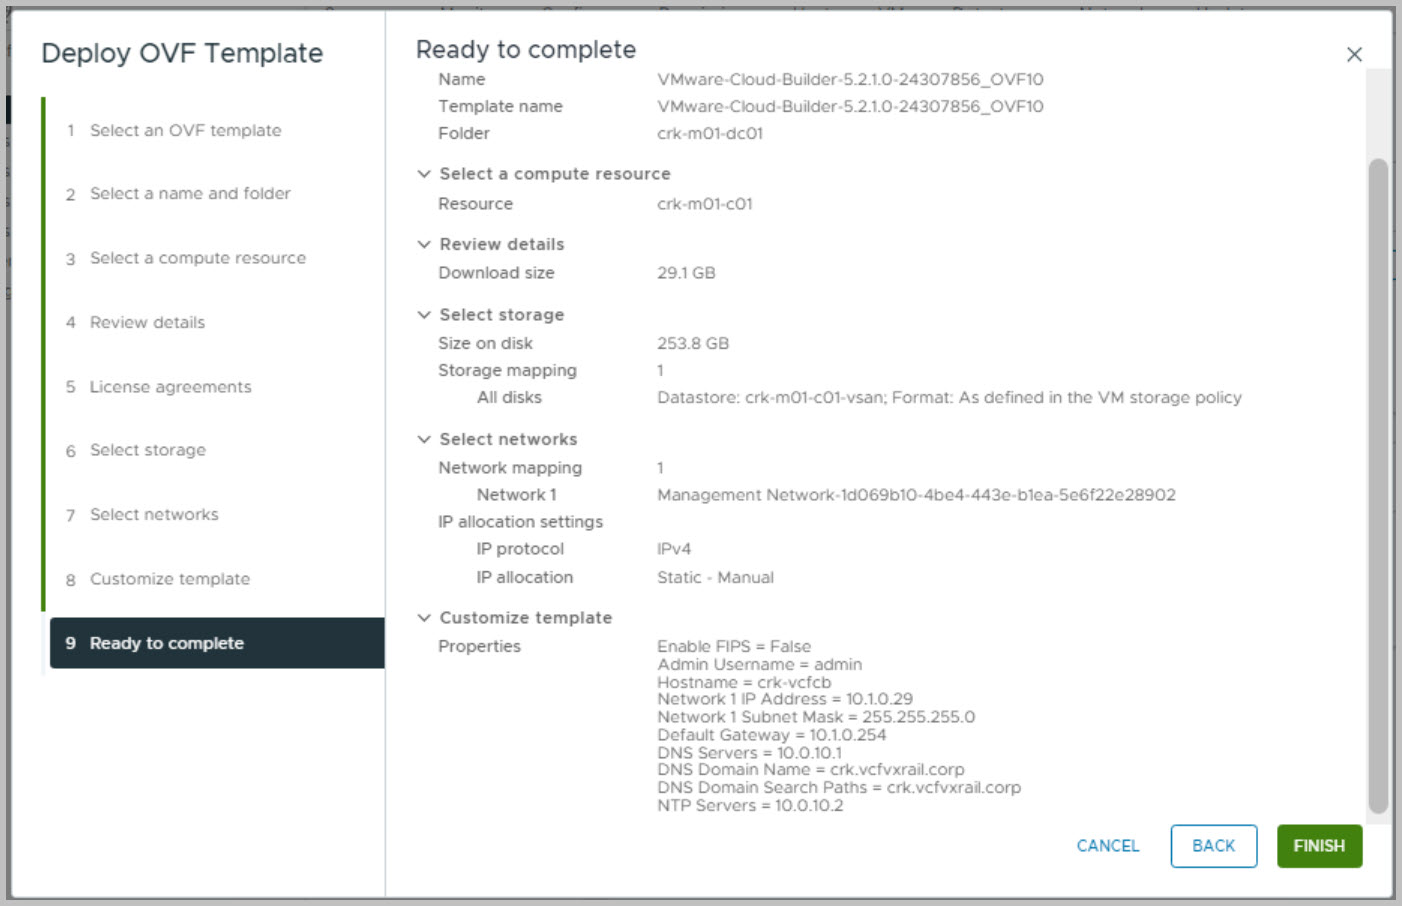
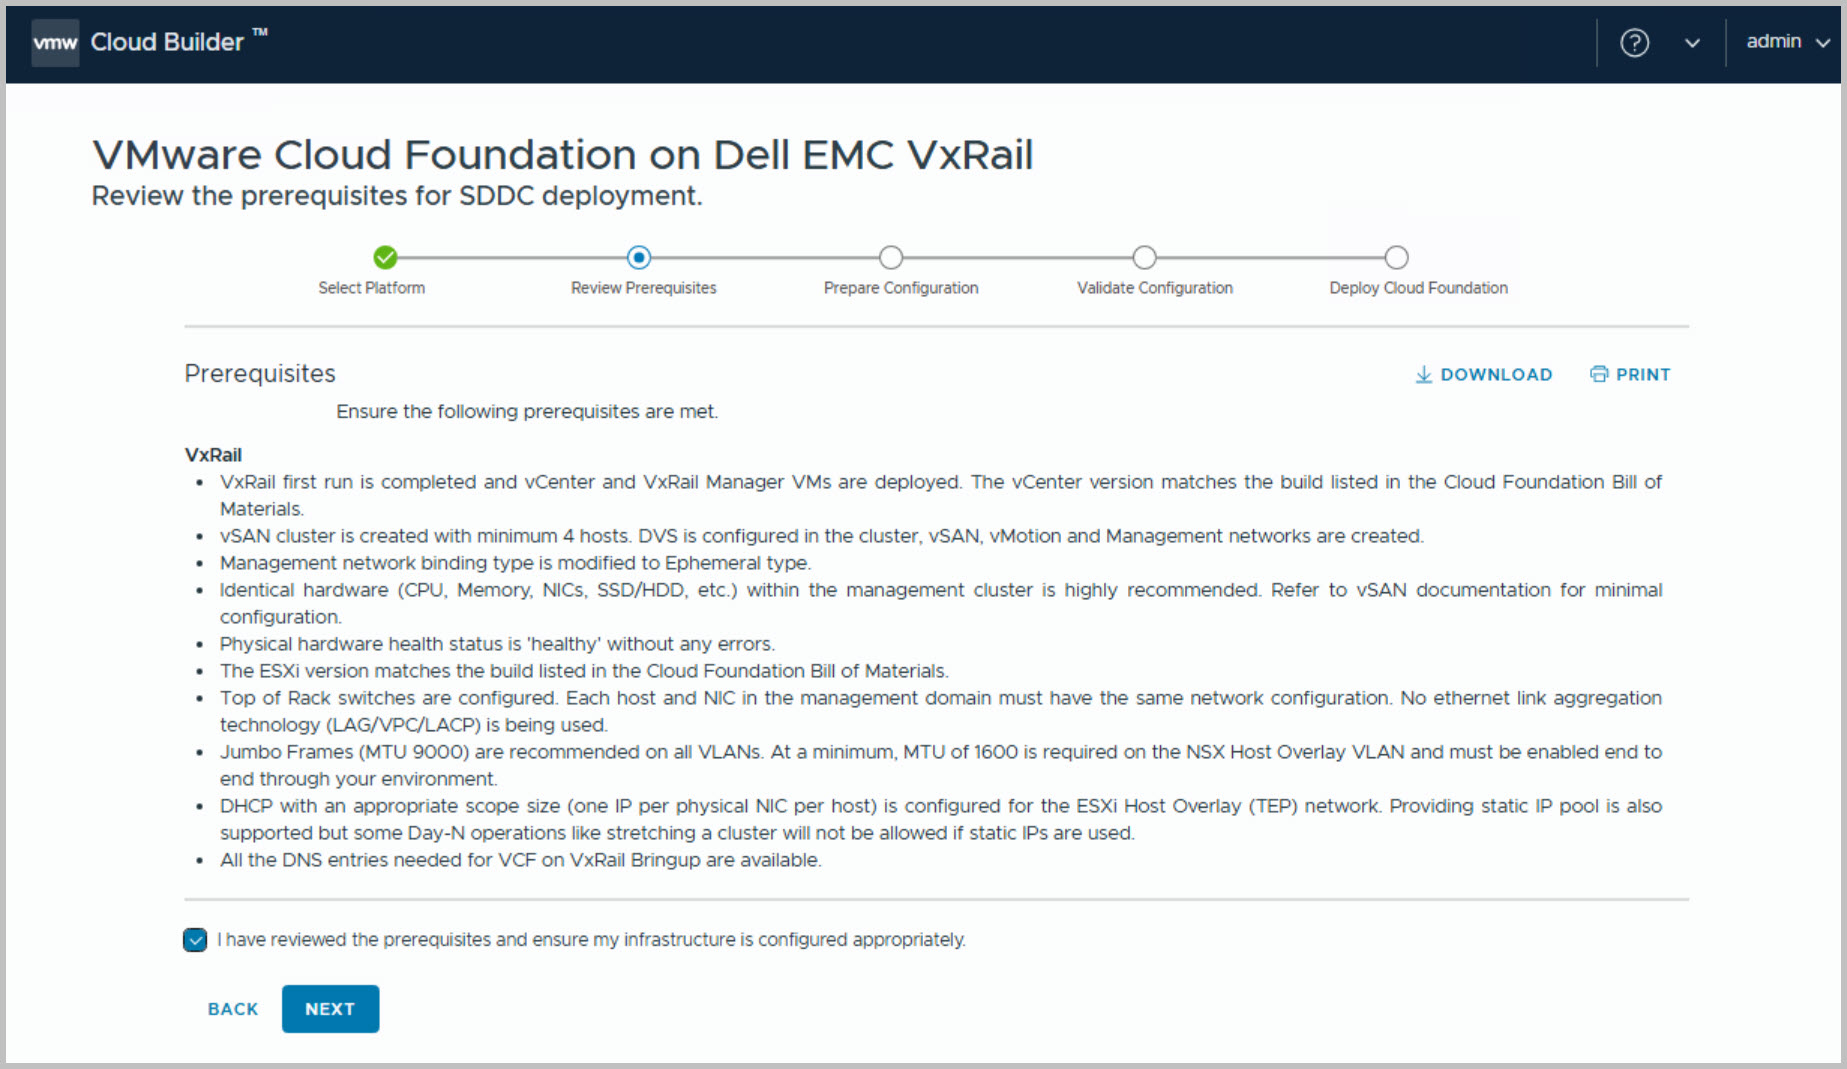
VCF on VxRail is deployed using VMware Cloud Builder, which can be downloaded as an OVA file from Broadcom support site and deployed as outlined below:
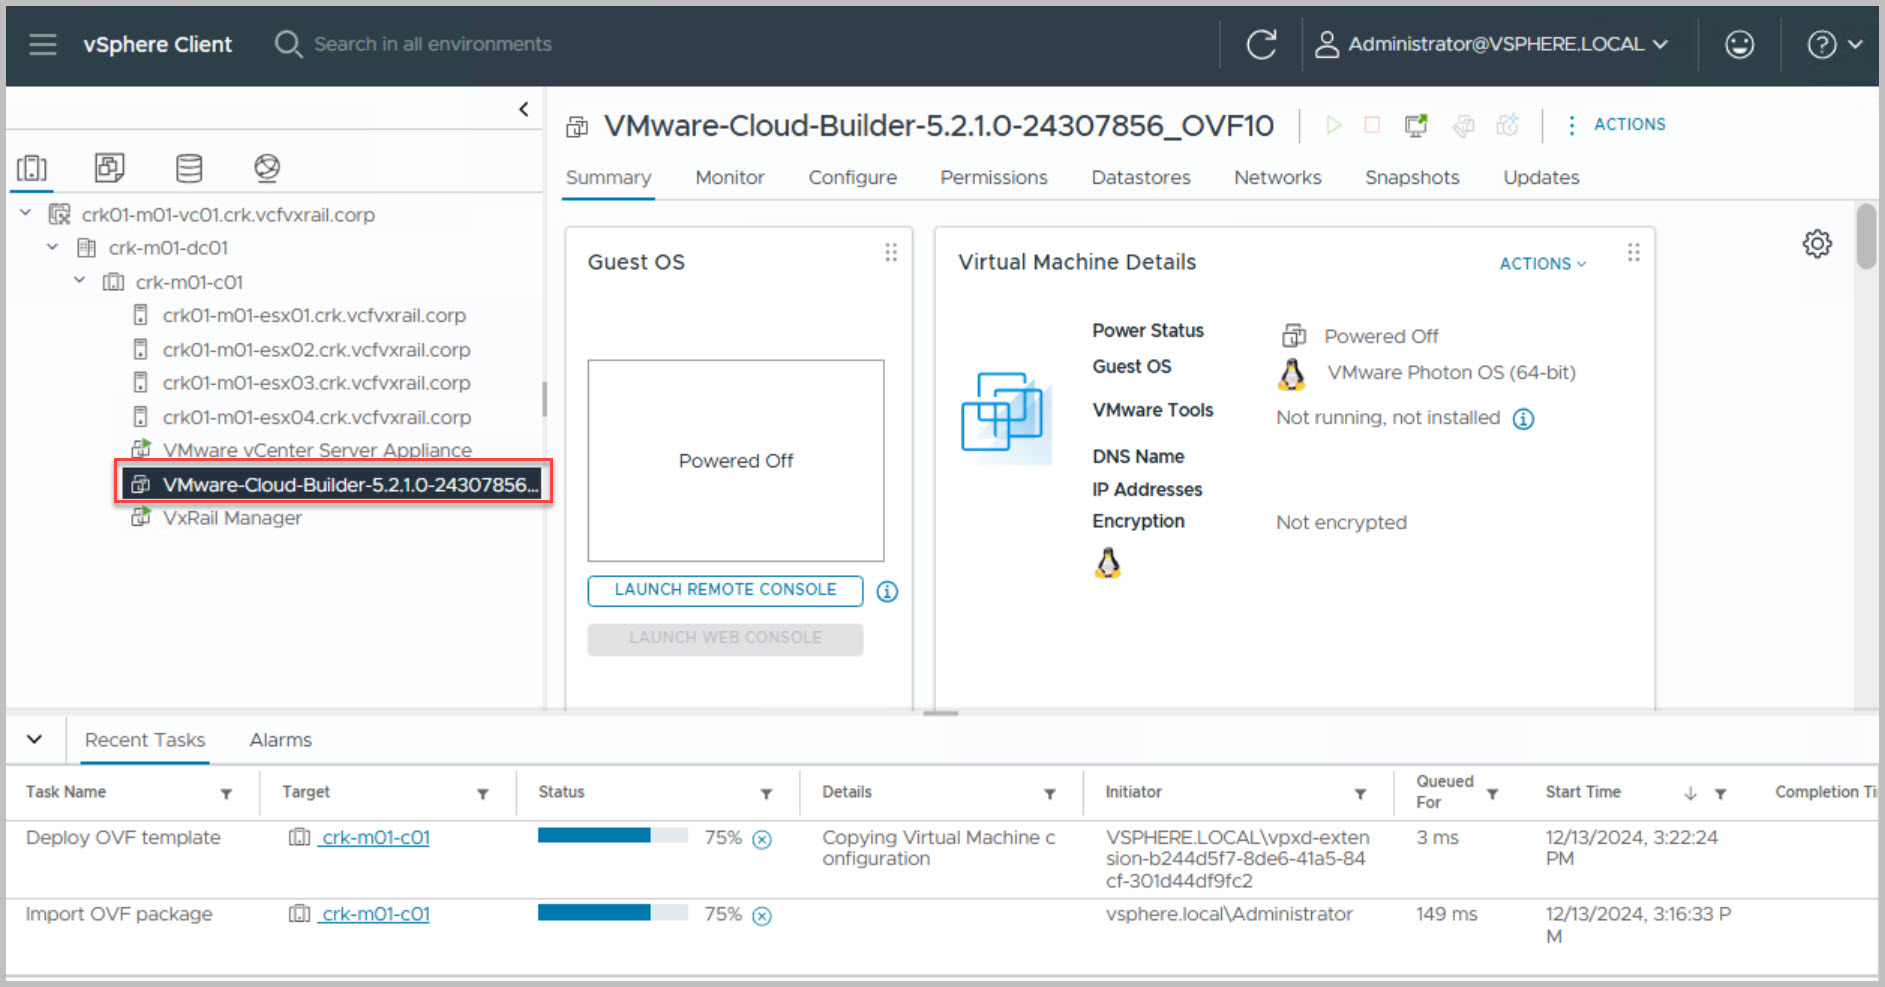
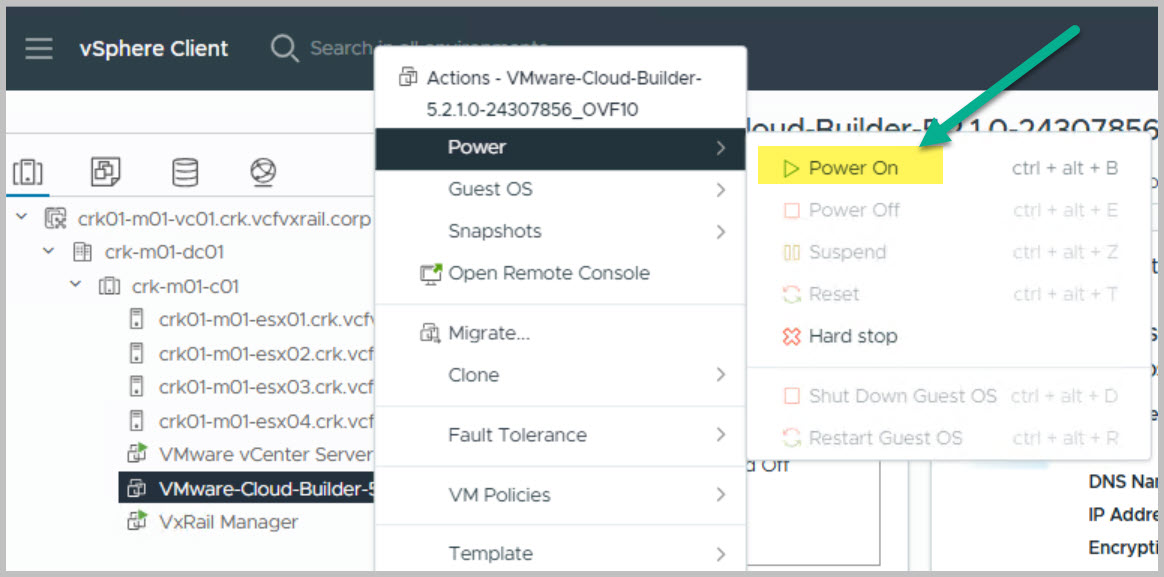
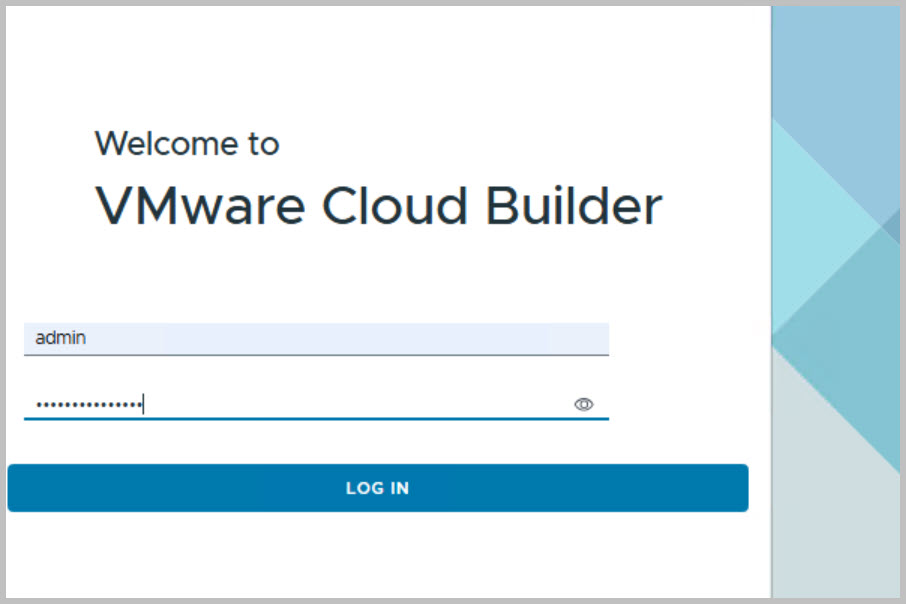
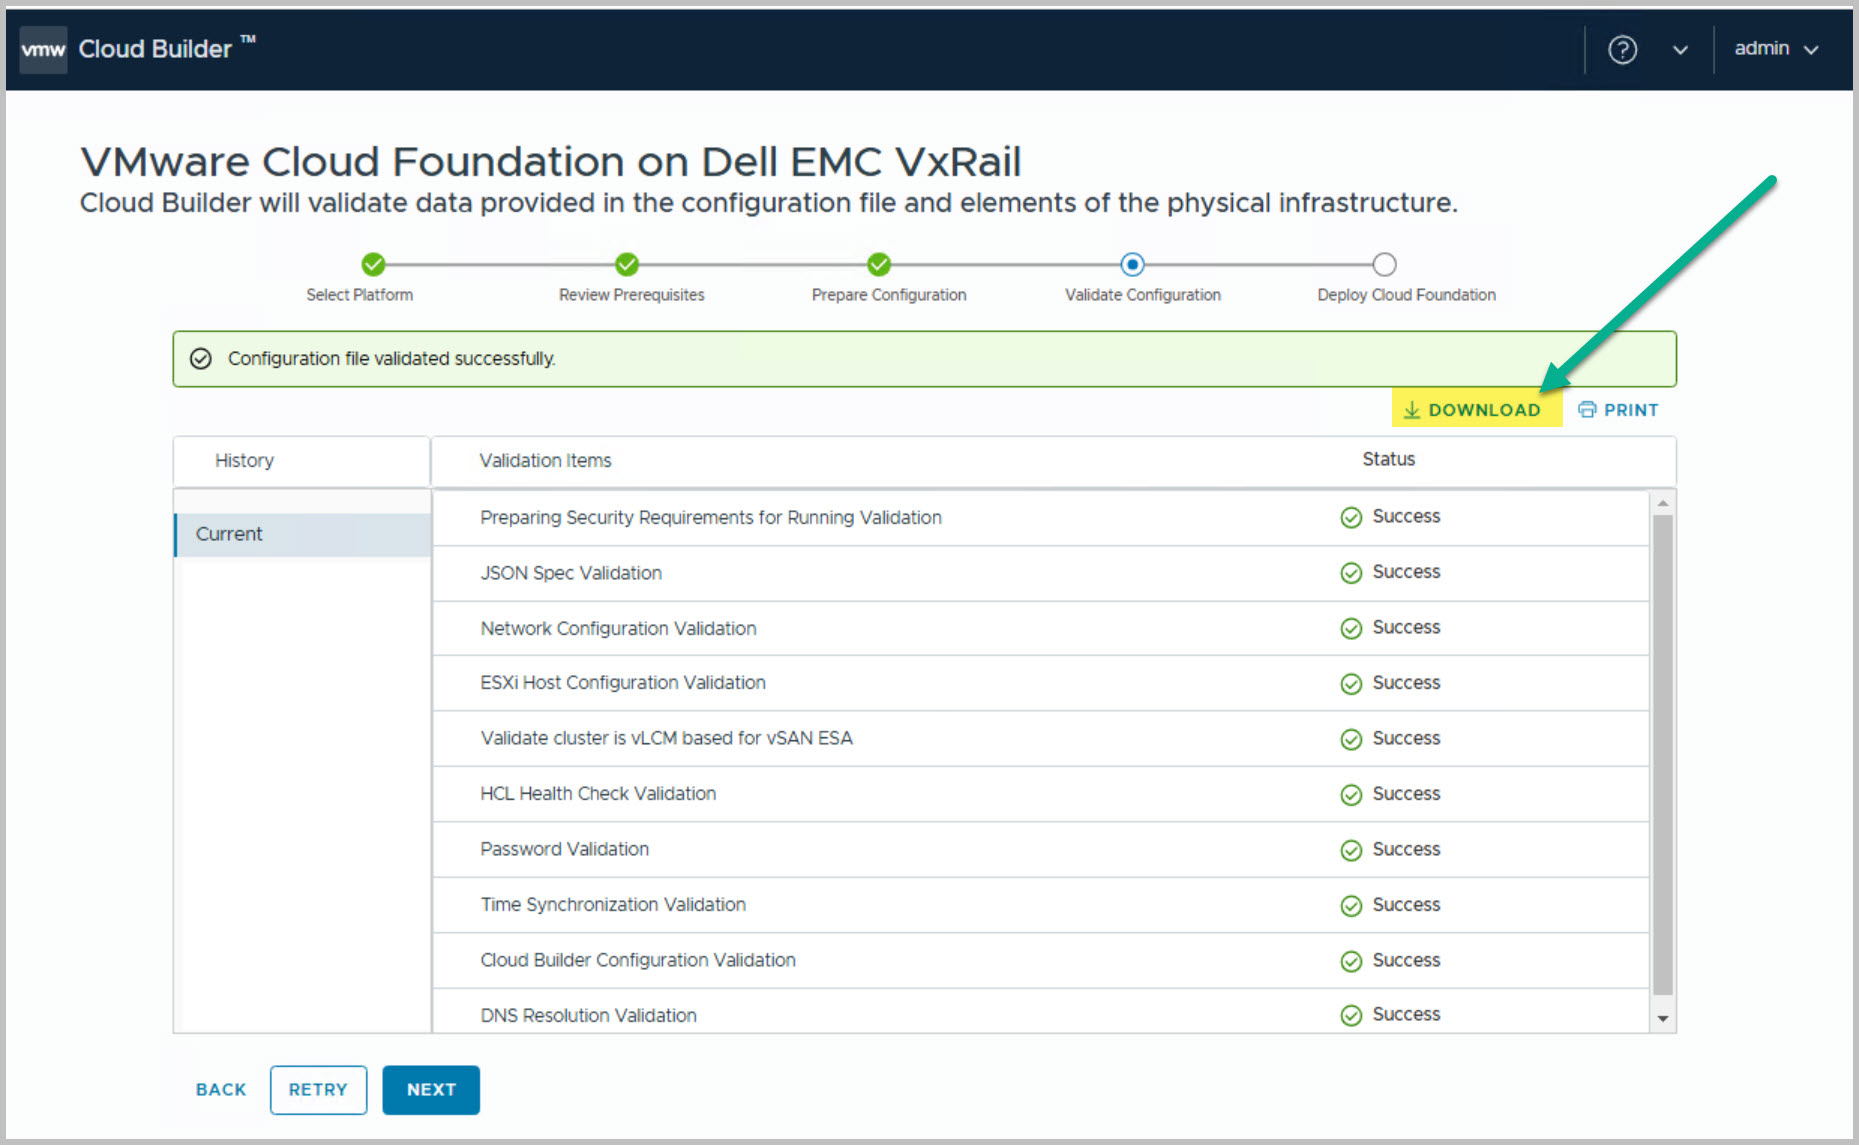
This section outlines the VCF on VxRail Bring-Up process. At this stage, the Cloud Builder VM has been deployed, powered on, and the user has logged into the Cloud Builder UI. The next steps are as follows:
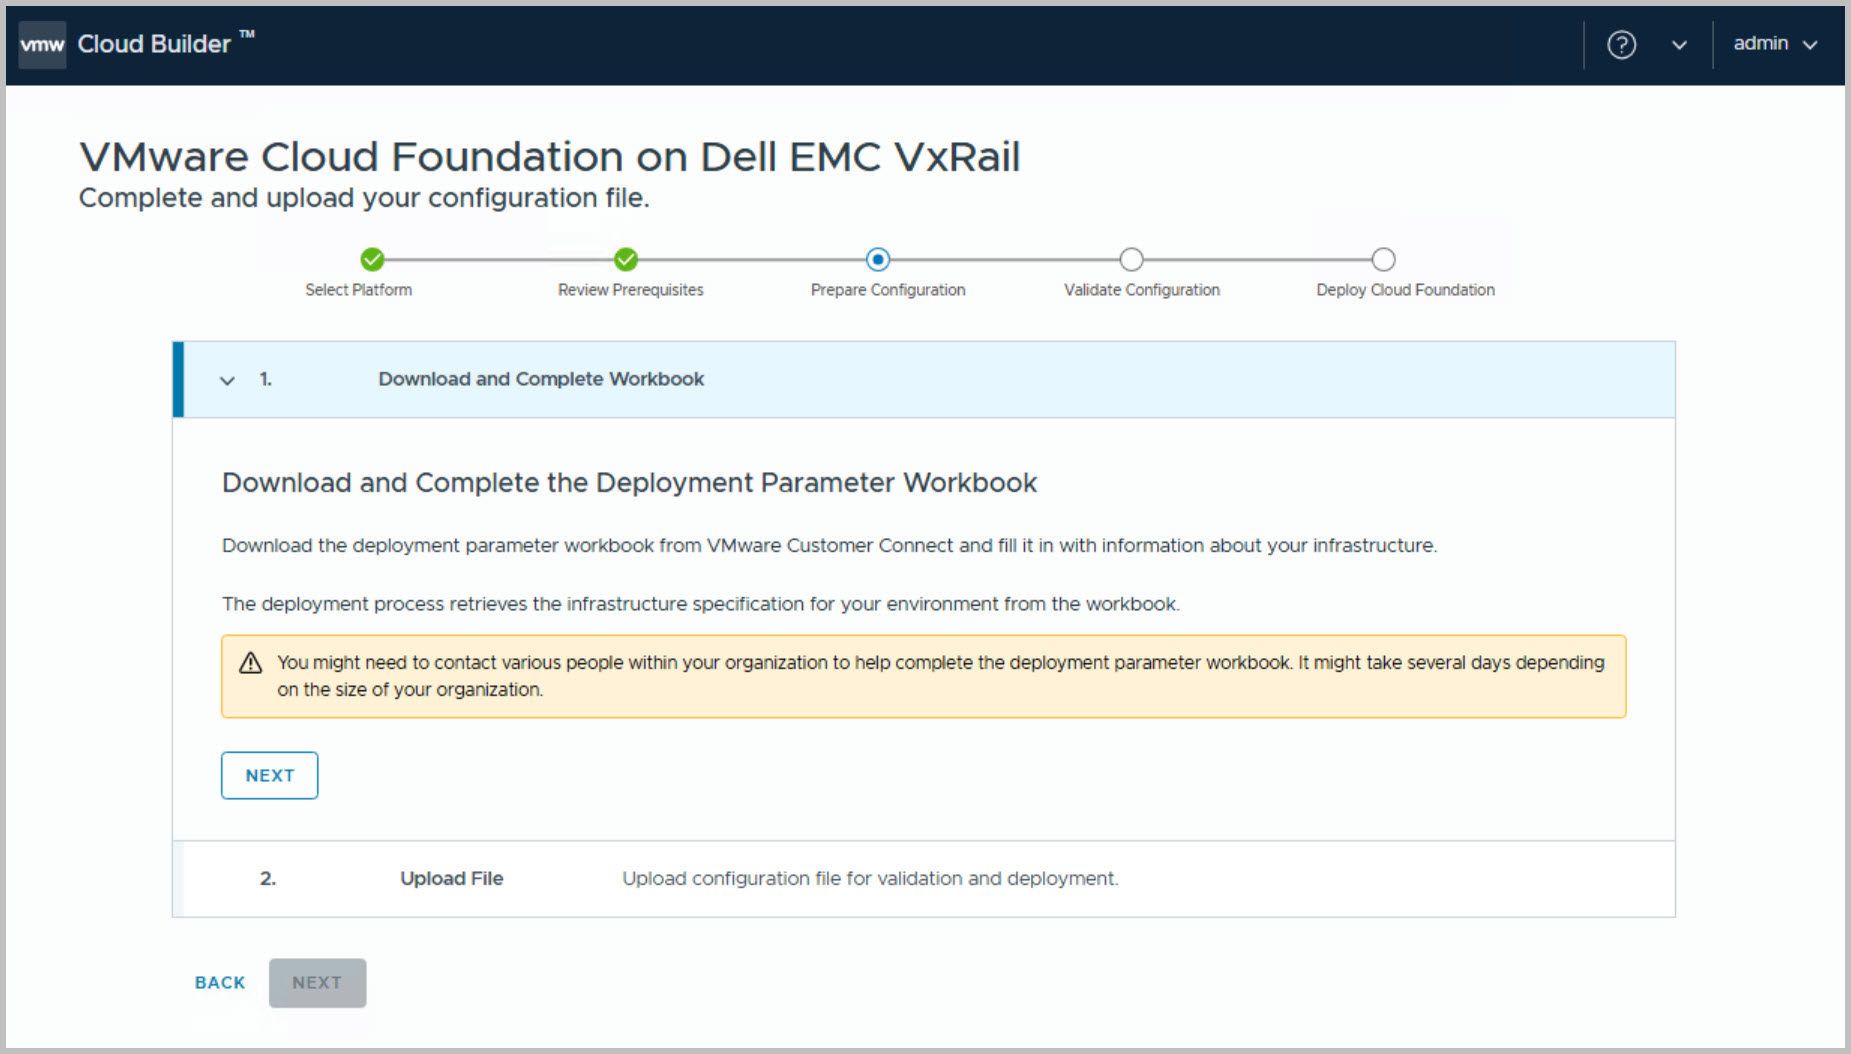
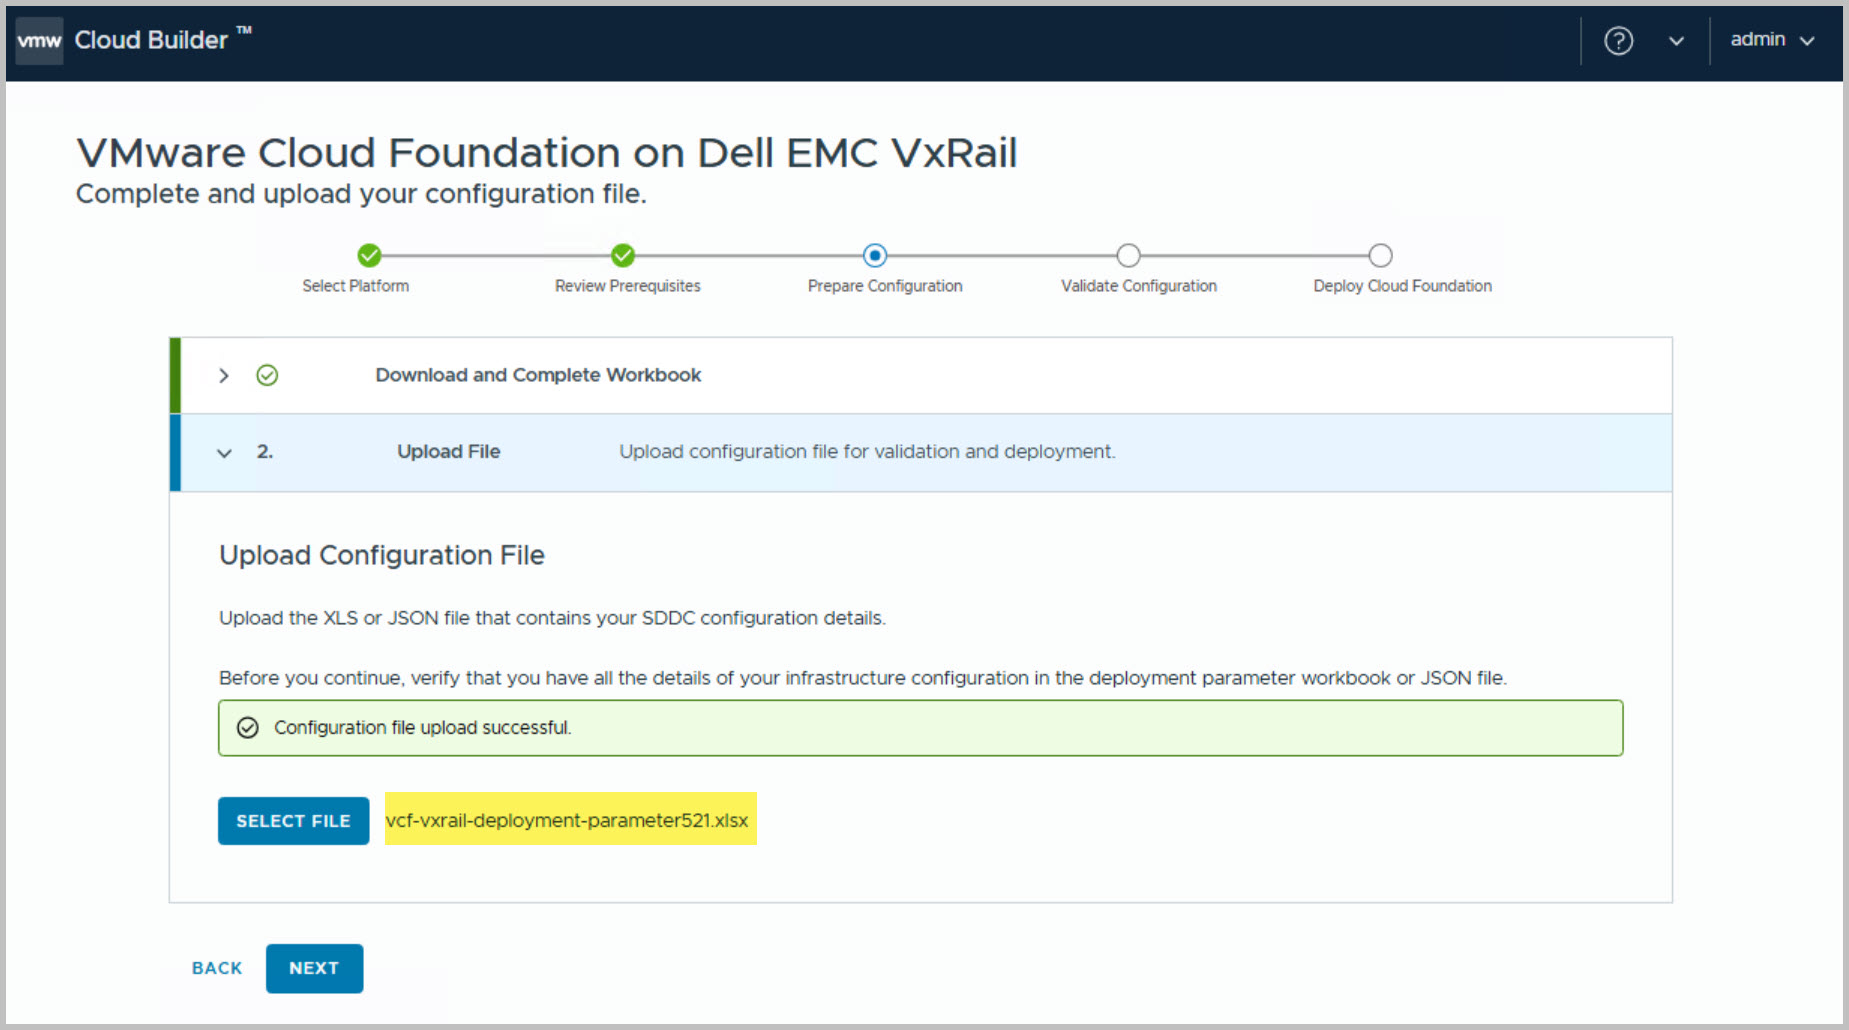
Download the Parameter Sheet from the Broadcom support site.
Populate the Parameter Sheet with network and environment-specific details.
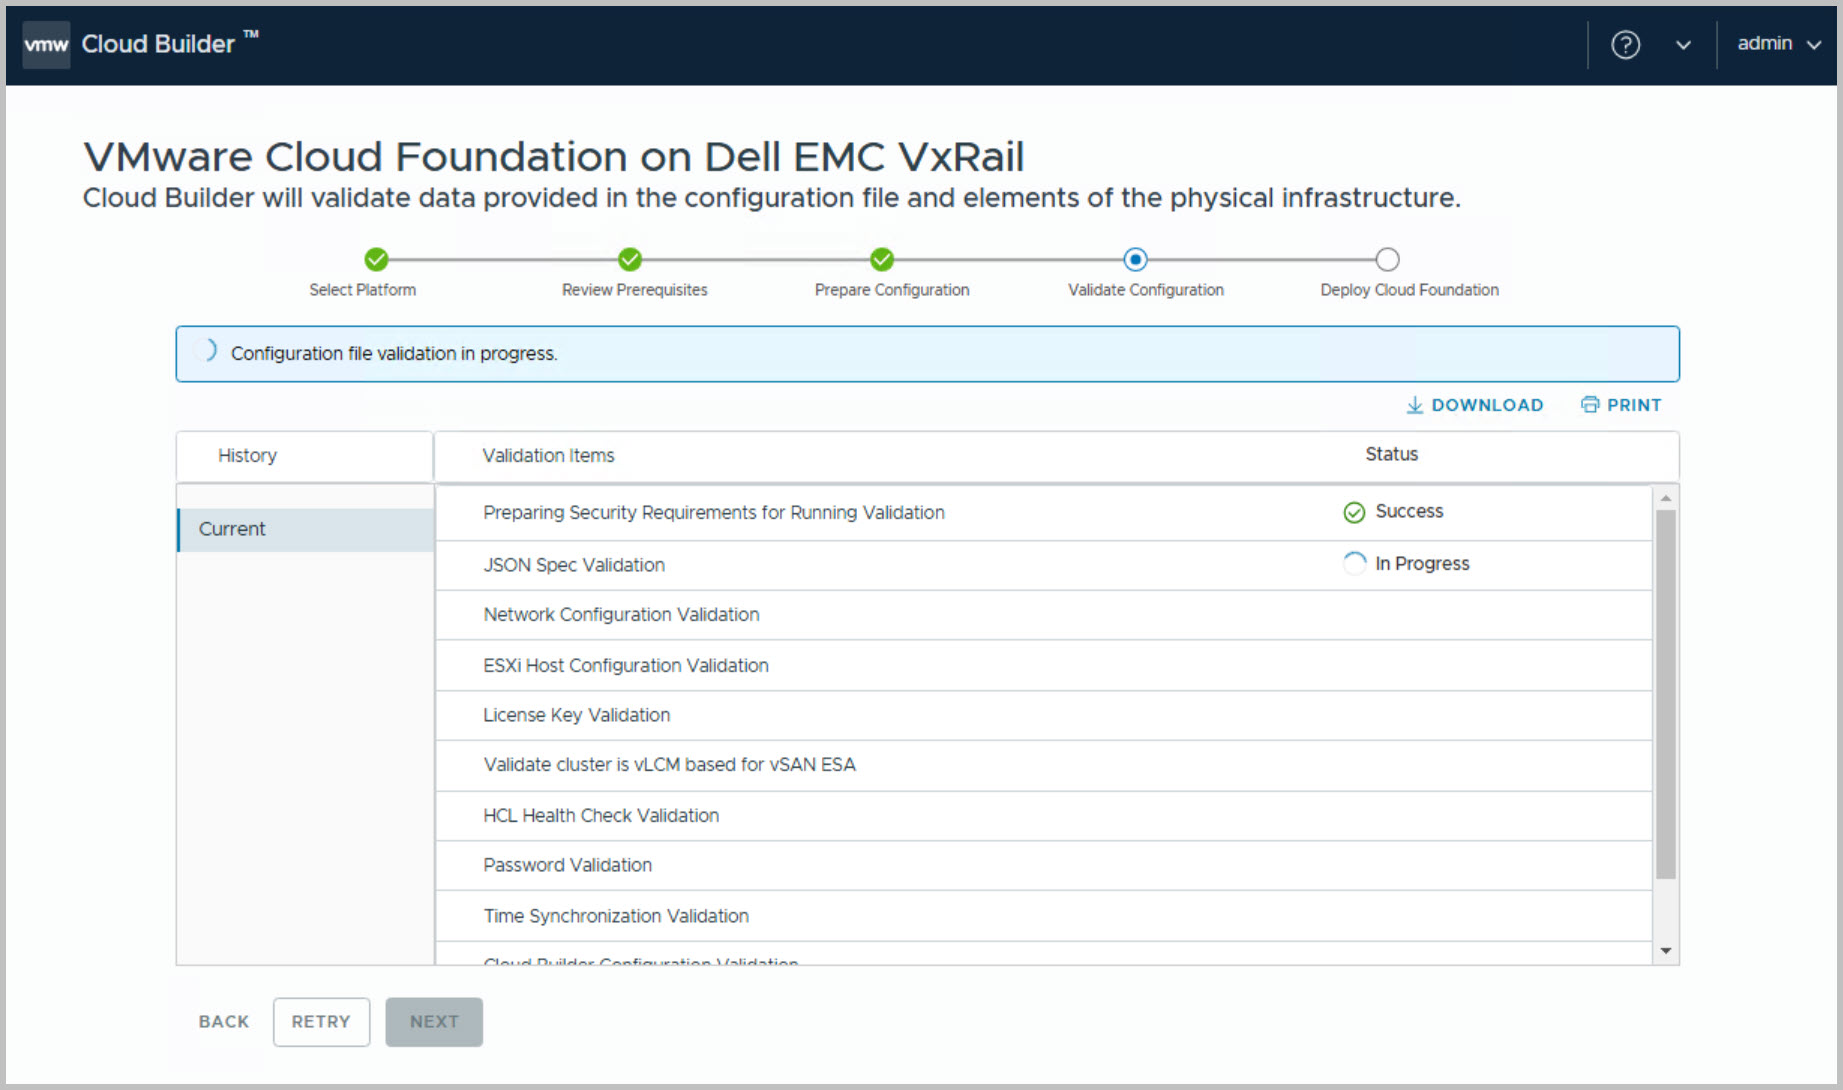
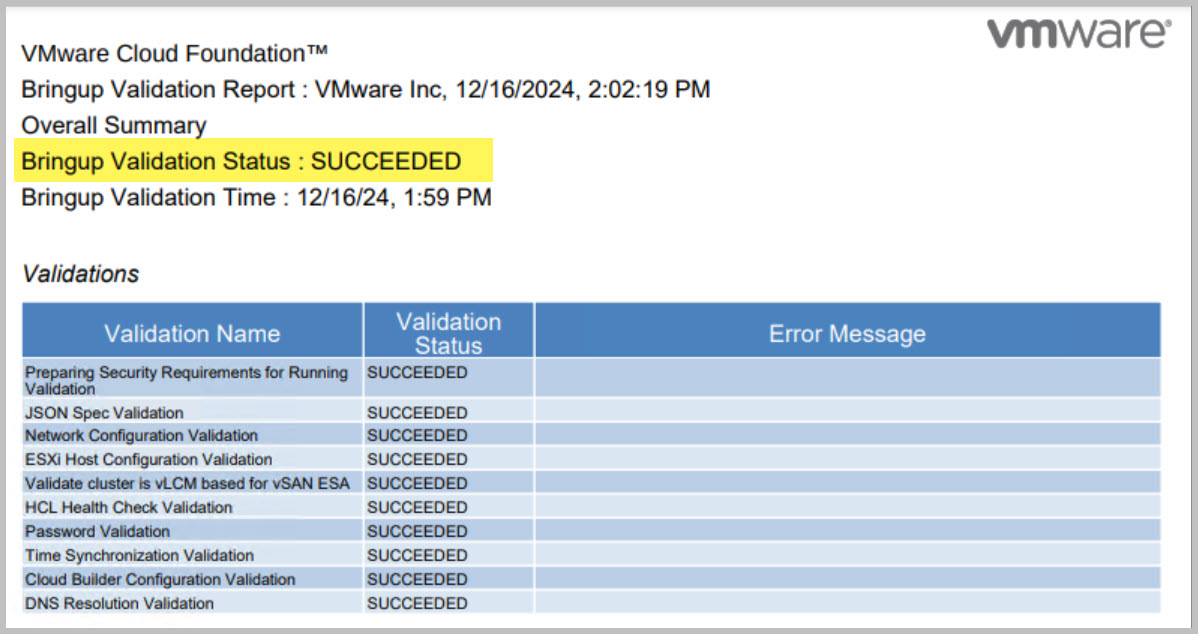
Validate the values in the Parameter Sheet.
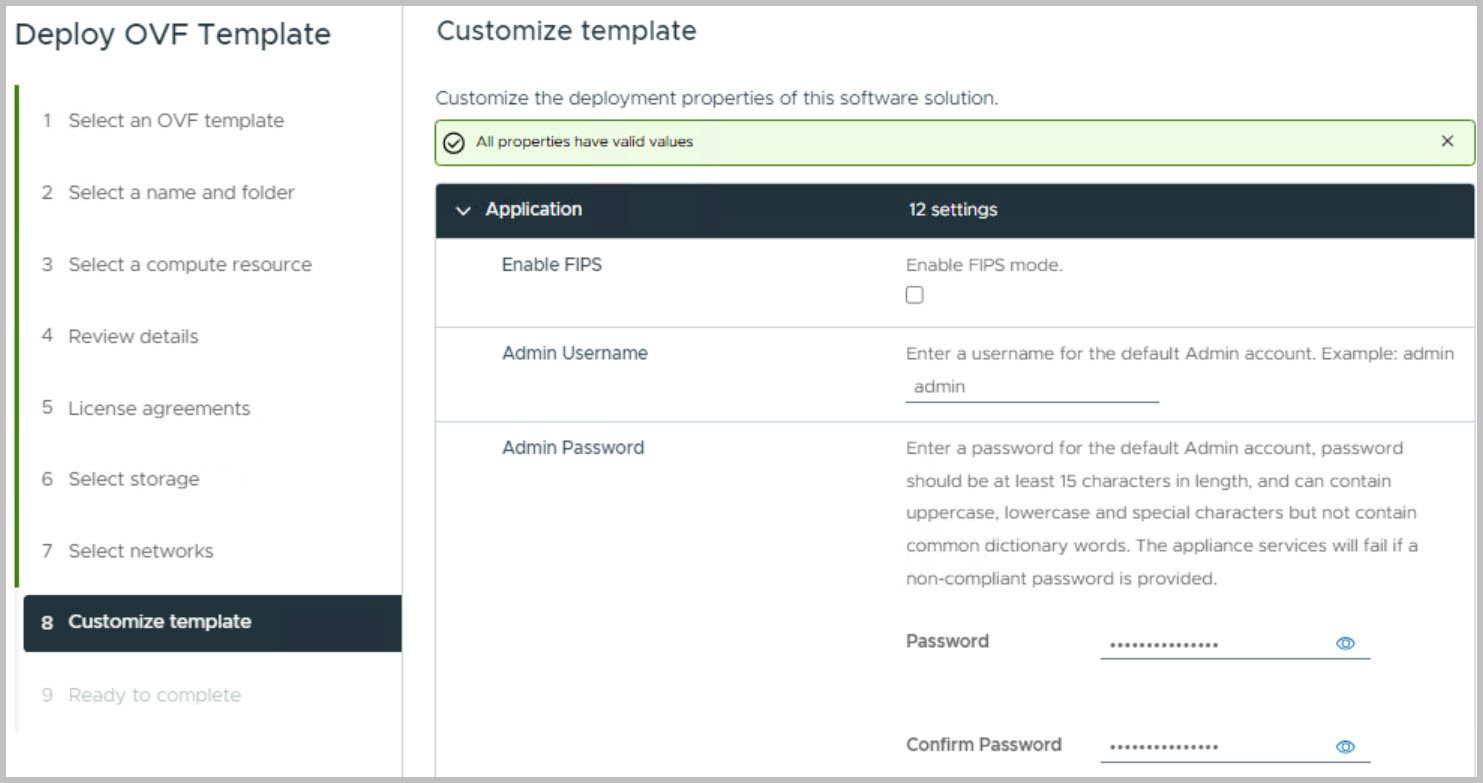
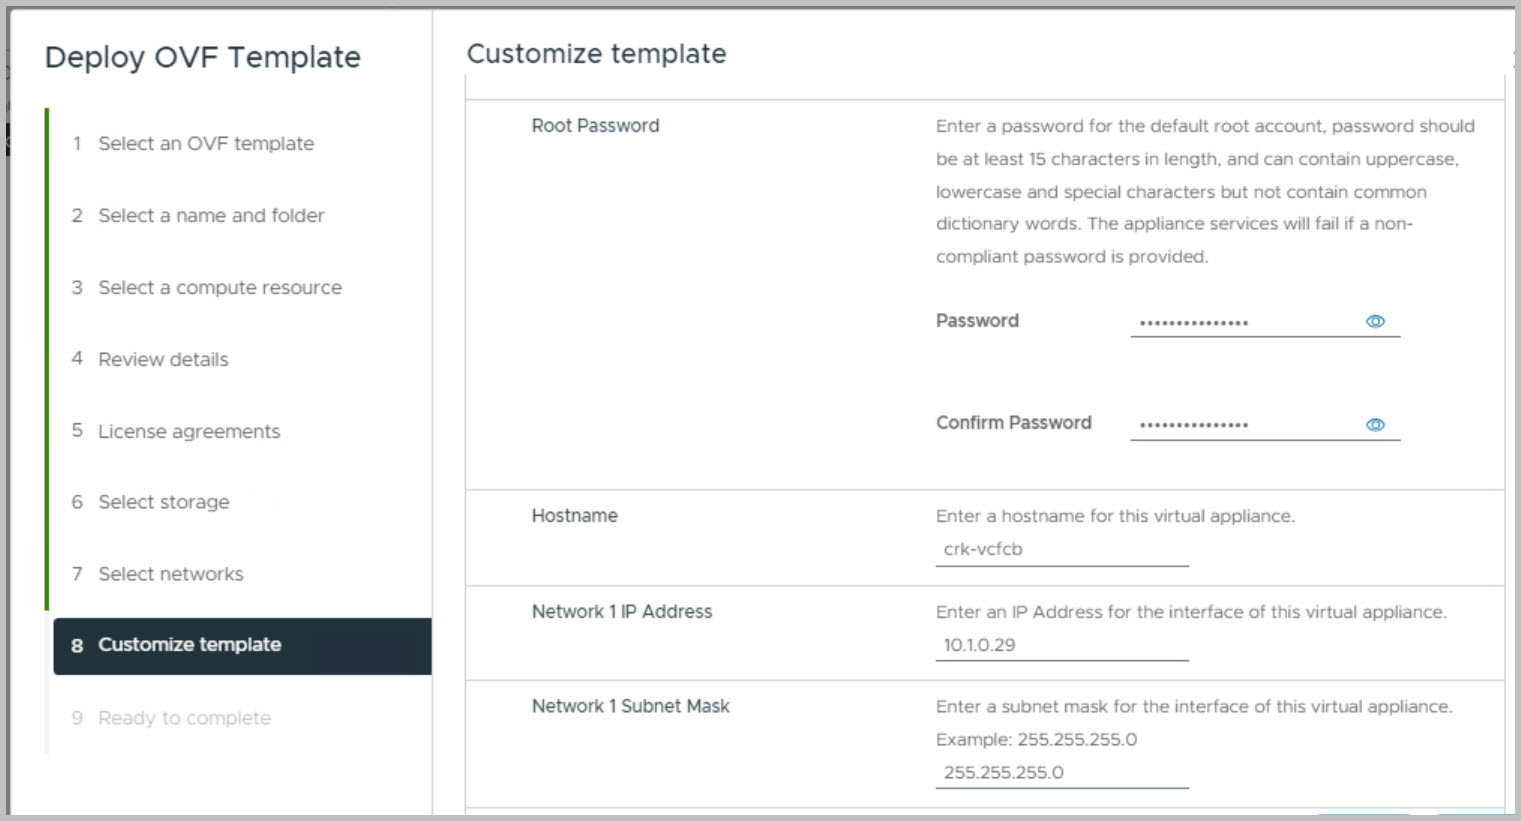
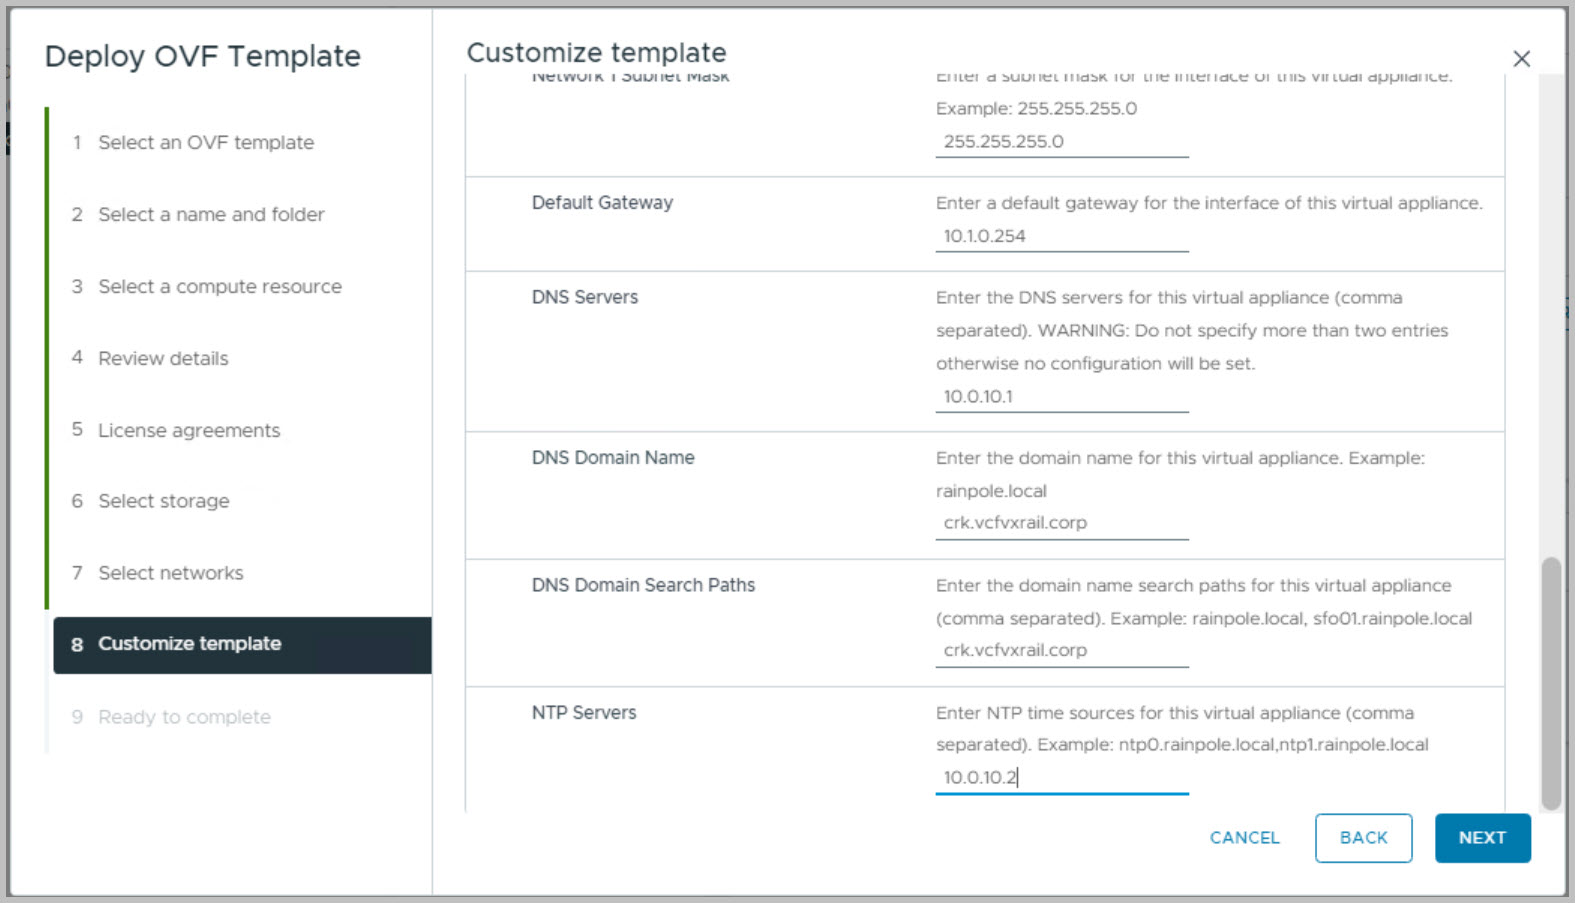
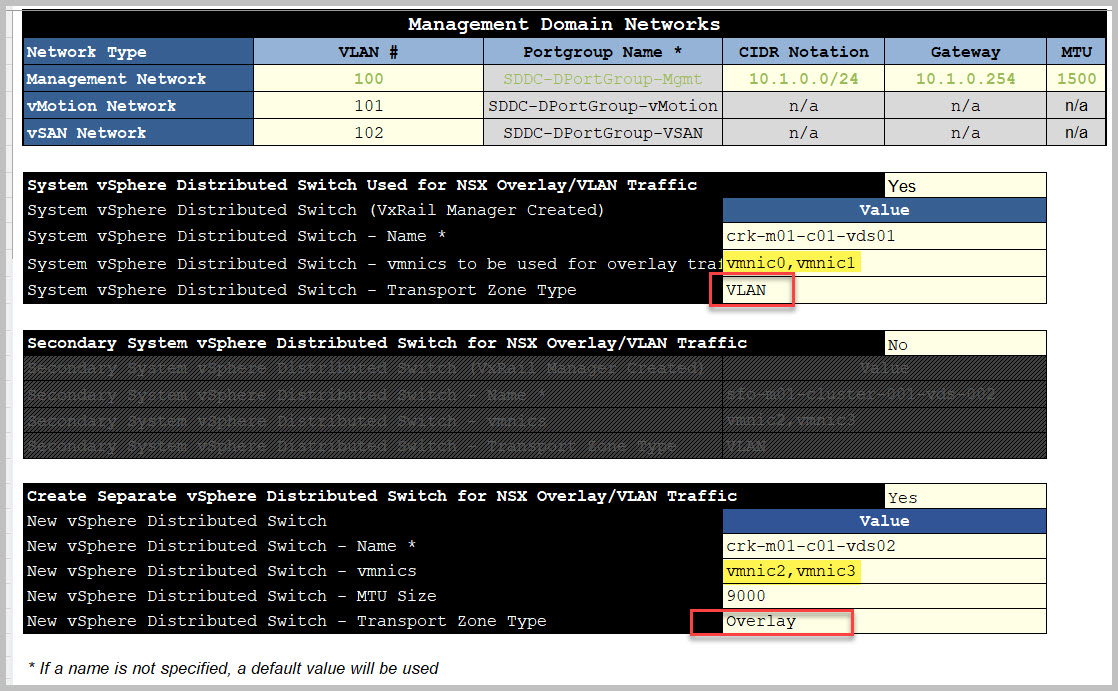
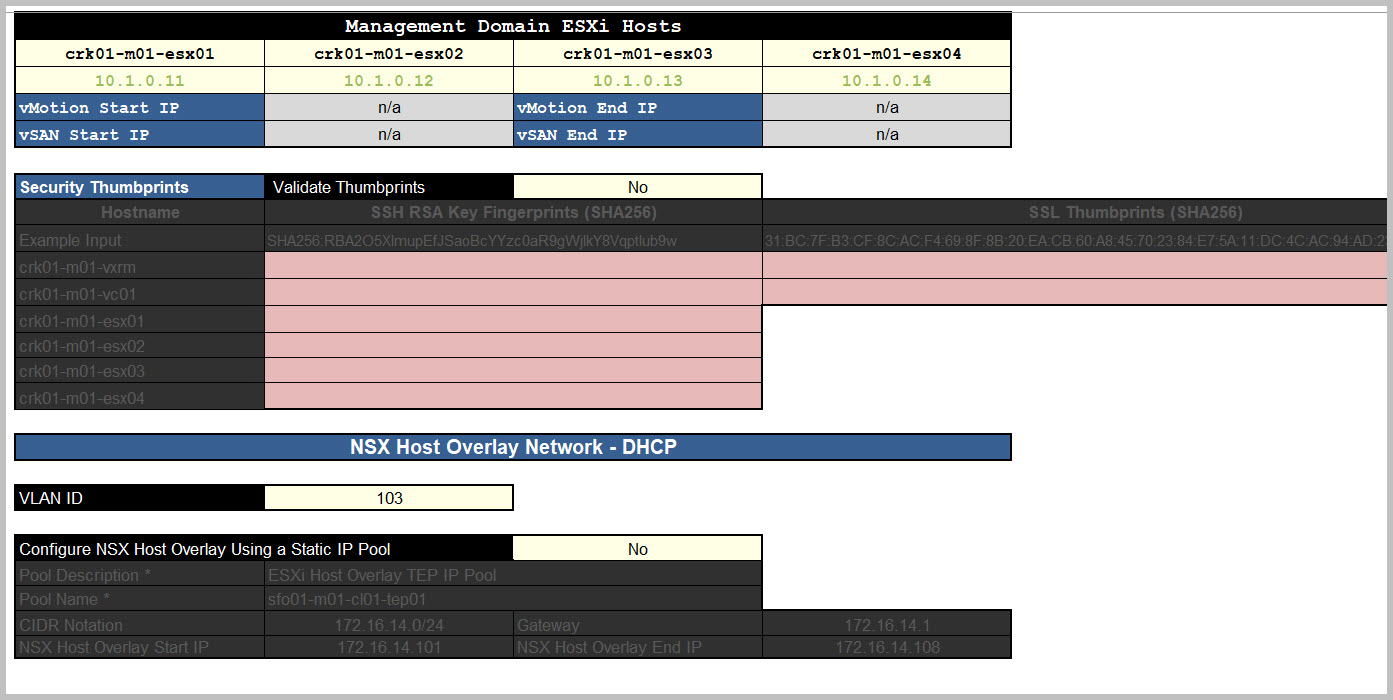
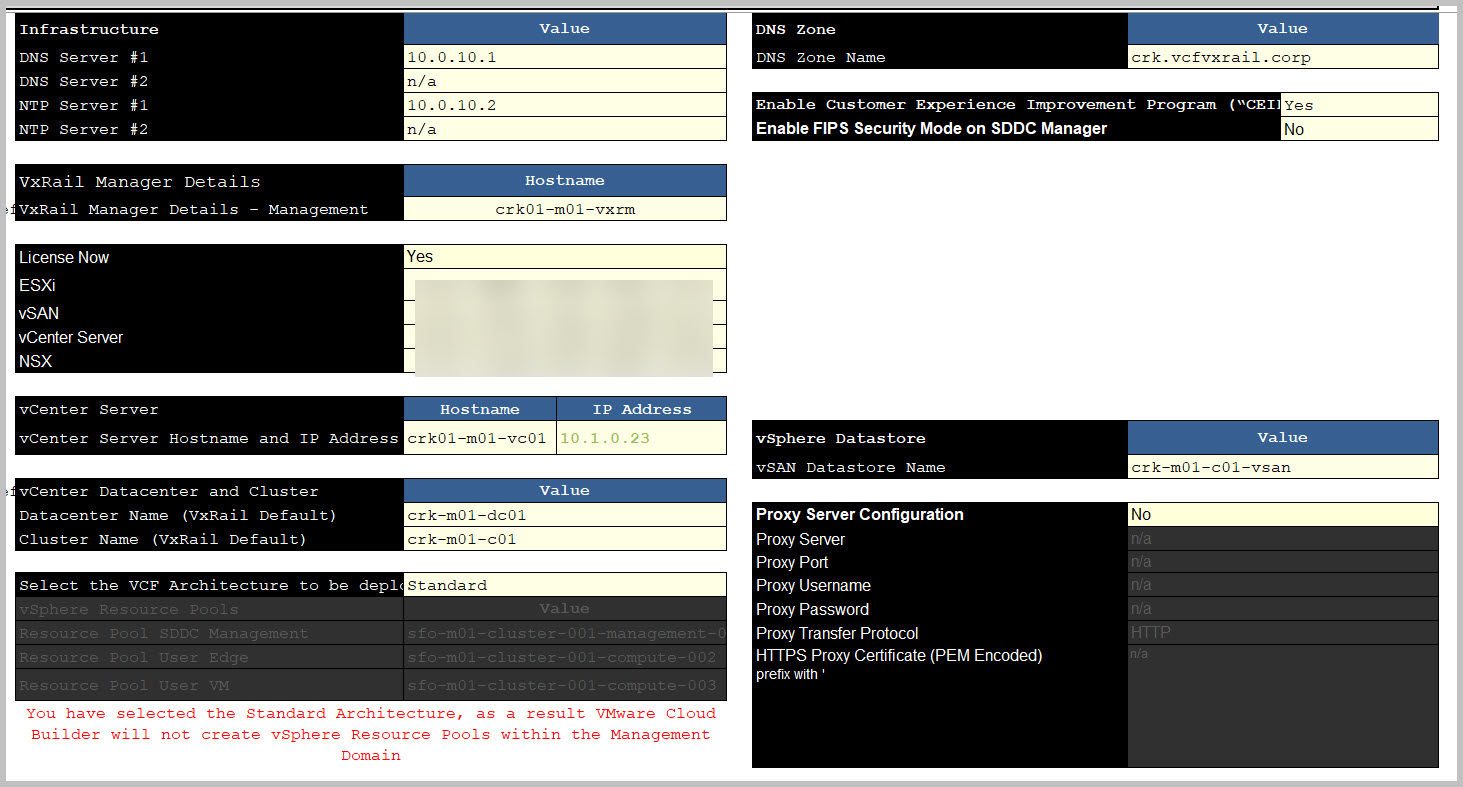
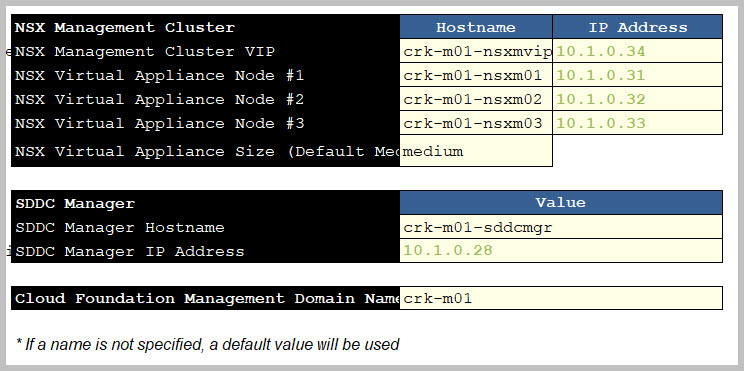
Below are example screen captures of the parameter sheet. Note: Providing Edge/AVN entries and BGP Peering details is no longer required at this stage, as these tasks are now part of the Day-N options, which I will cover later in this series.
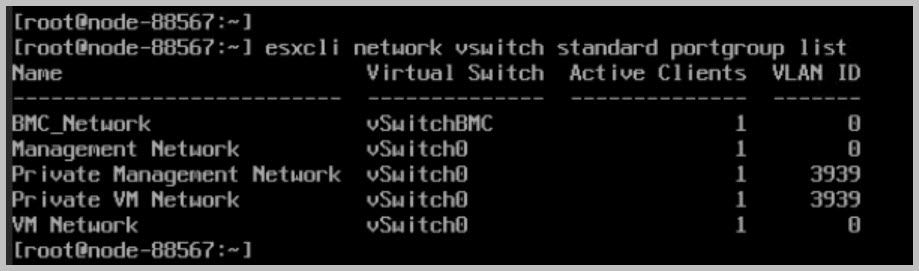
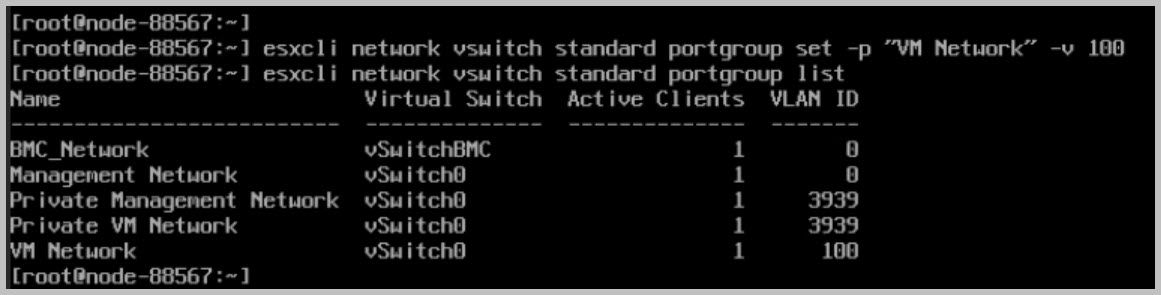
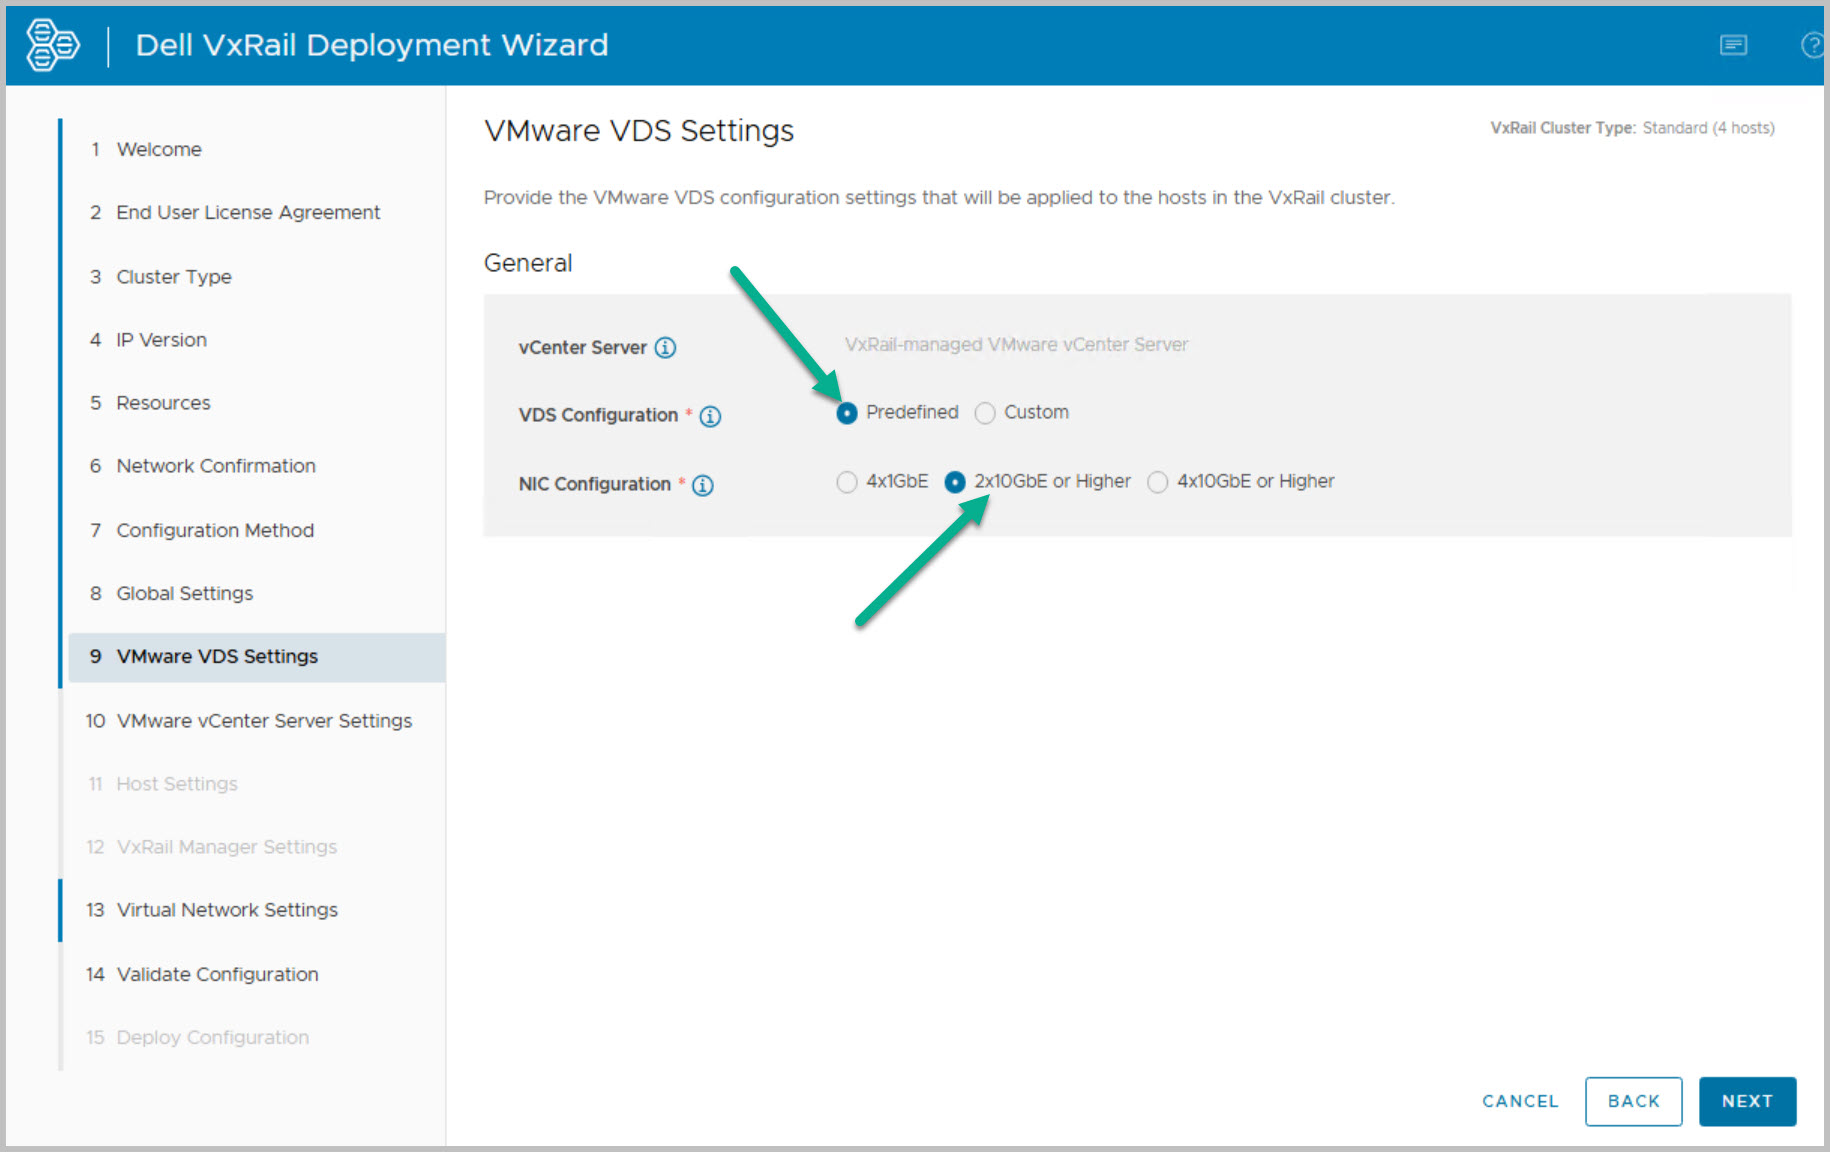
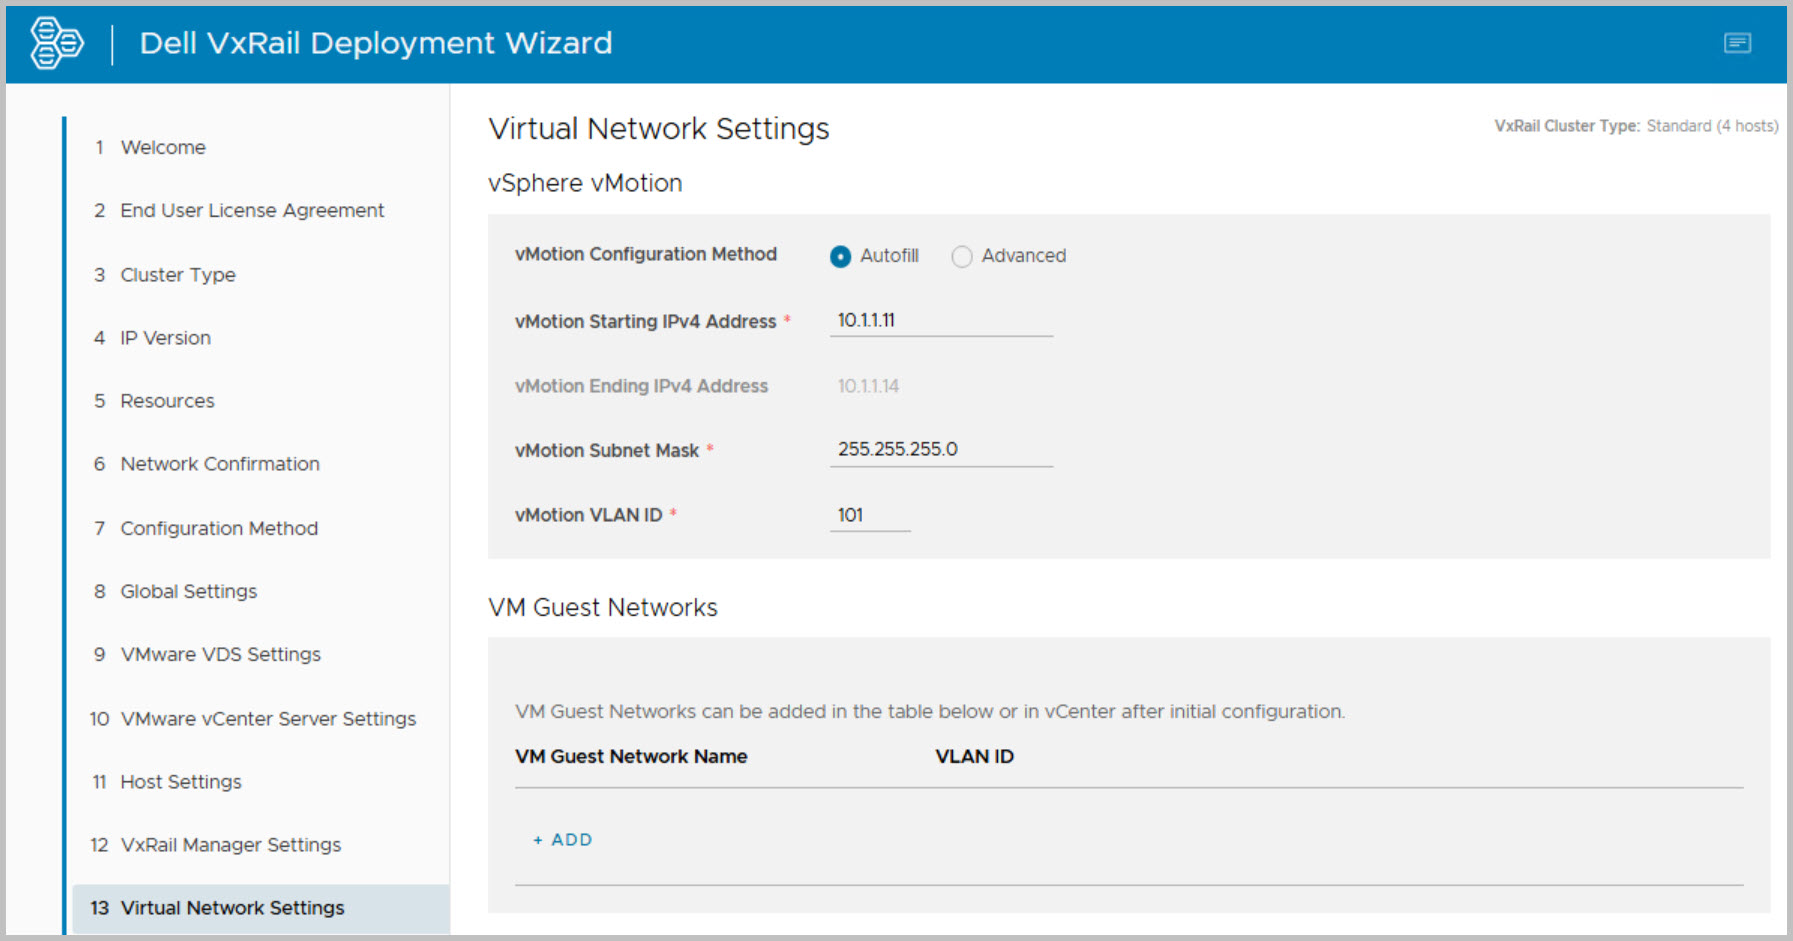
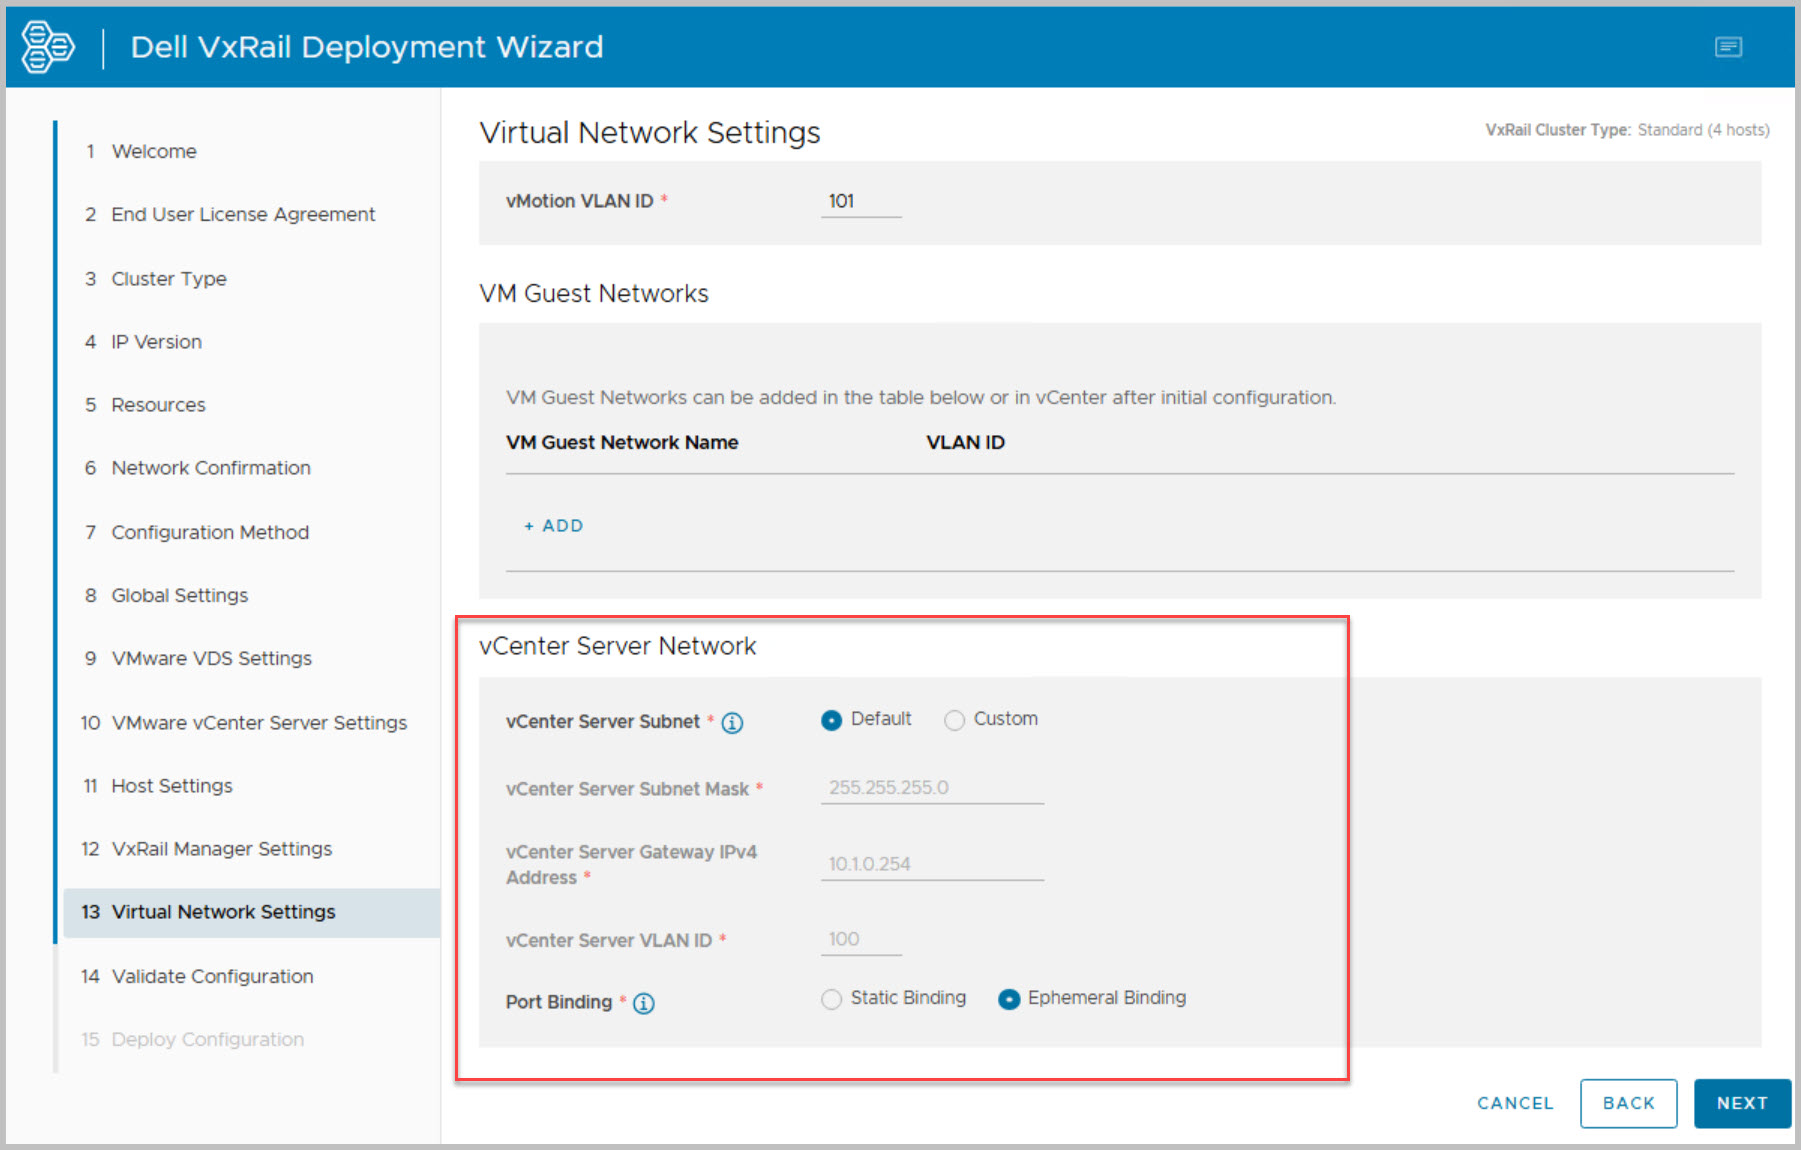
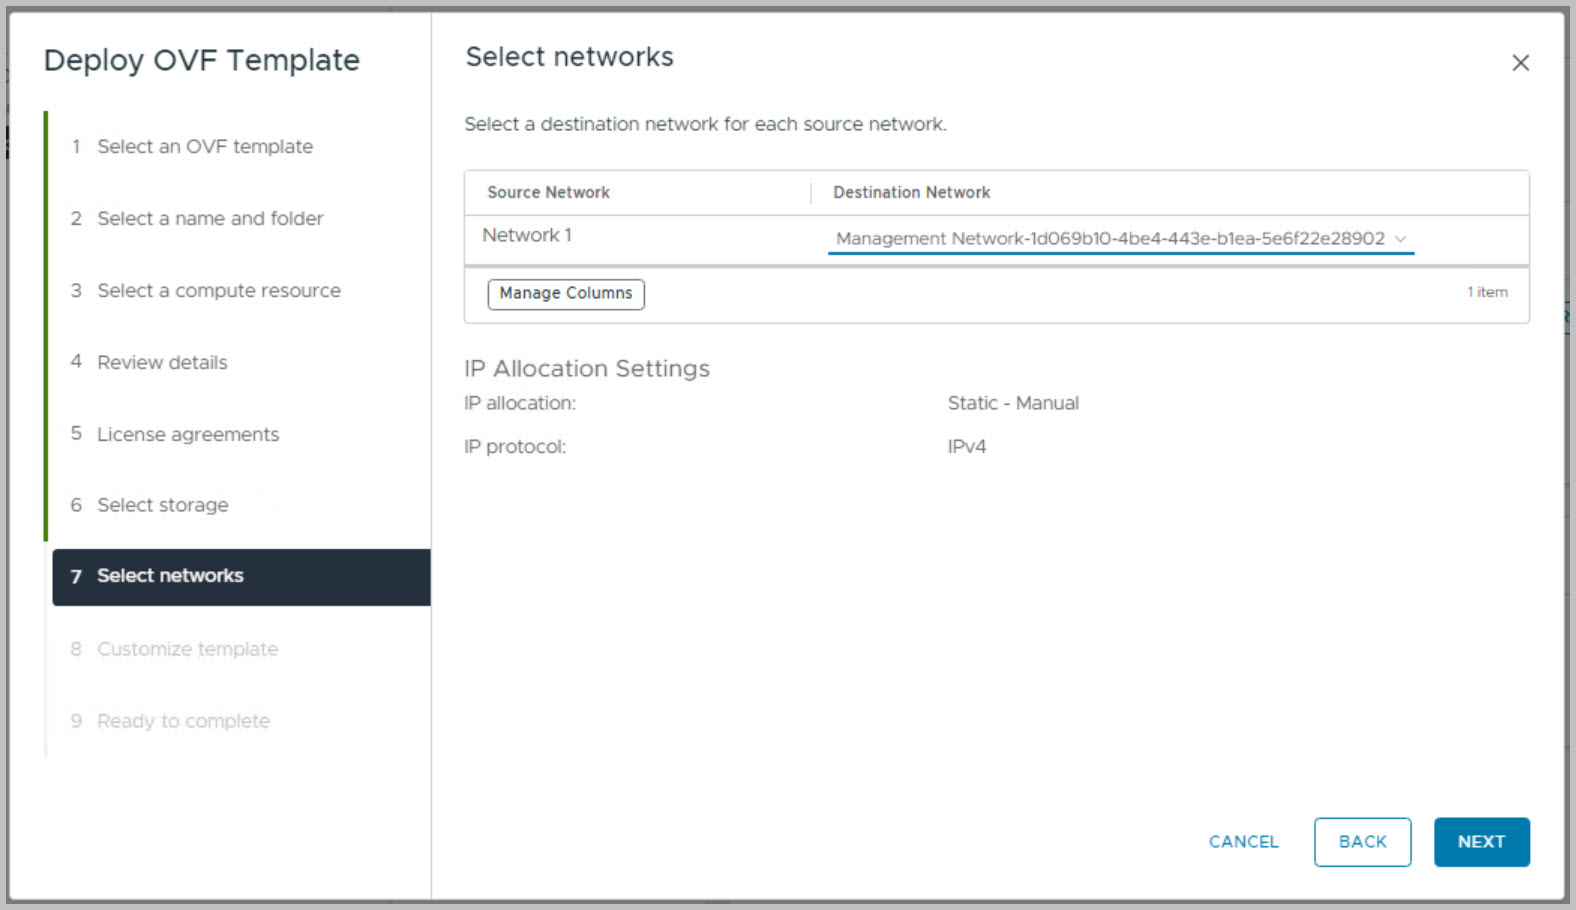
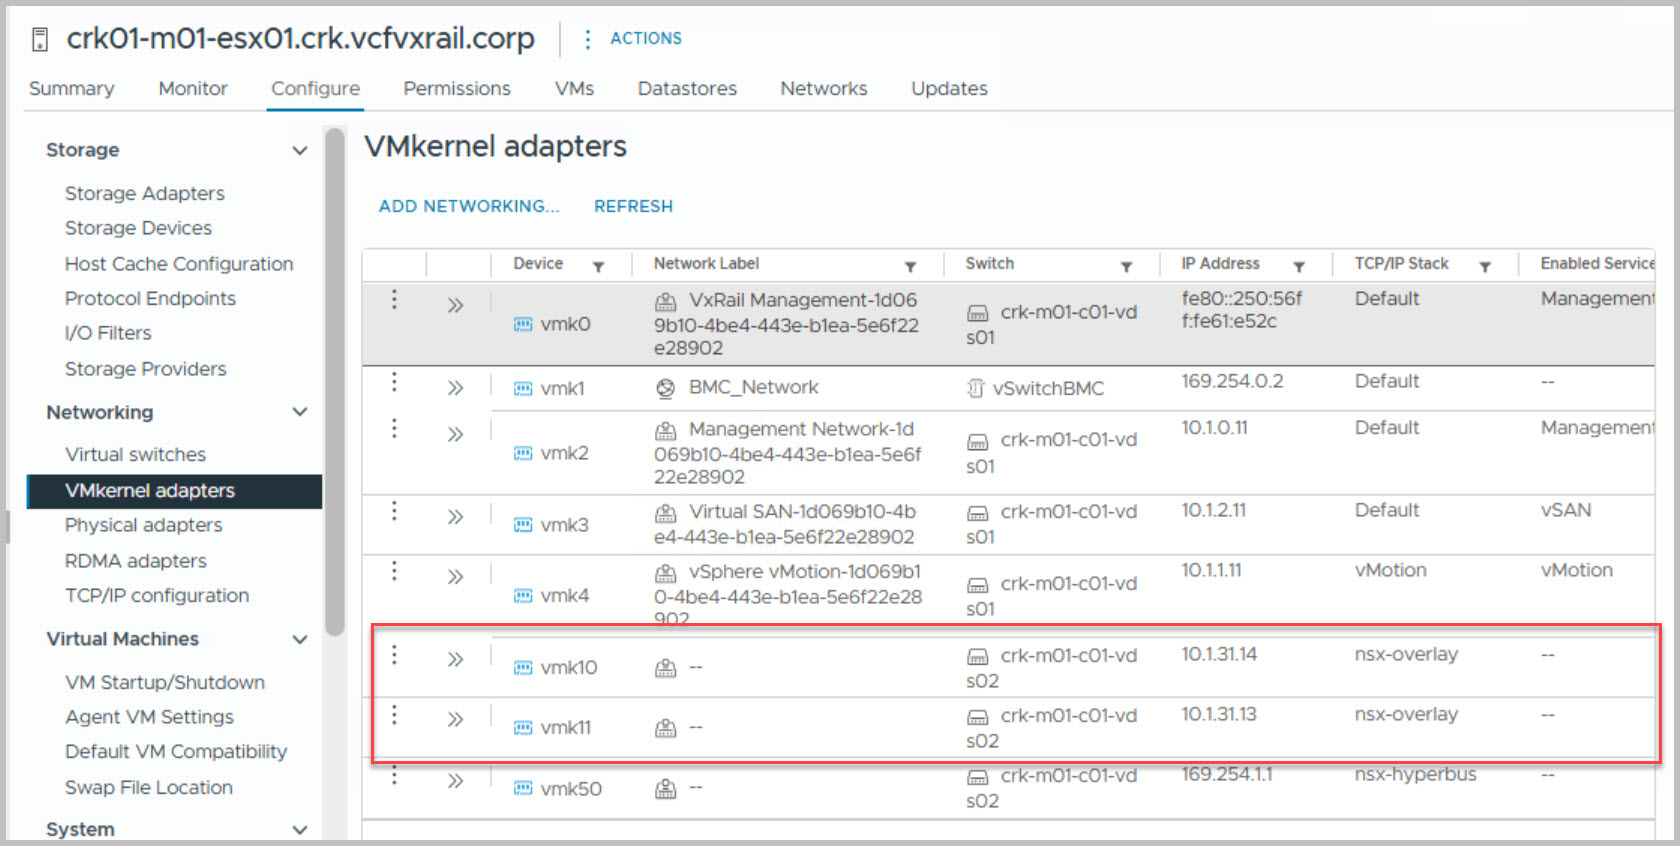
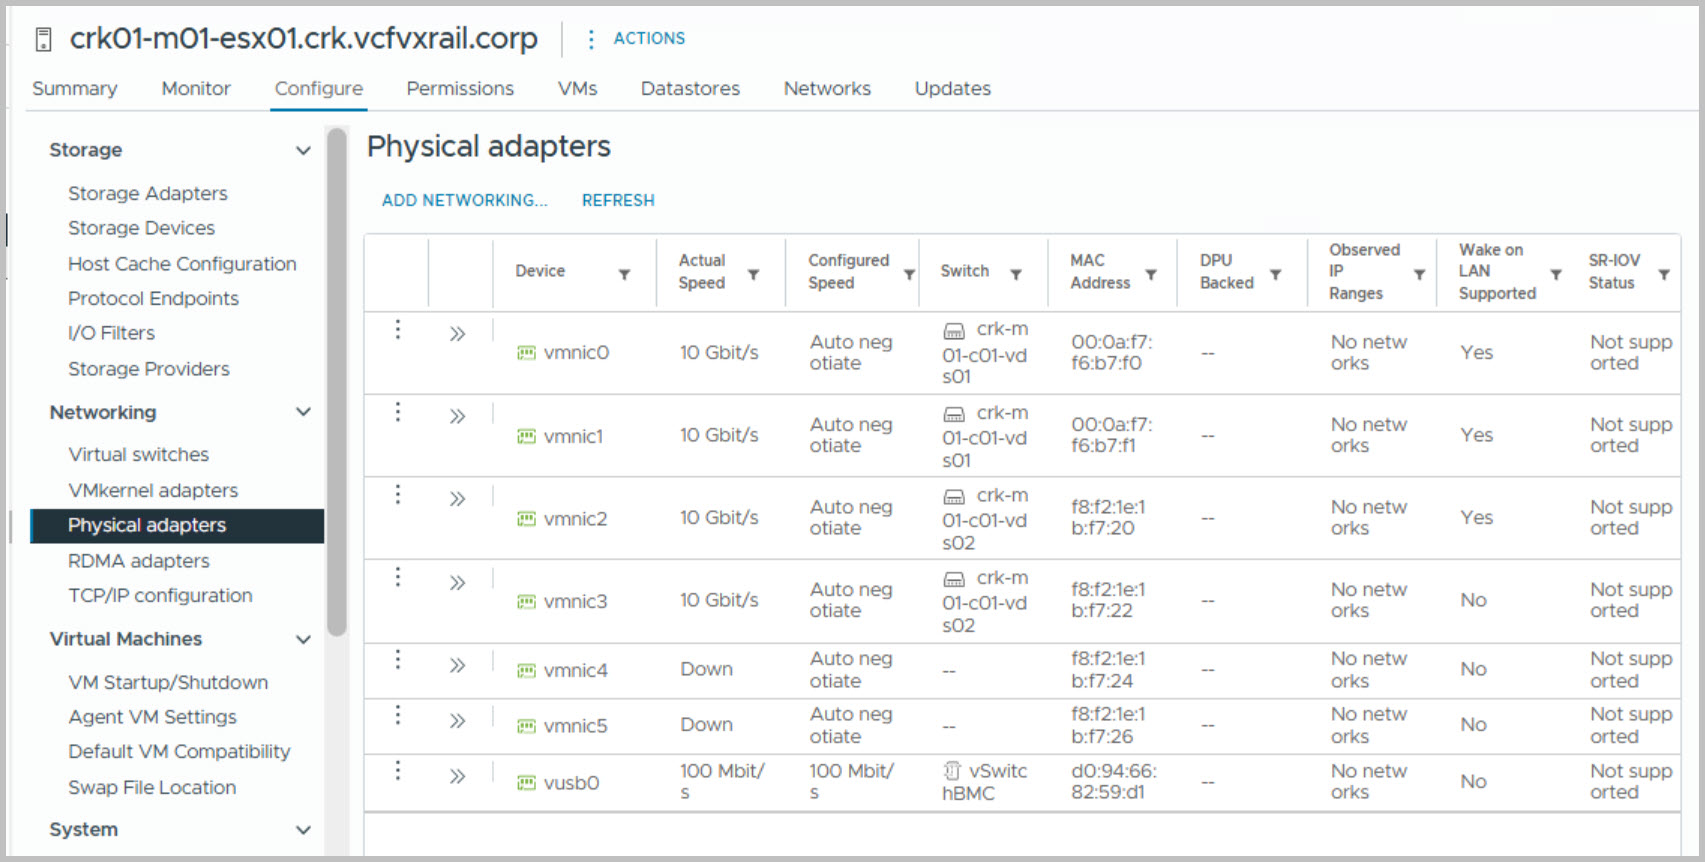
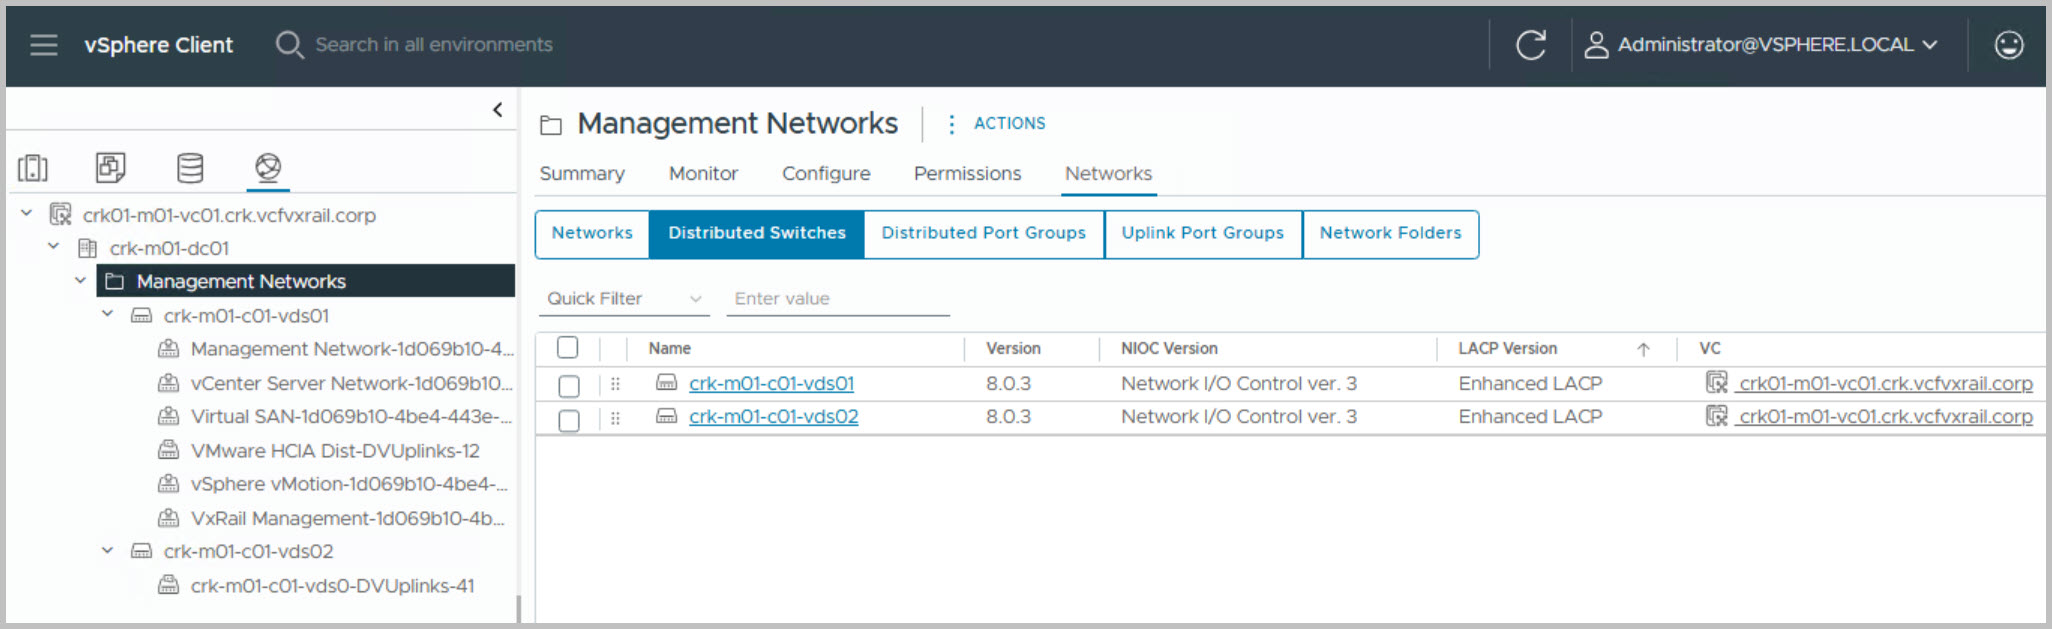
You’ll notice that I’ve utilized the new VCF 5.1 feature to implement a 2x vDS design. This approach enables NSX VLAN on the VxRail system-managed vDS while creating a second vDS dedicated specifically for NSX Overlay traffic. Note: Only one vDS can be used for Overlay traffic.
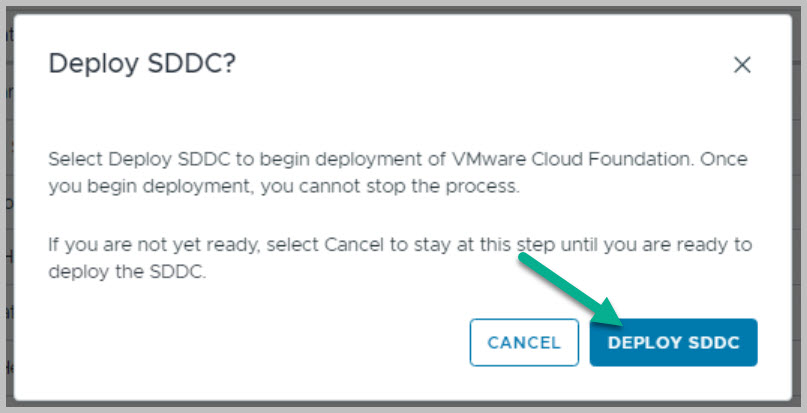
Before starting the VCF bring-up, it is recommended to create snapshots of the following virtual machines in case a rollback is needed:
VMware vCenter Server Appliance
VMware Cloud Builder
VxRail Manager
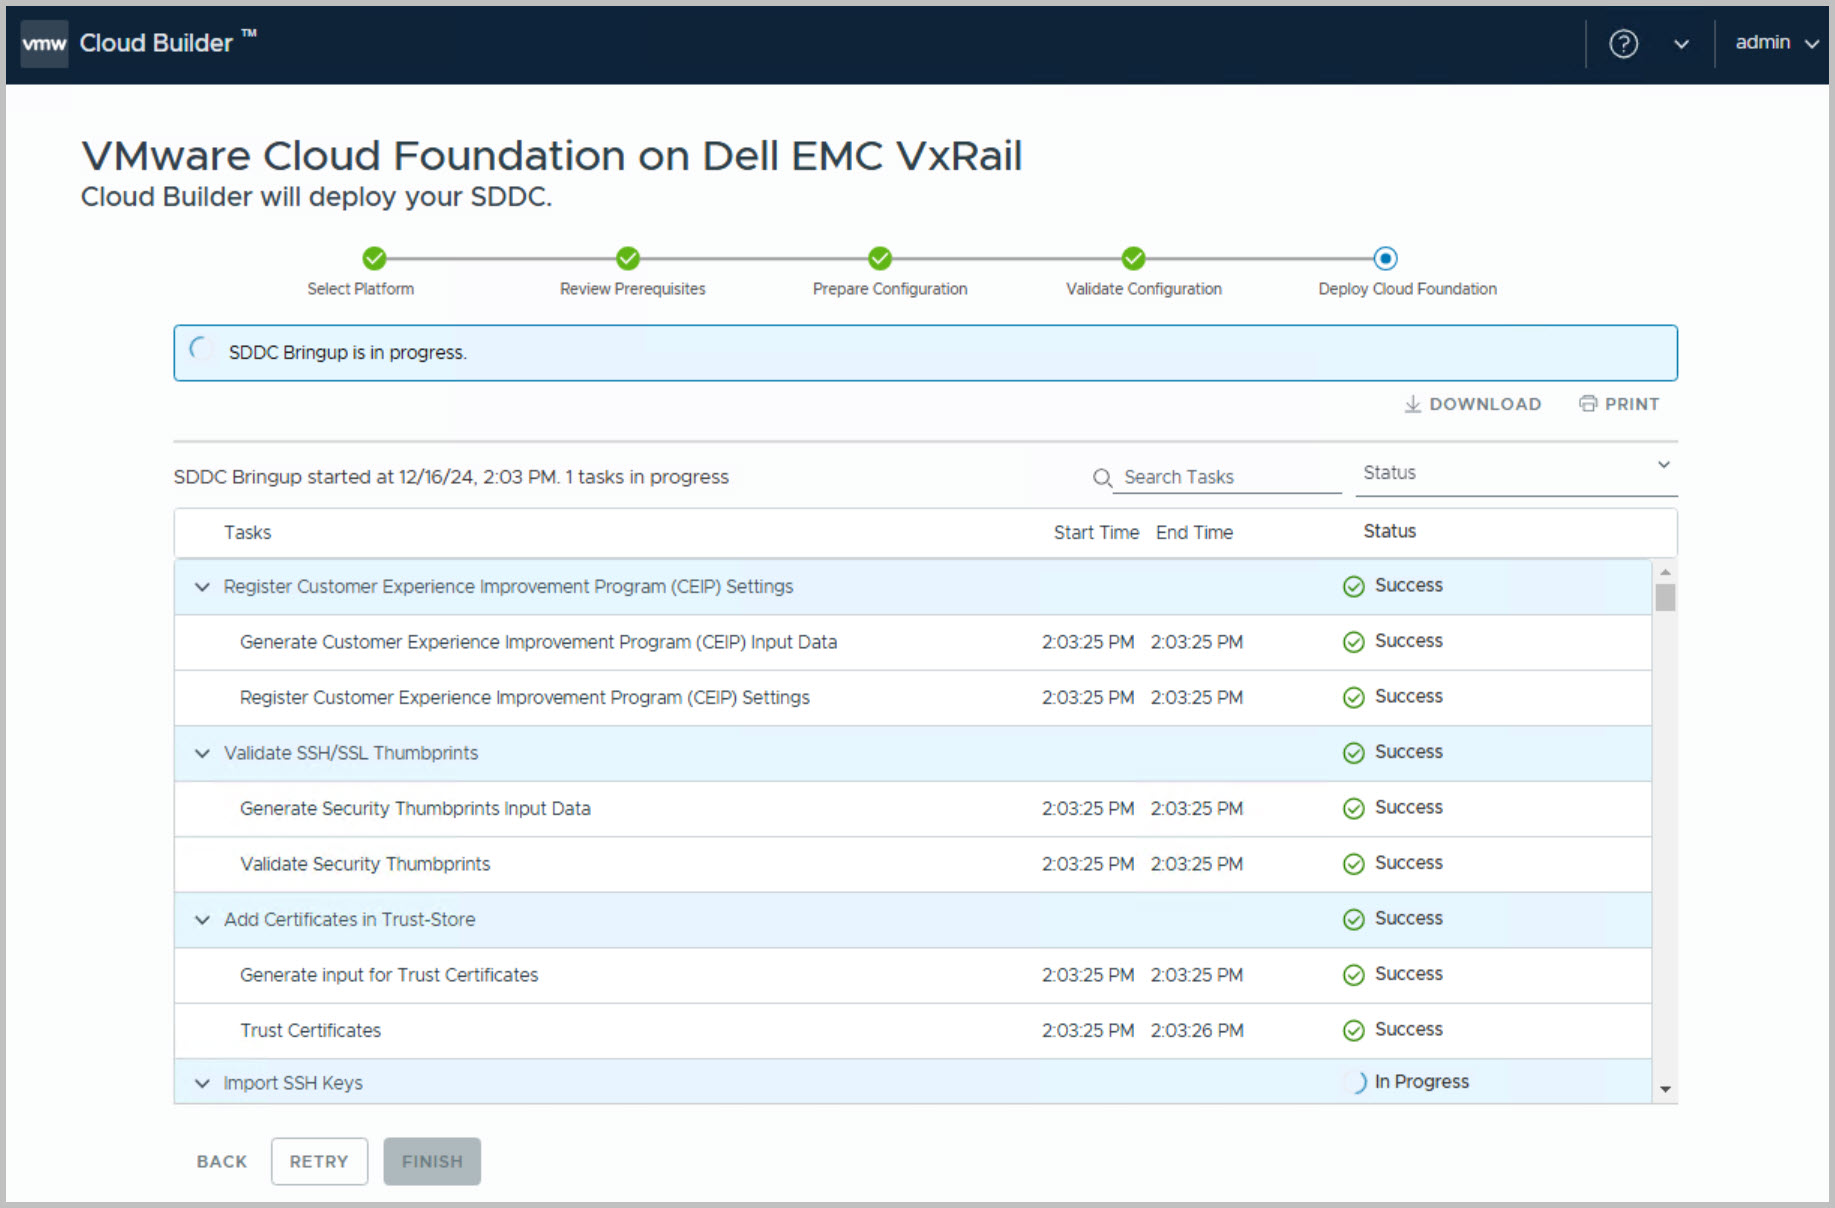
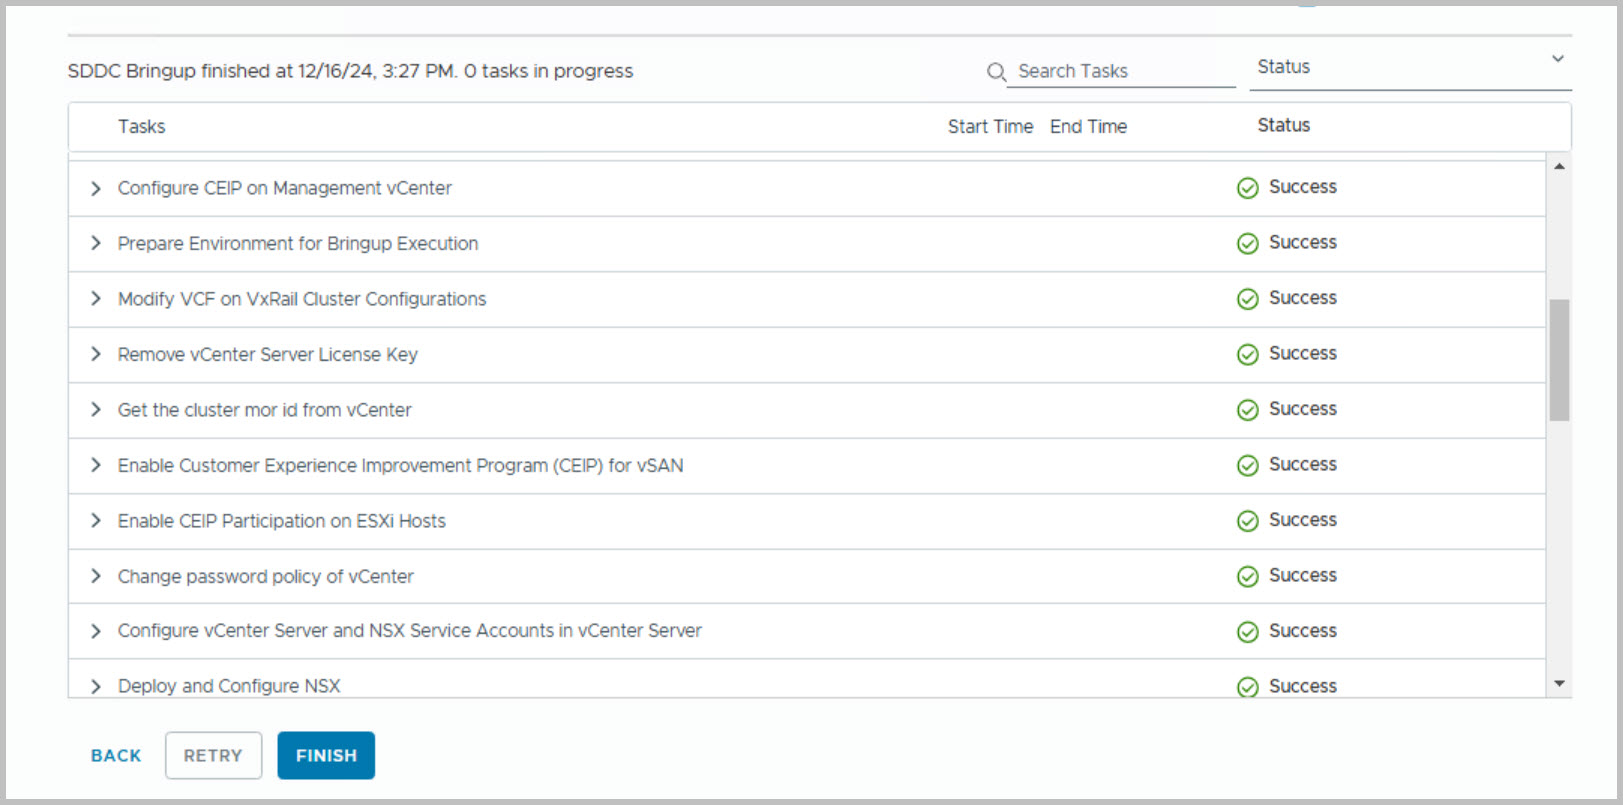
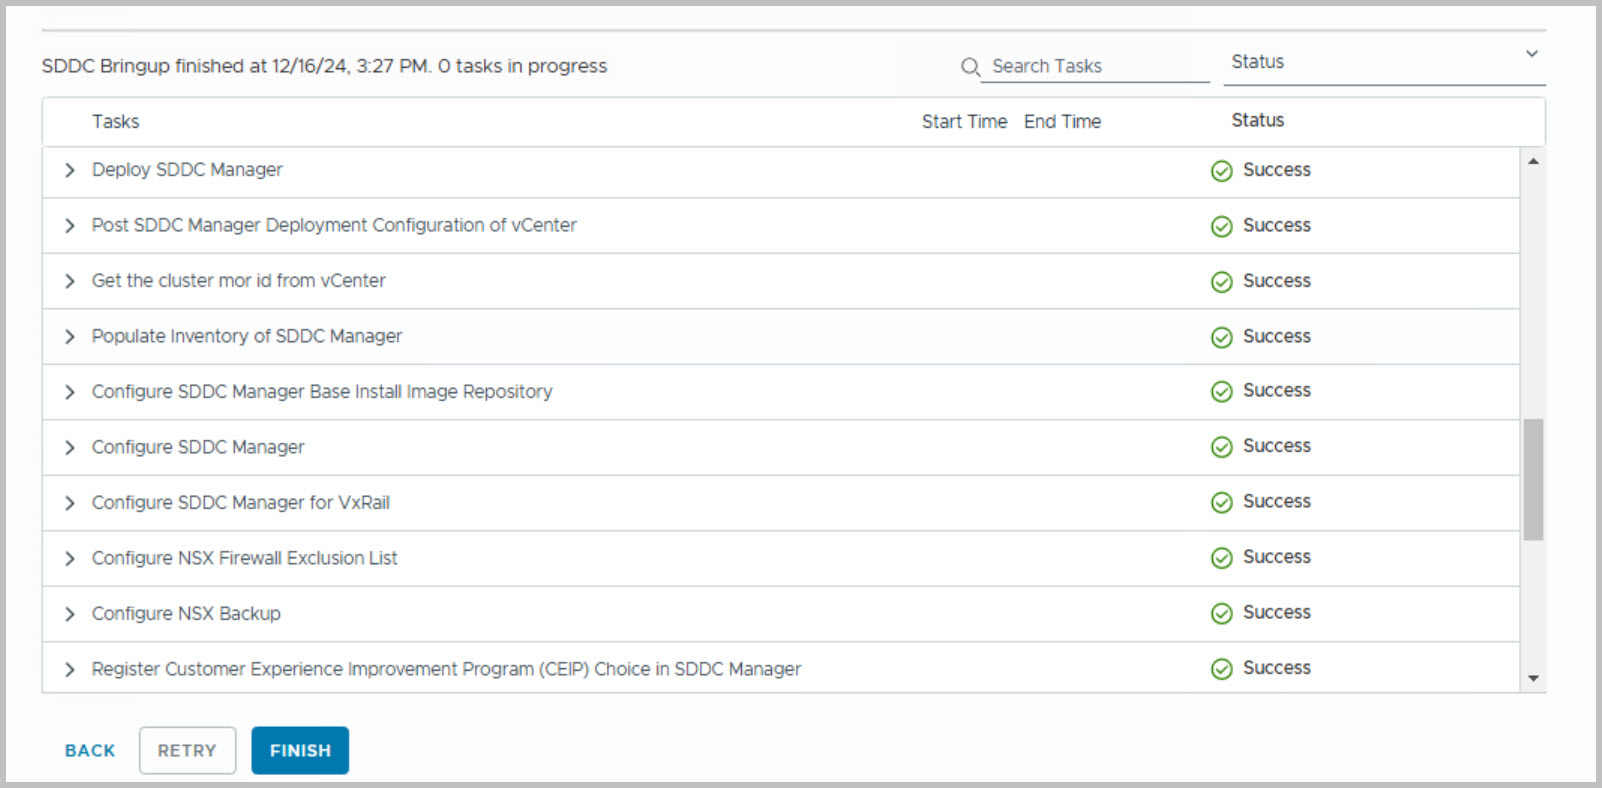
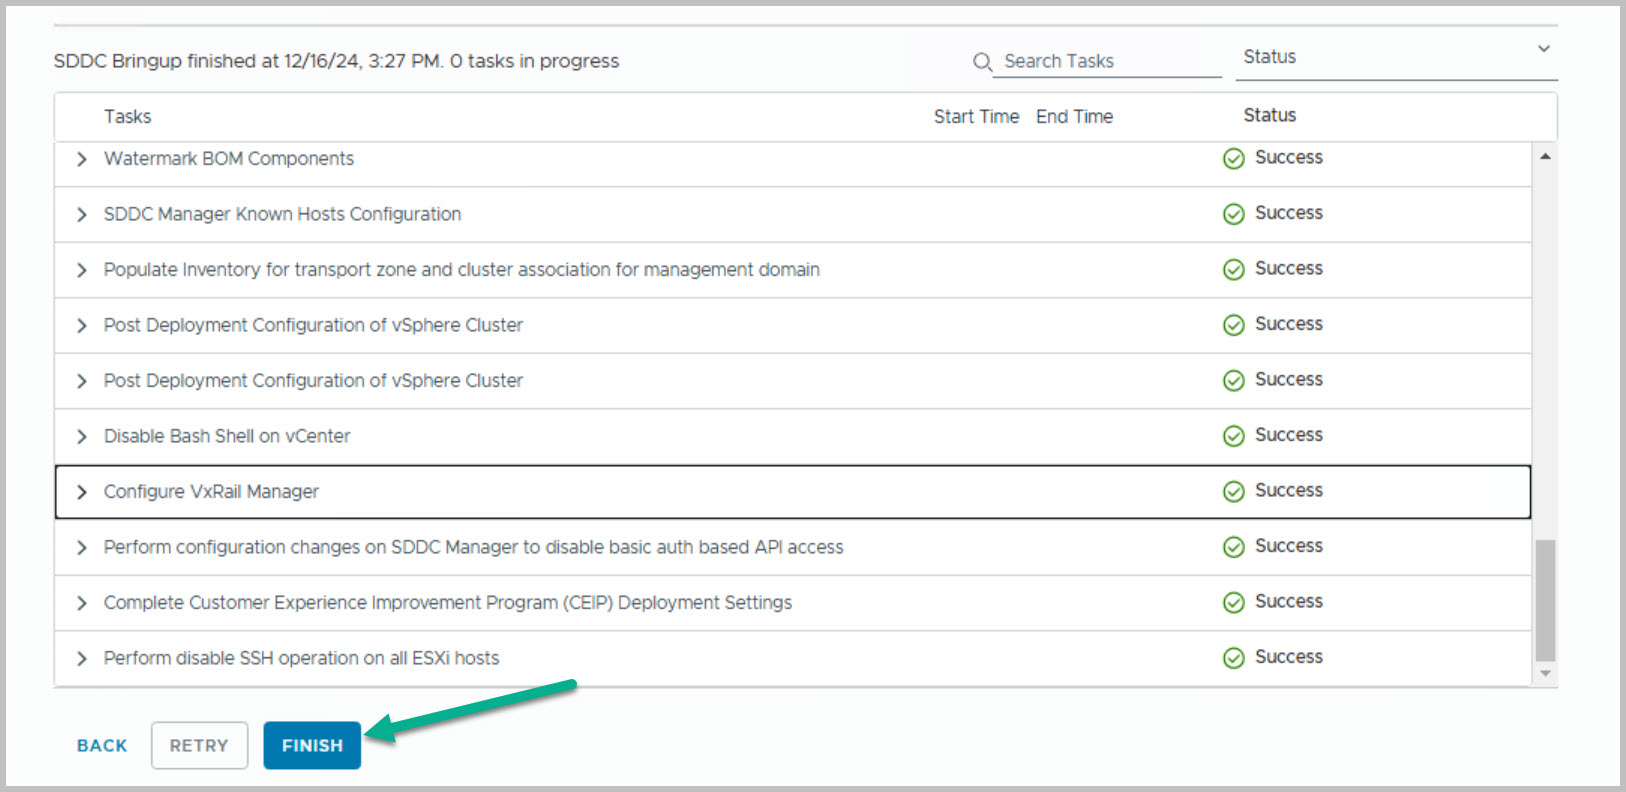
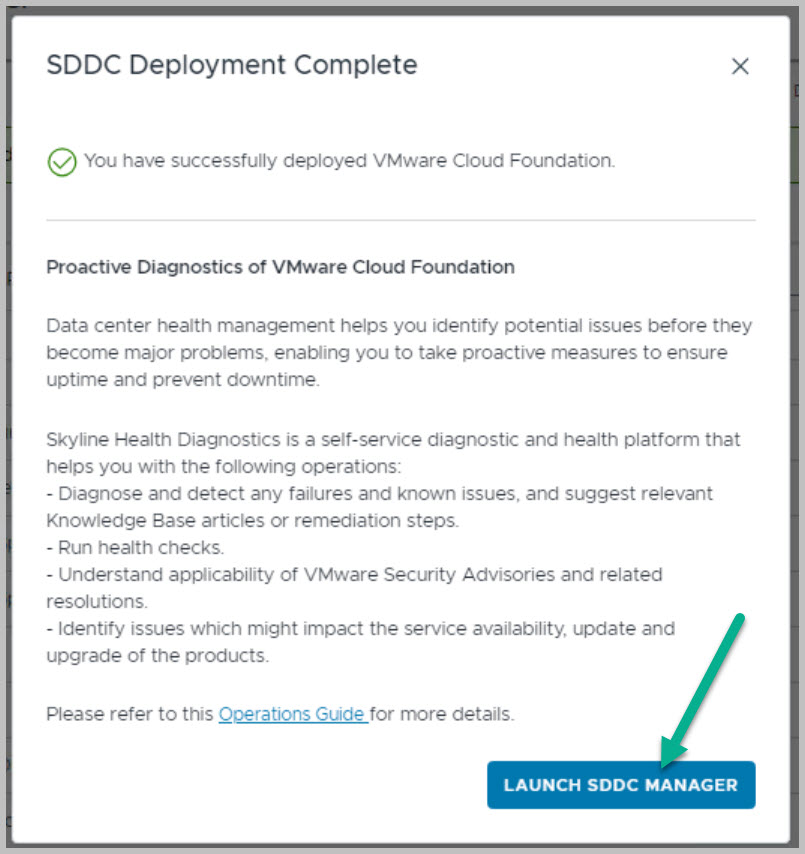
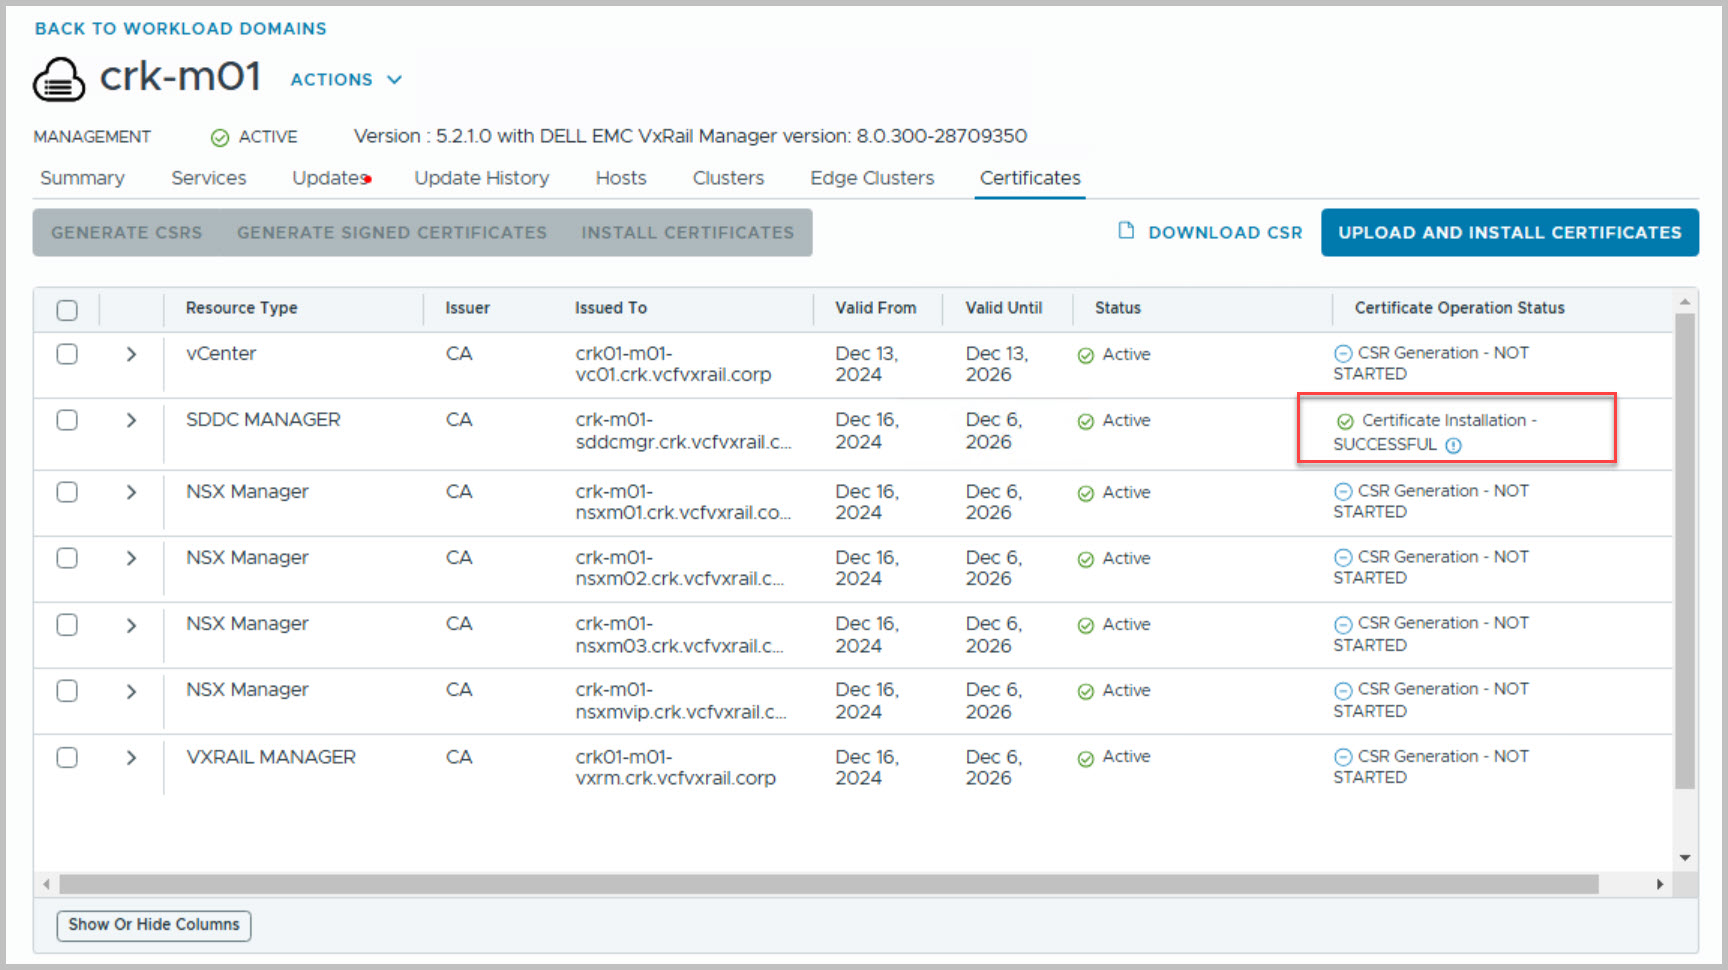
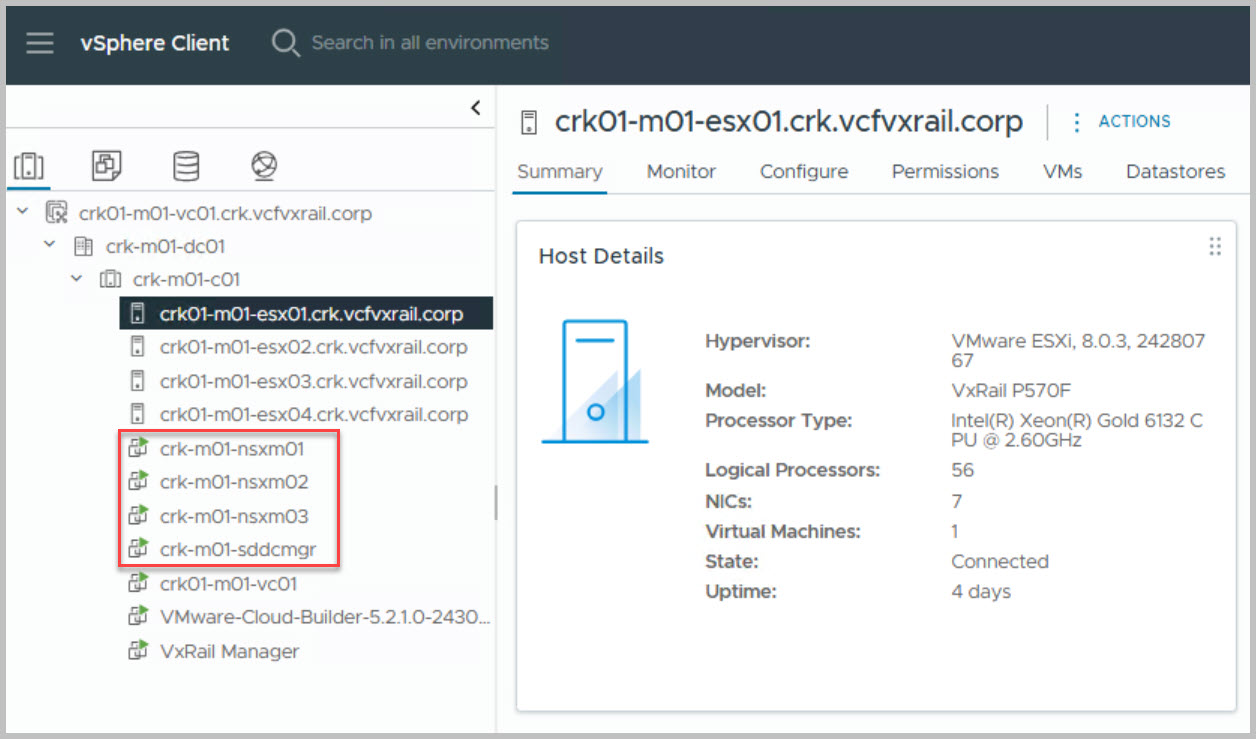
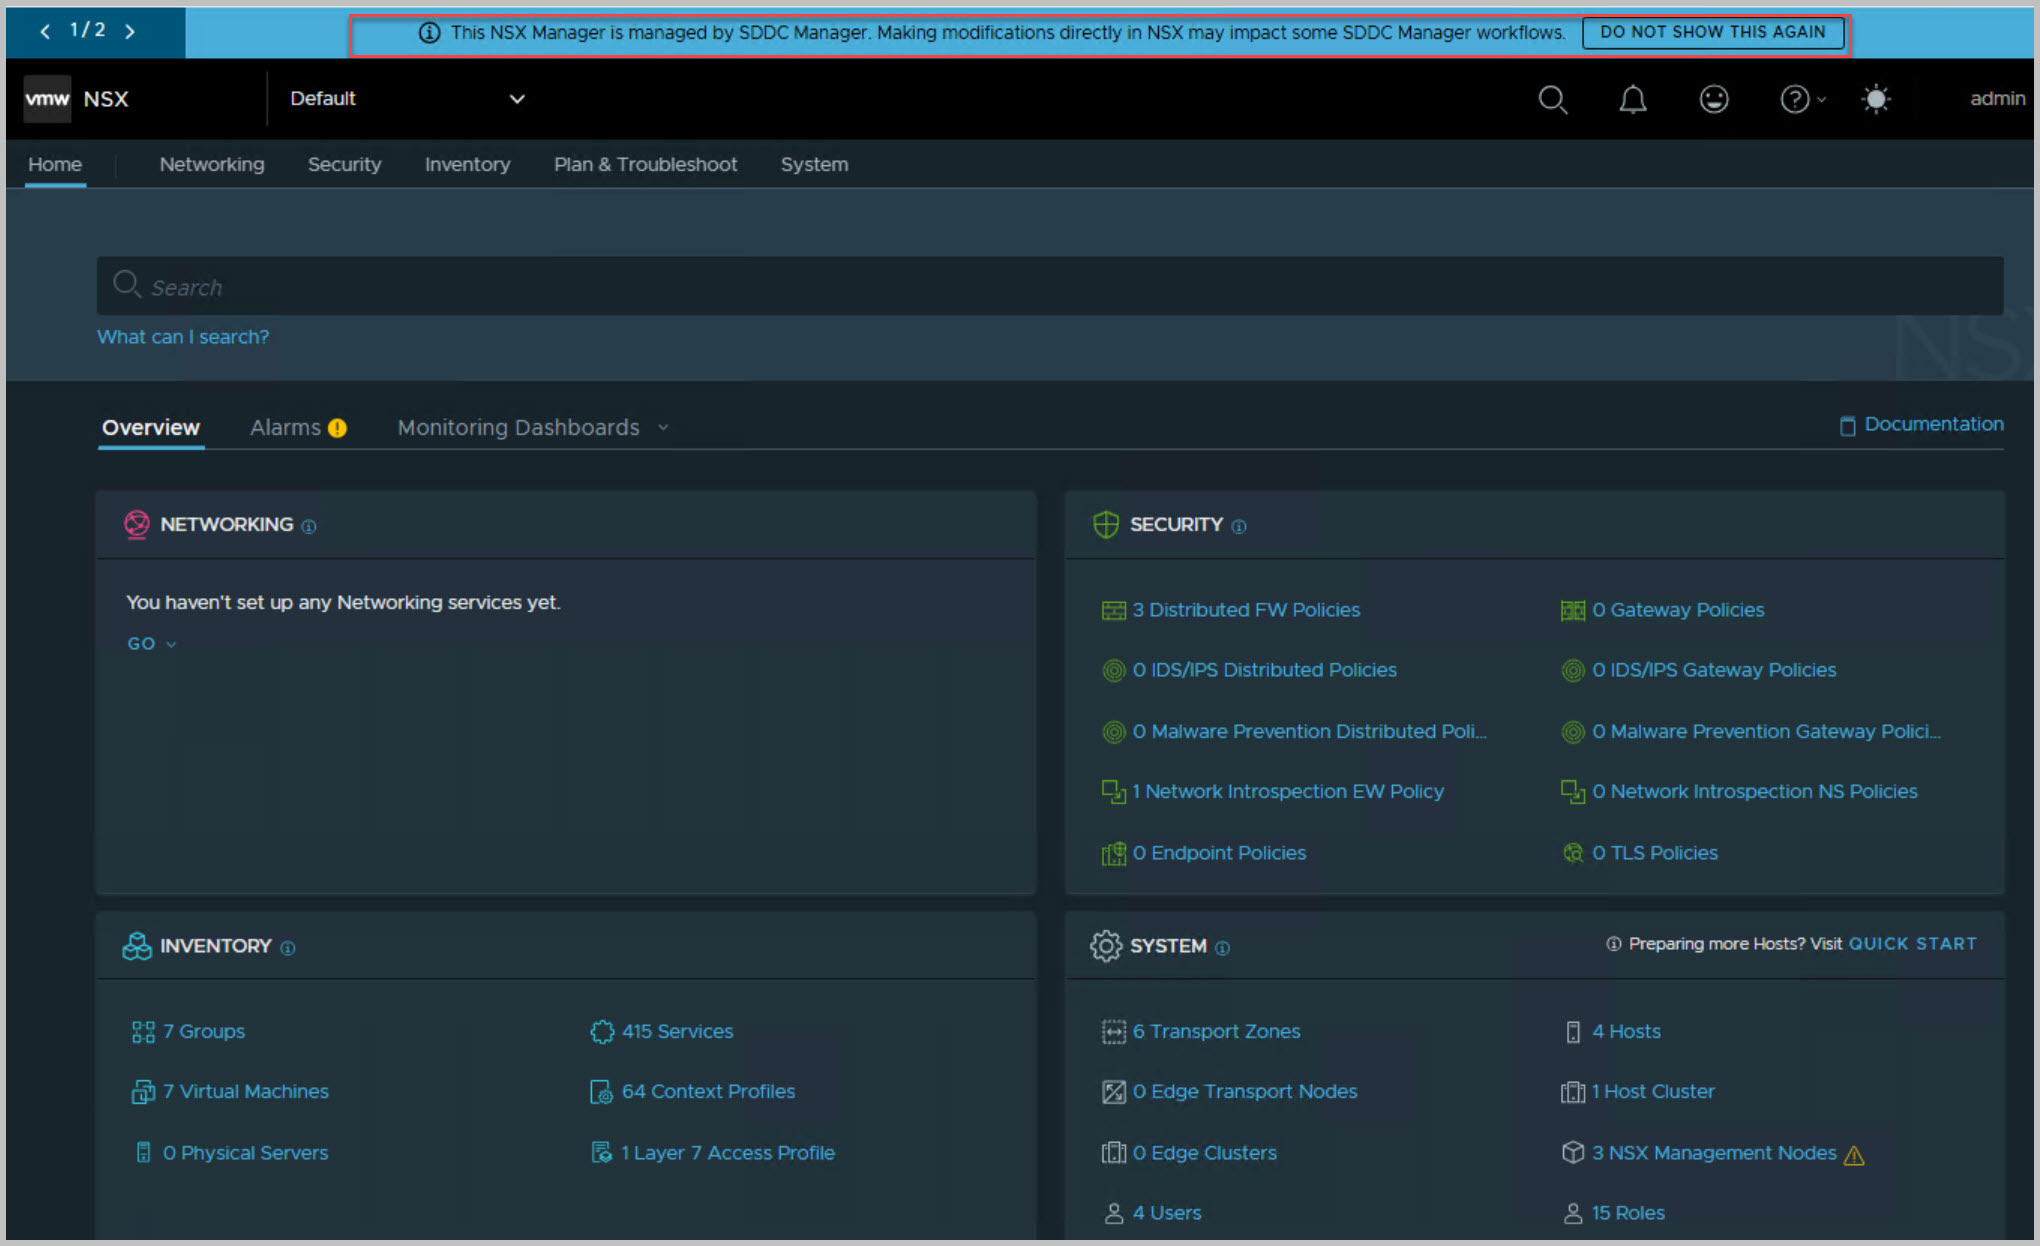
During the bring-up process, the following components will be automatically deployed and configured:
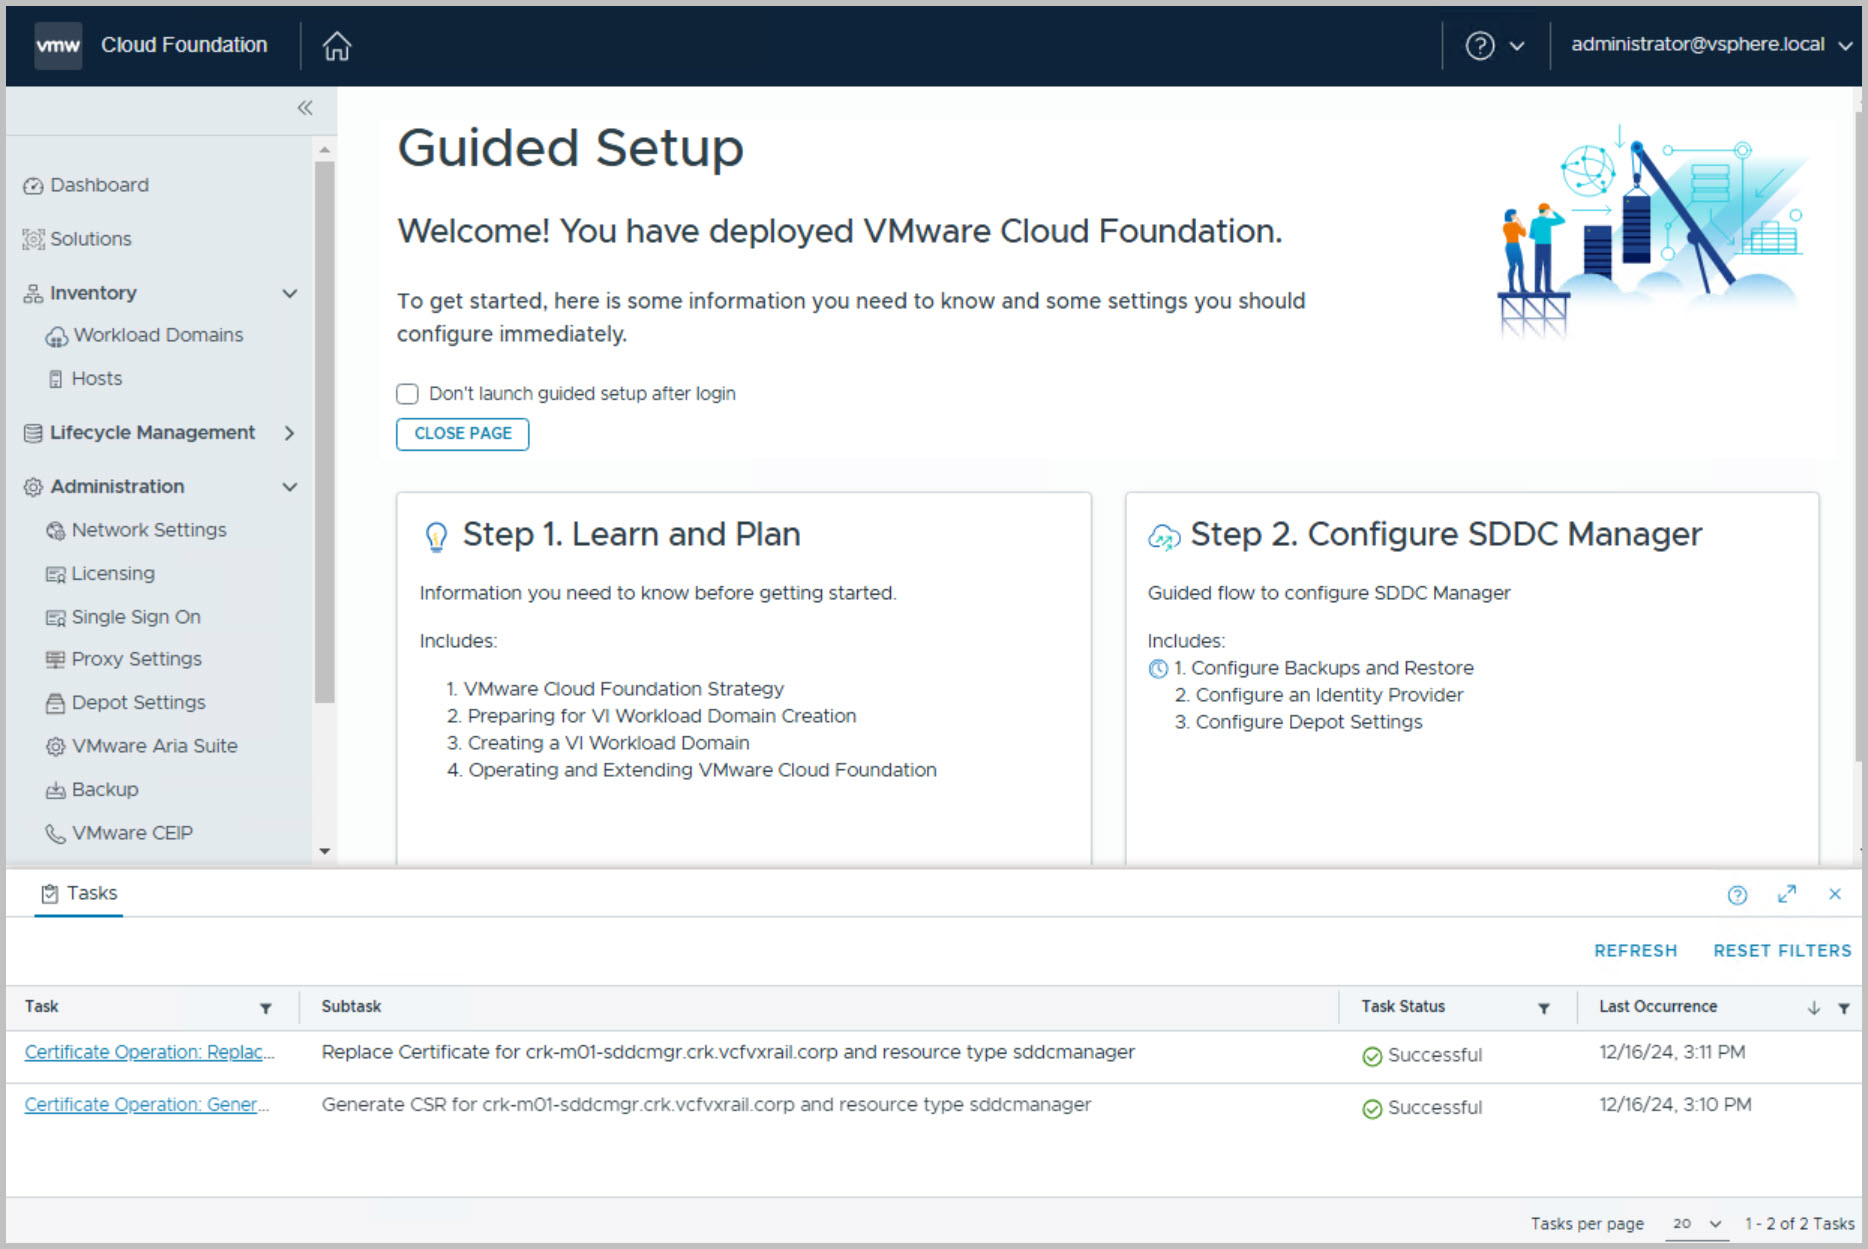
SDDC Manager
NSX Managers
Note: Ensure SSH is enabled on vCenter before proceeding.
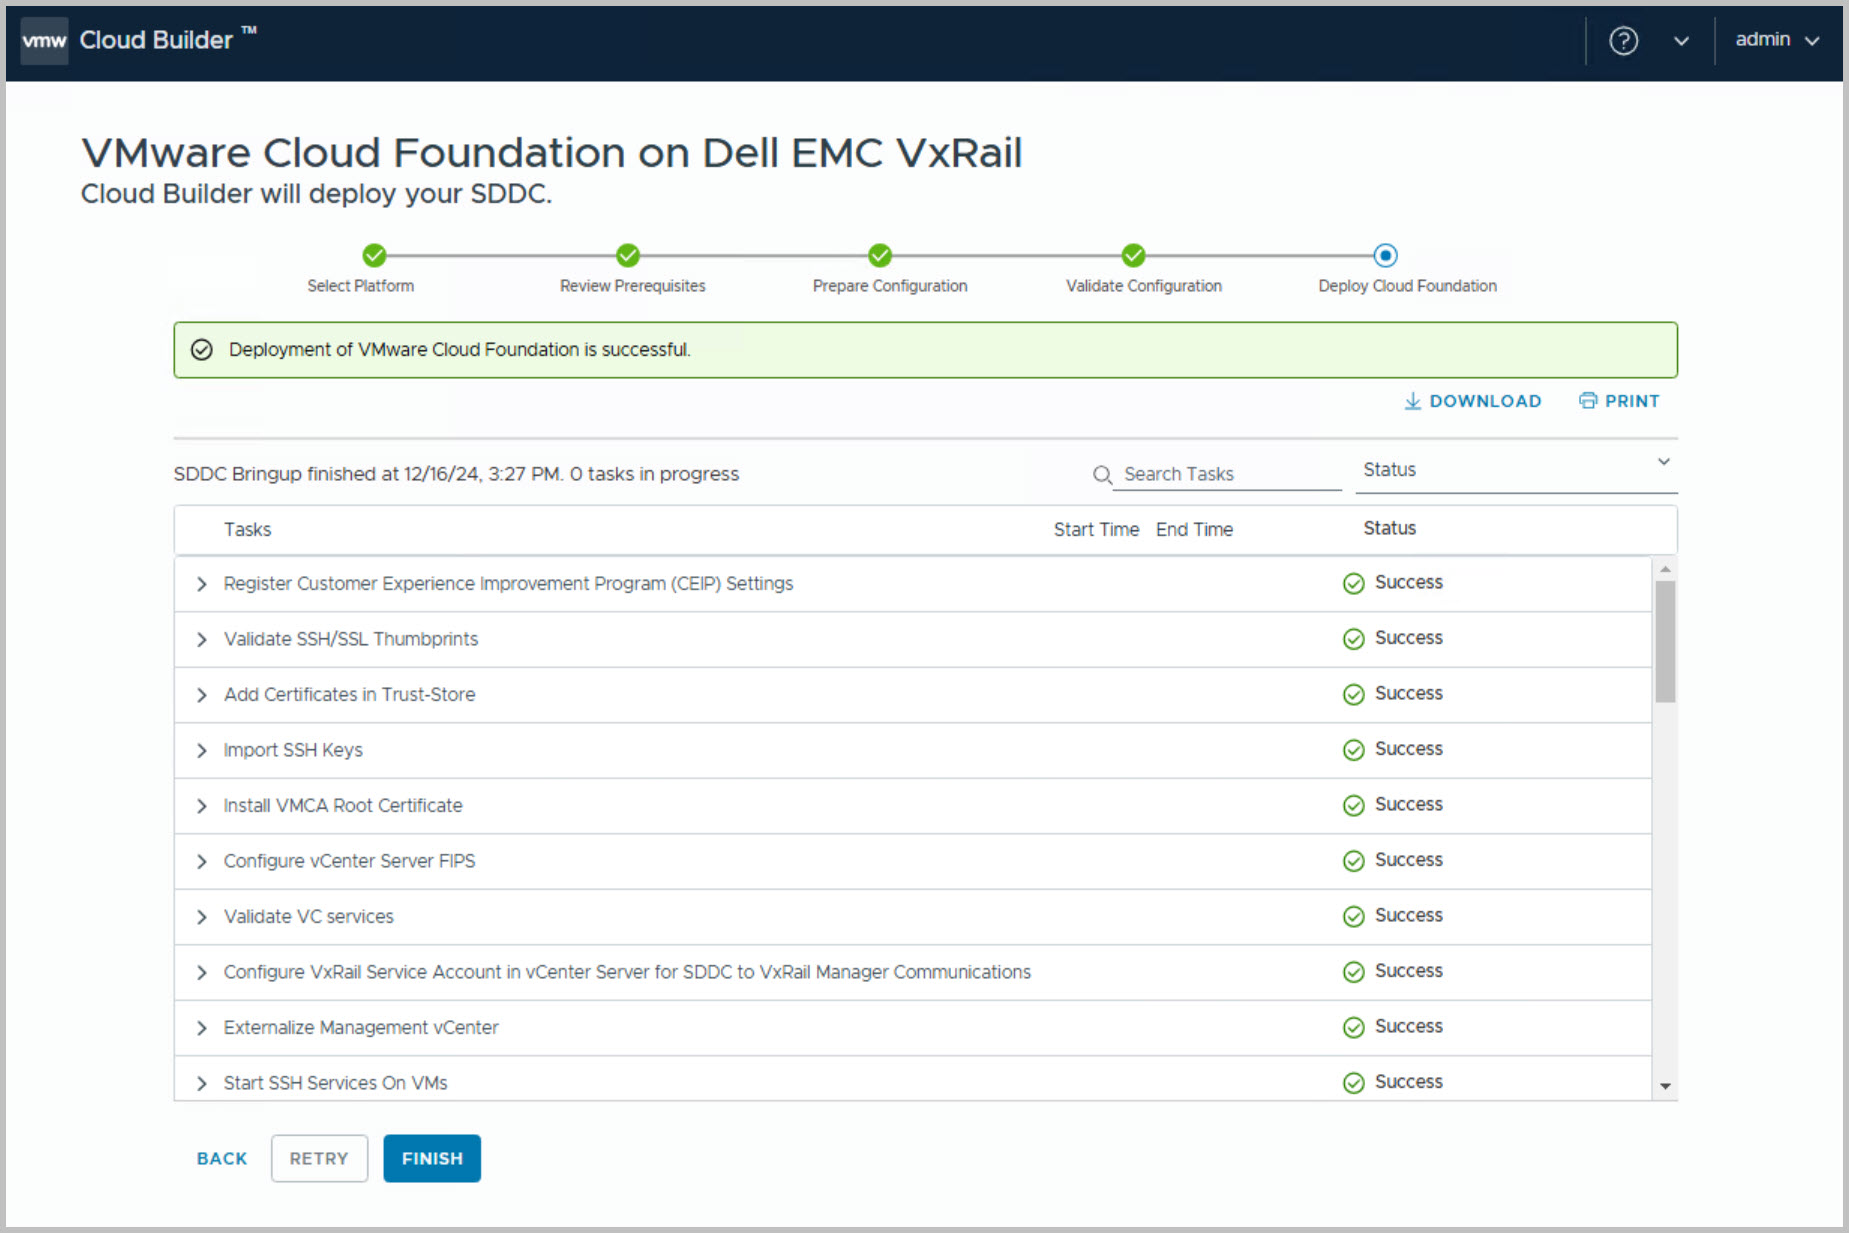
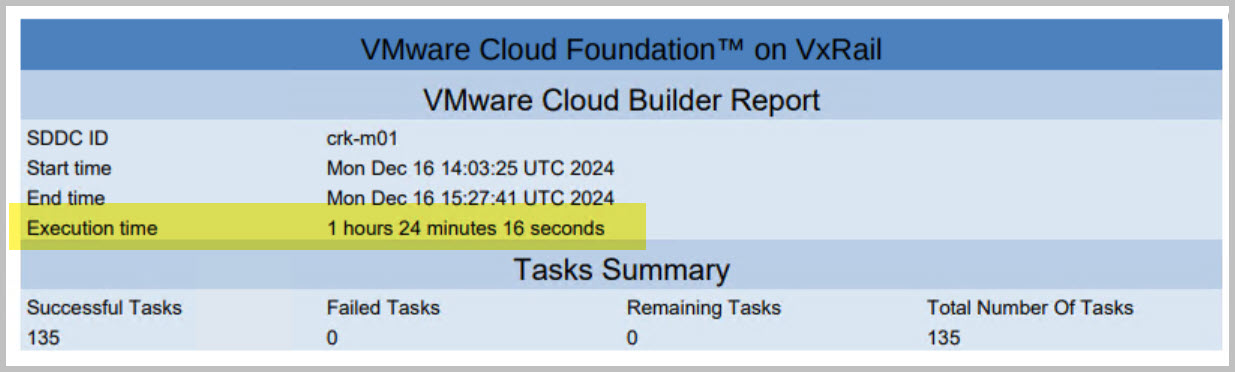
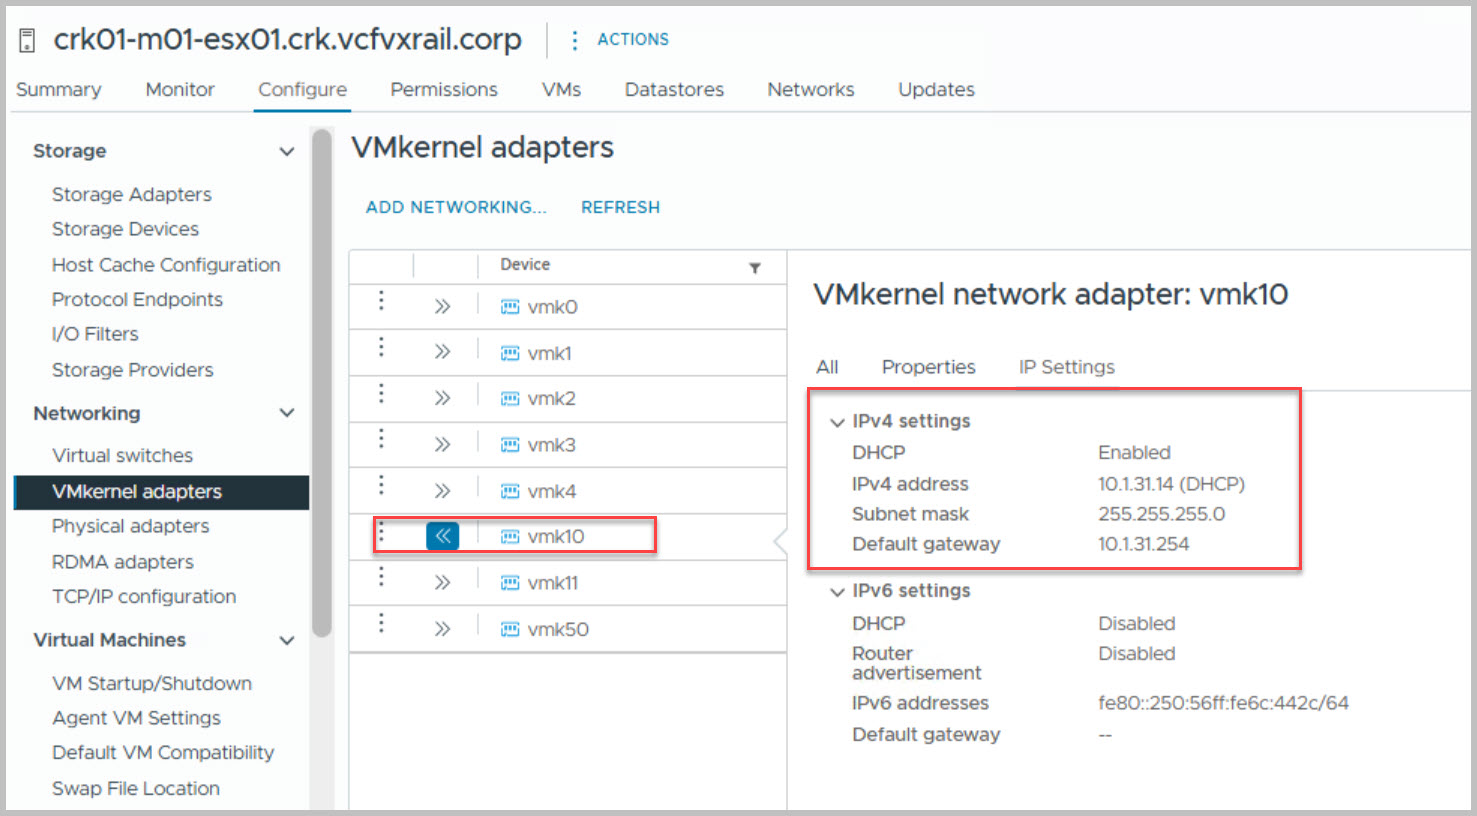
Upon completion of the VCF bring-up, we review the Management Domain VMs created in vCenter by the VCF bring-up process and verify the automatic IP assignment from the DHCP IP pool for the NSX-T Virtual Tunnel Endpoints (VTEPs).
Note: In previous releases, Cloud Builder generated a JSON file (vcf-public-vxrail.json) for the management cluster from the uploaded configuration file. To address security concerns, this file is now automatically deleted upon successful bring-up.
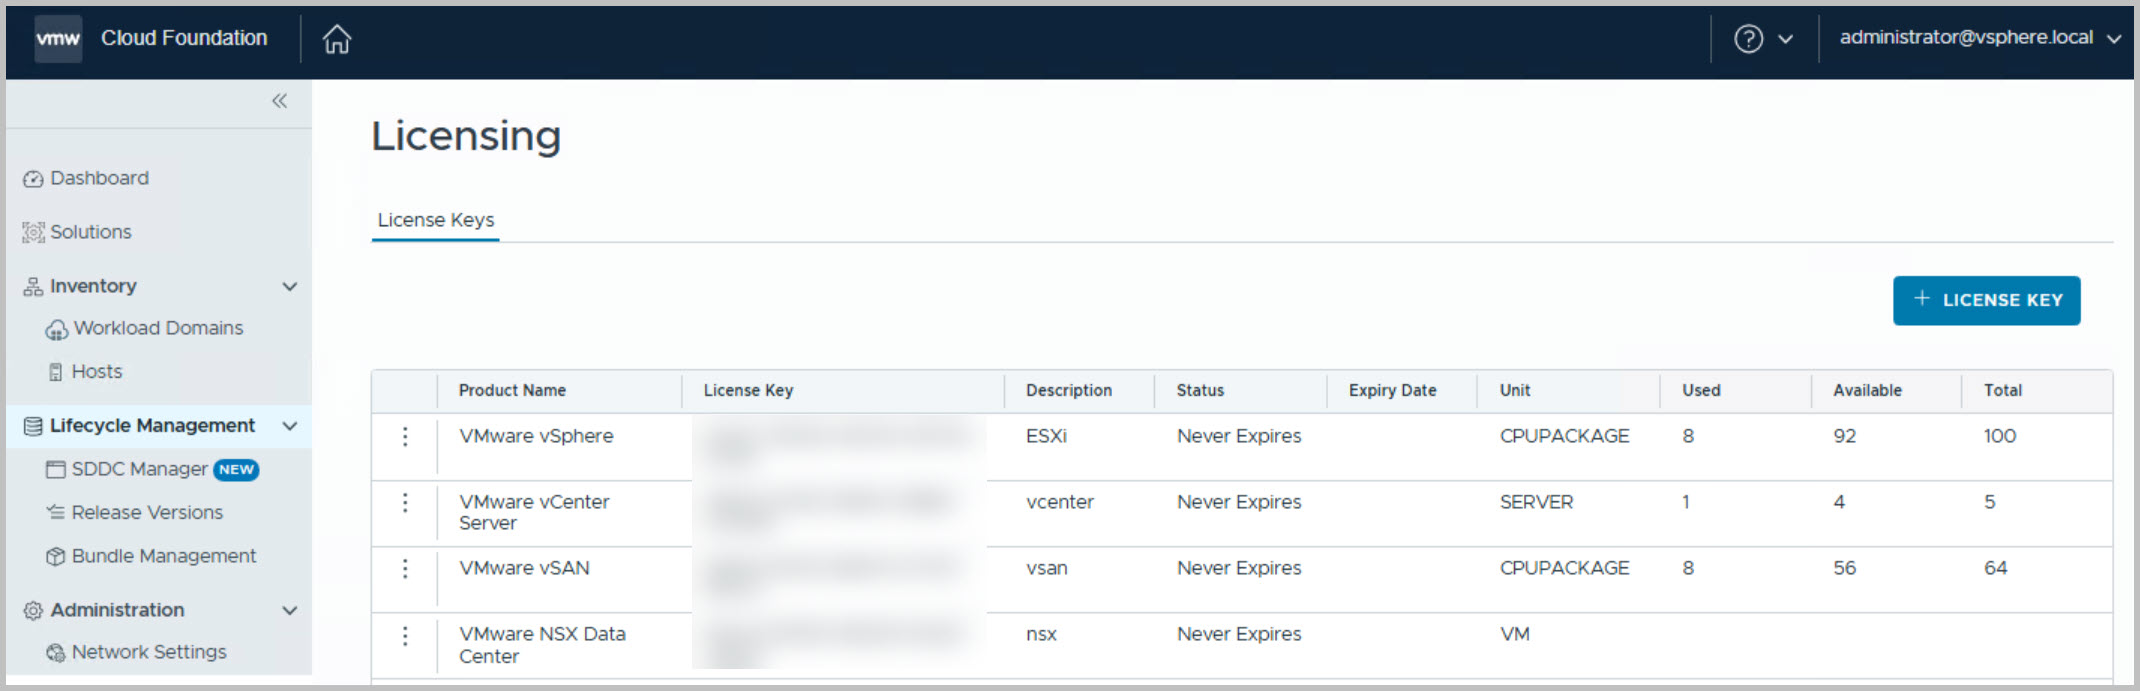
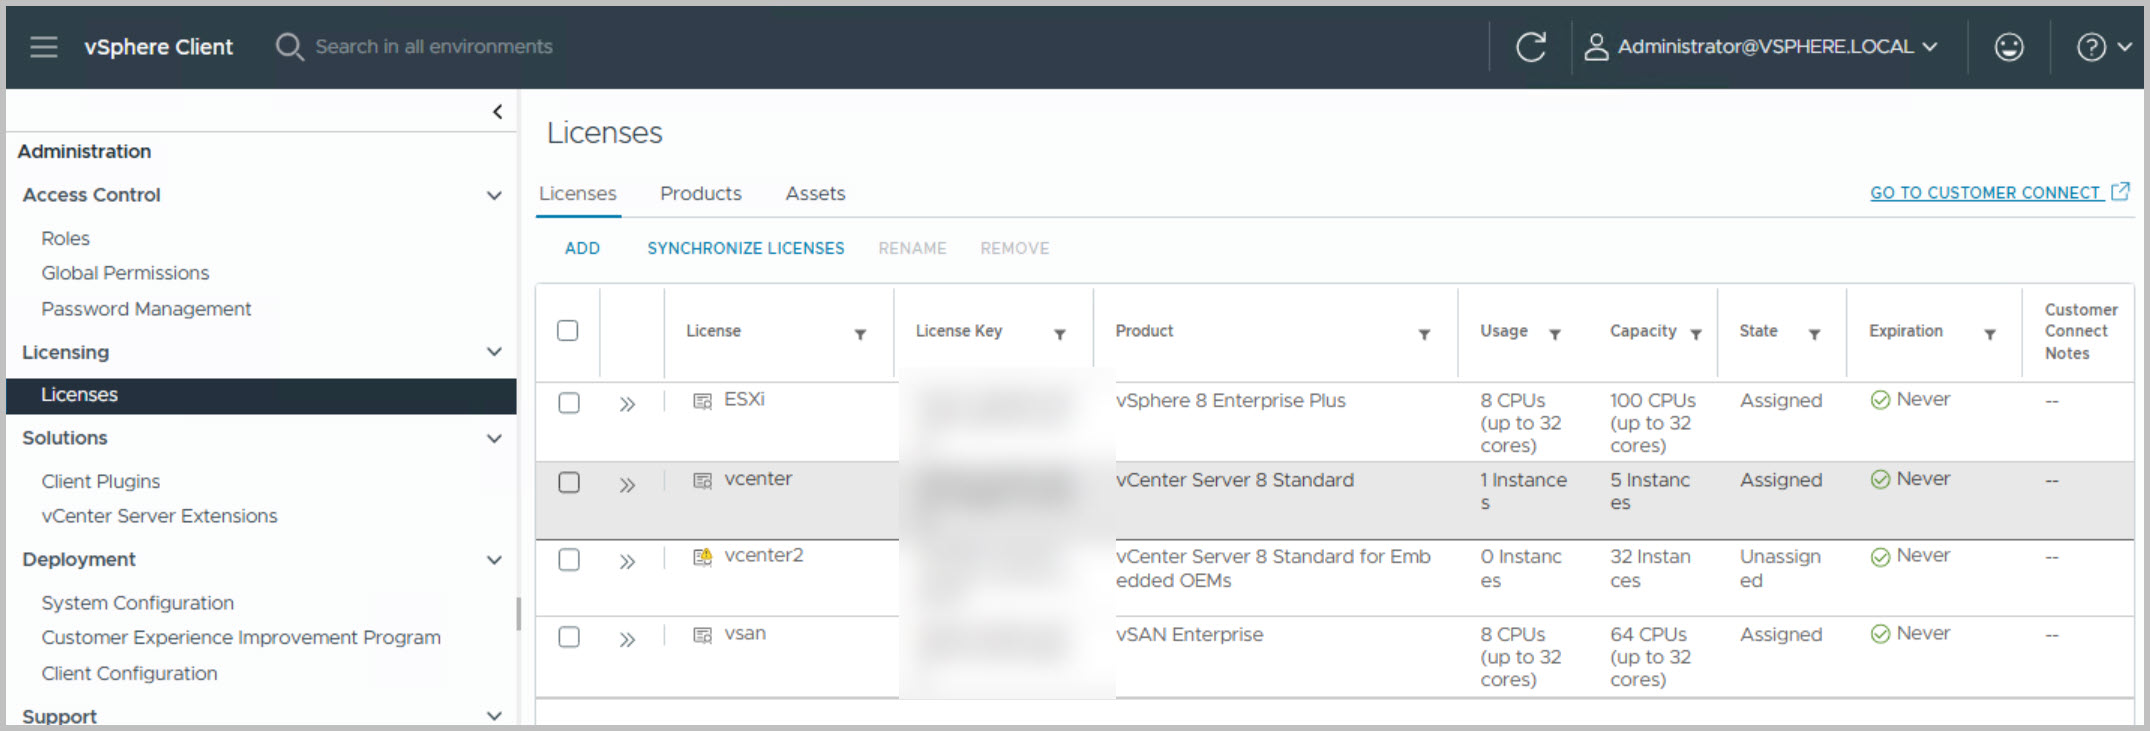
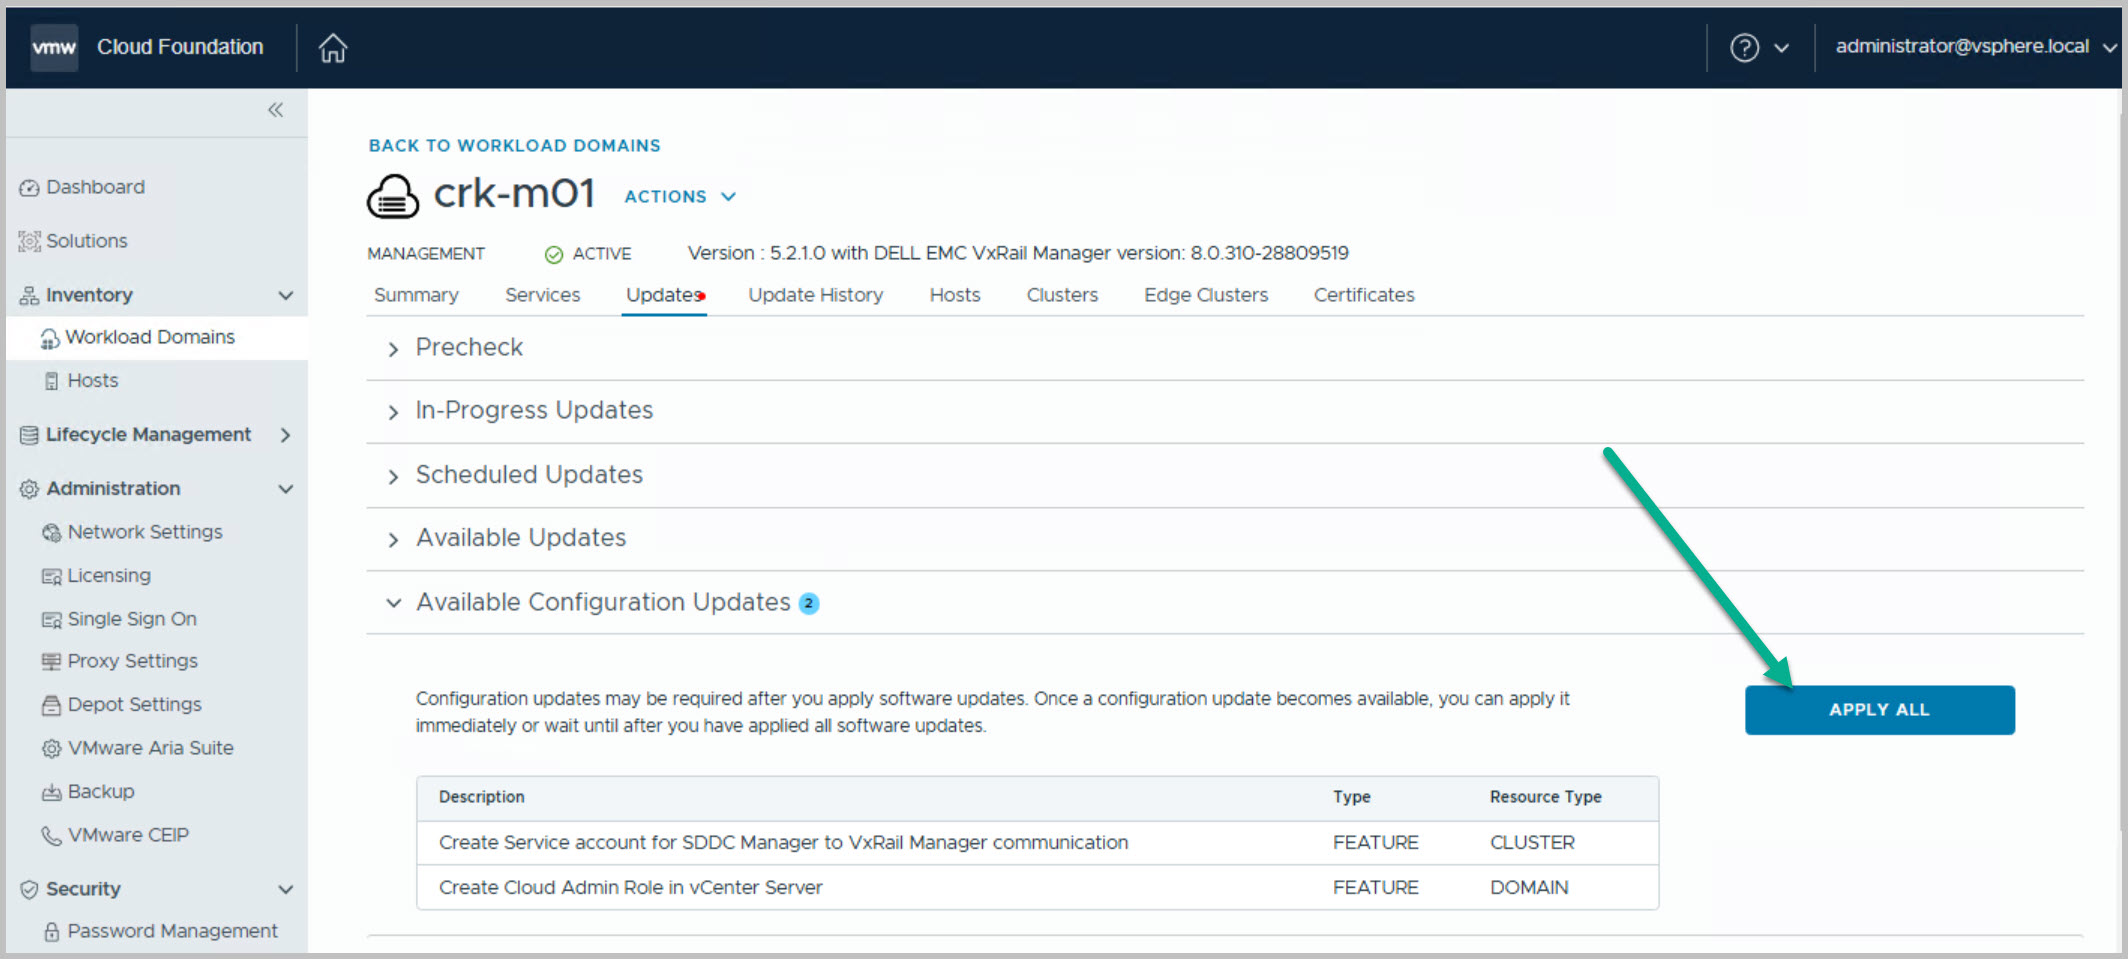
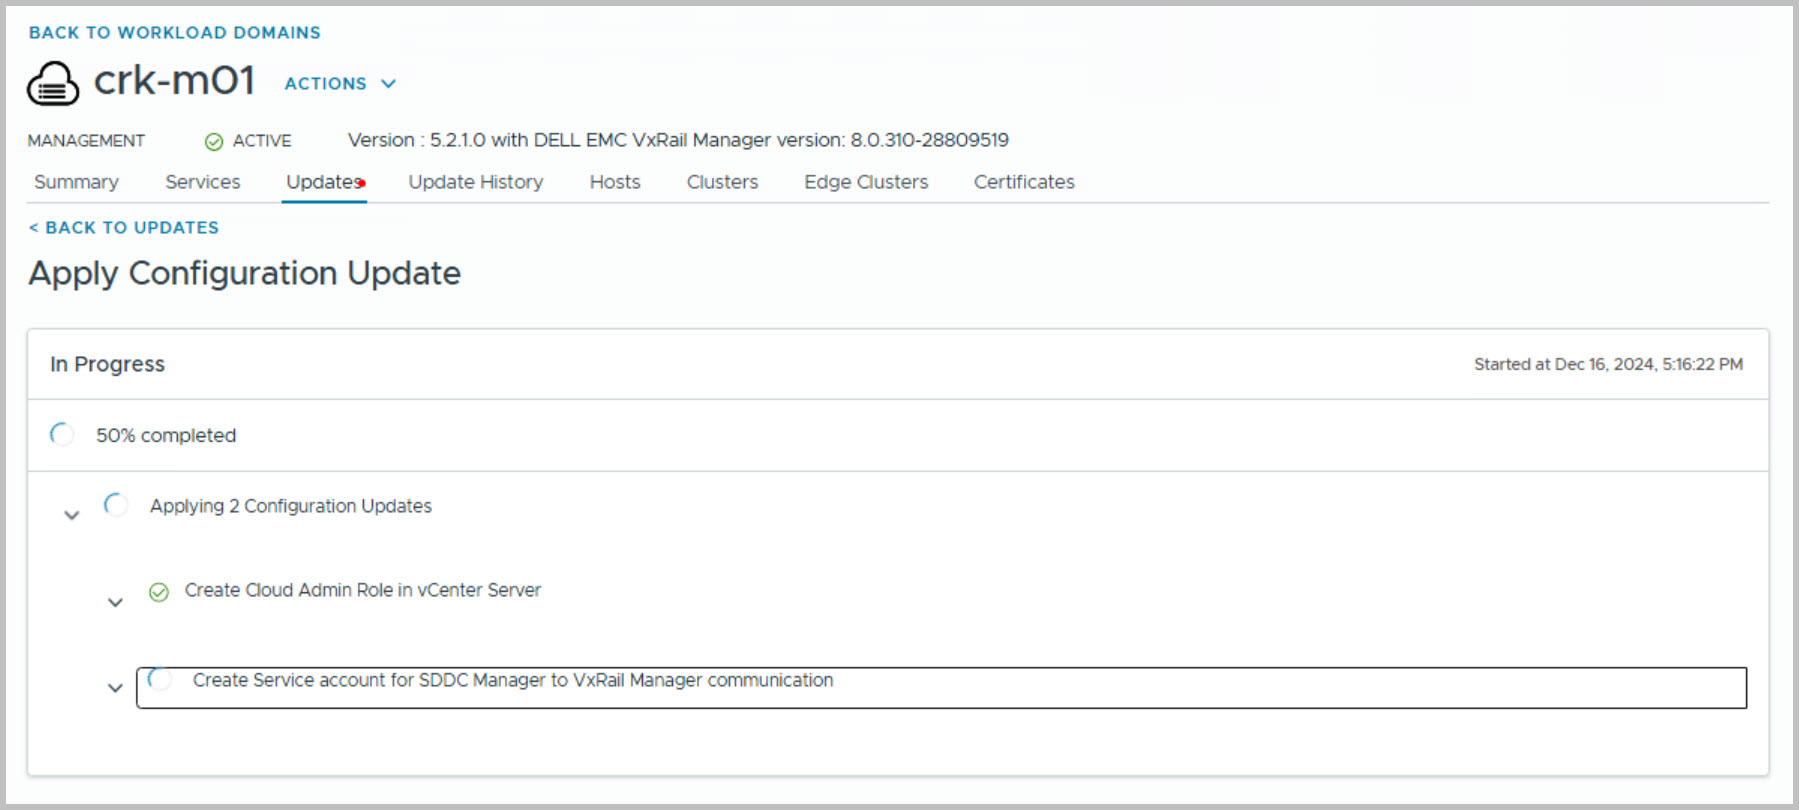
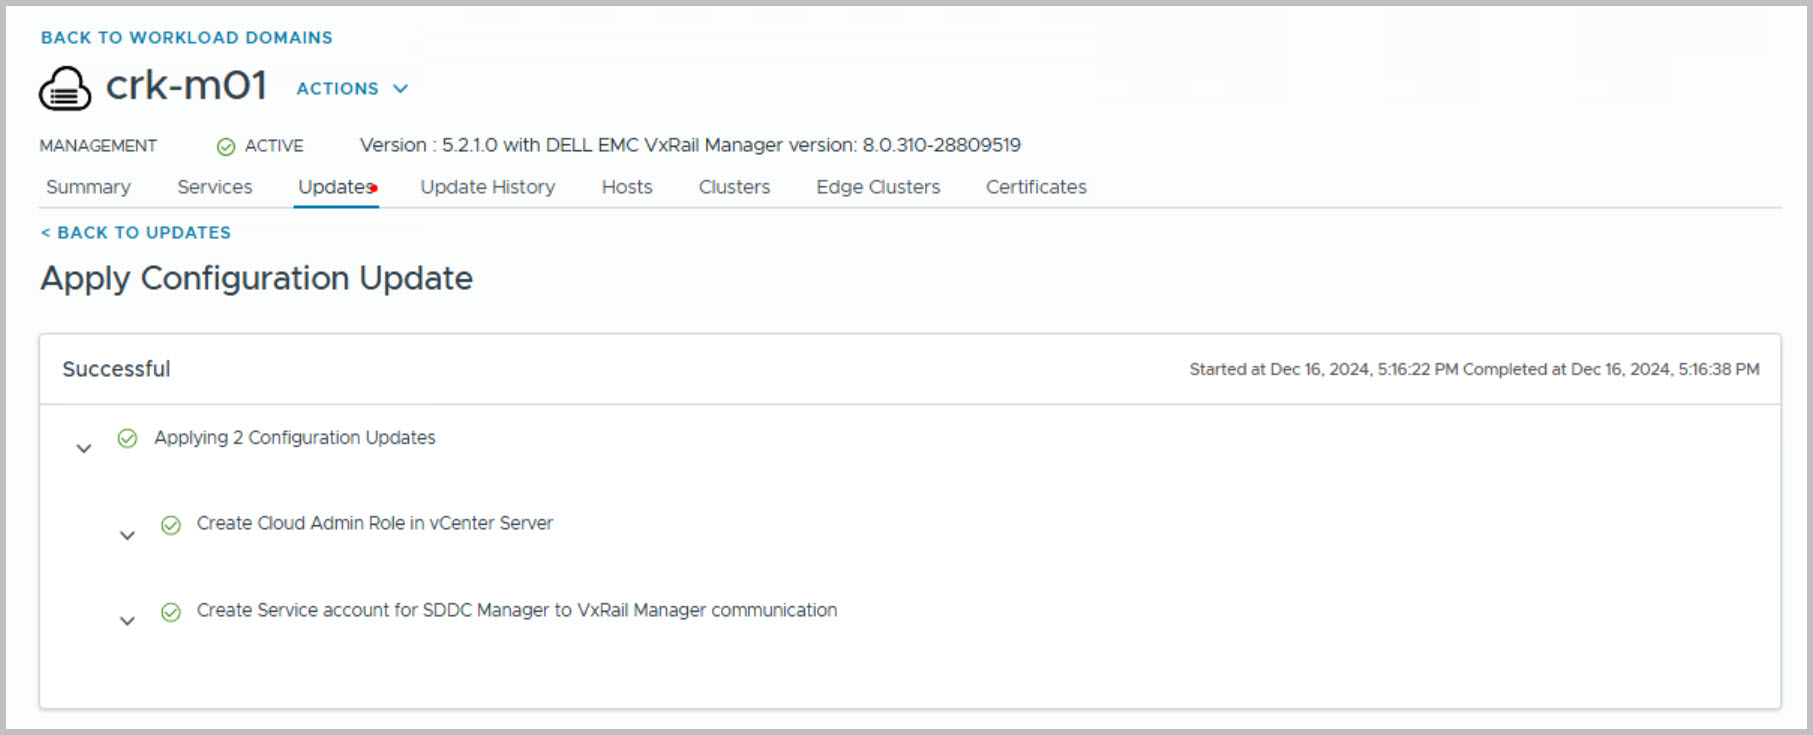
The creation of new dedicated service accounts for SDDC Manager communications with both VxRail and vCenter addresses previous issues caused by the use of a superuser account (administrator@domain) for invoking VxRail APIs. The reliance on the superuser account introduced security vulnerabilities during communication with VxRail. Additionally, since the superuser account is managed by the user, any password changes could disrupt connectivity between SDDC Manager and VxRail. To resolve these challenges, operations between SDDC Manager and VxRail are now performed using a dedicated service account:
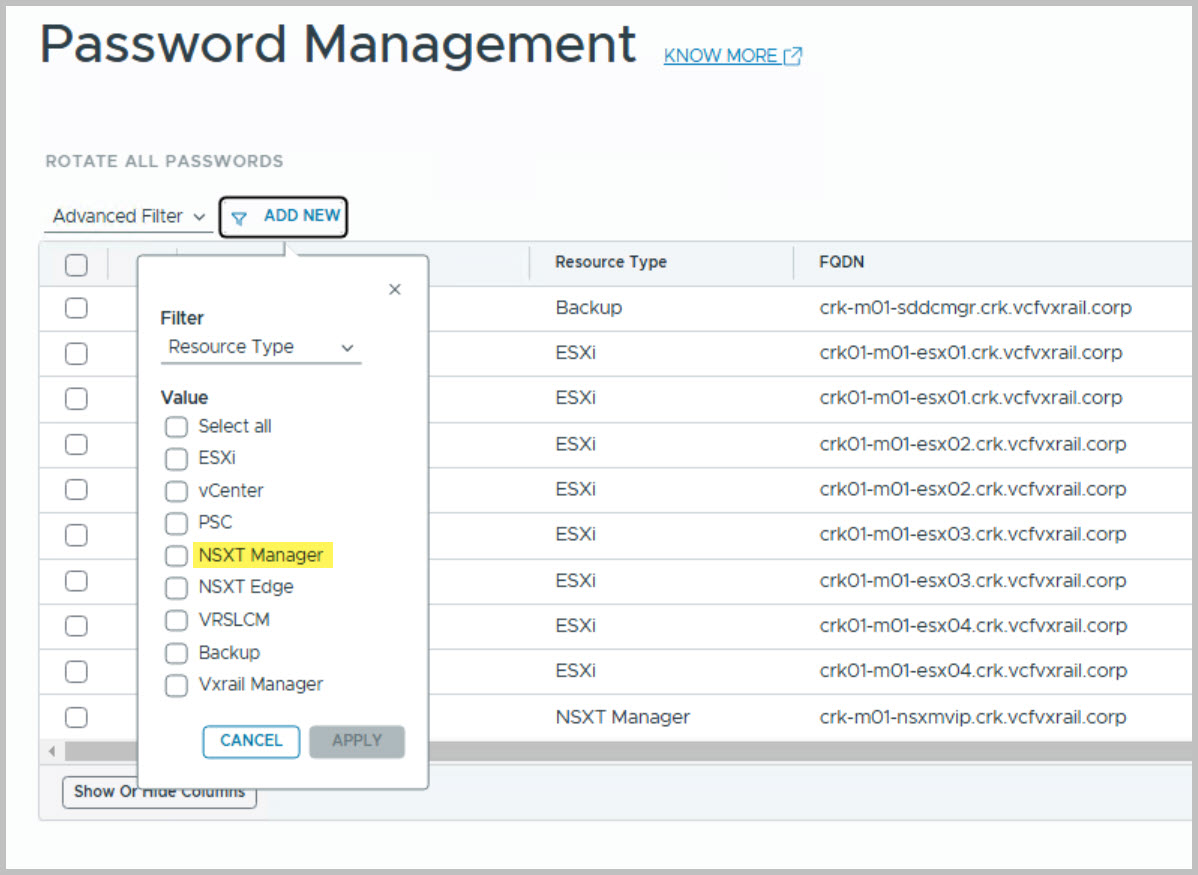
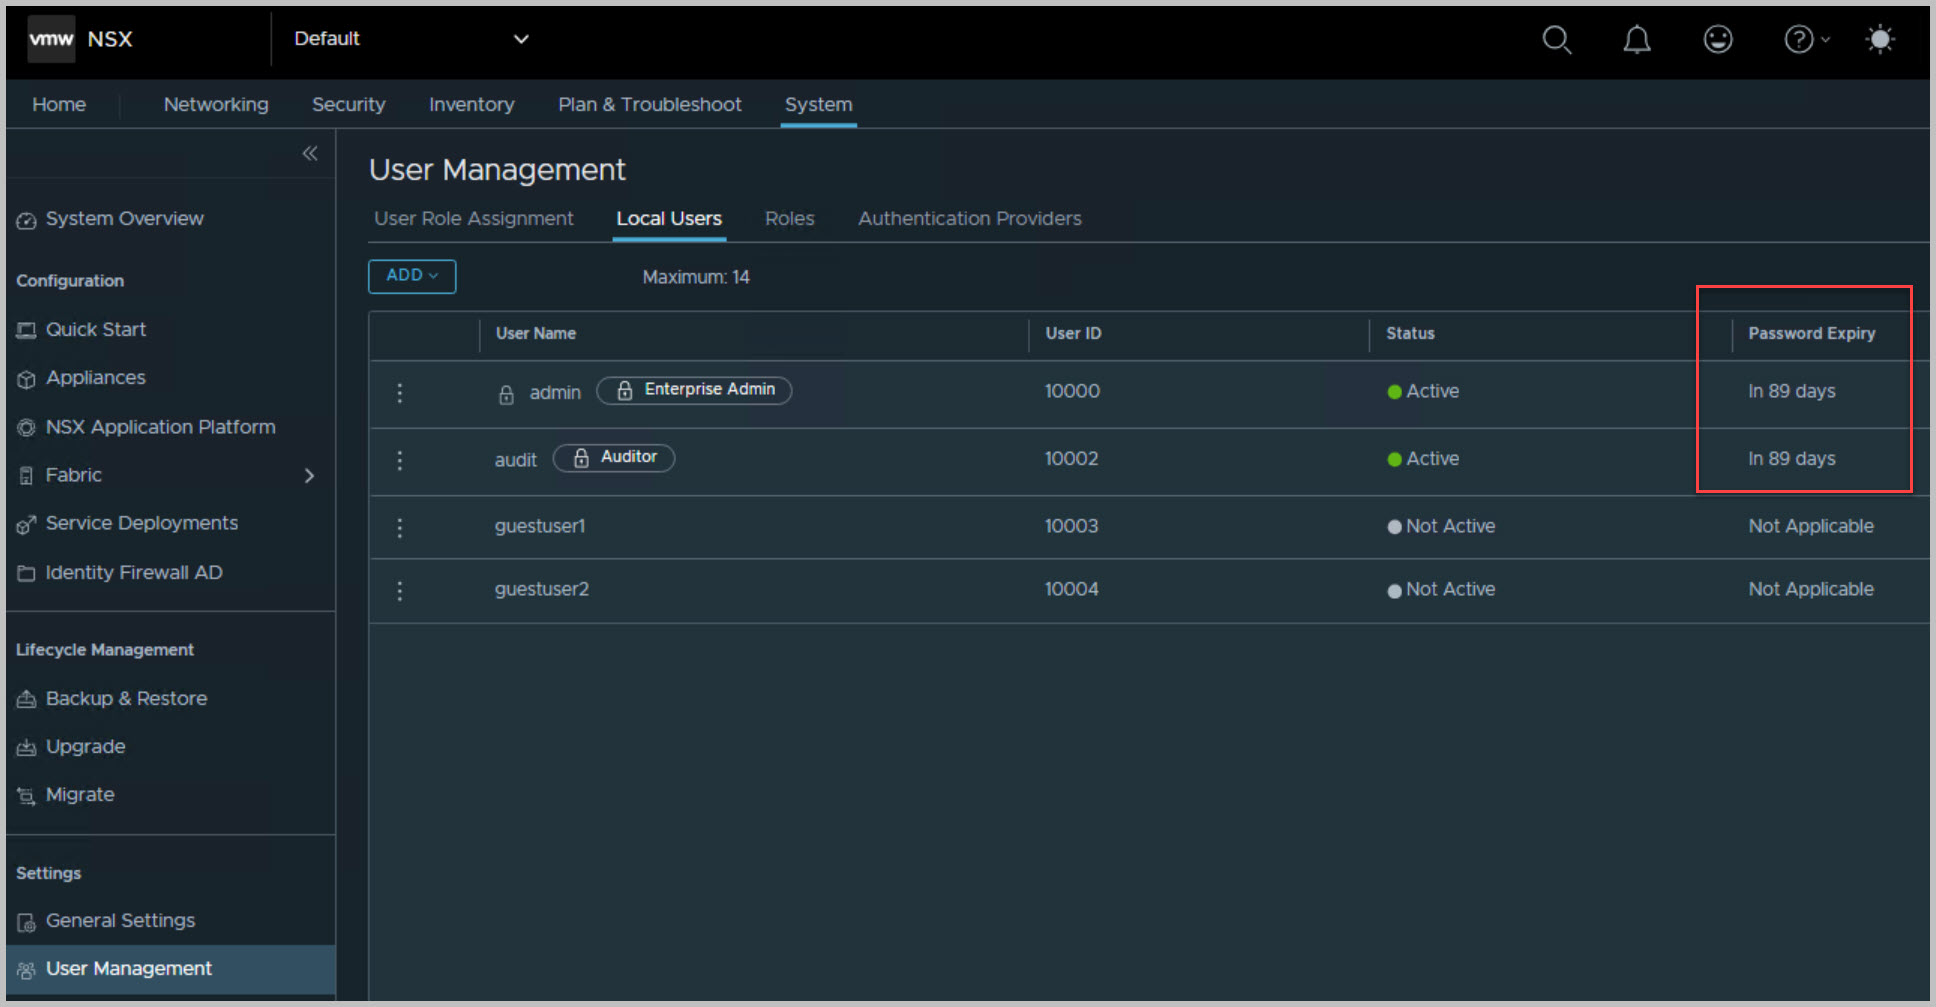
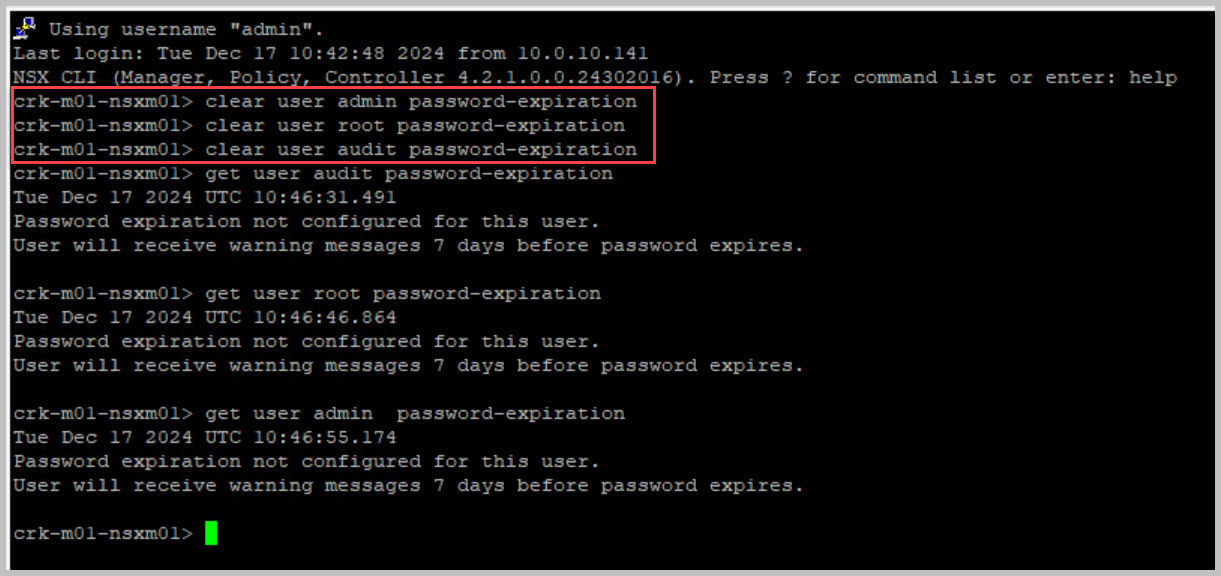
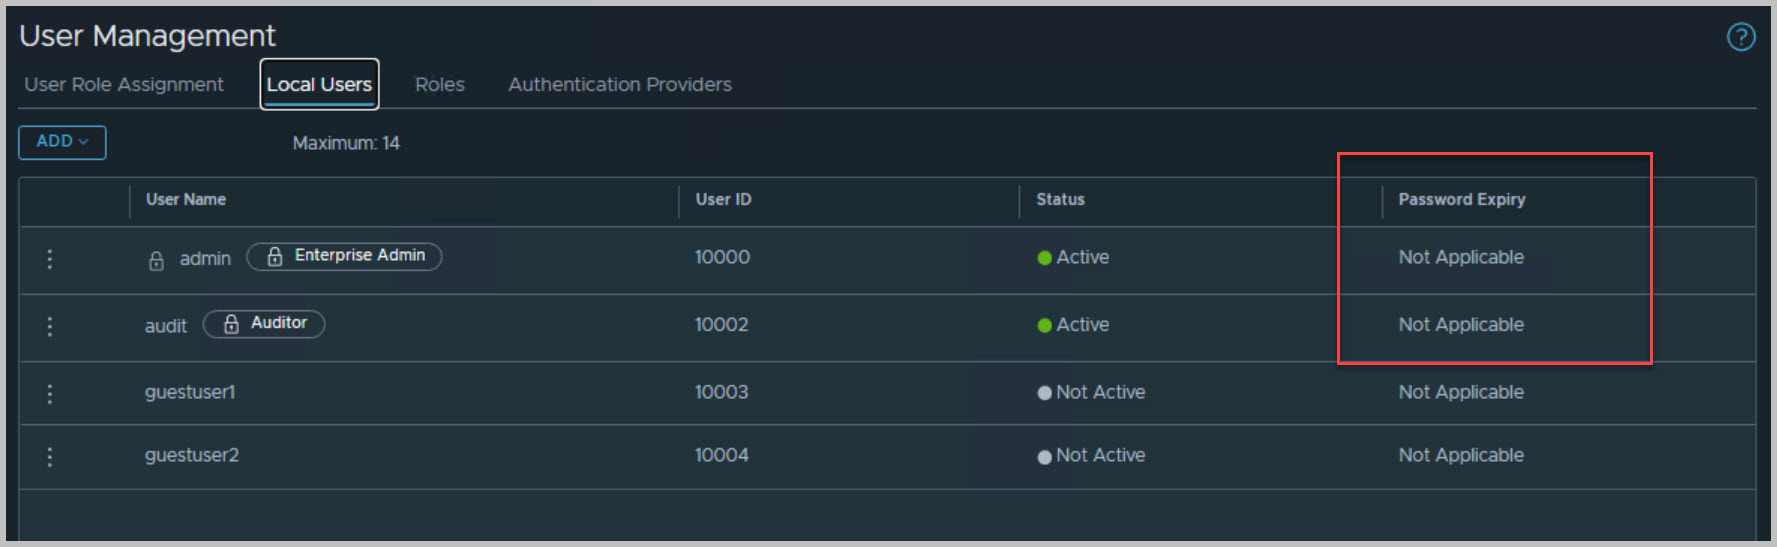
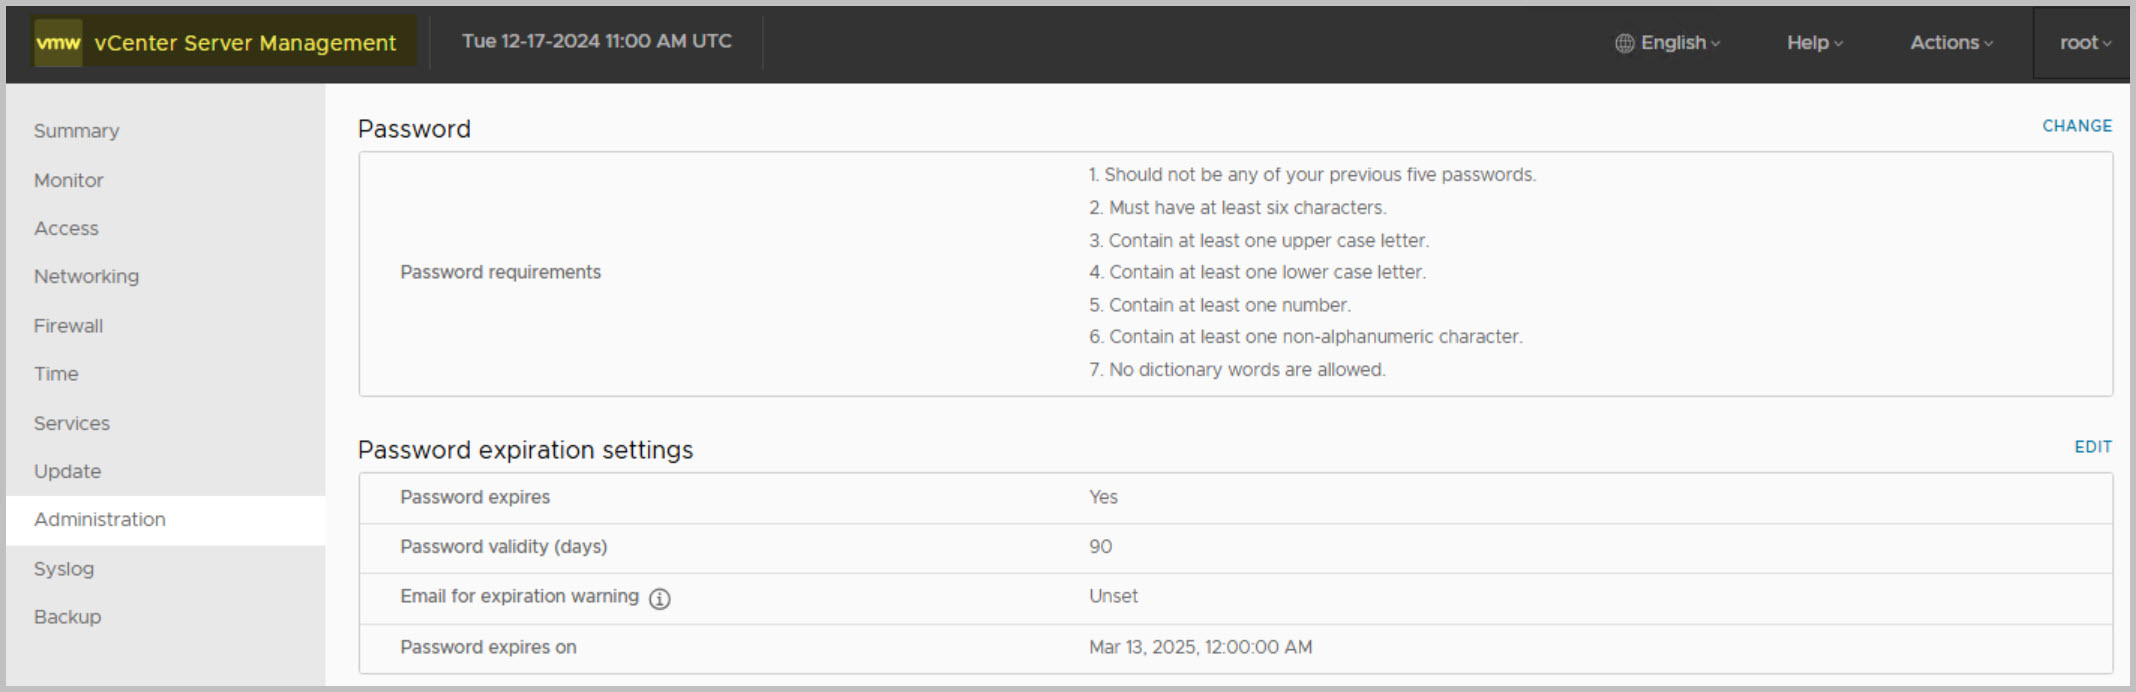
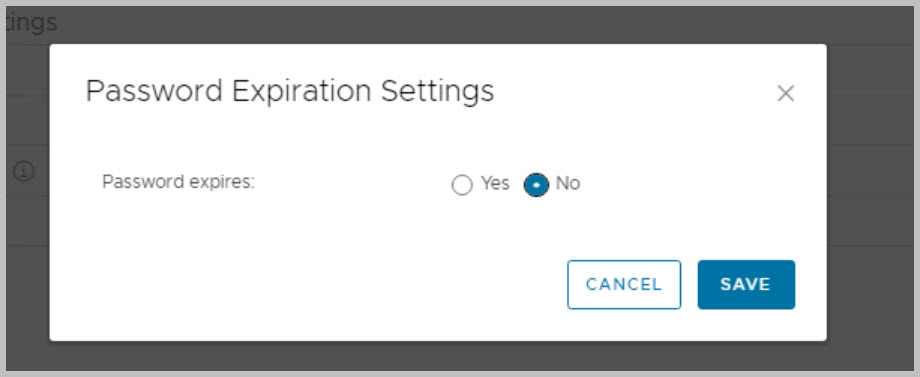
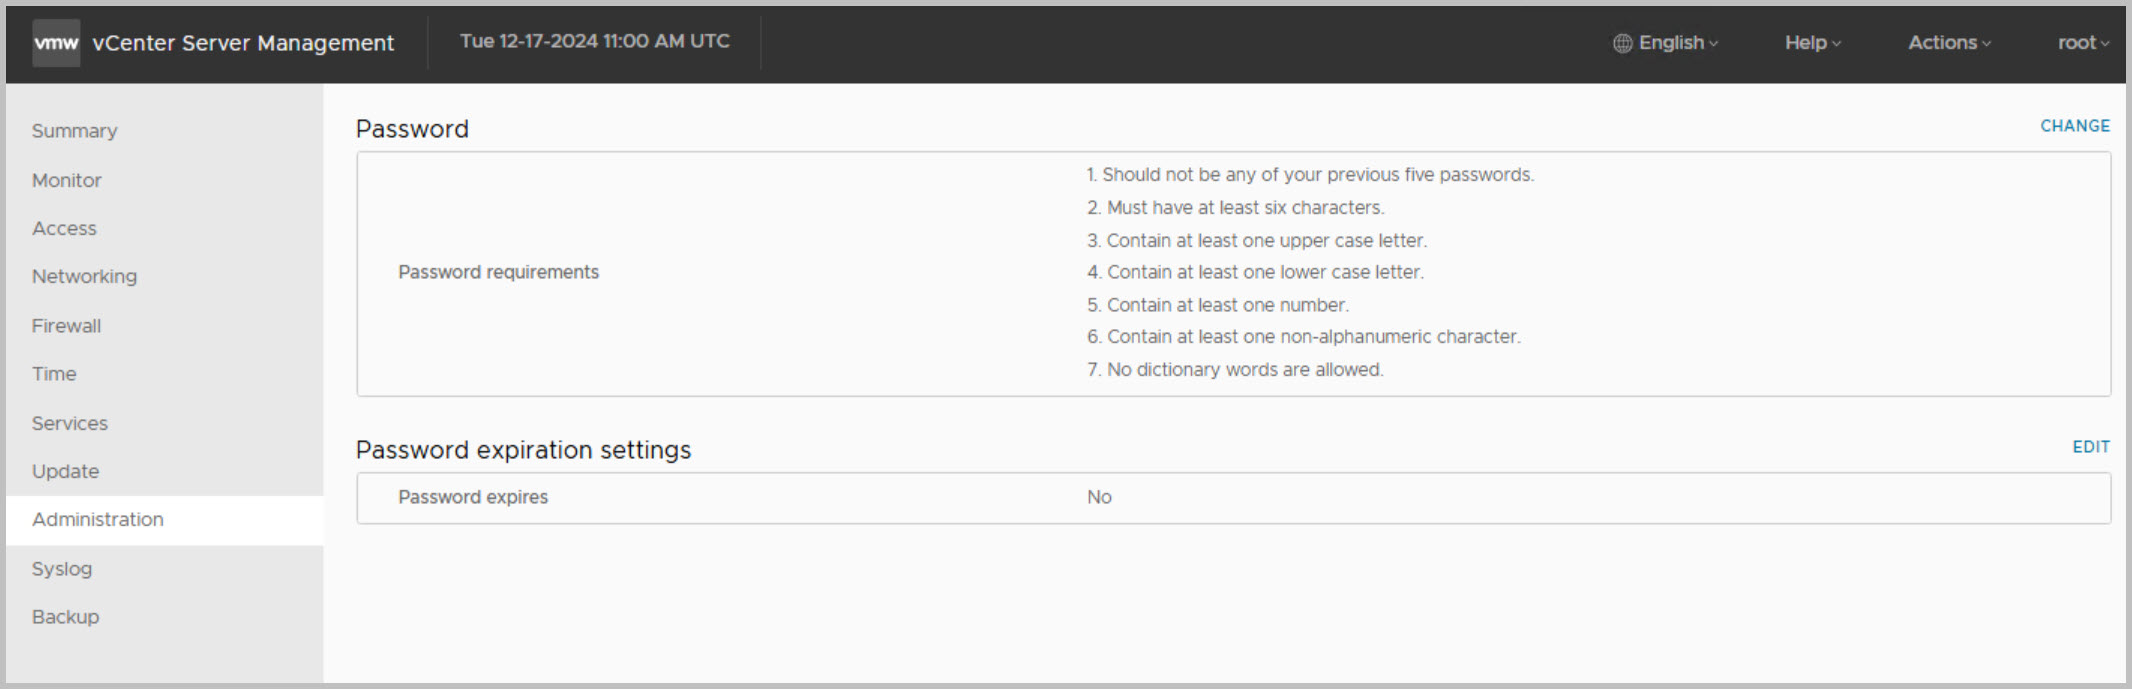
If you wish to disable password expiration for NSX Manager and vCenter accounts, follow these steps:
In Part 2 I will walkthrough the deployment of Application Virtual Networks (AVN)s including the NSX Edge Cluster and NSX network segments via SDDC Manager UI.
Note: this is an example for reference only please use the VxRail installation procedures provided by Dell.


6 Comments »